
1. Sarrera
Thank you for choosing the TFA Dostmann Digital Weather Station 35.1065. This device provides accurate indoor temperature, humidity, time, date, and a weather trend forecast. Please read this manual carefully before using the device to ensure proper operation and to prevent damage.
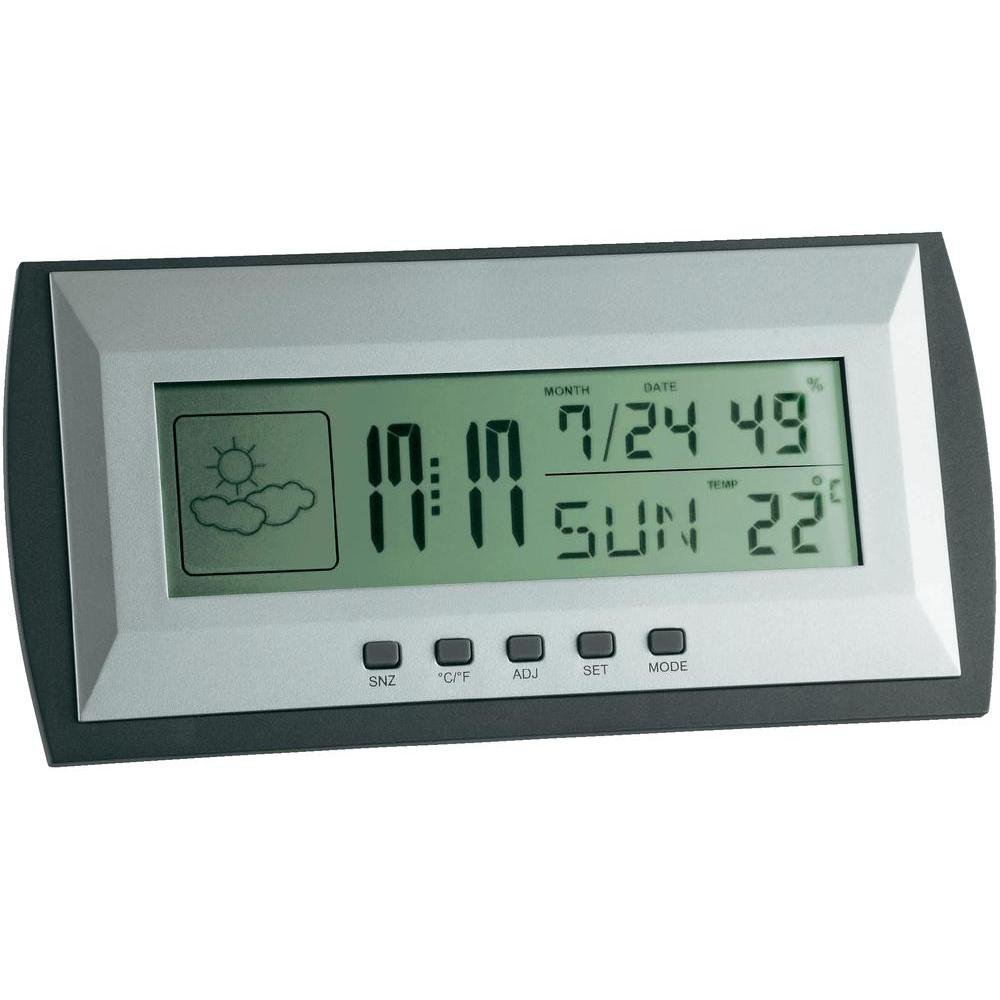
Figure 1: TFA Dostmann Digital Weather Station 35.1065 on a wooden desk. This image shows the weather station displaying time, date, and weather information in a typical home or office setting.
2. Segurtasun informazioa
- Gorde eskuliburu hau etorkizunean erreferentzia izateko.
- Ez jarri gailua muturreko tenperatura, bibrazio edo kolpeetara.
- Saihestu zuzeneko eguzki-argia eta hezetasuna.
- Ez sartu gailua uretan.
- Ez saiatu gailua zeuk konpontzen edo aldatzen. Jarri harremanetan langile kualifikatuekin zerbitzua jasotzeko.
- Bota erabilitako bateriak tokiko araudiaren arabera.
3. Konfigurazioa
3.1 Paketearen edukia
Ziurtatu elementu guztiak bertan daudela:
- TFA Dostmann Digital Weather Station 35.1065
- 2 x AA pila
- Erabiltzailearen eskuliburua (dokumentu hau)
3.2 Bateriaren instalazioa
- Locate the battery compartment cover on the back of the weather station.
- Lerratu estalkia ireki.
- Insert two (2) AA batteries, observing the correct polarity (+ and - markings).
- Itxi bateriaren konpartimenduaren estalkia ondo.
The device will power on automatically and display initial readings.
3.3 Hasierako ezarpenak (ordua, data, tenperatura unitatea)
Upon first power-on or after battery replacement, you may need to set the time, date, and preferred temperature unit.
- Eduki sakatuta EZARTU button for a few seconds to enter setting mode. The digit to be set will flash.
- Erabili ADJ button to adjust the flashing value (e.g., hour, minute, year, month, day).
- Sakatu EZARTU botoia berriro sakatu ezarpena berresteko eta hurrengo parametrora joateko.
- Repeat steps 2 and 3 until all desired settings (time, date) are configured.
- Celsius (°C) eta Fahrenheit (°F) artean aldatzeko, sakatu ° C / ° F botoia.
4. Eguraldi-estazioaren funtzionamendua
4.1 Bistaratuview
LCD pantailak hainbat informazio erakusten du:
- Ordua: Current time in 12-hour or 24-hour format.
- Data: Current month, day, and day of the week.
- Tenperatura: Indoor temperature, displayed in °C or °F.
- Hezetasuna: Indoor humidity percentage.
- Weather Forecast Icon: Indicates a trend forecast (e.g., sunny, cloudy, rainy). This is a prediction based on atmospheric pressure changes and may not always reflect actual weather.
4.2 Botoien funtzioak
- SNZ (Snooze): Activates the snooze function for the alarm.
- °C/°F: Celsius eta Fahrenheit tenperaturaren bistaratzea txandakatzen du.
- ADJ (Adjust): Used to adjust values during setting mode.
- SET: Enters and confirms settings.
- JARRAIBIDEAK: Switches between different display modes (e.g., time, alarm time).
4.3 Alarma ezartzea
- Sakatu MODUA botoia behin eta berriz sakatu alarmaren ordua bistaratu arte.
- Eduki sakatuta EZARTU button. The alarm hour will flash.
- Erabili ADJ botoia nahi duzun alarmaren ordua ezartzeko.
- Sakatu EZARTU baieztatzeko eta minutuetara joateko.
- Erabili ADJ nahi dituzun alarmaren minutuak ezartzeko.
- Sakatu EZARTU alarma ezarpena berresteko eta irteteko.
- Alarma aktibatzeko/desaktibatzeko, sakatu ADJ botoia alarma ordua bistaratzen den bitartean. Alarma ikono bat agertuko/desagertuko da.
5. Mantentzea
5.1 Garbiketa
Garbitu gailua leun batekin, damp cloth. Do not use abrasive cleaners or solvents. Ensure no water enters the device.
5.2 Bateria ordezkatzea
When the display becomes dim or the device stops functioning, replace the batteries. Follow the steps in Section 3.2. Always replace both batteries at the same time with new AA batteries.
5.3 Biltegiratzea
If the device will not be used for an extended period, remove the batteries to prevent leakage and damage. Store in a cool, dry place.
6. Arazoak
| Arazoa | Kausa posiblea | Irtenbidea |
|---|---|---|
| Pantailarik ez edo pantaila iluna. | Bateriak gutxi daude edo gaizki instalatuta daude. | Ordeztu bateriak beste batzuekin, polaritate zuzena ziurtatuz. |
| Ordu/data okerra. | Time/date not set correctly. | Refer to Section 3.3 to set the time and date. |
| Tenperatura/hezetasun neurketa zehaztugabeak. | Device placed near heat sources, vents, or in direct sunlight. | Relocate the weather station to a stable indoor environment away from extreme temperature fluctuations. Allow time for readings to stabilize. |
| Weather forecast icon seems incorrect. | Weather forecast is a trend prediction based on atmospheric pressure, not a real-time forecast. | Understand that the icon indicates a general trend over the next 12-24 hours, not current conditions. |
7. Zehaztapenak

Figure 2: TFA Dostmann Digital Weather Station 35.1065 with dimensions. This image provides a detailed view of the device, including its width (18 cm), height (9 cm), and depth (3.81 cm).
- Marka: TFA Dostmann
- Eredua: 35.1065
- Energia iturria: Battery-powered (2 x AA batteries, included)
- Materiala: Plastikoa
- Ezaugarri bereziak: Trend forecast
- Bistaratzeko mota: LCDa
- Elementuaren neurriak (L x W x H): 3.8 cm x 18 cm x 9 cm
- Elementuaren pisua: 164 gramo
- Dakarten osagaiak: Weather station, batteries, user manual
- Erabilera gomendatua: Etxeko bulegoa
- Erabilera zehatzak: Date, Humidity, Temperature, Time
- Jatorrizko herrialdea: Txina
8. Bermea eta Laguntza
For warranty information, please refer to the documentation provided at the time of purchase or visit the official TFA Dostmann website. For technical support or further assistance, please contact TFA Dostmann customer service through their official channels.
Official TFA Dostmann Webgunea: www.tfa-dostmann.de