1. Sarrera
This manual provides essential information for the installation, operation, and maintenance of the Liftmaster 45DCT Garage Door Opener Logic Board. The 45DCT is a genuine OEM replacement part designed to restore full functionality to compatible LiftMaster and Craftsman garage door opener systems. It integrates advanced features such as MyQ and AssureLink capabilities, allowing for enhanced connectivity and programmable security options.
2. Produktua amaitu daview eta Bateragarritasuna
The 45DCT logic board serves as a direct replacement for various garage door opener models and circuit boards. It is crucial to verify compatibility before installation.
Compatible Models and Replacements:
- LiftMaster Models: Hd920ev, Lw5000ev, Wd962kev, Wd962kpev, Wd962mlev, 349544.
- LiftMaster Systems: Compatible with 8360 Premium Series Chain Drive systems and 8550 Elite System Belt Drive systems.
- Sears Craftsman: Can replace Sears Craftsman model 139.3043 receiver logic assembly.
- Circuit Board Replacements: Replaces 04d11741 circuit boards.
- Also Known As (AKAs): 45DCBR1A, 041D7356, 1D7356, 41DCBC1A, 41DCBC3A, 41DCCC2A, 41DCBC5A, 45DCCL5A, 45DCCL3A, 45DCCL1A, 45DCCR5A, 41D7356, 45DCCR3A, 45DCCR1A, 001D7356, 41DCCC1A, 41DCCC3A, 45DCJL5A, 45DCRL1A, 41DCCC5A, 45DCRL3A, 45DCJL1A, 45DCJL3A, 45DCBL5A, 45DCBL3A, 45DCBL1A, 45DCBR5A, 45DCRL, 45DCBR3A.
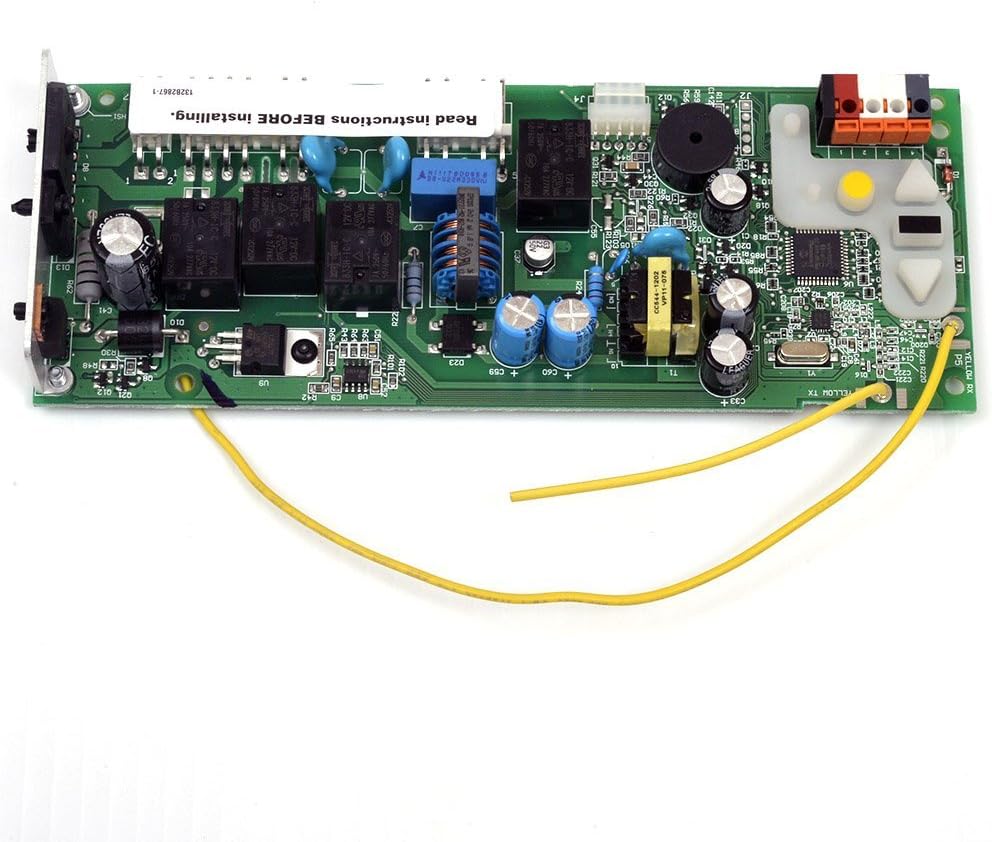
Figure 1: The Liftmaster 45DCT Garage Door Opener Logic Board. This image shows the green circuit board with various electronic components, including capacitors, relays, and integrated circuits. Two yellow wires are visible extending from the board. A label on the board clearly states, "Read instructions BEFORE installing."
3. Instalazioa
Safety Warning: Always disconnect power to the garage door opener before performing any installation or maintenance. Failure to do so may result in serious injury or death.
- Deskonektatu energia: Locate the circuit breaker or unplug the garage door opener from its power source. Ensure the power is completely off.
- Sartu Dauden Taulara: Open the garage door opener housing to gain access to the existing logic board. Refer to your specific garage door opener's manual for instructions on how to safely open the housing.
- Dokumentuen konexioak: Before disconnecting any wires, take clear photos or make a diagram of all wire connections to the old logic board. This will aid in reconnecting them correctly to the new board.
- Kendu taula zaharra: Carefully disconnect all wires and mounting screws securing the old logic board. Gently remove the board from the opener.
- Instalatu plaka berria: Position the new 45DCT logic board in the same location as the old one. Secure it with the appropriate mounting screws.
- Kableak berriro konektatu: Using your photos or diagram, carefully reconnect all wires to the corresponding terminals on the new 45DCT logic board. Ensure all connections are secure.
- Etxebizitza itxia: Once all connections are verified, carefully close and secure the garage door opener housing.
- Berrezarri boterea: Berriro konektatu energia garajeko ate irekigailura.
- Proba funtzionamendua: Follow the programming instructions for your specific garage door opener model to program remotes and test the opener's functionality (e.g., open/close, safety sensors).
Note: The label on the board itself states, "Read instructions BEFORE installing." This emphasizes the importance of following detailed instructions, which may vary slightly depending on your specific garage door opener model.
4. Funtzionamendua
The Liftmaster 45DCT logic board is the central control unit for your garage door opener. Once installed and properly programmed, it enables the following functionalities:
- Standard Open/Close: Controls the basic operation of the garage door via wall controls, remote controls, and keypads.
- MyQ and AssureLink Connectivity: The board is MyQ- and AssureLink-enabled, allowing for integration with smart home systems. This enables remote monitoring and control of your garage door from a smartphone or other compatible device (requires additional MyQ/AssureLink accessories, sold separately).
- Programmable Security Options: Supports various security features, including rolling code technology to prevent code grabbing, and compatibility with safety sensors to ensure the door reverses if an obstruction is detected.
- Iritzia diagnostikoa: May provide diagnostic codes or blinking patterns via the opener's light or LED indicators to assist in troubleshooting. Refer to your garage door opener's main manual for specific diagnostic information.
5. Mantentzea
The 45DCT logic board is a sealed electronic component and generally requires minimal maintenance. However, following these guidelines can help ensure its longevity:
- Mantendu garbi: Periodically inspect the board for dust or debris. If necessary, gently clean with a soft, dry brush or compressed air. Do not use liquids or harsh chemicals.
- Egiaztatu konexioak: During routine garage door opener maintenance, visually inspect the wire connections to the logic board to ensure they are secure and free from corrosion.
- Ingurumena babestea: Ensure the garage door opener housing remains closed and sealed to protect the logic board from moisture, extreme temperatures, and pests.
- Ikuskapen profesionala: If you suspect an issue with the logic board or the garage door opener's electrical system, it is recommended to consult a qualified technician.
6. Arazoak
If your garage door opener is not functioning correctly after installing the 45DCT logic board, consider the following troubleshooting steps:
- Potentziarik gabe:
- Verify the garage door opener is plugged into a working outlet.
- Check the circuit breaker for the garage.
- Ensure all power connections to the logic board are secure.
- Remote/Keypad Not Working:
- Ensure the logic board is properly programmed to your remotes and keypads. Refer to your garage door opener's manual for programming instructions.
- Check batteries in remotes/keypads.
- Door Not Moving or Reversing Unexpectedly:
- Inspect safety sensors for obstructions, misalignment, or damage. Clean sensor lenses if dirty.
- Check all wiring connections to the logic board, especially those related to the safety sensors and wall control.
- Ensure the travel limits and force settings are correctly adjusted. Refer to your opener's manual.
- Diagnostic Codes/LED Blinks:
- Many garage door openers provide diagnostic feedback through blinking LEDs or specific light patterns. Consult your specific opener's manual to interpret these codes.
- Arazo iraunkorrak: If troubleshooting steps do not resolve the issue, the logic board may be faulty, or there may be another issue with the garage door opener system. Contact a qualified garage door technician or LiftMaster customer support for further assistance.
7. Zehaztapenak
| Atributua | Xehetasuna |
|---|---|
| Fabrikatzailea | Chamberlain/Liftmaster |
| Zati zenbakia | 045DCT |
| Elementuaren eredu-zenbakia | 045DCT |
| Elementuaren pisua | 1 kilo |
| Produktuaren neurriak | 12 x 6 x 6 hazbete |
| Elementu pakete kopurua | 1 |
| Eskuragarri dagoen lehen data | 25ko urtarrilaren 2012a |
| Also Known As (AKAs) | 45DCBR1A, 041D7356, 1D7356, 41DCBC1A, 41DCBC3A, 41DCCC2A, 41DCBC5A, 45DCCL5A, 45DCCL3A, 45DCCL1A, 45DCCR5A, 41D7356, 45DCCR3A, 45DCCR1A, 001D7356, 41DCCC1A, 41DCCC3A, 45DCJL5A, 45DCRL1A, 41DCCC5A, 45DCRL3A, 45DCJL1A, 45DCJL3A, 45DCBL5A, 45DCBL3A, 45DCBL1A, 45DCBR5A, 45DCRL, 45DCBR3A |
8. Bermea eta Laguntza
For information regarding the warranty of your Liftmaster 45DCT Garage Door Opener Logic Board, please refer to the warranty documentation provided with your original garage door opener or contact LiftMaster customer support directly. Keep your proof of purchase for any warranty claims.
For technical support, programming assistance, or further troubleshooting, please visit the official LiftMaster website or contact their customer service department. Always provide your product model number (045DCT) and any relevant serial numbers when seeking support.