
1. Sarrera
This instruction manual provides essential information for the installation, operation, and maintenance of your DB Electrical ADR0139 Alternator. Please read this manual thoroughly before proceeding with installation or use to ensure proper function and safety. This alternator is designed as a direct replacement for specified Honda and Acura models.
2. Produktua amaitu daview
The DB Electrical ADR0139 is a new aftermarket alternator designed to meet OEM specifications, providing reliable electrical power for your vehicle's systems. It features a Delco CS130D family design, operating at 12 volts and producing 105 amps.

2.1. irudia: Aurrealdea view of the DB Electrical ADR0139 Alternator, showing the pulley and main housing.
3. Ibilgailuen bateragarritasuna
This alternator is compatible with the following vehicle models and years:
- Acura CL: 1997, 1998, 1999 (3.0L V6 models)
- Honda Accord: 1998, 1999, 2000, 2001, 2002 (3.0L V6 models, including EX and LX trims)
Please verify your vehicle's specific requirements and existing part numbers against the specifications provided in Section 4 to ensure proper fitment.
4. Zehaztapen Teknikoak
| Ezaugarri | Zehaztapena |
|---|---|
| Alternator Family | Delco CS130D |
| liburukiatage | 12 Volt |
| Amparoa | 105 Amps |
| Baldintza | New Aftermarket |
| Regulator Clock Position | 2:00 |
| Fan kokapena | Barnekoa |
| Regulator Location | Barnekoa |
| Terminal ID 2 | B+ |
| Terminal 2 Size | M6x1.00 |
| Polaritatea | Negatiboa |
| Modelo zenbakia | 400-12146 |
| Elementuaren pisua | 11.44 kilo |
| Produktuaren neurriak | 5.71 x 4.78 x 4.2 hazbete |
Replaces OEM Part Numbers:
- AC Delco Tools: 321-1765
- Arrowhead: ADR0139
- Bosch: AL1277N, AL1277X
- Delco: 10463963, 10464417, 10480228, 10480453, 321-1765
- Denso: 210-5233
- Honda: 31100-P8A-A01, 31100P8A-A01, 31100-P8A-A02, 31100P8A-A02, 31100-P8C-A02, 31100P8C-A02
- J&N Electrical Products: 400-12146
- JANNCO: 400-12146R
- Lester: 8220
5. Segurtasun informazioa
Always observe the following safety precautions when working on your vehicle's electrical system:
- Disconnect the negative battery terminal before beginning any work on the electrical system to prevent electrical shock or short circuits.
- Erabili babes pertsonaleko ekipamendu egokia, segurtasun-betaurrekoak eta eskularruak barne.
- Ensure the vehicle is on a stable, level surface and properly supported with jack stands if lifting is required.
- Allow the engine to cool completely before working on engine components.
- Instalazio prozesuko edozein urratsi buruz ziur ez bazaude, kontsultatu automobilgintzako teknikari kualifikatu bati.
6. Instalazio gida
Replacing an alternator can be complex. Professional installation is recommended. If you choose to proceed yourself, follow these general steps. Specific procedures may vary by vehicle model; consult your vehicle's service manual for detailed instructions.
6.1. Tools and Preparation
- Socket set and wrenches (metric)
- Serpentine belt tool or pry bar
- Bateriaren terminaleko giltza
- Wire brush for cleaning terminals
- Segurtasun betaurrekoak eta eskularruak
- Deskonektatu bateriaren kable negatiboa.
- Locate the alternator and identify all electrical connections and mounting bolts.
6.2. Removal of Old Alternator
- Relieve tension on the serpentine belt and remove it from the alternator pulley.
- Disconnect the main power wire (B+) from the alternator. This is typically a large gauge wire secured with a nut.
- Disconnect any other electrical connectors (e.g., regulator plug) from the alternator.
- Remove the mounting bolts securing the alternator to the engine bracket. Note their positions.
- Carefully remove the old alternator from the engine bay. This may require maneuvering around other components.

6.1. Irudia: Atzealdea view of the alternator, highlighting the B+ terminal and electrical connector.
6.3. Installation of New Alternator
- Position the new DB Electrical ADR0139 Alternator into the engine bay and align it with the mounting brackets.
- Install the mounting bolts and tighten them to the manufacturer's specifications. Do not overtighten.
- Reconnect all electrical connectors, ensuring they are secure and free from corrosion. Clean terminals with a wire brush if necessary.
- Reconnect the main power wire (B+) and tighten its nut securely.
- Route the serpentine belt back onto the alternator pulley and apply tension according to your vehicle's specifications. Ensure the belt is properly seated on all pulleys.
- Berriro konektatu bateriaren kable negatiboa.
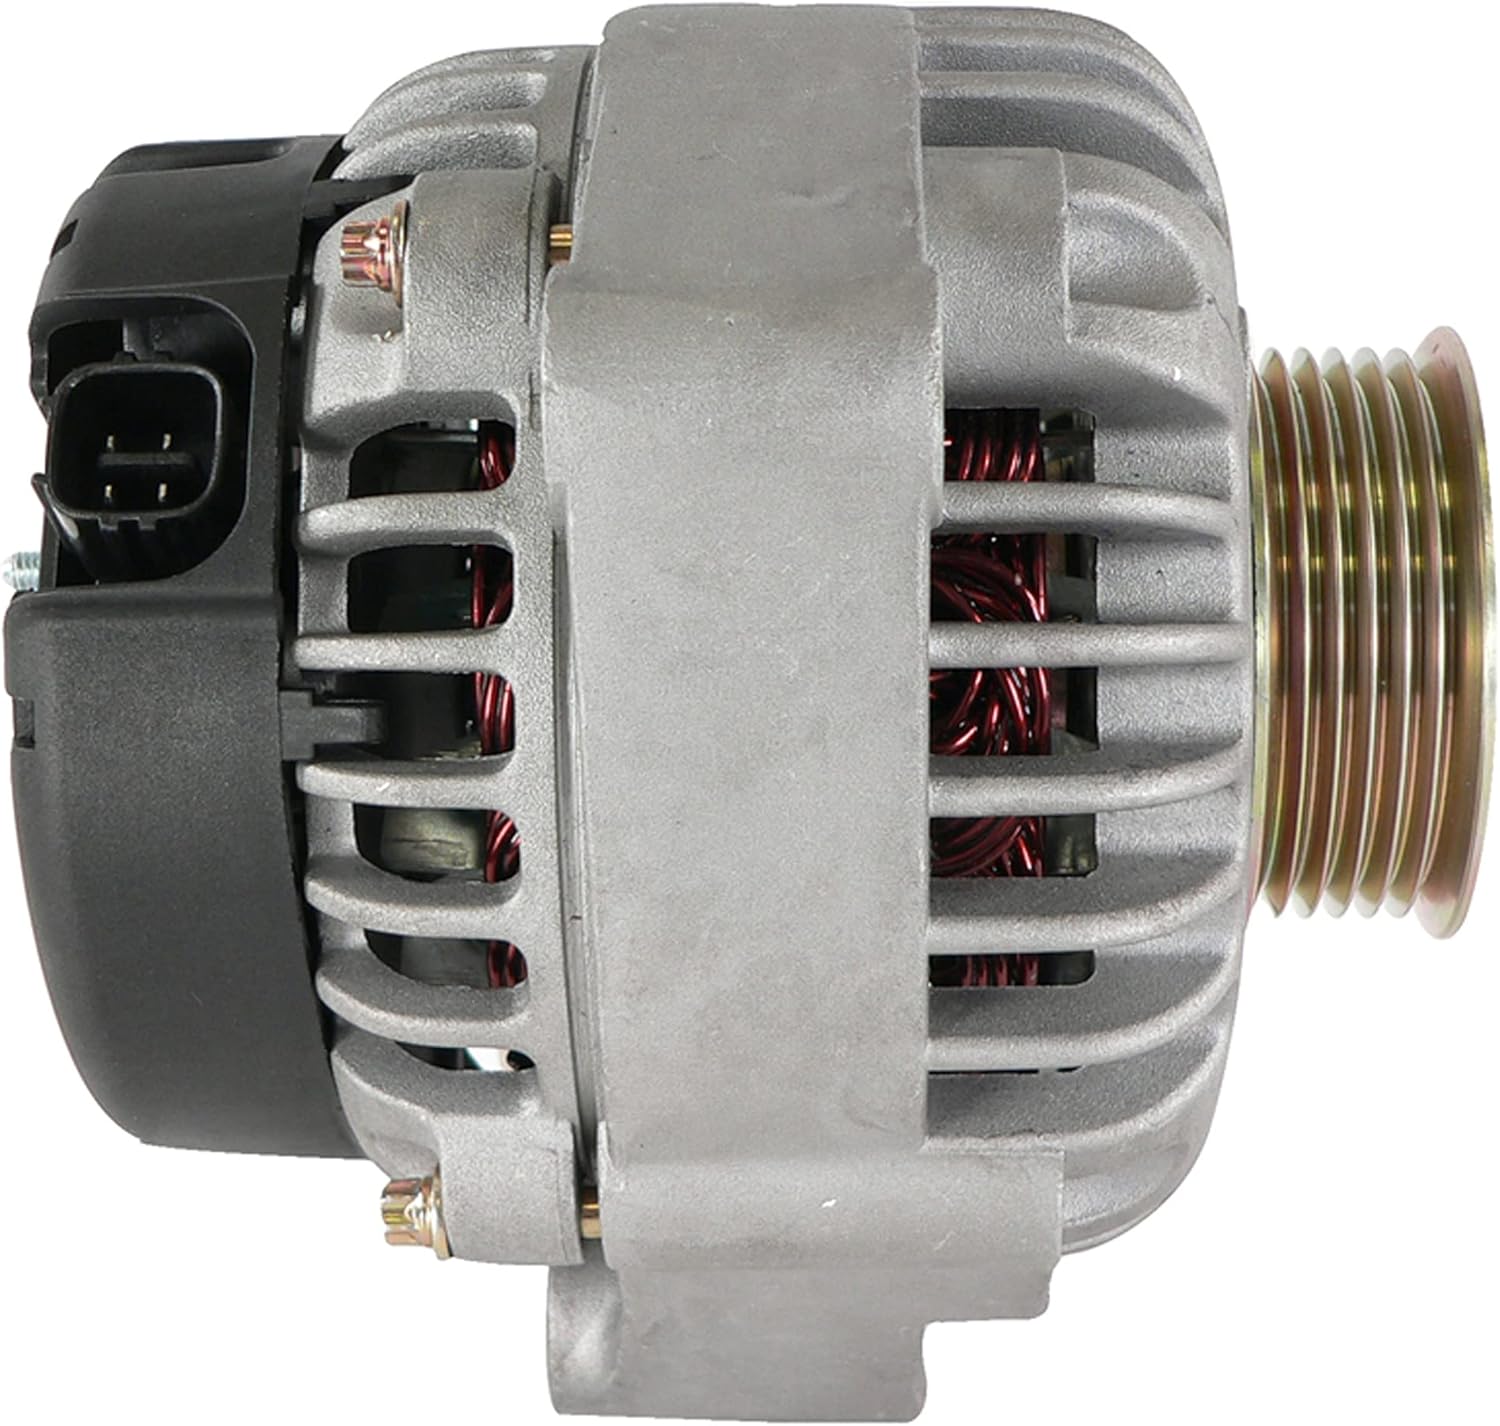
6.2. irudia: Aldea view of the alternator, showing mounting points and overall dimensions.
7. Funtzionamendua
After installation, start the vehicle and observe the dashboard warning lights. The battery light should turn off shortly after the engine starts. Check the vehicle's voltage gauge (if equipped) or use a multimeter to verify that the charging system is operating correctly, typically between 13.5V and 14.8V at idle.
A slight whine may be audible immediately after installation, which often dissipates after a short period of operation as the new components settle. If the battery light remains on or flickers, or if abnormal noises persist, refer to the Troubleshooting section.
8. Mantentzea
The DB Electrical ADR0139 Alternator is designed for long-term, maintenance-free operation. However, regular vehicle maintenance practices contribute to its longevity:
- Periodically inspect the serpentine belt for wear, cracks, or proper tension. A worn or loose belt can affect alternator performance.
- Ensure battery terminals are clean and tight to maintain good electrical conductivity.
- Avoid exposing the alternator to excessive moisture or contaminants.
9. Arazoak
| Sintoma | Kausa posiblea | Irtenbidea |
|---|---|---|
| Battery light remains on after starting | Loose or corroded battery/alternator connections, faulty belt, internal alternator issue. | Check all connections for tightness and corrosion. Inspect serpentine belt. Test alternator output with a multimeter. |
| Faro edo barneko argi ilunak | Bolumen baxuatage output from alternator, weak battery. | Test battery and alternator output. Ensure proper belt tension. |
| Grinding or whining noise from alternator | Bearing failure, loose pulley, improper belt tension. | Verify belt tension. If noise persists, professional inspection is recommended. (Note: A slight whine may be normal initially). |
| Bateria ez da kargatzen | Alternator failure, wiring issue, blown fuse. | Check fuses related to charging system. Test alternator output. Inspect wiring harness. |
Arazoa konpontzeko urratsek ez badute konpontzen, gomendatzen da automobilgintzako teknikari ziurtatu baten laguntza eskatzea.
10. Bermea eta Laguntza
The DB Electrical ADR0139 Alternator comes with a 1 urteko bermea erosketa-datatik aurrera. Berme honek materialen eta fabrikazioaren akatsak estaltzen ditu erabilera eta zerbitzu normalaren pean.
If you experience any issues with your product within the warranty period, please contact DB Electrical customer support. They will assist you with troubleshooting or arranging a replacement if necessary.
For warranty claims or technical assistance, please refer to the contact information provided by DB Electrical at the point of purchase or on their official webgunea.
11. Harremanetarako informazioa
For further assistance or inquiries, please visit the official DB Electrical webwebgunean edo jarri harremanetan bere bezeroarentzako arreta zerbitzuarekin.
DB Elektrikoa
Kingsport, Tennessee, USA
Note: Always refer to the latest contact details available on the manufacturer's official channels.