1. Sarrera
This manual provides essential information for the proper setup, operation, and maintenance of your Dual DAB 2 A DAB/DAB+ Radio Adapter. Please read these instructions carefully before using the device to ensure optimal performance and safety. The Dual DAB 2 A allows you to upgrade your existing stereo system with digital radio reception (DAB/DAB+) and traditional FM radio.
2. Segurtasun informazioa
- Energia iturria: Erabili zehaztutako energia-egokitzailea soilik. Ziurtatu bolumenatage gailuaren eskakizunekin bat dator.
- Ura eta hezetasuna: Do not expose the device to rain, moisture, or dripping/splashing liquids. Do not place objects filled with liquids, such as vases, on the device.
- Aireztapena: Ziurtatu aireztapen egokia dagoela. Ez blokeatu aireztapen-irekidurak.
- Beroa: Mantendu gailua bero-iturrietatik urrun, hala nola erradiadoreetatik, bero-erregistroetatik, sukaldeetatik edo beste aparatu batzuetatik (adibidez, ampberoa sortzen duten argitzaileak).
- Garbiketa: Unplug the device from the power outlet before cleaning. Use a soft, dry cloth. Do not use liquid cleaners or aerosol cleaners.
- Zerbitzua: Ez saiatu produktu hau zuk zeuk ematen. Bidali zerbitzu guztiak zerbitzu kualifikatuko langileengana.
3. Paketearen edukia
Mesedez, egiaztatu behean zerrendatutako elementu guztiak zure paketean sartuta daudela:
- Dual DAB 2 A Radio Adapter
- Elikatze-moldagailua
- External Antenna (wire with connector)
- Urruneko Kontrola
- Erabiltzailearen eskuliburua (dokumentu hau)
4. Produktua amaitu daview
4.1 Aurreko panela
The front panel features the main display and controls for operating the device.

4.1. irudia: Aurrealdea view of the Dual DAB 2 A radio adapter. The display shows the current time (14:28) and the selected station ("Senderliste #Galaxy"). The "DAB+" logo is visible at the top left, and "Dual" is printed at the bottom center.

4.2. irudia: Aurrealde angeluatua view of the Dual DAB 2 A, providing a clearer look at the illuminated multi-line LCD display and the device's compact design.
4.2 Atzeko panela eta konexioak
The rear panel contains all necessary connection ports for power, antenna, and audio output.

4.3. irudia: Atzekoa view of the Dual DAB 2 A. From left to right, the ports are: ILDOA (3.5mm audio jack), DC 6.0V=0.5A (power input), ANTENA (coaxial connector for external antenna), and BOTEREA botoia.

4.4. irudia: Aldea view of the Dual DAB 2 A, illustrating its compact and slightly curved profile.

4.5. irudia: Alde angeluduna view showing the rear connections, including the Line Out, DC power input, and antenna port.
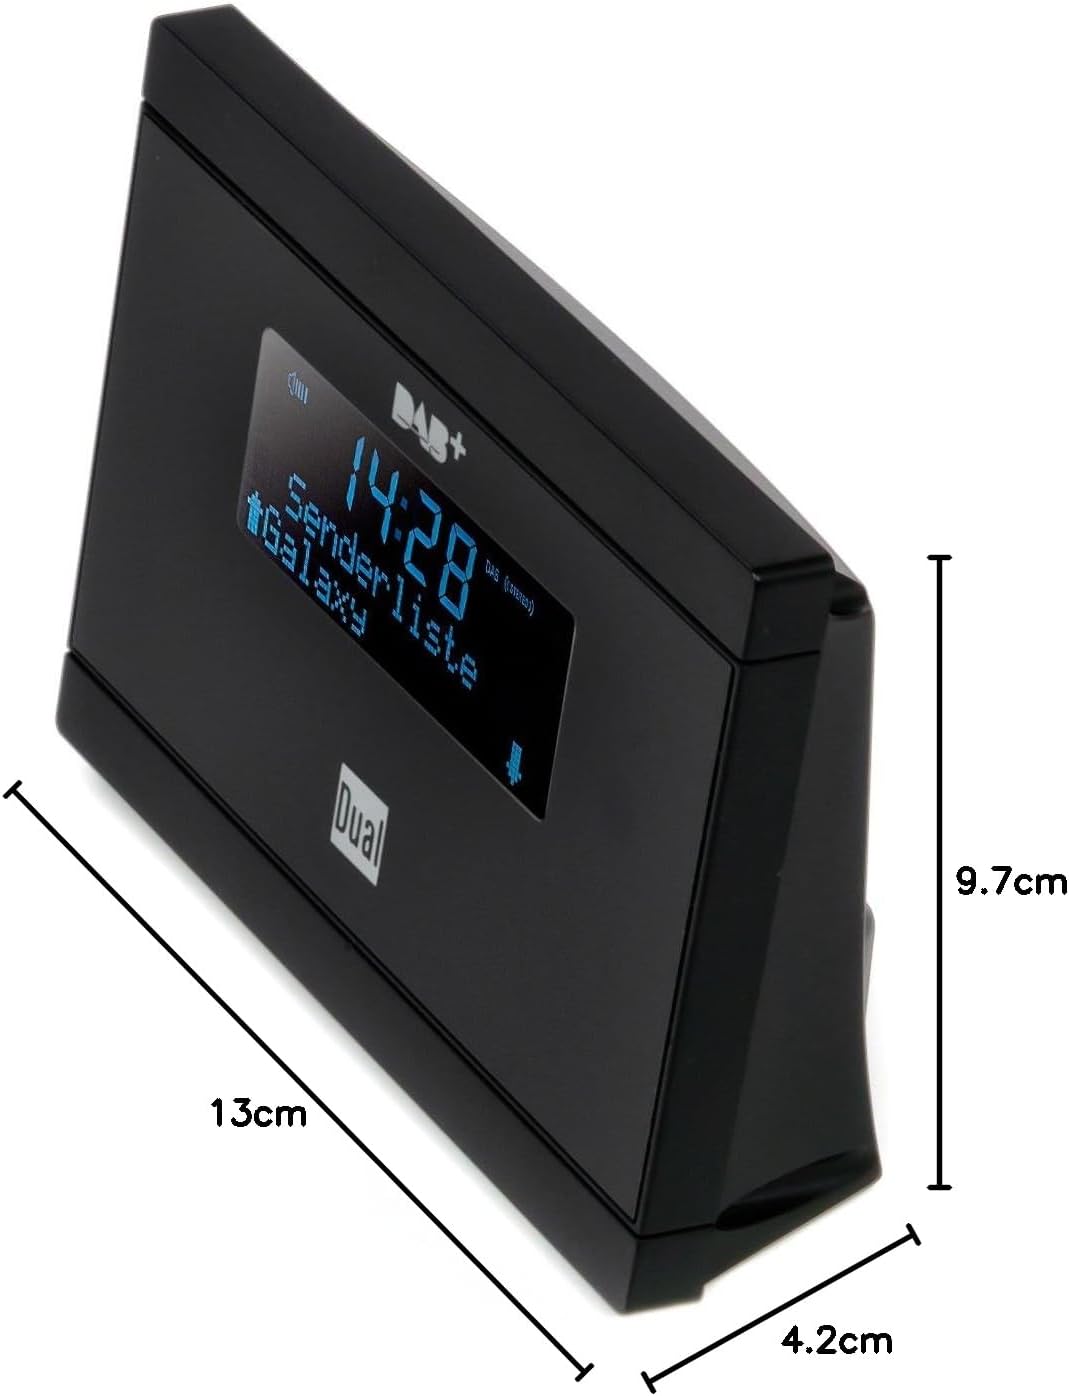
4.6. irudia: Dimensions of the Dual DAB 2 A: 13 cm (length), 4.2 cm (width), and 9.7 cm (height).
5. Konfigurazioa
5.1 Antena konektatzea
- Kokatu ANTENA port on the rear of the DAB 2 A.
- Connect the supplied external wire antenna to this port.
- For optimal reception, position the antenna away from other electronic devices and metallic objects. You may also connect a commercially available external antenna for improved signal quality.
5.2 Connecting to your Stereo System
- Kokatu ILDOA (3.5mm jack) on the rear of the DAB 2 A.
- Connect an audio cable (not supplied) from the ILDOA of the DAB 2 A to an available audio input (e.g., AUX IN, LINE IN) on your existing stereo system or audio device.
5.3 Energia-konexioa
- Konektatu emandako energia-egokitzailea DC 6.0V=0.5A port on the rear of the DAB 2 A.
- Entxufatu korronte-egokitzailea hormako entxufe egoki batera.
6. Funtzionamendu-argibideak
6.1 Piztu/Itzaltzea
Sakatu BOTEREA button on the rear of the device or on the remote control to turn the unit on or off.
6.2 Initial Scan (DAB/DAB+)
Upon first power-on, the device will automatically perform a scan for available DAB/DAB+ stations. This process may take a few minutes. Once complete, the first available station will begin playing.
6.3 Switching Between DAB/DAB+ and FM
Erabili MODUA button on the remote control or the device (if available) to switch between DAB/DAB+ and FM radio modes.
6.4 Tuning and Station Selection
- DAB/DAB+: Erabili GORA/BEHERA arrow buttons on the remote control or device to navigate through the list of available digital stations.
- FM: FM moduan, erabili GORA/BEHERA arrow buttons to manually tune frequencies or initiate an automatic scan for the next available station.
6.5 Aurrezarpenak gordetzea eta berreskuratzea
The DAB 2 A allows you to store up to 20 favorite stations (DAB/DAB+ and FM combined).
- Biltegiratzeko: Sintonizatu nahi duzun irratia. Sakatu eta eutsi botoiari PRESET button (or similar, refer to remote control layout) until the display shows a preset number. Use the arrow buttons to select a preset number (1-20) and confirm.
- Gogoratzeko: Sakatu PRESET button briefly, then use the arrow buttons to select the desired preset station.
6.6 Clock, Alarm, and Sleep Functions
The device features a clock, alarm, and sleep timer. Refer to the detailed instructions in the full manual for setting these functions. The alarm can be set to wake you with DAB, FM, or a buzzer sound.
7. Mantentzea
- Garbiketa: Always unplug the device before cleaning. Use a soft, dry, lint-free cloth to wipe the surfaces. Do not use abrasive cleaners, waxes, or solvents.
- Biltegiratzea: If not in use for an extended period, unplug the device and store it in a cool, dry place.
8. Arazoak
| Arazoa | Kausa posiblea | Irtenbidea |
|---|---|---|
| Botererik ez | Korronte-egokitzailea ez dago konektatuta edo entxufea akastuna da. | Ziurtatu korronte-egokitzailea ondo konektatuta dagoela gailura eta funtzionatzen duen entxufe batera. |
| Soinurik ez | Audio cable not connected, incorrect input selected on stereo, or volume too low. | Check audio cable connection. Select the correct input on your stereo system. Increase volume on both the DAB 2 A and your stereo. |
| Poor DAB/DAB+ reception or no stations found | Weak signal, antenna not properly connected or positioned. | Ensure the antenna is securely connected and positioned for optimal reception. Try repositioning the antenna. Consider using a higher-gain external antenna. Perform a full scan for stations. |
| FM harrera eskasa | Weak signal, antenna not properly connected or positioned. | Extend and reposition the wire antenna. Try a different antenna if available. |
| Urruneko kontrola ez dabil | Batteries are dead or incorrectly inserted, or line of sight is blocked. | Replace batteries with new ones, ensuring correct polarity. Remove any obstructions between the remote and the device. |
9. Zehaztapenak
| Ezaugarri | Xehetasuna |
|---|---|
| Marka | Duala |
| Modelo zenbakia | DAB 2 A |
| Kolorea | Beltza |
| Konektibitate Teknologia | Auxiliary (3.5mm Line Out) |
| Ezaugarri bereziak | DAB/DAB+ Radio, FM Tuner, Clock, Alarm, Sleep Function |
| Gailu bateragarriak | Devices with 3.5 mm audio connector |
| Produktuaren neurriak (L x W x H) | 13 cm x 4.2 cm x 9.7 cm |
| Doikuntza Teknologia | FM, DAB, DAB+ |
| Energia iturria | Electric Cable (DC 6.0V=0.5A) |
| Onartutako irrati-bandak | FM, DAB, DAB+ |
| Elementuaren pisua | 200 gramo |
10. Bermea eta Laguntza
For warranty information and technical support, please refer to the documentation provided with your purchase or contact Dual customer service. Keep your proof of purchase for any warranty claims.