
1. Sarrera
This manual provides comprehensive instructions for the installation, operation, and maintenance of your Hertz HDP4 4-Channel 1000W Max D-Class AmpLikidatzailea. Mesedez, irakurri arretaz eskuliburu hau instalazioa edo erabilera saiatu aurretik, funtzionamendu egokia eta segurtasuna bermatzeko.
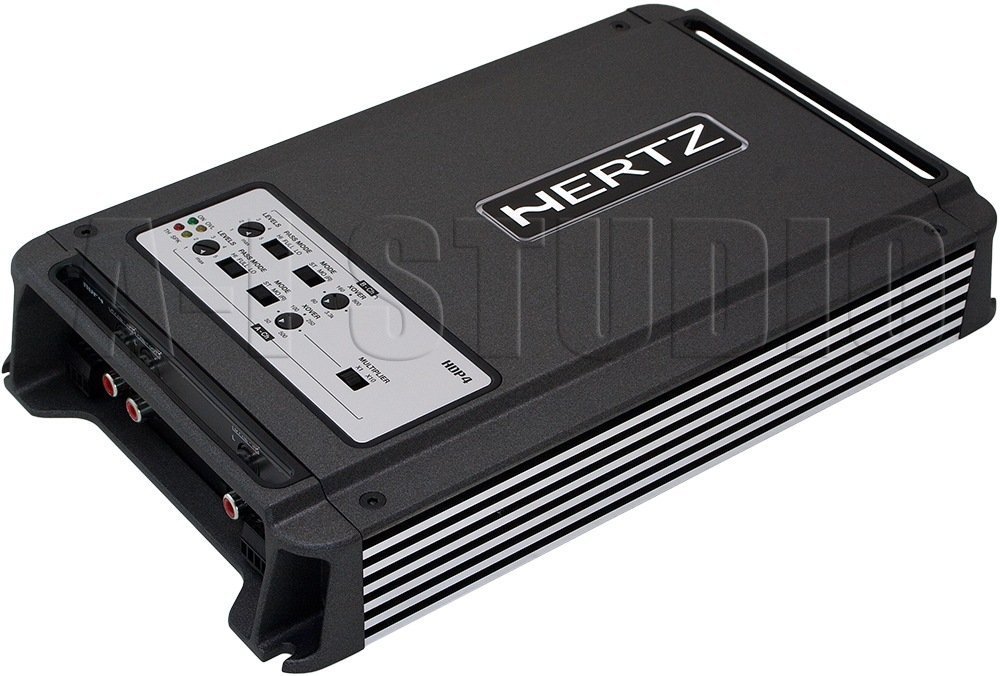
1.1 irudia: Goitik beherako angelua view of the Hertz HDP4 ampbizitzailea, erakustaldiaasing bere c beltz trinkoaasing and control panel on the top surface. The Hertz logo is visible on the main body.
2. Segurtasun informazioa
Beti beti segurtasun-neurri hauek:
- Disconnect the vehicle's battery before any installation or wiring.
- Ziurtatu kableatu guztiak behar bezala isolatuta daudela zirkuitulaburrak saihesteko.
- Muntatu amplifier securely in a well-ventilated area, away from moisture and direct heat.
- Erabili kableatu egokia elikatze eta lurrerako konexioetarako, instalazio atalean zehaztutako moduan.
- Instalazio prozesuaren edozein atalen inguruan ziur ez bazaude, kontsultatu instalatzaile profesional bati.
3. Paketearen edukia
Egiaztatu elementu guztiak paketean daudela:
- Hertz HDP4 Amplifier Unitatea
- Muntatzeko hardwarea (torlojuak, euskarriak)
- Erabiltzailearen eskuliburua (dokumentu hau)
4. Konfigurazioa eta instalazioa
4.1 Muntaketa Ampbiziagoa
Choose a suitable location for mounting the amplifier. It should be a dry, well-ventilated area, protected from direct sunlight and excessive vibration. Ensure there is sufficient space around the ampAirearen zirkulaziorako argitzailea.

4.1. irudia: Goikoa view of the Hertz HDP4 amplifier, illustrating its compact design and potential mounting points. The amplifier features a textured black finish with the Hertz logo prominently displayed.
- Jarri amplifier in the desired mounting location and mark the screw holes.
- Drill pilot holes if necessary, ensuring not to damage any vehicle components.
- Ziurtatu amplifatzailea emandako muntatzeko torlojuak erabiliz.
4.2 Kableatutako konexioak
Proper wiring is critical for performance and safety. Refer to the diagram below for power, ground, remote, and speaker connections.

Figure 4.2: Rear panel of the Hertz HDP4 amplifier, detailing the power input (BATT), ground (GND), remote turn-on (REM) terminals, and speaker output terminals (L/R mono for channels A and B). Two 40A fuses are also visible.
- Potentzia (BATT): Connect a fused power cable (minimum 8 AWG recommended) directly from the vehicle's positive battery terminal to the BATT terminal on the ampbiziagoa.
- Lurra (GND): Connect a ground cable of the same gauge as the power cable from the GND terminal to a clean, unpainted metal point on the vehicle chassis.
- Urruneko (REM): Connect a remote turn-on wire from your head unit's remote output to the REM terminal.
- Bozgorailuaren irteerak: Connect your speakers to the appropriate L (left) and R (right) terminals for each channel (A and B). Ensure correct polarity. The amplifier supports mono bridging for increased power output to a single speaker or subwoofer.
- Fusibleak: The amplifier is equipped with two 40A fuses. Replace only with fuses of the same type and rating.
4.3 Input Connections and Controls
The amplifier offers both RCA (low-level) and High-Level inputs, along with various crossover and gain controls.

Figure 4.3: Input and control panel of the Hertz HDP4 amplifier. This panel includes RCA pre-inputs (A PRE-IN, B PRE-IN), high-level inputs (A HI-IN, B HI-IN), and various adjustment knobs for levels, pass mode, and crossover settings. A switch for HI-IN AUTO TURN-ON is also present.
- RCA Pre-Inputs (A PRE-IN, B PRE-IN): Connect your head unit's RCA outputs to these inputs for low-level signal.
- High-Level Inputs (A HI-IN, B HI-IN): If your head unit does not have RCA outputs, connect speaker-level signals directly to these inputs. The amplifier features an auto turn-on function for high-level inputs.
- Mailak: Adjust the input sensitivity (gain) to match the output of your head unit. Start with the gain at minimum and slowly increase until desired volume is achieved without distortion.
- Pasa modua: Select the desired crossover mode (e.g., Full, HPF, LPF) for each channel pair.
- Crossover Frequency (XOVER): Adjust the frequency point for the selected crossover mode.
- Biderkatzailea: Use this switch to multiply the crossover frequency setting by 1 or 10, depending on your system requirements.
5. Funtzionamendu-argibideak
5.1 Hasierako piztea
- After all connections are made and verified, reconnect the vehicle's battery.
- Piztu zure unitate nagusia. amplifier should power on automatically (if remote wire is connected or HI-IN AUTO TURN-ON is active).
- Start with the head unit volume low and gradually increase it, listening for clear audio.
5.2 Audio ezarpenak doitzea
Sintonizatu amplifier's settings for optimal sound quality:
- Irabaziaren parekatzea: Egokitu amplifier's gain controls (LEVELS) to match the output voltage of your head unit. This is crucial to prevent distortion.
- Crossover ezarpenak: Set the crossover frequencies (XOVER) and pass modes (PASS MODE) according to the specifications of your speakers. For full-range speakers, a high-pass filter (HPF) is often used to protect them from low bass frequencies. For subwoofers, a low-pass filter (LPF) is used.
6. Mantentzea
To ensure the longevity and optimal performance of your Hertz HDP4 amplifizer-a, jarraitu mantentze-jarraibide hauek:
- Garbiketa: Aldian-aldian garbitu ampGarbitu garbigailuaren kanpoaldea oihal leun eta lehor batekin. Ez erabili produktu kimiko gogorrik edo garbitzaile urratzailerik.
- Aireztapena: Ziurtatu hori amplifier's cooling fins are free from dust and obstructions to maintain proper heat dissipation.
- Konexioak: Aldian-aldian egiaztatu kableatu-konexio guztiak estutasuna eta korrosioa duten ikusteko. Konexio solteek errendimendu eskasa edo kalteak eragin ditzakete.
- Fusibleak: If a fuse blows, replace it only with a fuse of the exact same type and rating (2 x 40A). Using an incorrect fuse can cause severe damage to the amplifier or vehicle electrical system.

Figure 6.1: Bottom panel of the Hertz HDP4 amplifier, displaying the serial number label and important caution notes regarding insulated screws. This area should be kept clean and free from obstructions.
7. Arazoak
Zurearekin arazoak badituzu amplaguntzaile gisa, kontsultatu hurrengo taula laguntzarekin harremanetan jarri aurretik:
| Arazoa | Kausa posiblea | Irtenbidea |
|---|---|---|
| Argirik ez / Amplifier ez da pizten | Fusible erreta, elikatze/lurrera/urrutiko agintearen kablea askatuta, unitate nagusiaren urrutiko agintearen irteera akastuna. | Check and replace fuses. Verify all power, ground, and remote connections are secure. Test remote wire for 12V signal. |
| Soinurik ez | Loose RCA/speaker wires, incorrect input selection, amplifier in protection mode, faulty speakers. | Check all signal and speaker connections. Ensure correct input mode is selected. Check for protection light. Test speakers. |
| Soinu distortsionatua | Gain set too high, incorrect crossover settings, poor quality audio source, damaged speakers. | Reduce gain. Adjust crossover settings. Test with a different audio source. Inspect speakers for damage. |
| Amplifier Gehiegi berotzen da | Insufficient ventilation, impedance mismatch, prolonged high-power operation. | Ziurtatu aireztapen egokia inguruan amplifizer. Egiaztatu bozgorailuen inpedantzia-bat etortzeak amplifier's capabilities. Reduce volume or operating time. |
8. Zehaztapenak
Technical specifications for the Hertz HDP4 4-Channel 1000W Max D-Class Ampbiziagoa:
- Eredua: HDP4
- Marka: HERTZ
- Mota: 4-Channel D-Class Ampbiziagoa
- Gehienezko potentzia: 1000W (as per product title, specific RMS not provided in data)
- Produktuaren neurriak (L x W x H): 11.18 x 6.73 x 1.83 hazbete
- Pisua: 6.35 kilo
- liburukiatage: 14.4 Voltio (Funtzionamenduan)
- Muntatze mota: Gainazaleko muntaia
- Fusibleak: 2 x 40A
- ASIN: B00AWBU1FQ
9. Bermearen informazioa
Hertz products are designed and manufactured to the highest quality standards. For specific warranty terms and conditions, please refer to the warranty card included with your product or visit the official Hertz webgunea. Gorde erosketa-agiria erosketaren frogagiri gisa berme-erreklamazioetarako.
10. Laguntza
For technical assistance, troubleshooting beyond this manual, or warranty inquiries, please contact Hertz customer support through their official website or authorized dealer. Ensure you have your product model (HDP4) and serial number ready when contacting support.
Official Hertz Webgunea: www.hertzaudiovideo.com