
1. Sarrera
Eskerrik asko erosketagatik.asing the SAMSON MS100 Studio Monitor Stands. These professional-grade stands are designed to provide stable and isolated support for your studio monitors, ensuring optimal audio performance. The MS100 features a telescoping column for height adjustment and an adjustable vise-style speaker bracket to accommodate various monitor sizes. Please read this manual thoroughly to ensure proper setup and safe operation.
2. Segurtasun informazioa
Beti jarraitu segurtasun neurri hauek ekipamenduari lesioak edo kalteak saihesteko:
- Ensure all components are securely fastened before placing monitors on the stands.
- Do not exceed the maximum weight capacity of the stands (consult product specifications or manufacturer for specific limits).
- Jarri euskarriak gainazal egonkor eta mailakatu batean, iraultzea saihesteko.
- Keep children and pets away from the stands, especially during adjustment.
- Avoid placing stands in high-traffic areas where they could be accidentally knocked over.
3. Paketearen edukia
Egiaztatu zure paketeak elementu hauek dituela:
- 2 x SAMSON MS100 Studio Monitor Stands (each comprising a base, telescoping column, and speaker bracket)
- Carpet spikes (typically pre-installed or included for optional attachment to the base)
- Assembly hardware (screws, washers, and any necessary tools if provided)
- Argibide eskuliburua (dokumentu hau)
4. Muntaketa eta Konfigurazioa
Follow these steps to assemble and set up your MS100 Studio Monitor Stands:
- Attach the Column to the Base: Securely fasten the main telescoping column to the heavy base using the provided hardware. Ensure it is tightened firmly to prevent wobbling.
- Install Carpet Spikes (Optional): If using on carpeted surfaces, ensure the carpet spikes are securely threaded into the bottom of the base. These spikes help to isolate the stand and improve stability.
- Attach the Speaker Bracket: Mount the adjustable vise-style speaker bracket to the top of the telescoping column. Ensure all screws are tightened.
- Doitu altuera: Loosen the locking mechanism on the telescoping column. Adjust the column to the desired height between 30 and 50 inches (76.2 cm - 127 cm). Once the desired height is reached, securely tighten the locking mechanism.
- Place Studio Monitor: Carefully place your studio monitor onto the speaker bracket. Adjust the vise-style clamps to securely hold the monitor in place without overtightening. Ensure the monitor is centered and stable.
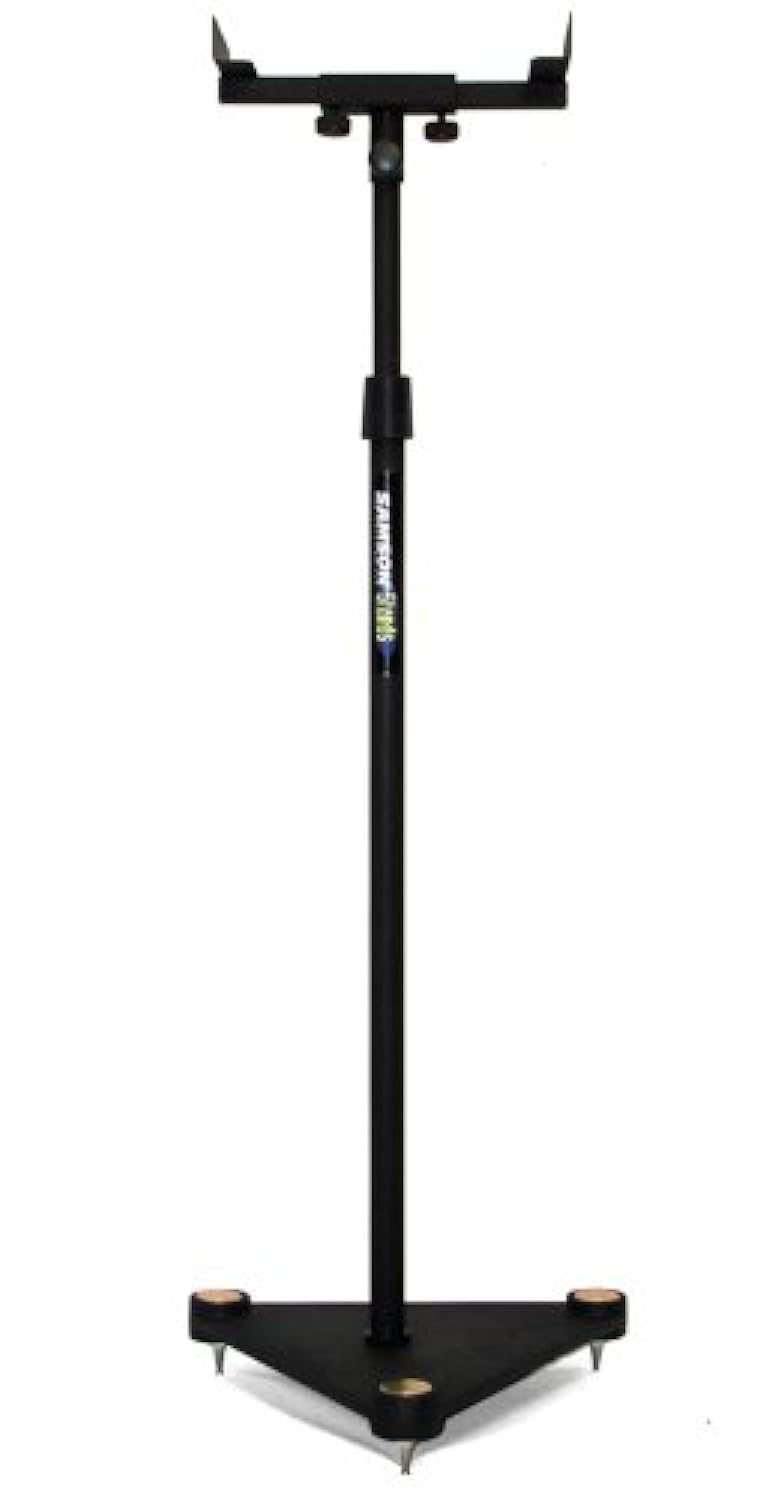
Image description: A fully assembled SAMSON MS100 Studio Monitor Stand with a studio monitor resting on its adjustable bracket. The stand is black with a heavy base, demonstrating its stable design.
5. Funtzionamendu-argibideak
Once assembled, the MS100 stands are ready for use. Position them in your studio or listening environment to achieve optimal sound staging and isolation. Ensure monitors are securely seated on the brackets and the stands are stable before use.
- Monitorearen kokapena: Place your studio monitors on the adjustable vise-style brackets. Ensure the monitors are balanced and the clamps are tightened just enough to hold them securely without causing damage.
- Altuera doitzea: For optimal listening, the acoustic axis of your monitors should be at ear level when you are in your primary listening position. Adjust the telescoping column as described in Section 4, Step 4, to achieve this.
- Egonkortasunaren egiaztapena: Periodically check that all connections are tight and the stands remain stable, especially after moving them or adjusting height.
6. Mantentzea
The SAMSON MS100 Studio Monitor Stands require minimal maintenance:
- Garbiketa: Wipe down the stands with a soft, dry cloth to remove dust. Avoid abrasive cleaners or solvents.
- Ikuskapena: Aldian-aldian ikuskatu torloju eta konexio guztiak ondo estututa daudela ziurtatzeko. Beharrezkoa bada, berriro estutu.
- Biltegiratzea: If storing the stands for an extended period, ensure they are clean and dry. They can be disassembled for more compact storage if desired.
7. Arazoak
If you encounter any issues with your MS100 Studio Monitor Stands, refer to the following common solutions:
- Zutik ezegonkorra da:
- Ensure the column is securely fastened to the base.
- Verify the height adjustment locking mechanism is fully tightened.
- Check that the stand is on a level surface. Adjust carpet spikes if applicable.
- Monitor Not Secure:
- Ensure the vise-style clamps are tightened sufficiently to hold the monitor.
- Verify your monitor's dimensions are compatible with the bracket.
8. Zehaztapenak
| Modelo zenbakia | MS100 |
| Altuera doitzea | 76.2 cm - 127 cm (30" - 50") |
| Speaker Bracket Type | Adjustable Vise-Style |
| Oinarri Mota | Heavy Base with Carpet Spikes |
| Product Dimensions (single stand) | 27.4 x 15.4 x 2.7 hazbete (69.6 x 39.1 x 6.9 cm) |
| Item Weight (single stand) | 1.32 libra (0.6 kg) |
Oharra: zehaztapenak aldatu egin daitezke, jakinarazi gabe.
9. Bermearen informazioa
The SAMSON MS100 Studio Monitor Stands are covered by a 3 urteko piezak eta eskulanaren bermea from the date of purchase. This warranty covers manufacturing defects and workmanship under normal use. It does not cover damage caused by misuse, accidents, unauthorized modifications, or improper installation.
For warranty service, please retain your proof of purchase and contact SAMSON customer support.
10. Bezeroarentzako arreta
If you have any questions, require technical assistance, or need to inquire about warranty service, please contact SAMSON customer support through their official webproduktua erosi duzun gunea edo dendaria.
SAMSON Official Webgunea: www.samsontech.com
Please note that specific contact details may vary by region. Refer to the official webinformazio eguneratuena lortzeko gunea.