
1. Sarrera
The Altronix Tempo2 Digital Timer is a versatile two-stage timer designed for various applications requiring precise timing control. It operates on either 12 or 24 volt AC or DC power and features a Single Pole Double Throw (SPDT) contact rated for 2 amps at 115VAC or 28VDC. Key functionalities include an adjustable timing range from 1 second to 60 seconds for timed door release, daily/weekly test modes, one-shot activation, and a door prop alarm. The unit incorporates EEProm memory for settings retention and an LCD display for clear status indication.
This manual provides detailed instructions for the proper installation, operation, and maintenance of your Tempo2 Digital Timer to ensure optimal performance and longevity.
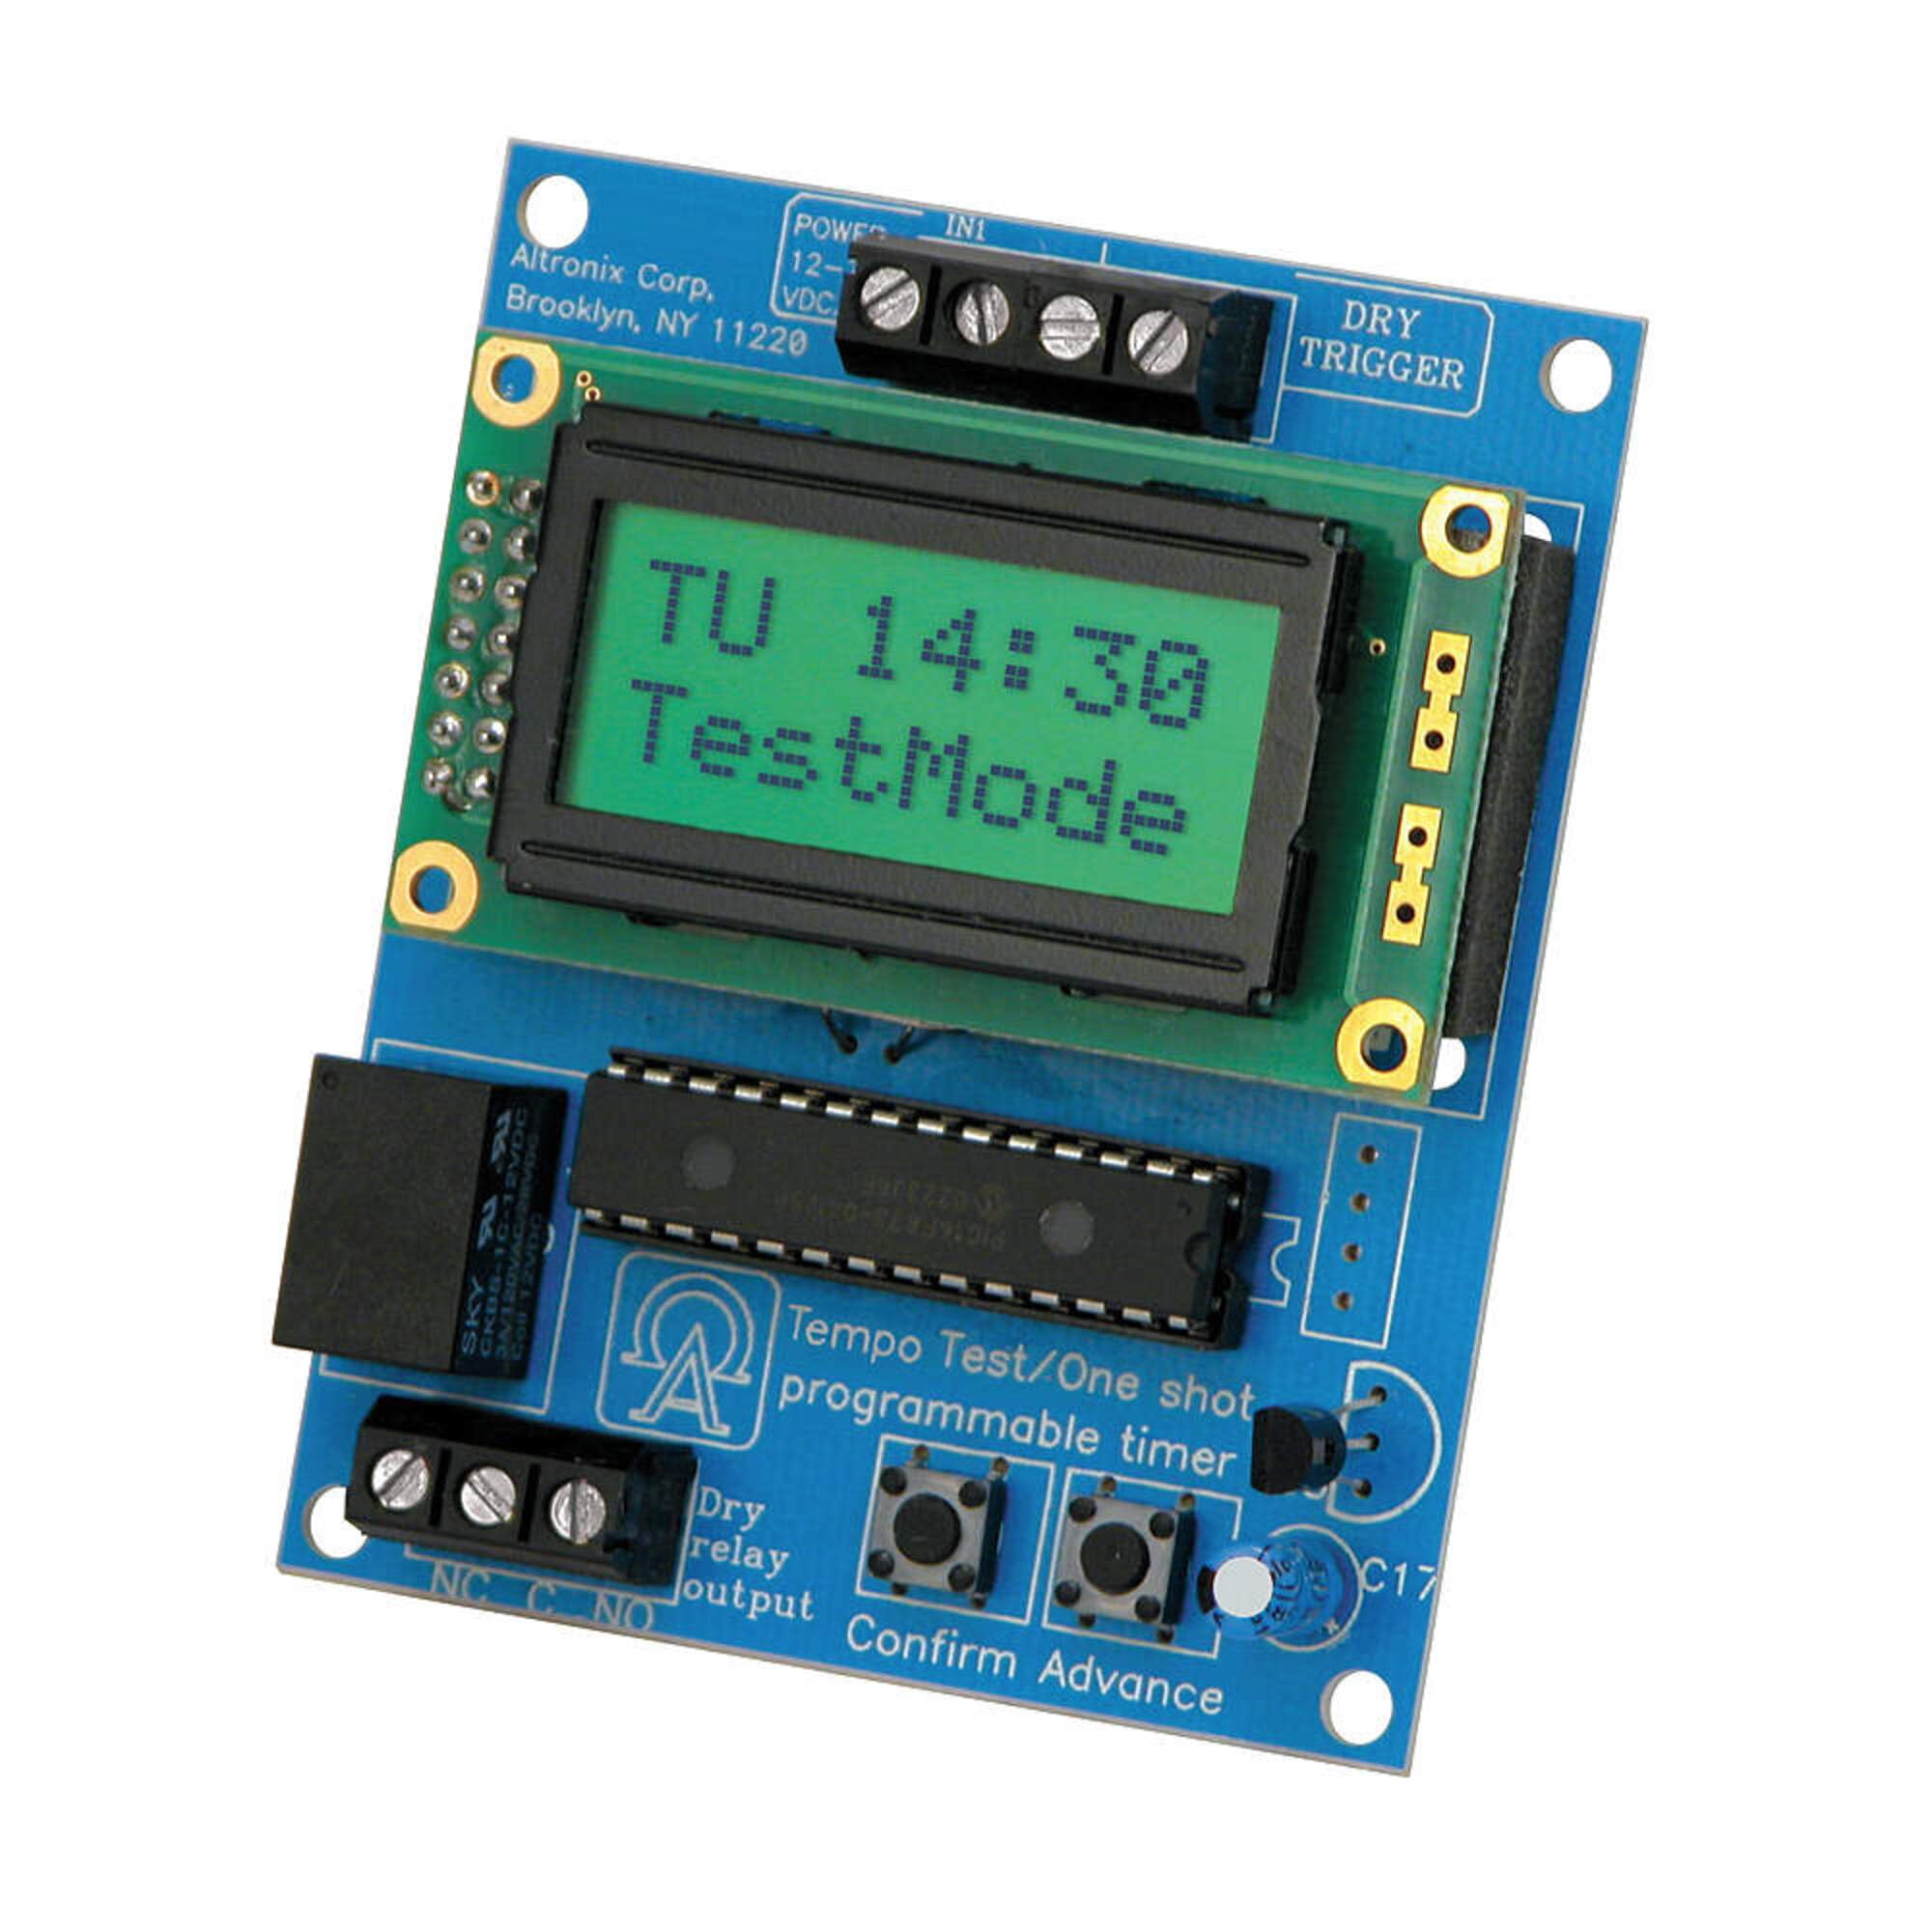
Image showing the Altronix Tempo2 Digital Timer unit, typically featuring its LCD display and control buttons.
2. Ezaugarriak
- Bi-S unibertsalatage Timer: Provides flexible timing control for various applications.
- Flexible Power Input: Operates on 12V or 24V AC or DC.
- SPDT Contact: 2eko puntuazioan Amp / 115VAC / 28VDC.
- Adjustable Timing Range: 1 second to 60 seconds for timed door release.
- Modu operatiboak: Includes daily/weekly test mode and one-shot activation.
- Door Prop Alarm: Integrated alarm function for security applications.
- EEProm Memory: Retains programmed settings during power loss.
- LCD pantaila: Provides clear visual feedback for programming and status.
3. Konfigurazioa eta instalazioa
Proper installation is crucial for the reliable operation of the Tempo2 Digital Timer. Ensure all power is disconnected before beginning installation.
3.1 Muntaketa
Mount the timer in a secure, dry location, away from direct heat sources or excessive moisture. Use appropriate fasteners for the mounting surface.
3.2 Kableatutako konexioak
Refer to the wiring diagram provided with your unit for specific connection points. General wiring guidelines are as follows:
- Potentzia sarrera: Connect 12V or 24V AC/DC power to the designated terminals. Observe correct polarity for DC connections.
- Trigger sarrera: Connect the trigger source (e.g., door contact, push button) to the trigger input terminals.
- Errele irteera: Connect the device to be controlled (e.g., door strike, alarm panel) to the SPDT relay output terminals (Common, Normally Open, Normally Closed). Ensure the load does not exceed the 2 Amp / 115VAC / 28VDC rating.
Kontuz: Incorrect wiring can damage the unit or connected equipment. If you are unsure about any wiring procedures, consult a qualified electrician or technician.
4. Funtzionamendu-argibideak
The Tempo2 Digital Timer features an LCD display and control buttons for programming and operation.
4.1 Setting the Timer Duration
- Access the programming menu using the designated button (refer to the unit's specific button layout).
- Navigate to the 'Timing Duration' setting.
- Adjust the time from 1 second to 60 seconds using the up/down buttons.
- Save the setting and exit the programming menu.
4.2 Daily/Weekly Test Mode
This mode allows for scheduled testing of the timer's functionality without full activation. Consult the unit's programming guide for setting specific test schedules.
4.3 One-Shot Activation
The one-shot activation feature allows the timer to trigger once for the set duration upon receiving a signal. This is useful for single-event operations.
4.4 Atea Prop Alarma
When configured, the door prop alarm will activate if a connected door remains open beyond a pre-set time. This feature enhances security by alerting users to prolonged open door conditions.
5. Mantentzea
The Altronix Tempo2 Digital Timer is designed for reliable, long-term operation with minimal maintenance. Follow these guidelines to ensure continued performance:
- Garbiketa: Periodically wipe the unit with a soft, dry cloth to remove dust and debris. Do not use abrasive cleaners or solvents.
- Konexioak: Urtero ikuskatu kableatu-konexio guztiak, ondo finkatuta daudela eta korrosiorik gabe daudela ziurtatzeko.
- Ingurumena: Ziurtatu funtzionamendu-ingurunea zehaztutako tenperatura eta hezetasun tarteen barruan mantentzen dela.
No user-serviceable parts are inside the unit. Refer all servicing to qualified personnel.
6. Arazoak
If you encounter issues with your Tempo2 Digital Timer, refer to the following common problems and solutions:
| Arazoa | Kausa posiblea | Irtenbidea |
|---|---|---|
| Timer not powering on / LCD blank | Energiarik ez, bolumen okerratage, or reversed DC polarity. | Egiaztatu elikatze-iturriaren konexioak eta bolumenatage. Ensure correct DC polarity. |
| Timer not activating output | Incorrect trigger input, faulty wiring, or incorrect programming. | Verify trigger input signal. Check output wiring. Review programazio ezarpenak. |
| Denbora-iraupen okerra | Timer duration set incorrectly. | Re-enter the programming menu and adjust the timing duration as needed. |
| Door prop alarm not functioning | Door contact faulty, wiring issue, or alarm not enabled. | Check door contact and its wiring. Ensure door prop alarm is enabled in settings. |
If the problem persists after attempting these solutions, contact Altronix technical support for further assistance.
7. Zehaztapenak
- Eredua: TEMPO2
- Marka: Altronix
- Potentzia sarrera: 12V edo 24V AC/DC
- Kontaktu mota: SPDT (Polo Bakarreko Bi Jaurtiketa)
- Kontaktuen balorazioa: 2 Amp @ 115VAC / 28VDC
- Denbora tartea: 1 second to 60 seconds (adjustable)
- Memoria: EEProm (retains settings)
- Pantaila: LCDa
- Ezaugarriak: Bi-stage operation, daily/weekly test mode, one-shot activation, door prop alarm
- Elementuaren pisua: Gutxi gorabehera 0.2 libera (0.09 kg)
- UPC: 782239938292
- GTIN: 782239938292
8. Bermea eta Laguntza
Altronix products are backed by a manufacturer's warranty. For specific warranty terms and conditions, please refer to the warranty information included with your product packaging or visit the official Altronix webgunea.
For technical support, troubleshooting assistance, or to inquire about service, please contact Altronix customer support. Have your model number (TEMPO2) and any relevant purchase information ready when contacting support.
Altronix Contact Information:
Please refer to the official Altronix website for the most current contact details, including phone numbers and email addresses for technical support.


