
Sarrera
This manual provides essential instructions for the installation, operation, and maintenance of the eMachines D525 Intel Laptop Motherboard, model MB.N4501.002. This motherboard is designed for specific laptop systems and is a genuine replacement part. Please read this manual thoroughly before proceeding with any installation or maintenance procedures.
Konfigurazioa eta Instalazioa
Proper installation is crucial for the functionality and longevity of your motherboard. Always ensure you are working in a static-free environment and handle the motherboard by its edges to avoid damage to components.
1. Instalazioaren aurreko egiaztapenak
- Bateragarritasuna egiaztatzea: Before installation, verify that this motherboard (MB.N4501.002) is the correct replacement part for your eMachines D525 laptop. Parts are generally not interchangeable between different models. Consult your laptop's service manual or the manufacturer's recommendations.
- Deskarga estatikoa: Wear an anti-static wrist strap or frequently touch a grounded metal object to discharge static electricity from your body.
- Beharrezko tresnak: Gather necessary tools such as a Phillips head screwdriver, plastic spudger, and thermal paste.
2. Plaka Amaview
Below is an image of the eMachines D525 Intel Laptop Motherboard. Familiarize yourself with the component layout before proceeding.
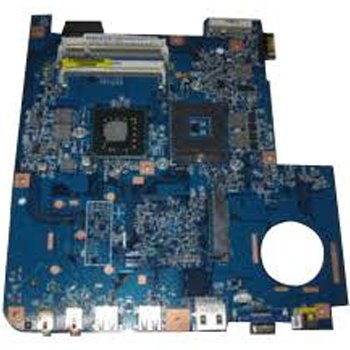
Image: eMachines D525 Intel Laptop Motherboard (MB.N4501.002). This image displays the overall layout of the motherboard, including various connectors and component placements.
3. Instalazio urratsak
- Desmihiztatu: Carefully disassemble your laptop, following the specific instructions for your eMachines D525 model to access the existing motherboard. Disconnect all cables, remove components like the CPU, RAM, and storage drives from the old motherboard.
- CPU instalazioa: Install the Intel Core 2 DUO processor into the Socket 478 on the new motherboard. Ensure proper alignment and secure the CPU retention lever. Apply a thin, even layer of thermal paste to the CPU surface before installing the heatsink.
- RAM instalazioa: Insert compatible DDR2 SODIMM memory modules into the 2 available memory slots. Press down firmly until the clips on both sides snap into place.
- Storage Connection: Connect SATA storage devices (e.g., hard drive, SSD) to the SATA 3 ports on the motherboard.
- Muntaketa: Kontu handiz jarri plaka base berria ordenagailu eramangarriaren xasisean, torloju-euskarriekin lerrokatuz. Lotu torloju egokiekin.
- Konexio periferikoak: Reconnect all internal cables, including power, display, keyboard, touchpad, and USB ports, to their respective connectors on the motherboard.
- Berriz muntatzea: Reassemble the laptop chassis, ensuring all components are properly seated and secured.
Funtzionamendu-argibideak
1. Hasierako abiaraztea
After reassembly, connect the AC adapter and attempt to power on the laptop. Observe for any POST (Power-On Self-Test) beeps or display output. If the system boots successfully, proceed to operating system installation or verification.
2. BIOS/UEFI konfigurazioa
During startup, you may need to press a specific key (e.g., F2, Del, F10) to enter the BIOS/UEFI setup utility. Here, you can configure boot order, system time, and other hardware settings. Ensure that the SATA mode is correctly set for your storage device (e.g., AHCI).
3. Sistema eragilearen instalazioa
If you have replaced the storage drive or are performing a fresh installation, you will need to install an operating system. Boot from your operating system installation media (USB drive or DVD) and follow the on-screen prompts. Install all necessary drivers for the motherboard's components (chipset, audio, network, etc.) after the OS installation is complete.
Mantentzea
Regular maintenance helps ensure the stability and performance of your laptop.
- Garbiketa: Periodically clean the laptop's cooling system (fans and heatsinks) to prevent dust buildup, which can lead to overheating. Use compressed air and ensure the laptop is powered off and disconnected from power.
- BIOS eguneraketak: Check the eMachines support website for any available BIOS updates for your D525 model. BIOS updates can improve compatibility, stability, and performance. Follow the manufacturer's instructions carefully when performing a BIOS update.
- Osagaien egiaztapenak: Occasionally inspect internal connections to ensure all cables are securely seated.
Arazoak konpontzea
Plaka basea instalatu ondoren arazorik baduzu, kontuan hartu arazoak konpontzeko urrats hauek:
- Potentziarik gabe:
- Ensure the AC adapter is functioning and properly connected.
- Verify all internal power cables to the motherboard are securely connected.
- Ez dago pantailarik:
- Check the display cable connection to the motherboard.
- Reseat the RAM modules. Try booting with one RAM module at a time if you have multiple.
- Ensure the CPU is properly seated and the heatsink is installed correctly.
- System Beeps:
Refer to your laptop's service manual for a list of POST beep codes, which can indicate specific hardware failures (e.g., RAM, CPU, graphics).
- Sistema eragilea ez da kargatzen:
- Check the boot order in BIOS/UEFI to ensure the correct storage device is selected.
- Verify the storage device is properly connected and detected by the BIOS.
- If the OS was installed on a different motherboard, a fresh installation might be required due to driver conflicts.
Zehaztapenak
Key technical specifications for the eMachines D525 Intel Laptop Motherboard (MB.N4501.002):
| Ezaugarri | Xehetasuna |
|---|---|
| Marka | eMachines |
| Modelo zenbakia | MB.N4501.002 |
| CPU Socketa | 478 entxufea |
| Prozesadore bateragarriak | Intel Core 2 DUO |
| Memoria zirrikituak eskuragarri | 2 |
| Sistemaren Bus Estandarra Onartua | SATA 3 |
| Gailu bateragarriak | Ordenagailu eramangarria |
| UPC | 014146449371 |
Bermea eta Laguntza
This eMachines D525 Intel Laptop Motherboard (MB.N4501.002) is a system pull part and is guaranteed for 90 days from the date of purchase. This guarantee covers defects in materials and workmanship under normal use.
For technical support or warranty claims, please contact your original vendor or the eMachines support channels. Ensure you have your purchase receipt and the motherboard's model number readily available.
For additional resources, you may visit the official eMachines support website or consult the service manual for your specific eMachines D525 laptop model.