1. Sarrera
Eskerrik asko erosketagatik.asing the Excelvan LK-T091 Digital LED Alarm Clock Radio. This manual provides detailed instructions for the proper setup, operation, and maintenance of your device. Please read this manual thoroughly before use and retain it for future reference.
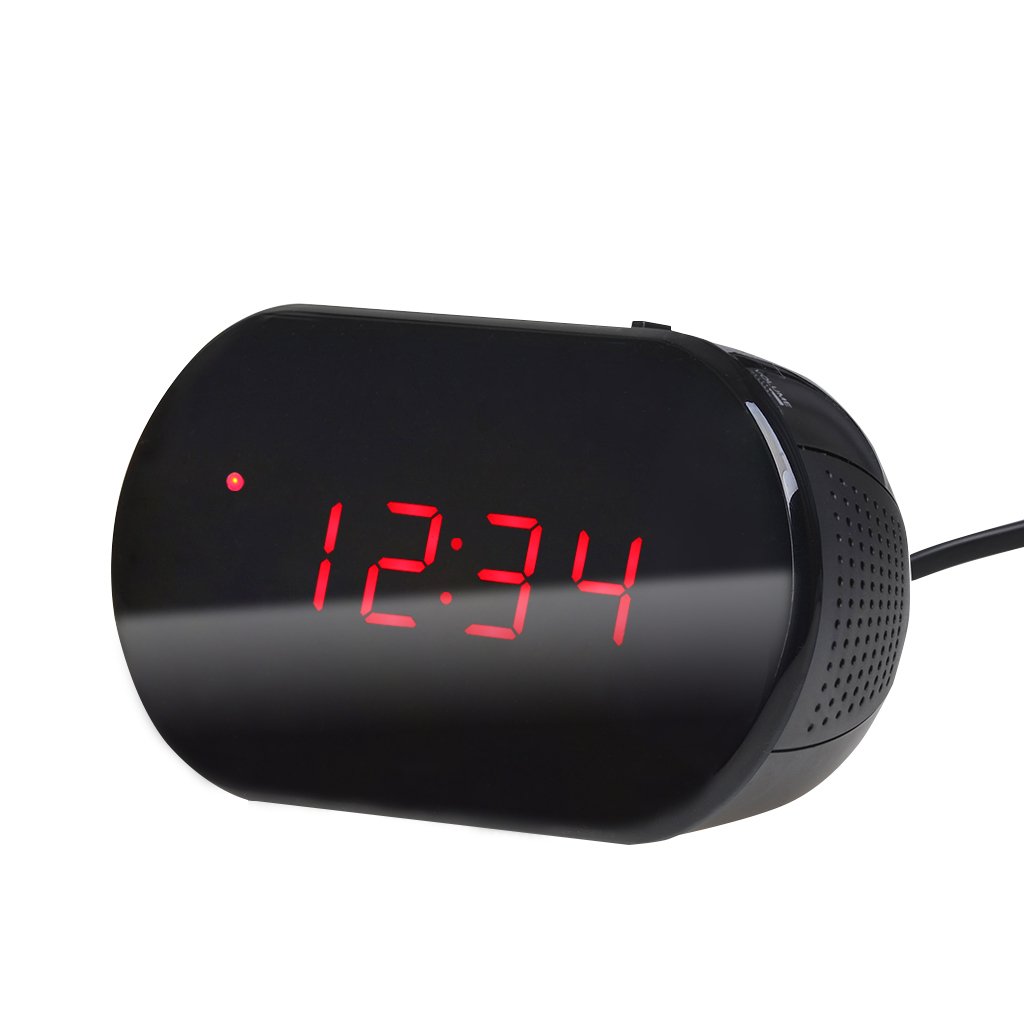
1. irudia: Aurrealdea view of the Excelvan LK-T091 Digital LED Alarm Clock Radio.
Paketearen edukia:
- 1 x Excelvan Digital LED Alarm Clock Radio (Model LK-T091)
- 1 x Erabiltzailearen eskuliburua
2. Segurtasun informazio garrantzitsua
- Ez erabili bateria kargagarriak for the backup power. Alkaline or lithium batteries are recommended for optimal performance and longevity.
- Ensure the power adapter is compatible with your local power supply (AC230V ~ 50Hz).
- Ez jarri gailua uraren, hezetasunaren edo muturreko tenperaturen eraginpean.
- Saihestu gailua bero-iturrietatik gertu edo eguzki-argia zuzenean jartzen.
- Ez saiatu unitatea zeuk desmuntatzen edo konpontzen. Mantendu mantentze-lan guztiak langile kualifikatuen esku.
- Mantendu haurren eskura.
3. Produktua amaitu daview
Kontrolak eta pantaila:

Figure 2: Top panel controls of the Excelvan LK-T091.
- LED pantaila: Ordua, alarmaren egoera eta irrati-maiztasuna erakusten ditu.
- SNOOZE botoia: Alarma aldi baterako isilarazten du.
- SET / PRESET Button: Used to set time/alarm and save radio presets.
- ALARM / MEM Button: Activates alarm setting mode and recalls radio presets.
- Berrezarri botoia: Resets the unit.
- Tuning Buttons (▲ / ▼): Adjust time, alarm, and radio frequency.
- RADIO / SLEEP Button: Turns radio on/off and activates sleep timer.
- ALARM OFF / BUZZER / RADIO Switch: Selects alarm sound source (off, buzzer, or radio).
- BOLUMENaren botoia: Adjusts radio volume.

3. Irudia: Atzealdea view showing the battery compartment for backup power.
4. Konfigurazioa
4.1 Energia-konexioa
- Connect the AC power cord to the power input jack on the back of the clock radio.
- Plug the other end of the power cord into a standard AC230V ~ 50Hz wall outlet.
- LED pantaila piztuko da, unitatea piztuta dagoela adieraziz.
4.2 Bateriaren babeskopiaren instalazioa
The clock radio uses one 9V (6F22 type) battery (not included) for backup power. This battery maintains time settings during a power outage.
- Aurkitu bateriaren konpartimentua unitatearen behealdean.
- Ireki bateriaren konpartimenduaren estalkia.
- Insert one 9V (6F22 type) alkaline or lithium battery, ensuring correct polarity (+ and -).
- Itxi bateriaren konpartimenduaren estalkia ondo.
- Note: The battery backup only maintains time settings; the display will not be visible during a power outage. Do not use rechargeable batteries.
4.3 Ordua ezartzea
- Eduki sakatuta EZARTU button until the hour digits start flashing.
- Erabili ▲ or ▼ (Tuning) buttons to adjust the hour.
- Sakatu EZARTU button again; the minute digits will flash.
- Erabili ▲ or ▼ (Tuning) buttons to adjust the minutes.
- Sakatu EZARTU button once more to confirm and exit time setting mode. The time is displayed in 24-hour format.
5. Funtzionamendu-argibideak
5.1 Alarma ezartzea
The alarm can be set to wake you with a buzzer or your favorite FM radio station.
- Eduki sakatuta ALARMA button until the alarm hour digits start flashing.
- Erabili ▲ or ▼ (Tuning) buttons to adjust the alarm hour.
- Sakatu ALARMA button again; the alarm minute digits will flash.
- Erabili ▲ or ▼ (Tuning) buttons to adjust the alarm minutes.
- Sakatu ALARMA button once more to confirm and exit alarm setting mode.
- Alarma aktibatzeko, irristatu ALARM OFF / BUZZER / RADIO edozeinetara aldatu BIZARRA or IRRATIA. An alarm indicator will appear on the display.
- To turn off the alarm, slide the switch to ALARMA AKTIBA.

Figure 4: Choose to wake up to a buzzer sound or your preferred radio station.
5.2 Snooze funtzioa
Alarma jotzen duenean, sakatu botoi handia SNOOZE button to temporarily silence the alarm for approximately 9 minutes. The alarm will sound again after this period. To cancel snooze and turn off the alarm, slide the ALARM OFF / BUZZER / RADIO aldatu ALARMA AKTIBA.

Figure 5: The snooze function allows for a short delay before the alarm sounds again.
5.3 FM irratiaren funtzionamendua
5.3.1 Tuning the Radio
- Sakatu IRRATIA botoia FM irratia pizteko.
- Erabili ▲ or ▼ (Tuning) buttons to manually tune to your desired FM frequency (87.5 – 108 MHz).
- To automatically scan for the next available station, press and hold the ▲ or ▼ (Tuning) buttons for a few seconds until the frequency starts scanning.
- Doitu bolumena BOLUMENA botoia.
- Sakatu IRRATIA botoia berriro sakatu irratia itzaltzeko.
5.3.2 Aurrezarpenak gordetzea eta berreskuratzea
The clock radio can store up to 10 FM radio station presets.
- Tune to your desired station using the tuning method described above.
- Eduki sakatuta SET / PRESET botoia sakatu "P01" (edo eskuragarri dagoen hurrengo aurrezarpen zenbakia) pantailan keinuka agertu arte.
- Erabili ▲ or ▼ (Tuning) buttons to select the desired preset number (P01-P10).
- Sakatu SET / PRESET botoia berriro sakatu hautatutako aurrezarpenean irratia gordetzeko.
- To recall a saved preset, press the ALARM / MEM botoia behin eta berriz gordetako irratiak zeharkatzeko.

Figure 6: Digital FM tuning allows for precise station selection and saving presets.
5.4 Lo egiteko tenporizadorearen funtzioa
Lo egiteko tenporizadoreak irratiak denbora jakin batez erreproduzitzen uzten du automatikoki itzali aurretik.
- Irratia jotzen ari den bitartean, sakatu botoia LO button repeatedly to cycle through the available sleep timer durations: 90, 75, 60, 45, 30, 15, 00 minutes.
- The selected duration will be displayed briefly. The radio will automatically turn off after the set time.
- Lo egiteko tenporizadorea bertan behera uzteko, sakatu LO button until "00" is displayed, or turn off the radio manually.
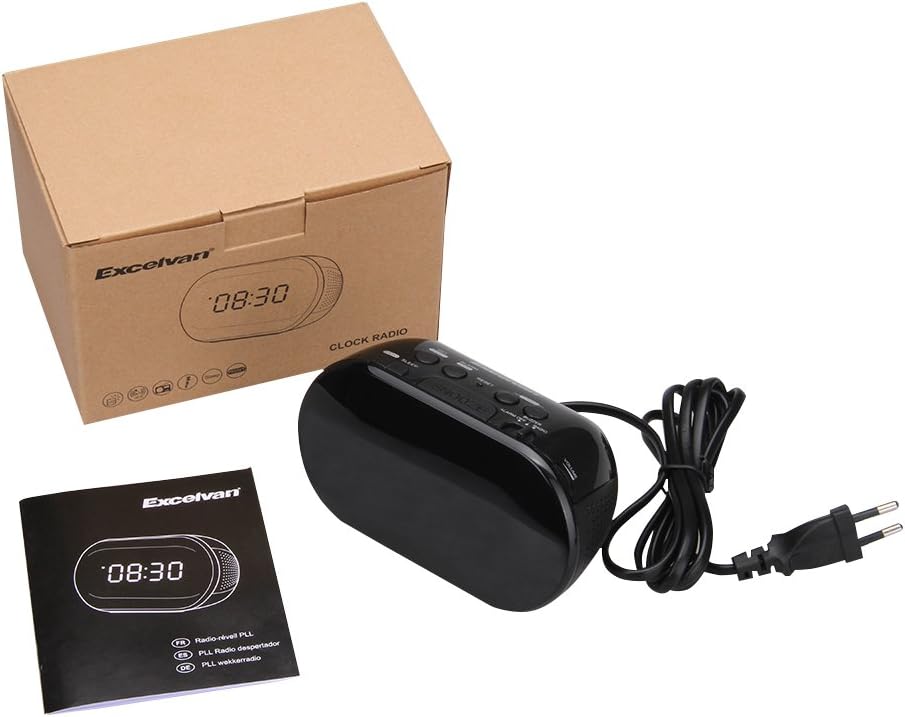
Figure 7: The sleep timer allows you to fall asleep to music, which then automatically turns off.
6. Mantentzea
6.1 Garbiketa
- Garbitu unitatearen kanpoaldea zapi leun eta lehor batekin.
- Ez erabili garbitzaile, argizari edo disolbatzaile urratzailerik, akabera kaltetu baitezakete.
- Ziurtatu unitatea entxufetik deskonektatuta dagoela garbitu aurretik.
6.2 Bateria ordezkatzea
If the time settings are lost during a power outage, the 9V backup battery may need to be replaced. Follow the instructions in Section 4.2 for battery installation.
7. Arazoak
| Arazoa | Kausa posiblea | Irtenbidea |
|---|---|---|
| No display / Unit not turning on | Power cord not connected or power outlet not active. | Ziurtatu elikatze-kablea ondo konektatuta dagoela unitatean eta funtzionatzen duen hormako entxufe batean. |
| Ordu/Alarma ezarpenak galdu dira argindarra itzaltzeantage | Backup battery is dead or not installed. | Install a new 9V alkaline or lithium battery in the battery compartment. |
| FM irratiaren harrera eskasa | Antena ez dago luzatuta edo seinale eskasa dago eremuan. | Extend the FM wire antenna fully. Try repositioning the unit for better reception. |
| Alarma ez da jotzen | Alarm not set or alarm switch is in "OFF" position. | Verify alarm time is set correctly. Ensure the ALARM OFF / BUZZER / RADIO etengailua ezarrita dago BIZARRA or IRRATIA. |
| Pantaila oso distiratsua/iluna da | No brightness adjustment feature on this model. | The display brightness is fixed. |
8. Zehaztapenak
- Eredua: LK-T091
- Pantaila: LED, 24-hour format
- Alarma mota: Single alarm (Buzzer or FM Radio)
- FM maiztasun gama: 87.5 – 108 MHz
- Lo egiteko tenporizadorea: 00, 15, 30, 45, 60, 75, 90 minutu
- Potentzia sarrera: AC 230V ~ 50Hz
- Ordezko Bateria: 1 x 9V (6F22 type) battery (not included)
- Produktuaren neurriak (L x A x S): Gutxi gorabehera 14.15 cm x 7.14 cm x 0.89 cm
- Pisua: Gutxi gorabehera 380 g
- Materiala: AC (Plastic)
- Kolorea: Beltza
9. Bermea eta Laguntza
Excelvan products are designed to provide reliable performance. For specific warranty information, please refer to the warranty card included with your purchase or contact your retailer. If you encounter any issues or require technical assistance, please contact Excelvan customer support through their official webgunea edo zure produktuarekin emandako harremanetarako informazioa.
Please have your model number (LK-T091) and purchase details ready when contacting support.