1. Sarrera
This manual provides essential information for the installation, maintenance, and troubleshooting of your Blendin Replacement Motor and Blade Gear Clutch Set. These parts are designed to restore the functionality of compatible Nutribullet blenders.
2. Bateragarritasunari buruzko informazioa
This Blendin Replacement Motor and Blade Gear Clutch Set is compatible with the following Nutribullet models:
- Nutribullet 600W Series
- Nutribullet 900W Series
- NB-101B
- NB-101S
- NB-201
- NBR-0601
- NBR-1201
- NB9-1301
- NB-WL088D-23
- 900 Pro Series Blenders
Important: This set is NOT compatible with Magic Bullet MB1001 or Nutribullet RX models.

3. Paketearen edukia
Your Blendin Replacement Motor and Blade Gear Clutch Set includes the following components:
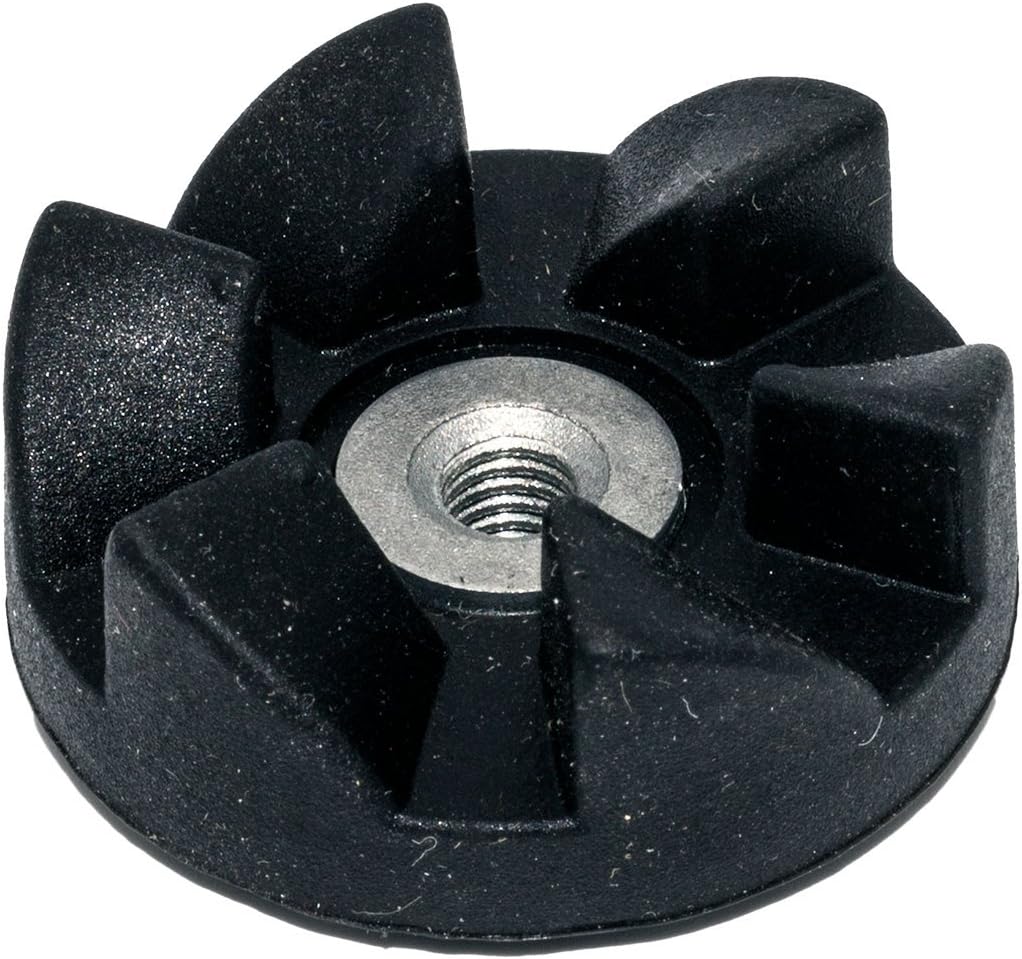
- 2 x Motor Gear Clutches (black, rubber)
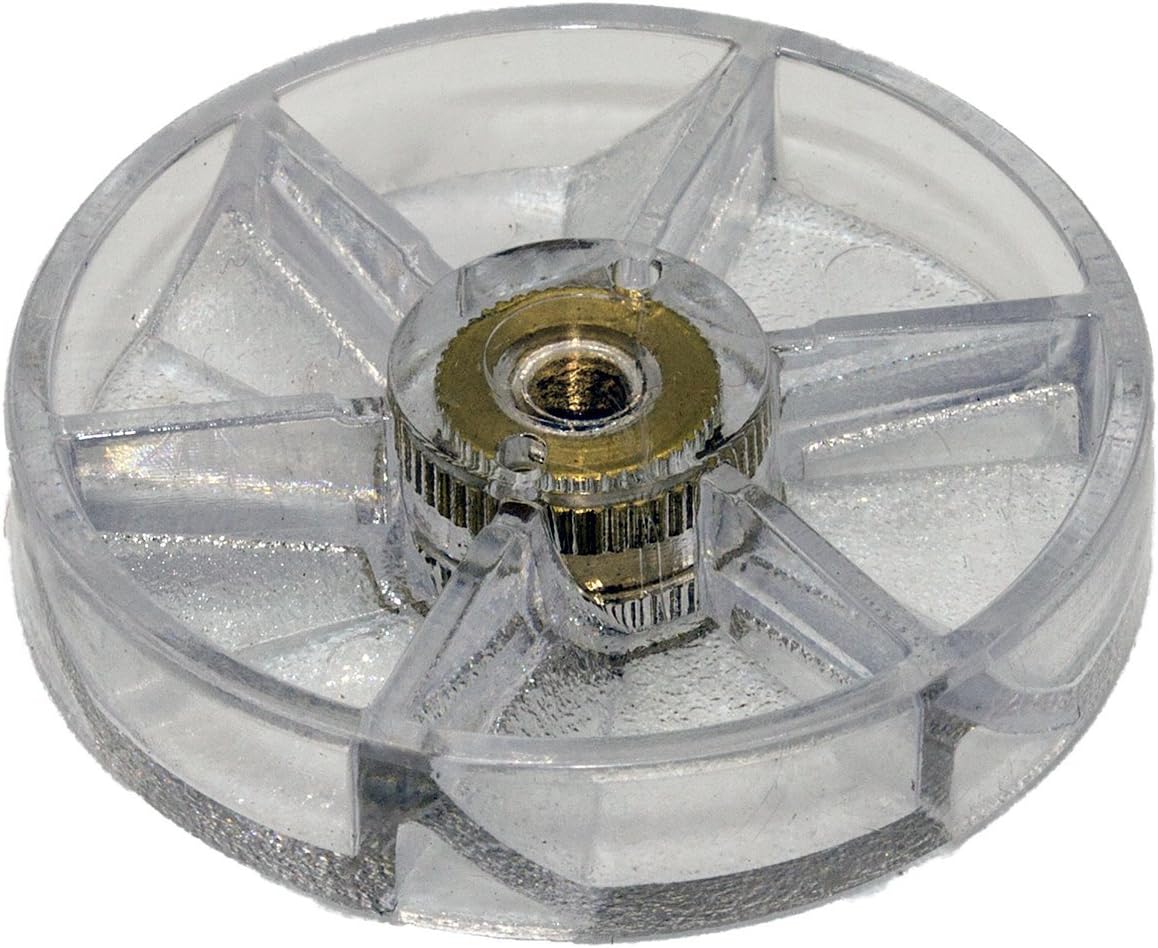
- 2 x Blade Gear Clutches (clear, hard plastic)

4. Segurtasun-argibideak
- Always unplug your blender from the power outlet before attempting any maintenance or part replacement.
- Ensure the blender is completely off and cool before handling any components.
- Use appropriate tools for removal and installation to prevent damage to the blender or injury.
- Mantendu pieza txikiak haurrengandik urrun.
- If you are unsure about any step, consult a qualified technician or refer to online video tutorials for visual guidance.
5. Instalazio gida
Replacing the motor and blade gears requires careful attention. It is highly recommended to watch a video tutorial for visual instructions, as the gears often require specific tools and counter-clockwise rotation for removal. Search online for "Nutribullet gear replacement" for detailed video guides.
5.1. Replacing the Motor Gear Clutch
- Unplug the Blender: Ensure the blender base is completely disconnected from the power supply.
- Access the Motor Gear: The motor gear (black, rubber) is located on top of the blender's motor base.
- Remove the Old Motor Gear: The old gear is typically threaded onto the motor shaft. It often requires significant force and specific tools (e.g., vice grips and a flat-head screwdriver) to remove, as it may be reverse-threaded (turn clockwise to loosen, or counter-clockwise depending on the model and how it was installed). Some users find it helpful to hold the motor shaft from below while turning the gear.
- Install the New Motor Gear: Carefully thread the new black motor gear onto the motor shaft. Turn it counter-clockwise (or clockwise if the old one was reverse-threaded) until it is securely tightened. Do not overtighten.
5.2. Replacing the Blade Gear Clutch
- Access the Blade Gear: The blade gear (clear, hard plastic) is located on the underside of the extractor blade assembly.
- Remove the Old Blade Gear: Similar to the motor gear, the blade gear is threaded. It typically requires firm grip and counter-clockwise rotation to loosen. You may need to use a cloth or rubber grip to get sufficient leverage.
- Install the New Blade Gear: Thread the new clear blade gear onto the blade assembly shaft. Turn it clockwise until it is securely tightened. Ensure it is flush and stable.
5.3. Probak
- Once both gears are replaced, reassemble your Nutribullet blender.
- Plug the blender back into the power outlet.
- Perform a test run with water to ensure proper function and no leaks before blending food items.
6. Mantentzea
For optimal performance and longevity of your Nutribullet blender, it is recommended to inspect and replace both the blade and motor gears every six months, or sooner if signs of wear and tear are observed. Regular inspection helps prevent unexpected failures during operation.
7. Arazoak
- Blender not activating after replacement:
- Ensure the cup and blade assembly are correctly seated and locked into the motor base.
- Verify that the new gears are fully tightened and properly aligned.
- Grinding noise during operation:
- This may indicate improper alignment or damage to the gears. Disassemble, inspect, and re-install the gears carefully.
- Ensure no debris is lodged between the gears.
- Piezak ez dira egokitzen:
- Double-check the compatibility list in Section 2 to ensure your Nutribullet model is supported.
- Confirm you are attempting to install the correct gear (motor gear on base, blade gear on blade assembly).
If issues persist after troubleshooting, consider consulting a professional or contacting Blendin customer support.
8. Zehaztapenak
| Produktuaren neurriak | 4 x 1.8 x 4 hazbete |
| Elementuaren pisua | 2.89 ontza |
| Elementuaren eredu-zenbakia | 8541987754 |
| Fabrikatzailea | Blendin Parts Inc. |
9. Bermea eta Laguntza
For specific warranty information or customer support regarding your Blendin Replacement Parts, please refer to the product packaging or contact Blendin Parts Inc. directly through their official channels. General support for installation queries can often be found through online video tutorials from experienced users.