Sarrera
Welcome to the world of sewing with your new Janome IT 1028 Glamour mechanical sewing machine. This manual provides essential information for the safe and efficient operation, setup, maintenance, and troubleshooting of your machine. Please read it thoroughly before using the machine to ensure optimal performance and longevity.
The Janome IT 1028 Glamour is designed for ease of use, featuring 12 stitch types, a free arm for circular sewing, an oscillating hook, automatic buttonholes, and adjustable stitch length and width. It also includes a double presser foot lift, feed dog lowering, a thread cutter, a needle threader, and a soft cover for protection.
Segurtasun-argibideak
Deskarga elektrikoa, erredurak, suteak edo pertsonei lesioak izateko arriskua murrizteko:
- Deskonektatu beti makina entxufe elektrikotik erabili ondoren eta garbitu, estalkiak kendu edo erabiltzailearen mantentze-lanetarako doikuntzak egin aurretik.
- Do not allow the machine to be used as a toy. Close attention is necessary when the machine is used by or near children.
- Erabili makina hau eskuliburu honetan deskribatutako erabilerarako soilik. Erabili fabrikatzaileak gomendatutako osagarriak soilik.
- Ez erabili inoiz makina hau kablea edo entxufea hondatuta badu, behar bezala funtzionatzen ez badu, erori edo hondatu bada, edo uretara erori bada.
- Inoiz ez erori edo sartu objekturik edozein irekiduratan.
- Ez erabili kanpoan.
- Ez erabili aerosol (spray) produktuak erabiltzen ari diren tokietan edo oxigenoa administratzen den lekuetan.
- Mantendu hatzak mugitzen diren zati guztietatik urrun. Josteko makinaren orratzaren inguruan arreta berezia jarri behar da.
- Erabili beti orratz plaka egokia. Okerreko plakak orratza hautsi dezake.
- Ez erabili orratz okertuta.
- Ez tira edo bultzatu ehuna josi bitartean. Horrek orratza desbideratu eta hautsi egin dezake.
- Turn the sewing machine off when making any adjustments in the needle area, such as threading the needle, changing the needle, threading the bobbin, or changing the presser foot.
- Always unplug the machine when removing the light bulb.
- Ez deskonektatu kableari tiraka. Deskonektatzeko, heldu entxufeari, ez kableari.
Produktua amaituview
Ezaugarri nagusiak
- 12 Stitch Types: Versatile options for various sewing projects.
- Beso librea: Facilitates sewing cuffs, sleeves, and other small, circular items.
- Oscillating Hook: Ensures smooth and consistent stitch formation.
- Adjustable Stitch Length and Width: Provides control over stitch appearance.
- Automatic Four-Step Buttonhole: Simplifies the creation of professional-looking buttonholes.
- Double Presser Foot Lift: Allows for sewing thicker fabrics.
- Feed Dog Lowering: Useful for darning and free-motion quilting.
- Hari-ebakitzailea: Conveniently trims threads.
- Orratz-harigailua: Assists in quickly threading the needle.
- Azala biguna: Protects the machine from dust and damage.
Makinaren osagaiak
Familiarize yourself with the main parts of your Janome IT 1028 Glamour sewing machine.

1. irudia: Aurrealdea view of the Janome IT 1028 Glamour sewing machine with the soft cover in place. This image shows the overall design and the stitch selection and length dials.

2. irudia: hurbileko planoa view of the stitch selector dial (left) and stitch length dial (right) on the Janome IT 1028 Glamour. The decorative illustration on the machine body is also visible.
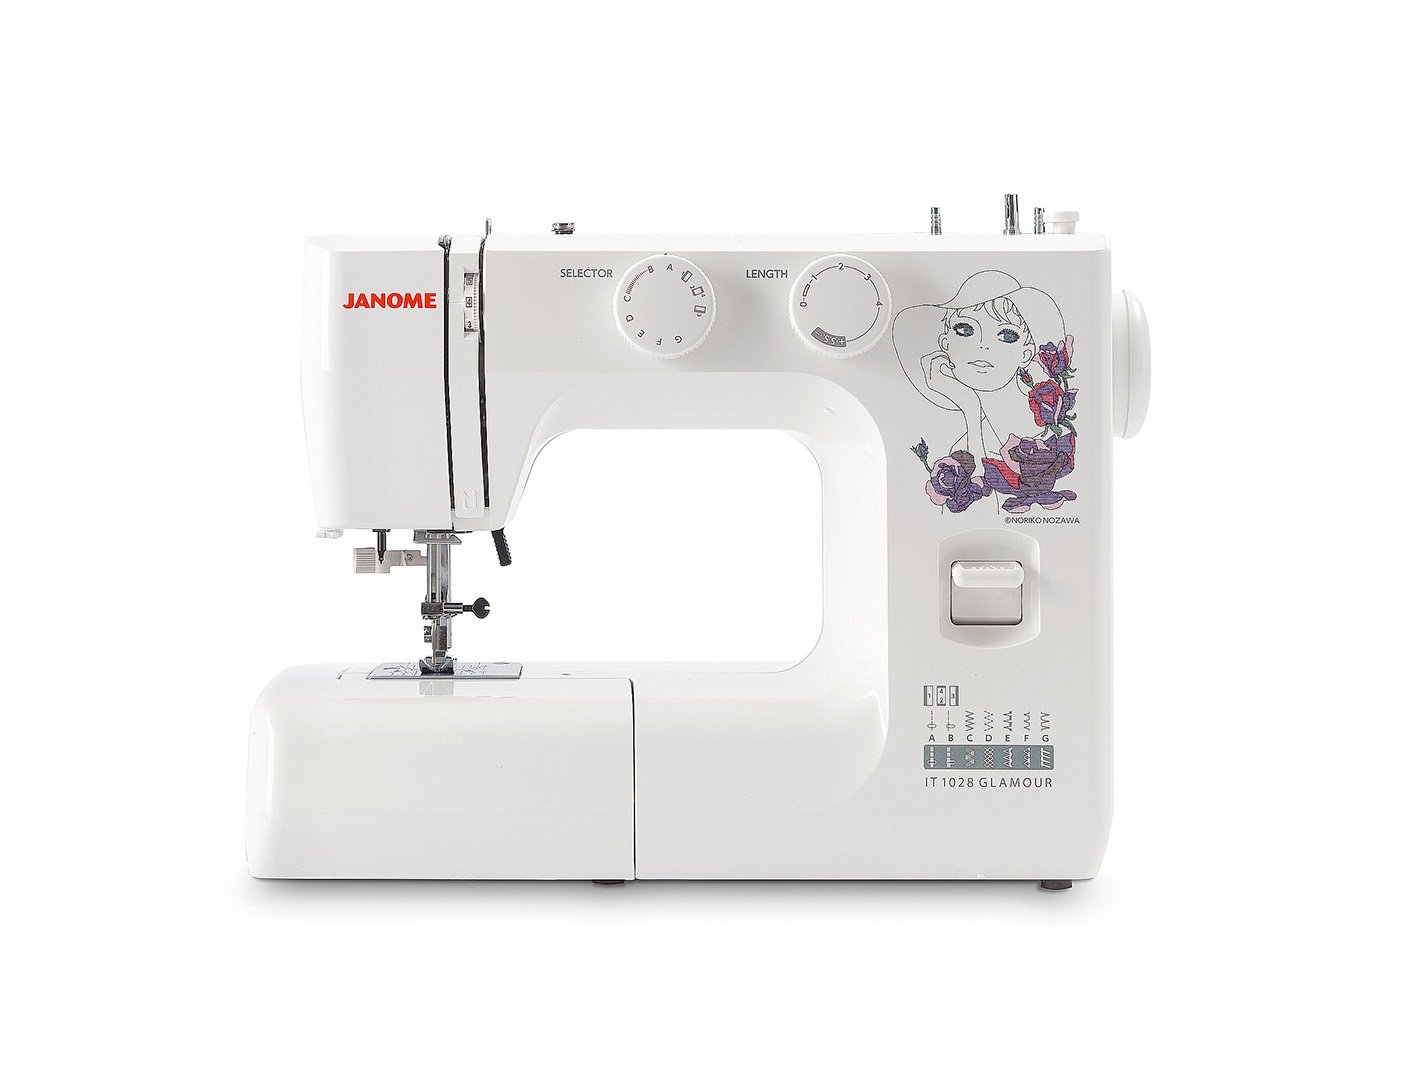
Figure 3: The Janome IT 1028 Glamour sewing machine with the accessory tray removed, revealing the free arm and the bobbin case area. This view is essential for bobbin insertion and cleaning.
Konfigurazioa
1. Desontziratzea eta kokatzea
- Kontu handiz atera makina bere paketetik.
- Jarri makina gainazal egonkor eta lau batean.
- Kendu babes-filmak edo ontziratzeko materialak.
2. Energia-konexioa
- Ziurtatu makinaren etengailua "OFF" posizioan dagoela.
- Connect the power cord to the machine's power input jack.
- Entxufatu korronte-kablea entxufe elektriko egoki batean.
3. Bobina harilkatzea
- Jarri hari-bobina bat biribilgailuaren gainean.
- Gidatu haria goiko hari-gidatik eta bobina-hazteko tentsio-diskoaren inguruan.
- Insert the thread through the hole in the bobbin from the inside out.
- Place the bobbin onto the bobbin winder spindle and push the spindle to the right.
- Start the machine. The bobbin will wind automatically. Stop when the bobbin is full.
- Cut the thread and push the bobbin winder spindle to the left. Remove the bobbin.
4. Bobina sartzea
- Itzali makina.
- Open the bobbin cover plate located on the free arm.
- Insert the bobbin into the bobbin case with the thread running in the direction indicated by the arrows.
- Pull the thread through the tension spring and into the guide slot.
- Itxi bobinaren estalki-plaka.
5. Goiko haria hariztatzea
- Goratu prentsa-oina.
- Jarri hari-bobina bat biribilgailuaren gainean.
- Gidatu haria goiko hari-gidatik.
- Bring the thread down the right channel, up the left channel, and through the take-up lever from right to left.
- Continue guiding the thread down to the needle bar thread guide.
- Erabili barneko orratz-harigailua edo sartu orratza eskuz aurrealdetik atzera haria.
- Pull about 6 inches of thread through the needle eye.
6. Bringing Up the Bobbin Thread
- Hold the upper thread lightly with your left hand.
- Turn the handwheel towards you to lower the needle into the needle plate and then raise it.
- The upper thread will catch the bobbin thread, forming a loop.
- Pull the loop to bring the bobbin thread up through the needle plate hole.
- Pull both threads (upper and bobbin) under the presser foot and towards the back of the machine.
Funtzionamendu-argibideak
1. Puntuen hautaketa
Biratu Puntadun hautatzailea (refer to Figure 2) to choose your desired stitch pattern. The available stitches are indicated by letters or symbols on the dial.
2. Adjusting Stitch Length and Width
- Puntuen luzera: Erabili Puntuaren luzera markatzailea (refer to Figure 2) to adjust the length of your stitches. Higher numbers indicate longer stitches.
- Puntuen zabalera: For stitches that allow width adjustment, use the corresponding dial or setting. (Note: The Janome IT 1028 Glamour has adjustable stitch width, typically integrated with the stitch selector or a separate dial. Consult the machine's markings for specific controls.)
3. Basic Sewing
- Jarri oihala prentsa-oinaren azpian.
- Jaitsi prentsa-oinaren altxagailua.
- Piztu makina.
- Gently press the foot controller to start sewing. The harder you press, the faster the machine will sew.
- Guide the fabric gently with your hands, but do not pull or push forcefully.
- To secure the beginning and end of a seam, use the reverse lever to sew a few stitches backward.
- When finished, raise the needle to its highest position, lift the presser foot, and pull the fabric away from the machine.
- Use the built-in thread cutter or scissors to trim the threads.
4. Using the Free Arm
To use the free arm, simply slide off the accessory tray (refer to Figure 3). This exposes the narrow free arm, ideal for sewing small, tubular items like sleeves, pant hems, and cuffs.
5. Automatic Four-Step Buttonholes
The Janome IT 1028 Glamour features an automatic four-step buttonhole function. Refer to the stitch selector dial for the buttonhole settings (usually marked with a buttonhole symbol and steps 1-4).
- Erantsi botoidun oina.
- Markatu botoi-zuloaren posizioa oihalean.
- Set the stitch selector to the first buttonhole step.
- Sew the first side of the buttonhole.
- Change the stitch selector to the next step and sew the bar tack.
- Continue through all four steps, following the machine's markings for each segment of the buttonhole.
- Carefully cut open the buttonhole using a seam ripper, ensuring not to cut the stitches.
Mantentzea
1. Makina garbitzea
Garbiketa erregularrak makinaren errendimendua mantentzen laguntzen du. Deskonektatu beti makina garbitu aurretik.
- Bobinaren eremua: Remove the needle plate and bobbin case. Use a small brush to remove lint and dust from the bobbin area and feed dogs.
- Kanpoaldea: Garbitu kanpoko gainazalak zapi leun eta lehor batekin. Ez erabili produktu kimiko gogorrik edo garbitzaile urratzailerik.
2. Orratz ordezkatzea
Replace the needle regularly (after 8-10 hours of sewing) or if it becomes bent, dull, or damaged. A damaged needle can cause skipped stitches or fabric damage.
- Itzali makina eta deskonektatu.
- Askatu orratza clamp torlojua.
- Kendu orratz zaharra.
- Sartu orratz berri bat alde laua makinaren atzealdera begira duela, ahal den neurrian bultzatuz.
- Orratza clamp torlojuak ongi.
Arazoak konpontzea
Atal honek aurki ditzakezun arazo ohikoenak jorratzen ditu. Hemen zerrendatzen ez diren arazoetarako, jarri harremanetan bezeroarentzako arreta-zerbitzuarekin.
| Arazoa | Kausa posiblea | Irtenbidea |
|---|---|---|
| Saltatu puntuak | Orratz okerra, orratz okertua, haria gaizki sartuta, ehunerako orratz tamaina okerra. | Replace needle, re-thread machine, ensure correct needle type/size. |
| Hari-haustura (goikoa) | Improper threading, tension too tight, poor quality thread, bent needle, burr on needle plate. | Re-thread machine, adjust upper tension, use quality thread, replace needle, check needle plate for damage. |
| Hari-haustura (bobina) | Improperly wound bobbin, bobbin inserted incorrectly, lint in bobbin case, tension too tight. | Re-wind bobbin, re-insert bobbin correctly, clean bobbin case, adjust bobbin tension (if adjustable). |
| Puntu irregularrak | Incorrect tension settings, pulling/pushing fabric, wrong presser foot. | Adjust tension, guide fabric gently, use appropriate presser foot. |
| Makina ez da martxan jartzen | Konektatu gabe, etengailua itzalita, oin-kontrolagailua konektatuta ez. | Check power connections, ensure switch is ON, connect foot controller. |
Zehaztapenak
- Modelo zenbakia: 8100000017663 (IT 1028 Glamour)
- Marka: JANOME
- Materiala: Plastikoa
- Pisua: 8 kilogramo
- Dimensions (P x L x H): 10 cm x 35 cm x 25 cm (Depth x Width x Height)
- Energia iturria: Kable elektrikoa
- Stitch Types: 12
- Kako mota: oszilatzen
- Buttonhole Type: Automatic Four-Step
Bermea eta Laguntza
For warranty information, service, or technical support, please refer to the warranty card included with your product or contact your authorized Janome dealer or customer service center. Keep your purchase receipt as proof of purchase.