1. Produktua amaitu daview
The Retevis Noise Reduction Walkie Talkie Headset is designed for clear communication in noisy environments. It features foam sound insulation to block external noise, an adjustable head size for comfortable wear, and multiple controls for easy operation.
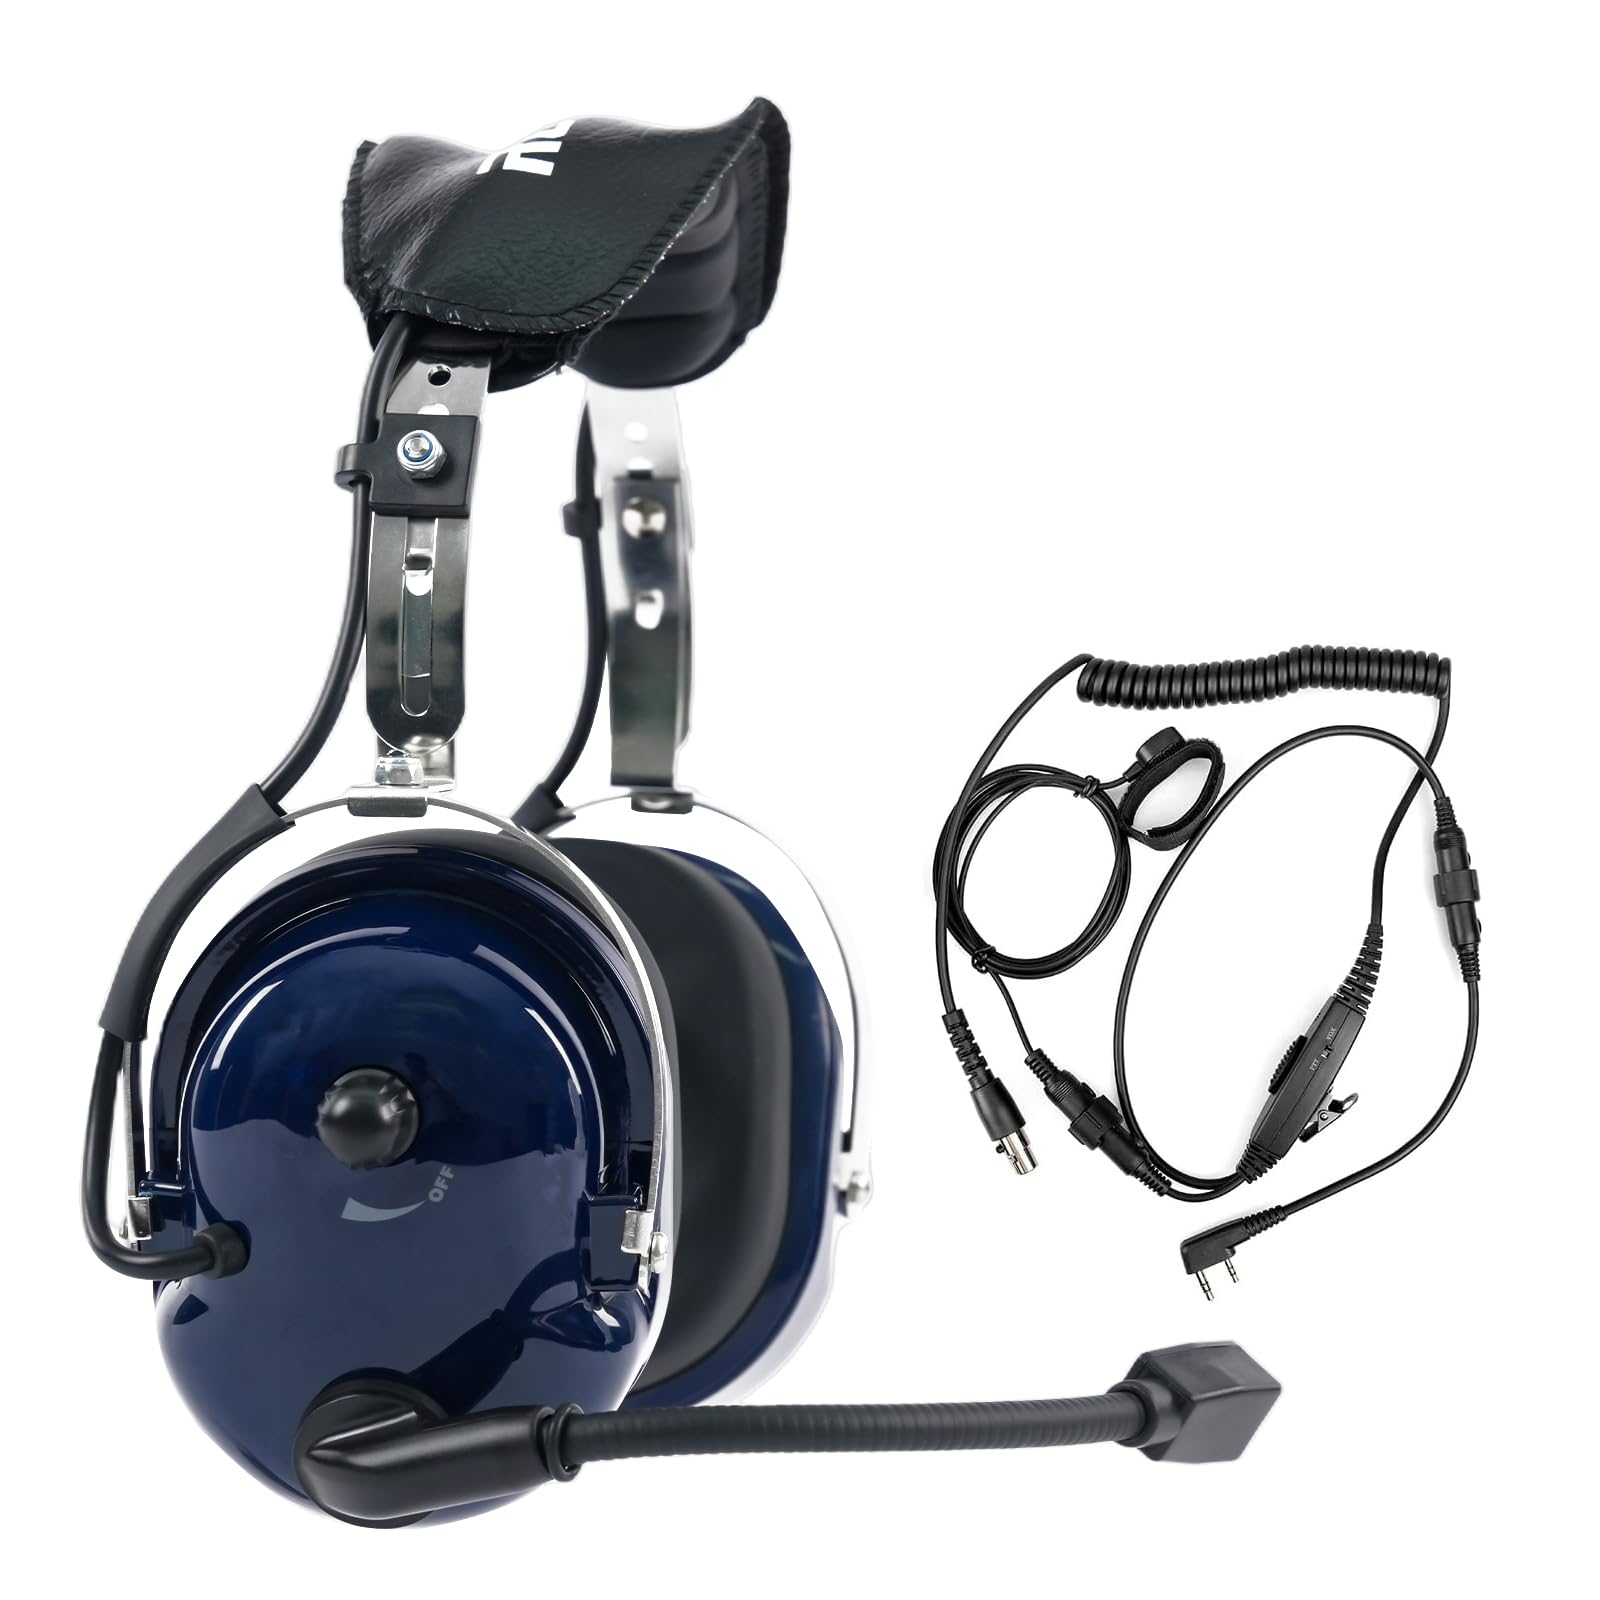
Image 1.1: The Retevis Noise Reduction Walkie Talkie Headset, showcasinbere diseinu sendoa dela eta.

Image 1.2: The adjustable headband mechanism, allowing for a customized and comfortable fit for various head sizes.

Image 1.3: Close-up of the comfortable, noise-isolating earmuffs designed to fit snugly and block external sounds.
2. Konfigurazioa
To set up your Retevis headset, ensure your walkie-talkie is turned off before connecting the headset. Locate the K-head 2-pin connector on your walkie-talkie and firmly insert the headset's connector. Once connected, you can power on your walkie-talkie.

Image 2.1: The K-head 2-pin connector, which ensures compatibility with various two-way radios.
3. Funtzionamendu-argibideak
3.1 Bolumenaren doikuntza
The headset features two volume adjustment knobs for precise control. One knob is located directly on the earmuff, and another is on the inline cable. Adjust both to your desired listening level. For initial use, turn both up to hear audio, then fine-tune with either knob.

Image 3.1: Illustration of the two volume adjustment knobs, one on the earmuff and one on the cable, for convenient audio control.
3.2 Push-to-Talk (PTT) Buttons
The headset is equipped with three PTT buttons for flexible communication. These are located in different positions to suit various usage habits:
- Main PTT Button: Typically found on the inline cable unit.
- Headset PTT Button: Located on one of the earmuffs for quick access.
- Finger PTT Button: A smaller, remote button that can be attached to your finger or clothing for discreet activation.
Press and hold any PTT button to transmit your voice, and release to listen.

Image 3.2: Visual representation of the three PTT buttons, highlighting their placement for user convenience.
3.3 VOX funtzioa (Ahots bidezko trukea)
The VOX function allows for hands-free transmission. When enabled, the headset automatically detects your voice and begins transmitting without needing to press a PTT button. To activate VOX, locate the PTT/VOX switch on the inline cable unit and slide it to the 'VOX' position. Adjust the VOX sensitivity on your walkie-talkie if available, to prevent accidental transmissions or missed speech.

Image 3.3: Diagram illustrating the VOX function, which automatically identifies voice volume for hands-free operation.
4. Bateragarritasuna
The Retevis Noise Reduction Walkie Talkie Headset uses a standard K-head 2-pin connector, ensuring broad compatibility with many two-way radio models.
4.1 Gailu bateragarriak
- Retevis: H-777, RT21, RT22, RT-5R, RT-5RV, RT1, RT2, RT5, RT7, RT23, RT26, RT27, H-777S, RT28, RT15, RT46, RT50, RT52, RA79, RA89, RT68, RT68H
- Baofeng: UV-5R, 5RM, 888S, BF-F8HP
- Samcom
- Kenwood
- Arcshell
4.2 Gailu bateraezinak
Entzungailu hau da ez bateragarriak with Midland or Motorola walkie talkies.

Image 4.1: Visual guide to the K-head 2-pin connector and compatible brands.
Video 4.1: An official video demonstrating the Retevis Noise Reduction Walkie Talkie Headset, including its features and compatibility.
5. Mantentzea
Mantentze egokiak zure entzungailuen iraupena eta errendimendu optimoa bermatzen ditu.
- Garbiketa: Garbitu entzungailuen gainazalak zapi leun etaamp cloth. Avoid using harsh chemicals or abrasive cleaners. Ensure no moisture enters the speaker or microphone areas.
- Belarritako zorroak: Regularly inspect ear pads for wear and tear. Replace them if they become damaged or lose their sound-isolating properties.
- Kableen zainketa: Avoid sharp bends or excessive pulling on the cables and connectors to prevent internal damage.
- Biltegiratzea: Gorde entzungailuak leku lehor eta fresko batean, eguzki-argitik eta muturreko tenperaturetatik babestuta.
6. Arazoak
Aurikularrekin arazoak badituzu, jo ezazu honako arazo eta irtenbide ohikoenei:
| Arazoa | Kausa posiblea | Irtenbidea |
|---|---|---|
| Ez dago soinurik entzungailuetatik | Volume too low; Headset not fully connected; Radio issue | Increase both volume knobs; Re-insert connector firmly; Test radio with another accessory |
| Audio kalitate eskasa / Estatikoa | Loose connection; Interference; Damaged cable/connector | Check connection; Move away from electronic devices; Inspect cable for damage |
| Mikrofonoa ez da transmititzen | PTT not pressed; VOX not enabled/sensitive enough; Microphone position | Ensure PTT is pressed; Check VOX switch and sensitivity; Adjust microphone closer to mouth |
| Headset is uncomfortable | Improper adjustment; Ear pads worn out | Adjust headband for a better fit; Consider replacing ear pads if they are compressed or damaged |
7. Zehaztapenak
Key technical specifications for the Retevis Noise Reduction Walkie Talkie Headset (Model FC9067A):
| Ezaugarri | Xehetasuna |
|---|---|
| Modelo zenbakia | FC9067A |
| Zarata Kontrola | Soinu Isolamendua |
| Sentikortasuna | 121 dB |
| Aurikularretarako Jack | Kenwood 2 Pin |
| Konektibitate Teknologia | Kableatua |
| Materiala | Plastic (ABS Shell) |
| Elementuaren pisua | 1.52 libra (gutxi gorabehera 0.69 kg) |
| Produktuaren neurriak | 4.61 x 10.79 x 9.09 hazbete |
| Belarrien Kokatzea | Belarri gainean |
| Inpedantzia | 8 ohmio |
| Dakarten osagaiak | 1 x Retevis Noise Reduction Walkie Talkie Headset |
8. Bermea eta Laguntza
For warranty information and customer support, please refer to the documentation included with your purchase or visit the official Retevis website. You can also contact the seller directly through the platform where the product was purchased for assistance with any issues or inquiries.