
1. Sarrera
This manual provides detailed instructions for the proper installation, operation, and maintenance of the GalaxyElec SHT10 Waterproof Temperature and Humidity Sensor Probe Module. This sensor is designed for accurate environmental monitoring in various applications, particularly where moisture resistance is required.
2. Produktua amaitu daview
The GalaxyElec SHT10 sensor module integrates the SHT10 chip, known for its precise temperature and relative humidity measurements, within a waterproof probe housing. It features a 0.3-meter cable for flexible placement and is suitable for environments where the sensor element may be exposed to water or high humidity.
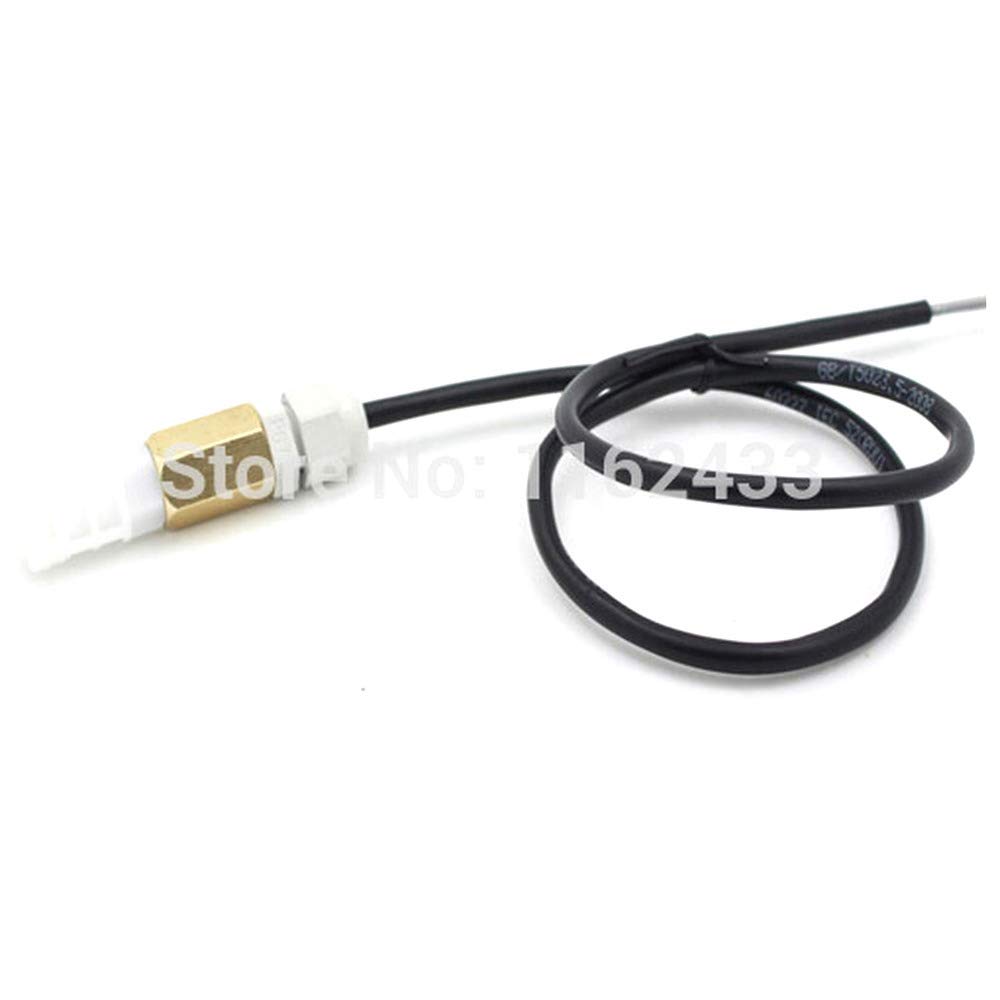
1. irudia: GalaxyElec SHT10 Waterproof Temperature and Humidity Sensor Probe Module. This image displays the sensor probe with its brass-colored tip, white plastic housing, and black cable, coiled for storage.
3. Ezaugarriak
- Integrated SHT10 Sensor: Provides accurate digital temperature and humidity readings.
- Diseinu iragazgaitza: Sensor probe is sealed for use in wet or submerged conditions.
- 0.3m Cable Length: Offers flexibility for remote sensing applications.
- Irteera digitala: Simplifies integration with microcontrollers.
- Energia-kontsumo baxua: Efficient for battery-powered projects.
4. Konfigurazioa eta instalazioa
Proper setup is essential for accurate readings and sensor longevity. The SHT10 sensor typically communicates via a 2-wire digital interface (Data and Clock).
4.1 Kableatutako konexioak
Connect the sensor to your microcontroller (e.g., Arduino, Raspberry Pi) as follows:
- Hari gorria: VCC (Power Supply, typically 3.3V to 5V)
- Hari beltza: GND (lurra)
- Hari horia: DATA (Data Line)
- Hari zuria: SCK (Clock Line)
Note: Specific wire colors may vary. Always refer to the sensor's datasheet or product labeling for definitive wiring. Pull-up resistors (typically 10kΩ) are often required on both DATA and SCK lines when connecting to a microcontroller.
4.2 Kokapen fisikoa
- Ensure the sensor probe is placed in the environment where temperature and humidity measurements are desired.
- Avoid placing the sensor directly in sunlight or near heat sources, as this can affect accuracy.
- For waterproof applications, ensure the probe tip is fully immersed or exposed to the target environment, while keeping the cable connections dry if not explicitly rated for immersion.
5. Funtzionamendu-argibideak
Operating the SHT10 sensor involves programming a microcontroller to communicate with it and read its digital output.
5.1 Softwarearen integrazioa
- Liburutegiak instalatu: For platforms like Arduino, install an appropriate SHT10 library from the IDE's Library Manager.
- Initialize Sensor: In your code, initialize the sensor by specifying the DATA and SCK pins.
- Irakurri datuak: Use the library functions to request temperature and humidity readings. The sensor typically provides raw digital values that the library converts into Celsius/Fahrenheit and relative humidity percentages.
- Display/Log Data: Process the readings as needed, such as displaying them on an LCD, sending them to a serial monitor, or logging them to a data storage system.
Example (Conceptual Arduino Code Snippet):
#include <SHT1x.h>

#define dataPin  2  // DATA pin
#define clockPin 3  // SCK pin

SHT1x sht1x(dataPin, clockPin);

void setup() {
  Serial.begin(9600);
  Serial.println("SHT10 Sensor Test");
}

void loop() {
  float temp_c = sht1x.readTemperatureC();
  float humidity = sht1x.readHumidity();

  Serial.print("Temperature: ");
  Serial.print(temp_c);
  Serial.print(" C / ");
  Serial.print(sht1x.readTemperatureF());
  Serial.println(" F");
  Serial.print("Humidity: ");
  Serial.print(humidity);
  Serial.println(" %");

  delay(2000); // Read every 2 seconds
}
This code snippet is illustrative. Actual implementation may vary based on the specific library and microcontroller used.
6. Mantentzea
The SHT10 sensor module is designed for durability, but proper maintenance ensures long-term accuracy and performance.
- Garbiketa: If the sensor probe becomes dirty, gently clean it with distilled water and a soft cloth. Avoid abrasive cleaners or solvents.
- Kalibrazioa: While SHT10 sensors are factory-calibrated, prolonged exposure to harsh chemicals or extreme conditions may affect accuracy over time. Recalibration is typically not user-serviceable for this module type.
- Ingurumena babestea: Despite being waterproof, avoid exposing the sensor to corrosive liquids or environments that exceed its specified operating limits.
- Kableen ikuskapena: Periodically inspect the cable for any signs of damage, cuts, or fraying, especially if used in dynamic environments.
7. Arazoak
If you encounter issues with your SHT10 sensor, consider the following troubleshooting steps:
- No Readings or Erratic Data:
- Verify all wiring connections (VCC, GND, DATA, SCK) are secure and correct.
- Ziurtatu elikadura hornidura boltage is within the sensor's operating range (typically 3.3V-5V).
- Check if pull-up resistors are correctly installed on the DATA and SCK lines.
- Confirm that the correct SHT10 library is installed and initialized in your code.
- Test with a different set of microcontroller pins if possible.
- Irakurketa okerrak:
- Ensure the sensor is not exposed to direct sunlight, drafts, or heat sources that could skew readings.
- Compare readings with a known accurate thermometer/hygrometer in a stable environment.
- Verify that the software conversion formulas (if manually implemented) are correct.
- Sentsoreak ez du erantzuten:
- Power cycle the microcontroller and sensor.
- Inspect the sensor cable and probe for any visible damage.
- If possible, test with another SHT10 sensor to rule out a faulty unit.
8. Zehaztapenak
| Parametroa | Balioa |
|---|---|
| Sentsore-txipa | SHT10 |
| Kablearen luzera | 0.3 meters (approximately 11.8 inches) |
| Bolumen eragileatage | 3.3V - 5V DC (typical) |
| Interfazea | 2-wire digital (DATA, SCK) |
| Tenperatura neurtzeko tartea | -40°C to +123.8°C (SHT10 chip specification) |
| Hezetasuna Neurtzeko Eremua | 0% to 100% RH (SHT10 chip specification) |
| Zehaztasuna (tenperatura) | ±0.5°C (typical for SHT10) |
| Zehaztasuna (Hezetasuna) | ±4.5% RH (typical for SHT10) |
| Iragazgaitzaren balorazioa | Probe tip is waterproof (specific IP rating not provided, but designed for wet environments) |
Note: These specifications are based on the SHT10 sensor chip and typical module implementations. Actual performance may vary slightly.
9. Bermea eta Laguntza
For any questions, technical assistance, or support regarding your GalaxyElec SHT10 Waterproof Temperature and Humidity Sensor Probe Module, please contact the seller directly through the platform where the purchase was made.
GalaxyElec is a professional distributor of electronic products. Please refer to your purchase documentation for specific warranty terms and conditions, if applicable.