1. Sarrera
Thank you for choosing the CREATE NETBOT S15 Robot Vacuum Cleaner. This manual provides essential information for the safe operation, maintenance, and troubleshooting of your device. Please read it thoroughly before first use and retain it for future reference.
Produktua amaituview

The image above displays the CREATE NETBOT S15 Robot Vacuum Cleaner, its dedicated remote control, and a smartphone screen showing the companion application interface. The robot is black with a textured top surface and a central green power button. The remote control features a digital display and various control buttons. The app shows a map of a cleaned area.
The NETBOT S15 is designed to simplify your cleaning routine, offering multiple cleaning modes and smart features for efficient floor maintenance.
2. Segurtasun-argibideak
Funtzionamendu segurua bermatzeko eta kalteak saihesteko, jarraitu segurtasun neurri hauek:
- Irakurri argibide guztiak aparatua erabili aurretik.
- Ez utzi haurrei robot-xurgagailua erabiltzen. Zaindu haurrak eta maskotak robota funtzionatzen ari den bitartean.
- Ensure the charging base is placed against a wall on a hard, level surface, with adequate clear space around it.
- Mantendu ilea, arropa solteak, behatzak eta gorputzeko atal guztiak irekiguneetatik eta atal mugikorretatik urrun.
- Do not pick up large objects, sharp objects, liquids, or burning/smoking materials.
- Ez erabili robota ingurune hezeetan edo gainazal hezeetan.
- Remove power cords, small objects, and fragile items from the floor before operation to prevent entanglement or damage.
- Use only the original charger and battery provided by the manufacturer.
- Do not modify or attempt to repair the robot vacuum yourself. Contact qualified service personnel for repairs.
3. Paketearen edukia
Egiaztatu osagai guztiak paketean daudela:

The image shows the retail box for the CREATE NETBOT S15 Robot Vacuum Cleaner, indicating the product and its key features.
- CREATE NETBOT S15 Robot Vacuum Cleaner
- Kargatzeko oinarria
- Elikatze-moldagailua
- Urruneko Kontrola
- Zaborrontzia (600 ml-ko edukiera)
- Ur-tanga (400 ml-ko edukiera)
- Side Brushes (2 + 2 replacements)
- HEPA Filter (1 + 1 replacement)
- Cleaning Mop (1 + 1 replacement)
- Garbiketa eskuila
- Banda magnetikoa
- Erabiltzailearen eskuliburua
4. Konfigurazioa
4.1 Kargatzeko oinarriaren kokapena

The image shows the CREATE NETBOT S15 Robot Vacuum Cleaner correctly docked on its charging station, indicating proper placement for recharging.
- Place the charging base against a wall in an open area.
- Ensure there is at least 1 meter (3 feet) of clear space on both sides of the charging base and 2 meters (6 feet) in front of it.
- Konektatu korronte-egokitzailea kargatzeko oinarrira eta entxufe batera.
- Ensure the power indicator light on the charging base is illuminated.
4.2 Hasierako karga

This image depicts the CREATE NETBOT S15 Robot Vacuum Cleaner positioned near its charging dock in a room, ready for or undergoing charging.
Before first use, fully charge the robot vacuum. Place the robot onto the charging base, ensuring the charging contacts align. The indicator light on the robot will show charging status. A full charge typically takes 4-5 hours.
4.3 Aplikazioaren instalazioa eta konexioa
The CREATE NETBOT S15 can be controlled via a smartphone application, compatible with Alexa and Google Home.
- Download the official CREATE app from your smartphone's app store.
- Erregistratu kontu bat eta hasi saioa.
- Follow the in-app instructions to add your NETBOT S15 device. This typically involves putting the robot into pairing mode and connecting it to your home Wi-Fi network.
- Once connected, you can program cleaning schedules, select cleaning modes, and monitor the robot's status from your phone.
- For voice control, link the CREATE app with your Alexa or Google Home account through their respective applications.
5. Funtzionamendu-argibideak
5.1 Garbiketa moduak
The NETBOT S15 offers four cleaning functions:
- Miaketa: Uses side brushes to gather debris.
- Vacuum: Utilizes suction power to collect dust and dirt. Features up to 1500 Pa suction power with adjustable levels.
- Mop: Wipes floors with a damp cloth from the water tank.
- Garbitu: Combines sweeping, vacuuming, and mopping for comprehensive cleaning.

This image illustrates the CREATE NETBOT S15 Robot Vacuum Cleaner actively cleaning under a sofa, demonstrating its ability to reach confined spaces. Two dogs are visible in the foreground, suggesting a pet-friendly environment.
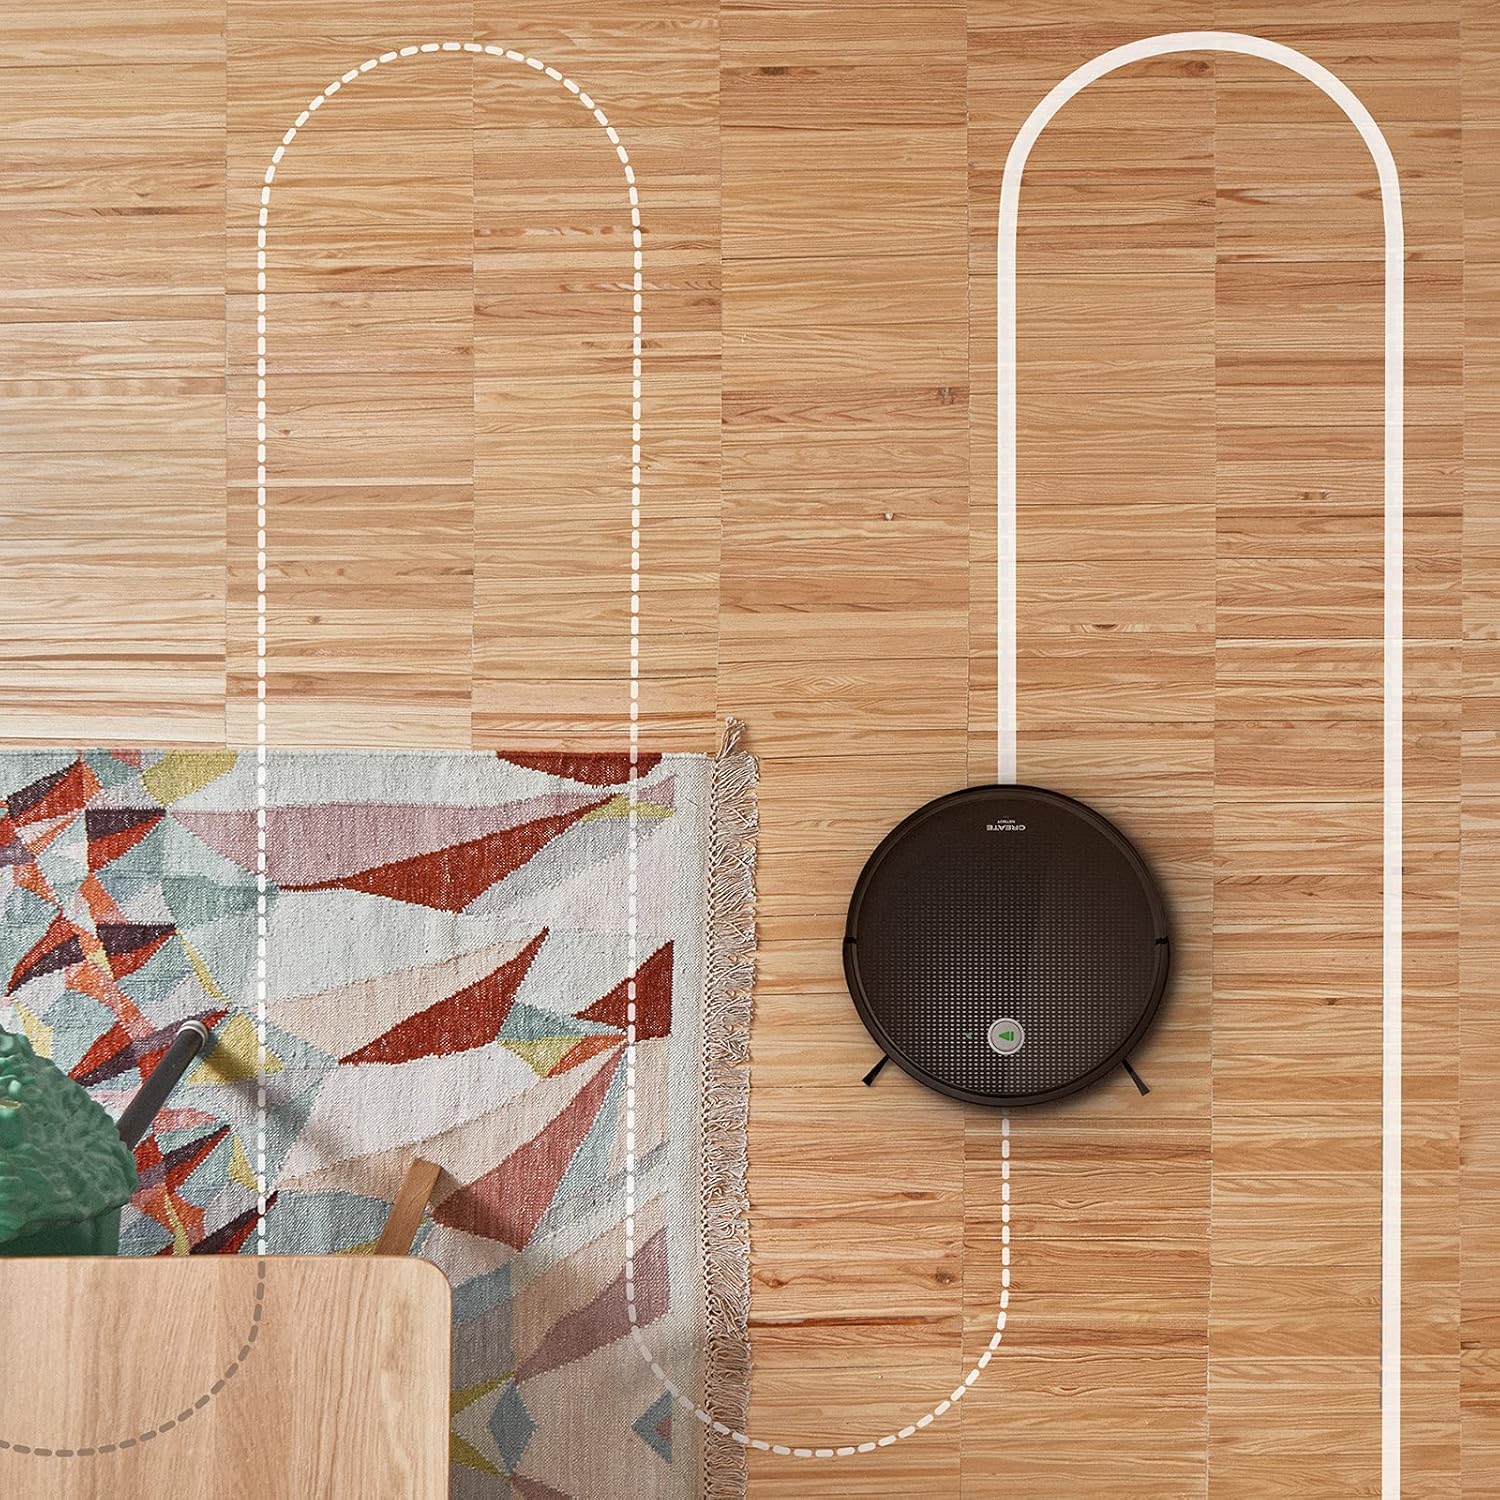
Airetiko bat view shows the CREATE NETBOT S15 Robot Vacuum Cleaner moving across a wooden floor, with a dotted line indicating its systematic cleaning path, highlighting its gyroscopic navigation.
5.2 Urruneko agintea erabiltzea
The included remote control allows for direct operation of the robot vacuum. Refer to the remote control diagram in your quick start guide for button functions. Common functions include:
- Garbiketa hasi / pausatu
- Itzuli Kargarako Oinarrira
- Directional Control (manual steering)
- Lekuen garbiketa
- Ertz Garbiketa
- Ordutegien ezarpena
5.3 Magnetic Strip Usage
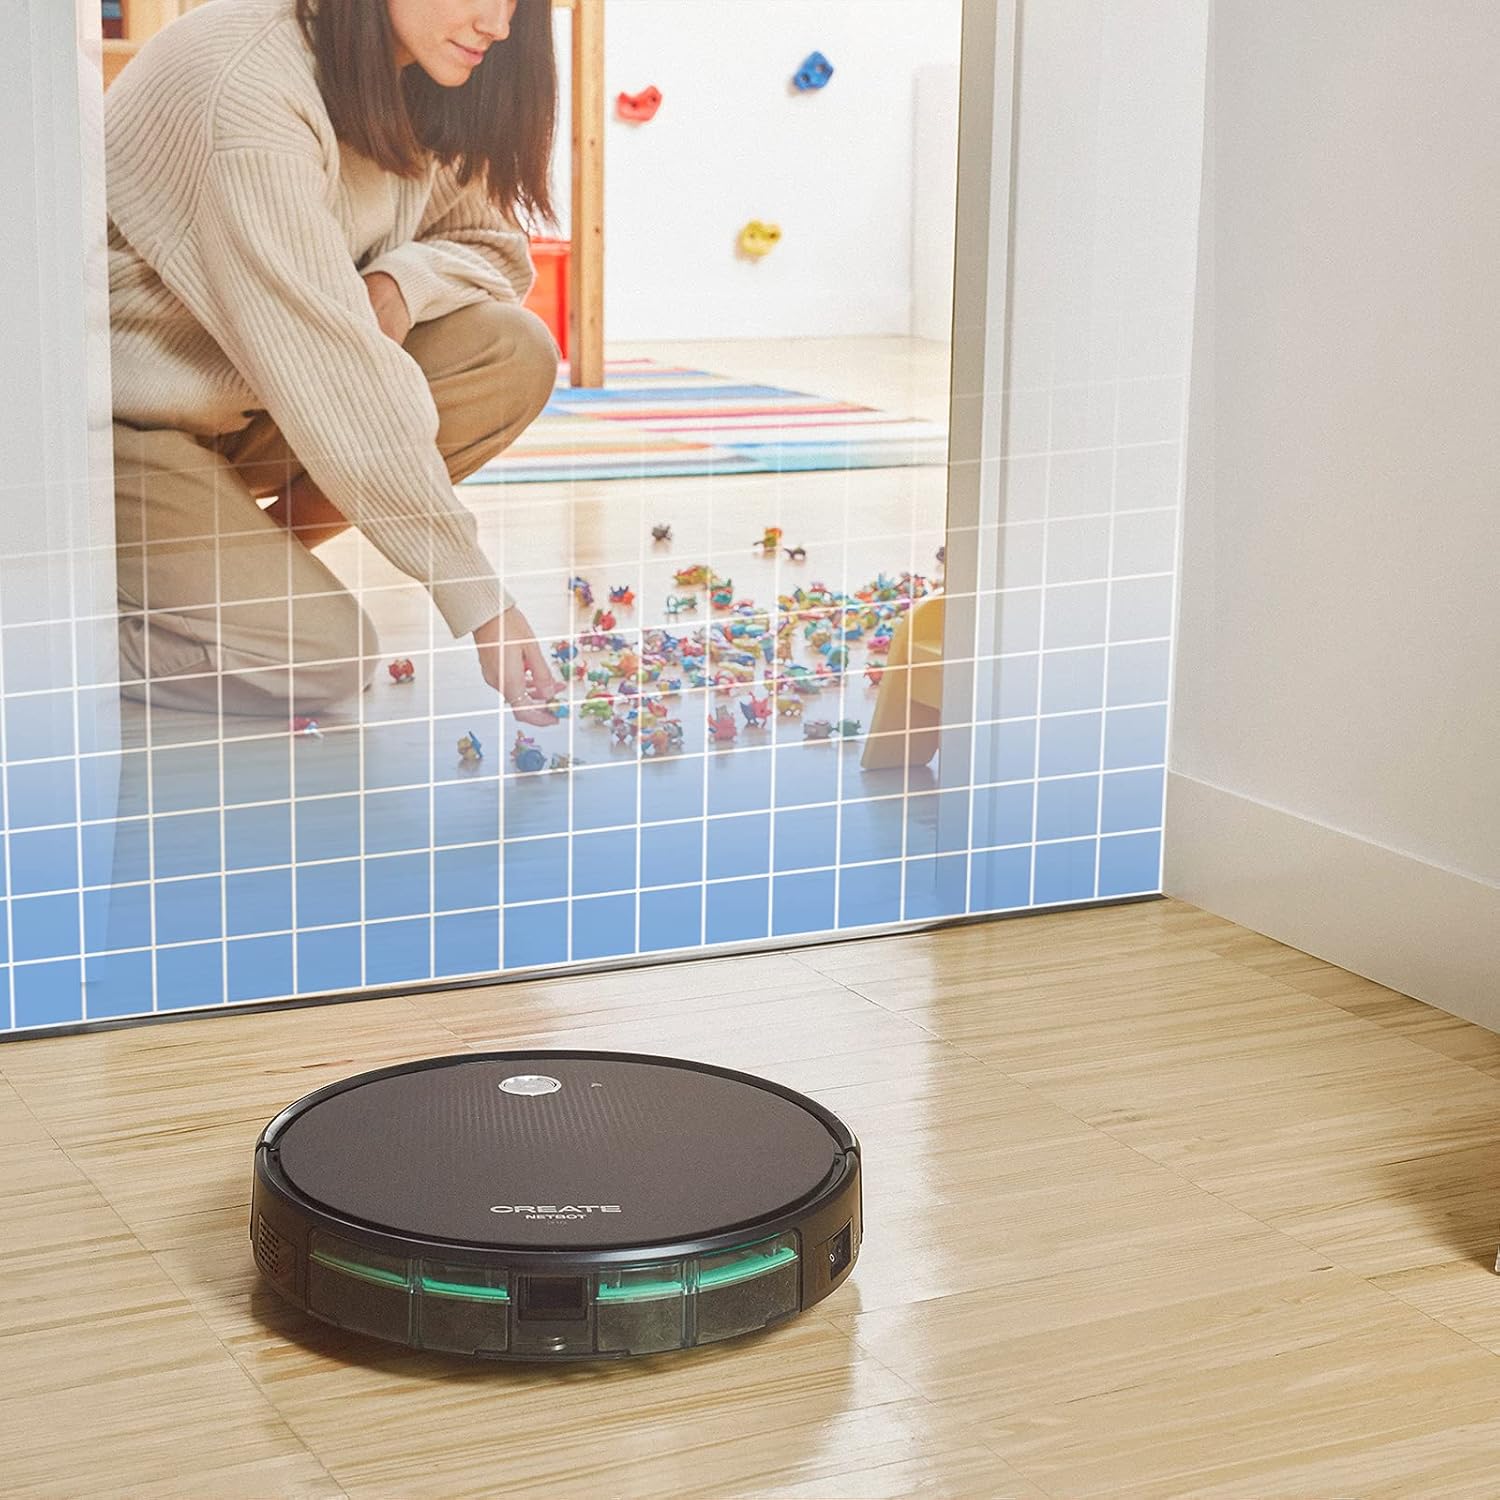
This illustration demonstrates the CREATE NETBOT S15 Robot Vacuum Cleaner approaching a virtual boundary, represented by a grid, which prevents it from entering a specific area, such as where toys are located.
Use the provided magnetic strip to create virtual boundaries that the robot will not cross. Place the strip on the floor to delimit areas where the robot should not enter, such as pet feeding zones or areas with delicate items.
5.4 Bateriaren iraupena
The NETBOT S15 is equipped with a long-lasting LG Lithium battery, providing up to 120 minutes of cleaning autonomy on a single charge, depending on the selected power mode.
6. Mantentzea
Mantentze-lan erregularrak zure robot-xurgagailuaren errendimendu optimoa bermatzen du eta bizitza luzatzen du.
6.1 Zaborrontzien eta ur-tangaren garbiketa
Empty the dustbin after each use. The 600 ml dustbin is easily removable. If using the mopping function, empty and rinse the 400 ml water tank after each use to prevent mold or odors.
6.2 Eskuila garbiketa

Gertu bat view of the CREATE NETBOT S15 Robot Vacuum Cleaner's side brush, showing its design for sweeping debris into the main suction path.
- Alboko eskuilak: Regularly check for hair or debris entanglement. Remove and clean as needed. Replace worn brushes with the provided spares.
- Eskuila nagusia: Remove the main brush cover and lift out the brush. Use the cleaning tool to remove tangled hair and debris.
6.3 Iragazkia garbitzea/ordeztea
The robot uses a double filter system: a sponge filter and a HEPA filter. Tap the filters to remove loose dirt. Do not wash HEPA filters with water. Replace filters every 3-6 months, or more frequently with heavy use, to maintain suction performance.
6.4 Sentsoreen garbiketa
Wipe the cliff sensors (located on the bottom of the robot) and the bumper sensors (on the front) with a clean, dry cloth to ensure proper navigation and obstacle detection.
7. Arazoak
If you encounter issues with your NETBOT S15, refer to the following common problems and solutions:
| Arazoa | Kausa posiblea | Irtenbidea |
|---|---|---|
| Robotak ez du abiarazten edo erantzuten. | Bateria baxua; Etengailua itzalita; Robota trabatuta. | Kargatu robota; Ziurtatu etengailua piztuta dagoela; Kendu oztopo guztiak. |
| Garbiketa-errendimendu eskasa. | Full dustbin; Clogged brushes/filters; Worn brushes. | Empty dustbin; Clean brushes and filters; Replace brushes/filters. |
| Robotak ezin du kargatzeko oinarria aurkitu. | Charging base obstructed; Robot too far from base; Base not powered. | Ensure clear space around base; Manually place robot closer; Check power connection to base. |
| Robota maiz trabatuta geratzen da. | Cables/small objects on floor; Uneven surfaces; Dark colored carpets. | Clear floor of obstacles; Use magnetic strips for problem areas; Robot may struggle on very dark surfaces. |
| Wi-Fi konexio arazoak. | Wi-Fi pasahitz okerra; bideratzailea urrunegi dago; 5 GHz-ko sarea. | Verify password; Move robot closer to router; Ensure connection to a 2.4GHz Wi-Fi network. |
8. Zehaztapenak
Key technical specifications for the CREATE NETBOT S15 Robot Vacuum Cleaner:
- Marka: SORTU
- Modelo zenbakia: Netbot S15
- Kolorea: Black - Turquoise
- Neurriak (L x W x H): 33 x 33 x 7.5 cm
- Pisua: 3 kilogramo
- Potentzia: 25 Watt
- Xurgatze potentzia: 1500 Pa arte
- Zarata maila: 62 dB
- Bateria mota: Litio-ioi
- Bateriaren iraupena: Gehienez 120 minutu
- Zaborrontziaren edukiera: 600 ml
- Ur deposituaren edukiera: 400 ml
- Iragazki-sistema: Double sponge Clean + HEPA filter
- Konektibitatea: Wi-Fi, App Control
- Ahots-laguntzailea bateragarritasuna: Google Home, Alexa
- Ezaugarri bereziak: Gyroscopic navigation, Magnetic strip boundary, 4 cleaning modes (sweep, vacuum, mop, wash)
9. Bermea eta Laguntza
For warranty information, technical support, or service inquiries, please refer to the warranty card included with your product or visit the official CREATE webgunea. Gorde erosketa-agiria erosketaren frogagiri gisa.