
1. Sarrera eta Overview
This manual provides instructions for the MAG Headshell and Moving Magnet Cartridge, Model CB1. This unit is designed to enhance audio playback on compatible DENON turntables by providing a high-quality, pre-assembled cartridge and headshell combination. It features gold-plated wiring and brass fittings for optimal signal transfer and tracking.
2. Produktuaren ezaugarriak
- Hand-Assembled: Each unit is carefully assembled by hand to ensure quality and precision.
- Moving Magnet Black Cartridge: Equipped with a high-quality moving magnet cartridge for accurate sound reproduction.
- High Quality HS3B Headshell: Features a robust HS3B headshell for secure mounting.
- Gold-Plated OFC Wires: Utilizes gold-plated Oxygen-Free Copper (OFC) wires for perfect signal transfer and minimal interference.
- Brass Fittings: Incorporates brass fittings for additional mass, contributing to improved tracking stability.
- Eraikuntza arina: Designed with a lightweight build for optimal tonearm performance.
- Kable bidezko konexioa: Ensures reliable wired connection for consistent audio performance.
- Top-Mounted Securing Screw: Designed for tonearms with a top-mounted securing screw for easy and secure attachment.
3. Zehaztapenak
| Zehaztapena | Balioa |
|---|---|
| Maiztasun Erantzuna | 20-20,000 Hz |
| Channel Separation (at 1kHz) | > 15 dB |
| Downforce barrutia | 2.5-3.5 gramo |
| Kartutxo mota | Moving Magnet Black Cartridge |
| Headshell eredua | HS3B |
| Konektibitatea | Kableatua |
| Fabrikatzailea | MAG |
| Modelo zenbakia | CB1 |
4. Bateragarritasuna
The MAG Headshell and Moving Magnet Cartridge (Model CB1) is compatible with the following DENON turntable models:
- DENON DP-30L
- DENON DP-35F
- DENON DP-37F
- DENON DP-45F
- DENON DP-47F
- DENON DP-51F
- DENON DP-52F
- DENON DP-23F
5. Konfigurazioa eta instalazioa
Proper installation is crucial for optimal performance. Please follow these steps carefully:
- Itzali: Ensure your turntable is powered off and unplugged from the mains electricity before beginning installation.
- Remove Old Headshell (if applicable): Gently twist and pull the existing headshell from the tonearm. Be careful not to damage the tonearm wires.
- Attach New Headshell: Insert the MAG Headshell into the tonearm socket. Twist it gently until it is firmly seated and the alignment pin engages.
- Secure Headshell: Tighten the top-mounted securing screw on the tonearm to firmly hold the headshell in place. Do not overtighten.
- Konektatu kableak: The headshell wires are color-coded. Carefully connect them to the corresponding pins on your tonearm. Ensure a secure connection without bending the pins.
- Balance Tonearm: Follow your turntable's instruction manual to properly balance the tonearm. This involves adjusting the counterweight until the tonearm floats freely.
- Set Downforce: Using a stylus force gauge (recommended) or your turntable's built-in scale, set the downforce to the recommended range of 2.5-3.5 gramo.
- Irristaketaren aurkako doikuntza: Adjust the anti-skate setting on your turntable according to the recommended downforce.
Garrantzitsua: Always handle the stylus with extreme care to prevent damage. Avoid touching the stylus tip directly.

1. irudia: Goitik behera view of the MAG Headshell and Cartridge, illustrating the black headshell, cartridge body, and the connected color-coded wires (red, green, blue, white) leading to the tonearm connector.
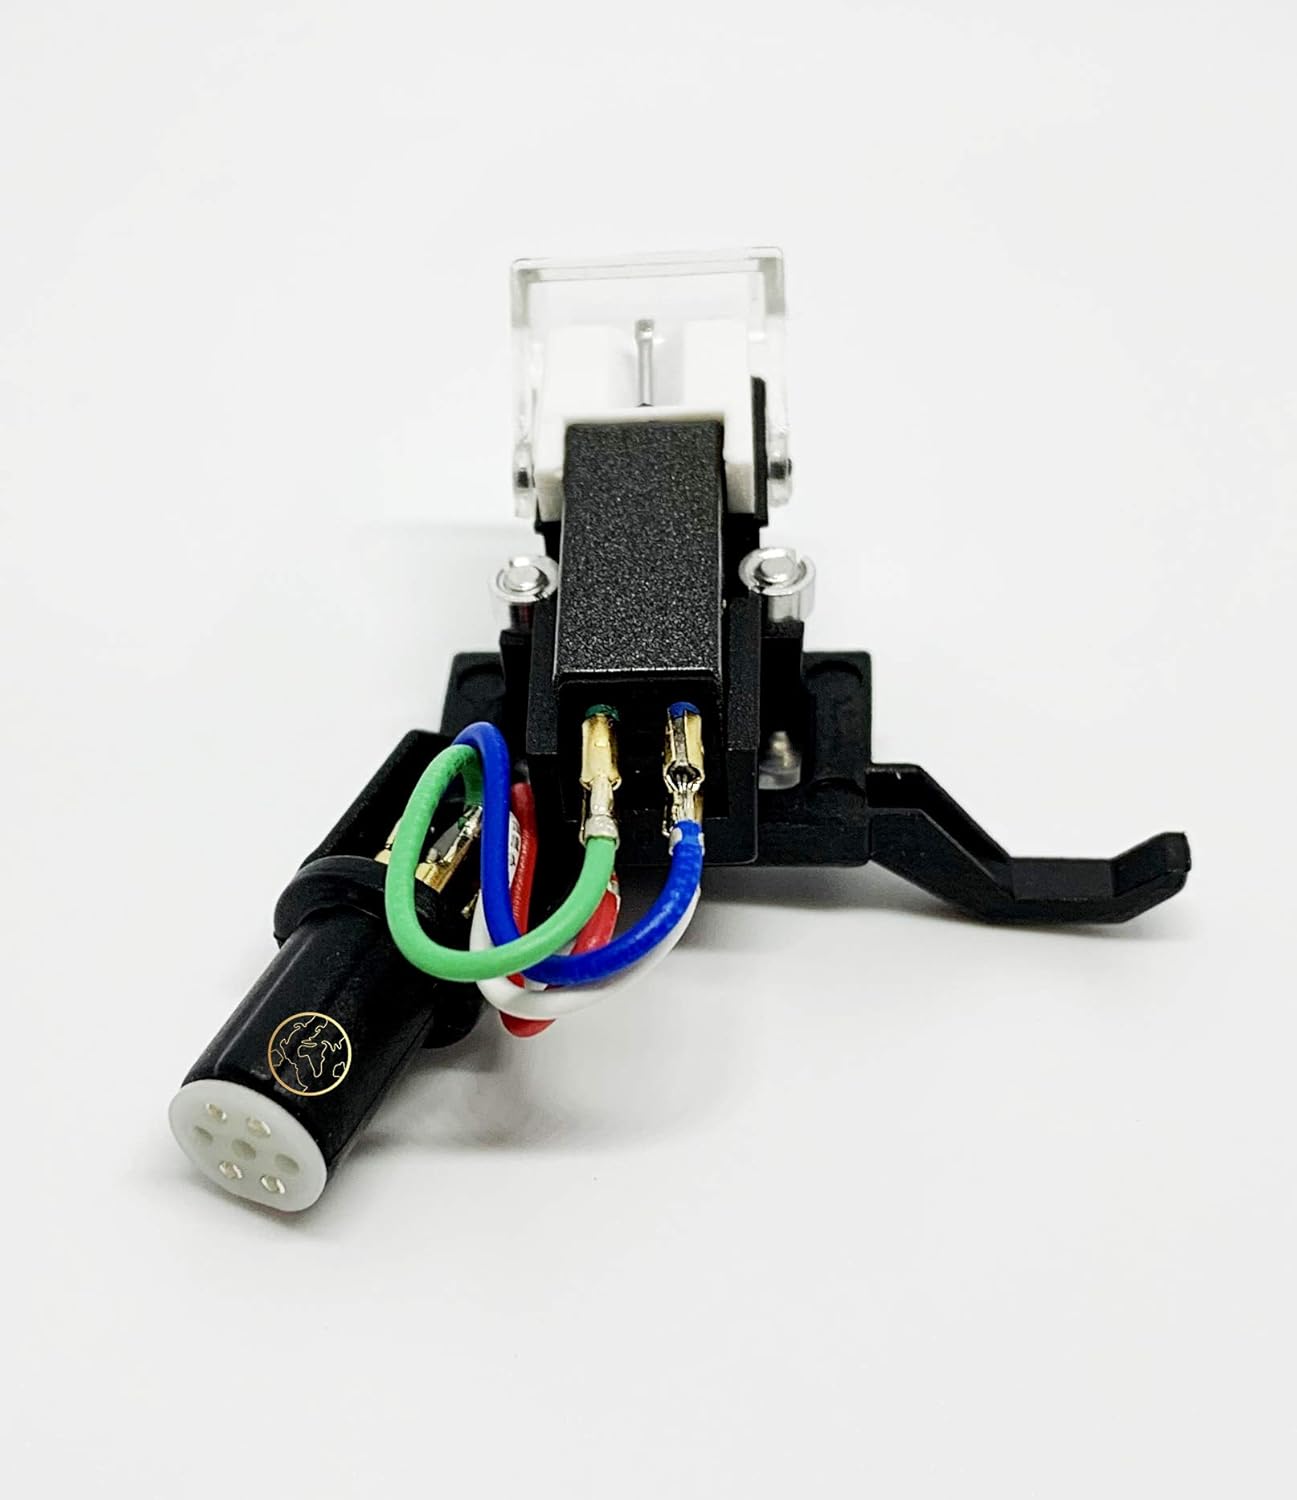
2. irudia: Aldea view of the MAG Headshell and Cartridge, showing the stylus assembly, the main cartridge body, and the securing screw mechanism for attachment to the tonearm.
Instalazio Bideo Gida
Video 1: An official video demonstrating the features and installation process of the MAG Headshell for DENON Turntables. This video provides a visual guide to help with setup and understanding the product's key attributes.
6. Funtzionamendua
Once the MAG Headshell and Cartridge are correctly installed and the tonearm is balanced with the appropriate downforce and anti-skate settings, operate your turntable as usual. Refer to your turntable's specific instruction manual for general operation procedures.
- Ensure the stylus guard is removed before playing a record.
- Gently lower the tonearm onto the record using the cueing lever.
- Raise the tonearm using the cueing lever when the record finishes or when you wish to stop playback.
7. Mantentzea
Regular maintenance helps prolong the life of your cartridge and stylus, ensuring optimal sound quality.
- Estiletearen garbiketa: Use a soft stylus brush (sold separately) to gently brush the stylus tip from back to front. Never brush from side to side or front to back, as this can damage the stylus. Clean regularly to remove dust and debris.
- Hautsaren babesa: Always use your turntable's dust cover when not in use to protect the cartridge and record from dust accumulation.
- Manipulazio leuna: Avoid dropping the tonearm or applying excessive force to the cartridge.
- Biltegiratzea: If storing the turntable for an extended period, replace the stylus guard to protect the stylus.
8. Arazoak
If you experience issues with your MAG Headshell and Cartridge, consider the following common troubleshooting steps:
- Soinurik ez edo soinu ahula:
- Check all wire connections between the headshell and tonearm, and from the turntable to your amplifier/receiver. Ensure they are secure and correctly matched (color-coded).
- Egiaztatu zure amplifier/receiver is set to the correct input (e.g., PHONO).
- Distorted Sound or Skipping:
- Re-check the tonearm's downforce setting. Ensure it is within the recommended 2.5-3.5 grams.
- Verify the anti-skate setting is correctly adjusted.
- Inspect the stylus for any visible damage or debris. Clean the stylus if necessary.
- Ensure the record is clean and free of dust or scratches.
- Zurrumuda zarata:
- Ensure the turntable's ground wire is properly connected to your ampargitzaile/hartzaile.
- Egiaztatu interferentziak sor ditzakeen inguruko gailu elektronikorik.
If problems persist after following these steps, consult a qualified audio technician or contact the product seller for further assistance.
9. Bermea eta Laguntza
For information regarding product warranty, returns, or technical support, please refer to the documentation provided at the time of purchase or contact your retailer. You may also visit the manufacturer's official webgunea laguntza-informazio eguneratuena lortzeko.