
Sarrera
This manual provides comprehensive instructions for the Vivitar Podcast and Social Media Microphone MIC918. This high-quality condenser microphone is designed for clear audio capture for various applications, including podcasting, live streaming, gaming, voice-overs, and vocal recording. It features a simple plug-and-play USB connection, integrated volume control, and a stable tripod stand for optimal positioning.
Segurtasun Informazioa
- Ez jarri mikrofonoa uretan edo gehiegizko hezetasunean.
- Saihestu tenperatura altukoak edo eguzki-argia zuzenean.
- Ez saiatu mikrofonoa desmuntatzen edo aldatzen. Horrek bermea baliogabetuko du.
- Mantendu mikrofonoa eremu magnetiko indartsuetatik urrun.
- Erabili zapi leun eta lehor bat bakarrik garbitzeko.
Produktua amaituview
Paketearen edukia
- Vivitar MIC918 Microphone Unit
- Tripontziko papera
- Integrated USB Connection Cable
Mikrofonoaren osagaiak
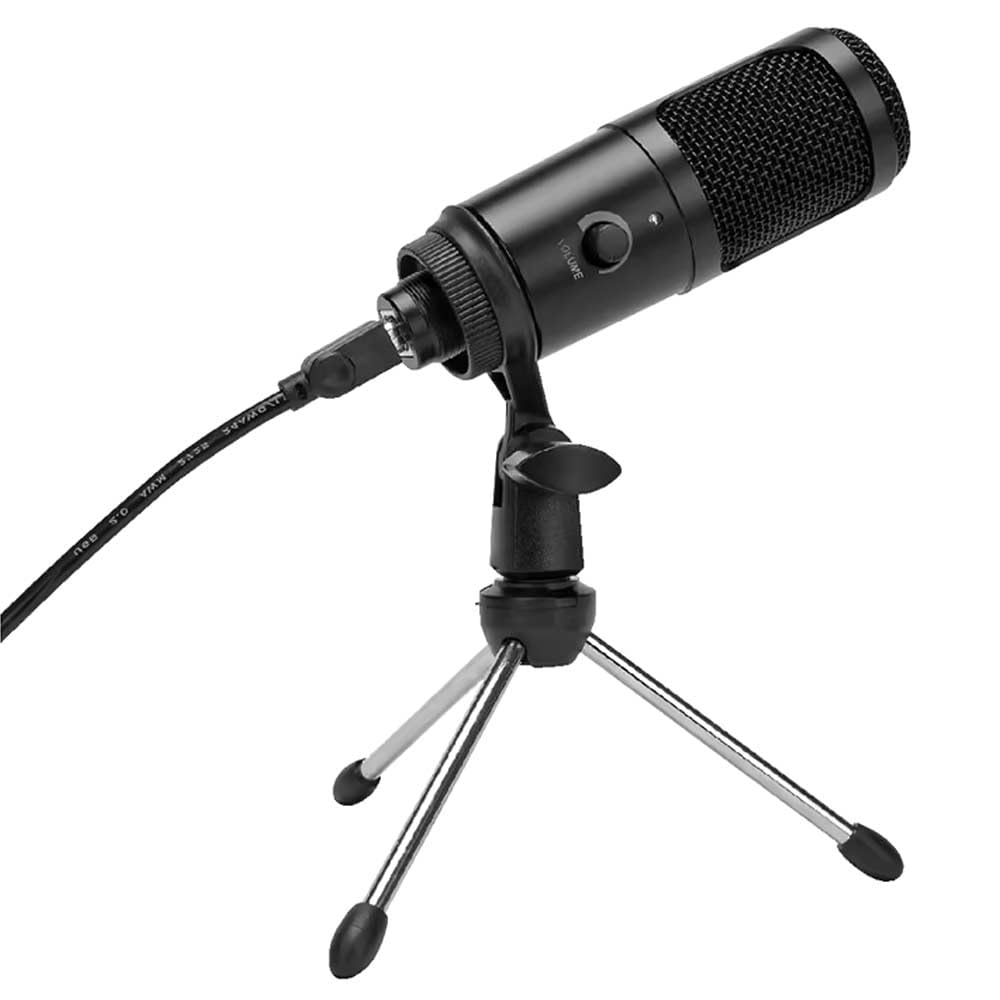
1. irudia: Vivitar MIC918 Microphone unit attached to its tripod stand, showing the integrated USB cable.

2. irudia: Aldea view of the Vivitar MIC918 Microphone, highlighting the volume control knob and the Vivitar brand logo.
The microphone unit features a durable metal construction. The front side includes a volume control knob for easy audio level adjustments. The microphone is designed with a unidirectional polar pattern to focus on sound directly in front of it, reducing background noise.
Konfigurazioa
Mikrofonoa konektatzea
- Muntatu standa: If not already assembled, unfold the tripod stand and ensure it is stable on a flat surface. Securely attach the microphone unit to the stand's mounting point. The rotating shaft ring allows for angle adjustment.
- Konektatu gailura: Plug the integrated USB cable from the microphone into an available USB port on your computer, laptop, or compatible gaming console.
- Plug and Play: The Vivitar MIC918 is a plug-and-play device. Your operating system (Windows, macOS, etc.) should automatically detect and install the necessary drivers. No additional software installation is typically required.
- Hautatu sarrerako gailu gisa: After connecting, navigate to your device's sound settings or the audio settings within your recording/streaming software. Select the "Vivitar MIC918" or similar USB audio device as your primary input (microphone) device.
Funtzionamendua
Bolumena doitzea
The microphone features a built-in volume control knob located on its side (refer to Figure 2). Rotate this knob clockwise to increase the microphone's input sensitivity (volume) and counter-clockwise to decrease it. Adjust this to achieve the desired recording level without distortion.
Mikrofonoa kokatzea
For optimal audio capture, position the microphone directly in front of the sound source (e.g., your mouth for speaking or singing). The tilting tripod stand allows you to adjust the microphone's angle to best suit your needs. Due to its unidirectional polar pattern, the microphone is most sensitive to sounds coming from the front and less sensitive to sounds from the sides or rear, helping to minimize ambient noise.
Mantentzea
- Garbiketa: Use a soft, dry, lint-free cloth to wipe the microphone's exterior. Do not use liquid cleaners, aerosols, or solvents.
- Biltegiratzea: Erabiltzen ez duzunean, gorde mikrofonoa leku garbi eta lehor batean, hautsetik eta muturreko tenperaturetatik urrun.
- Manipulazioa: Kontuz ibili mikrofonoarekin. Saihestu erortzea edo kolpe bortitzak jasatea.
Arazoak konpontzea
| Arazoa | Kausa posiblea | Irtenbidea |
|---|---|---|
| Ez da soinurik ateratzen mikrofonotik. | Mikrofonoa ez dago behar bezala konektatuta. Sarrerako gailu okerra hautatu da. Mikrofonoaren bolumena baxuegia. | Ensure USB cable is securely plugged into both the microphone and the device. Verify that "Vivitar MIC918" is selected as the input device in your system's sound settings or recording software. Increase the volume using the knob on the microphone and check system input levels. |
| Poor sound quality (e.g., muffled, too quiet, background noise). | Incorrect microphone positioning. High ambient noise. Input level too high or too low. | Position the microphone closer to the sound source and ensure it's facing directly towards it. Grabatu ingurune lasaiago batean. Adjust the microphone's volume knob and system input levels to an optimal range, avoiding clipping or being too faint. |
| Ordenagailuak ez du mikrofonoa ezagutzen. | USB ataka edo kable akastuna. System driver issue. | Saiatu mikrofonoa ordenagailuko beste USB ataka batera konektatzen. Restart your computer. If the issue persists, check your operating system's device manager for any driver conflicts or updates. |
Zehaztapenak
| Ezaugarri | Zehaztapena |
|---|---|
| Marka | Vivitar |
| Modelo zenbakia | MIC918 |
| Konektibitatea | USB (Entxufatu eta Erabili) |
| Mikrofono Mota | Kondentsadorea |
| Eredu polarra | Norabide bakarrekoa |
| Seinaleen eta zarataren arteko erlazioa | 78 dB |
| Itxituraren Materiala | Metala |
| Elementuaren pisua | 0.95 libra (gutxi gorabehera 0.43 kg) |
| Elementuaren neurriak (L x W x H) | 8.86 x 5.36 x 2.49 hazbete (gutxi gorabehera 22.5 x 13.6 x 6.3 cm) |
| Energia iturria | Kable bidezko elektrikoa (USB bidez) |
| Gailu bateragarriak | Computers, Laptops, Gaming Consoles |
Bermearen informazioa
The Vivitar Podcast and Social Media Microphone MIC918 comes with a 3-Year USA Warranty. For specific terms, conditions, and to register your product, please refer to the official Vivitar webwebgunera edo jarri harremanetan bezeroarentzako arreta-zerbitzuarekin zuzenean. Gorde erosketaren frogagiria berme-erreklamazioetarako.
Bezeroarentzako Arreta
For further assistance, technical support, or inquiries regarding your Vivitar MIC918 microphone, please visit the official Vivitar website or contact their customer service department. Contact information can typically be found on the Vivitar webgunea 'Laguntza' edo 'Jarri gurekin harremanetan' atalen azpian.