BN-LINK B097PC1X1R
BN-LINK Digital Water Timer Instruction Manual
Model: B097PC1X1R
1. Sarrera
Thank you for choosing the BN-LINK Digital Water Timer. This device is designed to automate your garden watering, providing convenience and water efficiency. Featuring 6 independent irrigation programs, an intelligent rain sensor, and a child lock function, this timer ensures your plants receive optimal hydration while preventing over-watering and accidental operation. Please read this manual carefully before use to ensure proper installation and operation.
2. Produktua amaitu daview
2.1 Ezaugarri nagusiak
- 6 Individual Irrigation Programs: Set customized watering schedules with specific frequencies and durations.
- Intelligent Rain Sensor: Automatically pauses watering during rain to conserve water and prevent over-watering.
- Waterproof & Durable Construction: IP65 rated with robust materials for outdoor use.
- Energia-kontsumo baxua: Operates for over 6 months on 2 AA alkaline batteries (not included).
- Haurren Blokeo Modua: Ezarpenetan nahi gabeko aldaketak saihesten ditu.
- Eskuzko modua: Allows immediate watering without interrupting programmed schedules.
- LCD pantaila garbia: Shows current time, program details, battery level, and operation information.
2.2 Osagaiak eta kontrolak

Figure 2.2.1: Function Decomposition and Controls
This diagram illustrates the various components and control buttons of the water timer, including the hose tap connection, rain sensor area, LCD display, manual watering button, control buttons (Return/Pause, OK, Plus, Minus), and watering outlet.
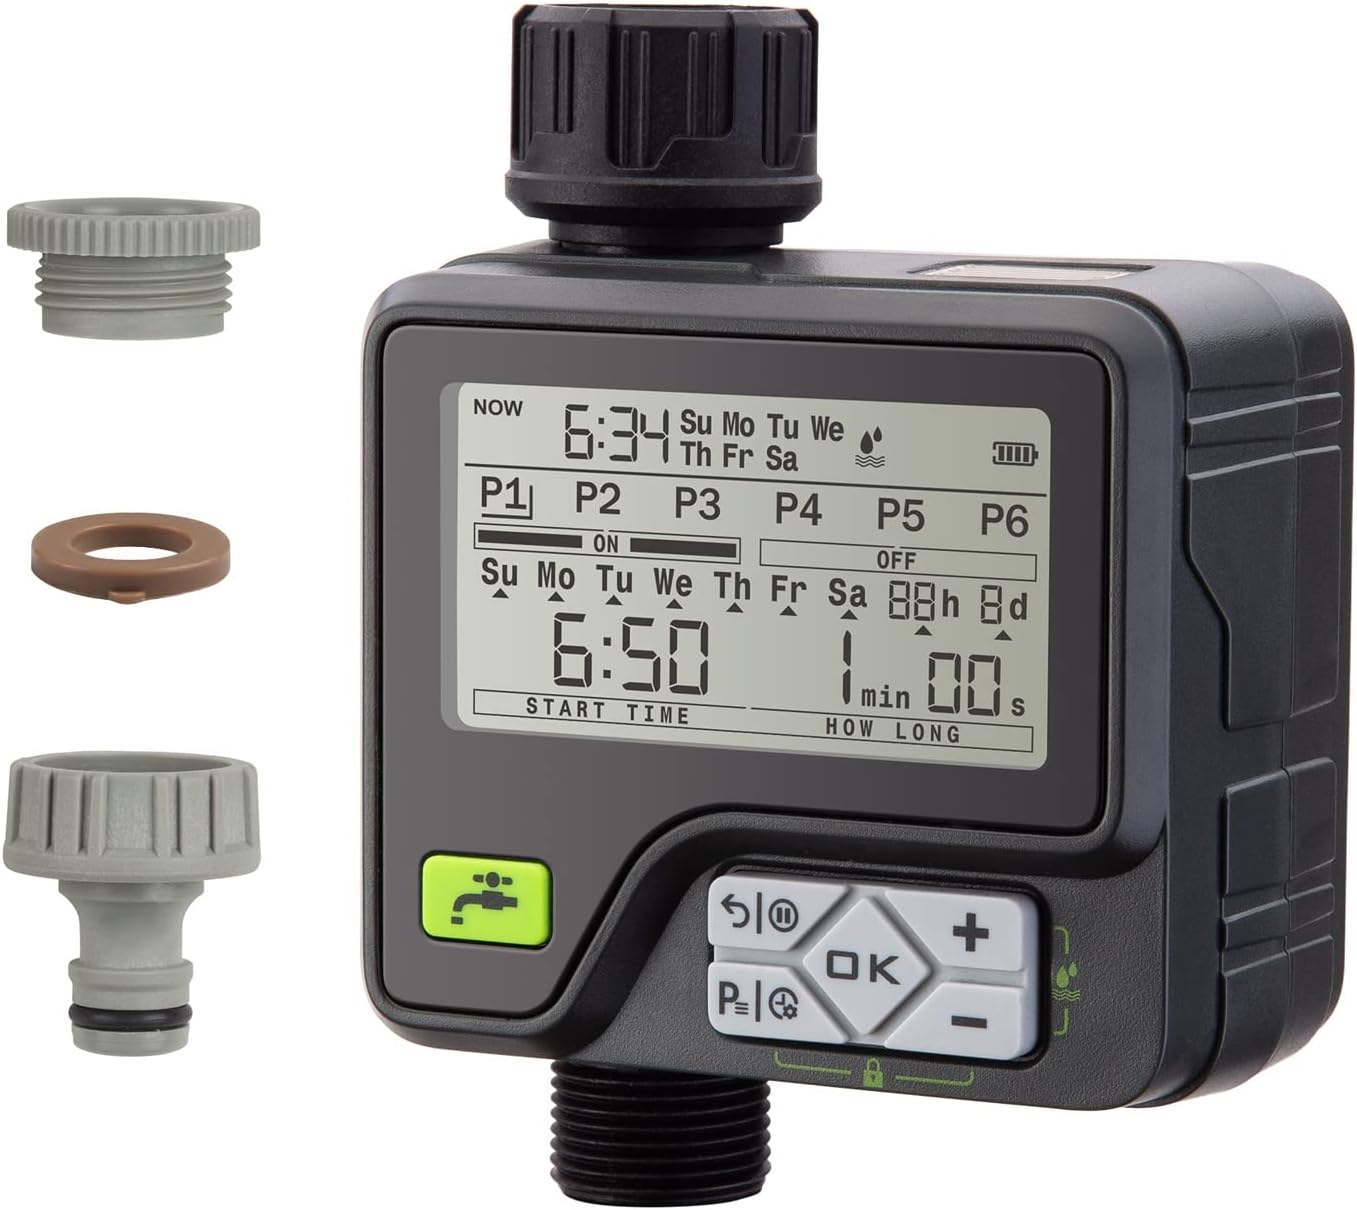
2.2.2. irudia: Produktuaview Osagarriekin
Osoa view of the BN-LINK Digital Water Timer, showcasing its main body, LCD screen, control panel, and the included connection accessories for versatile installation.

2.2.3. irudia: Produktuaren neurriak
This image provides the physical dimensions of the water timer, indicating its height (17.9cm), width (14.1cm), and depth (6.8cm) for installation planning.
3. Konfigurazioa
3.1 Bateriaren instalazioa
- Aurkitu bateriaren konpartimentua tenporizadorearen atzealdean.
- Irristatu bateriaren estalkia behera irekitzeko.
- Insert two 1.5V AA alkaline batteries (not included), ensuring correct polarity (+/-).
- Itxi bateriaren estalkia ondo itxi arte klik egin arte.
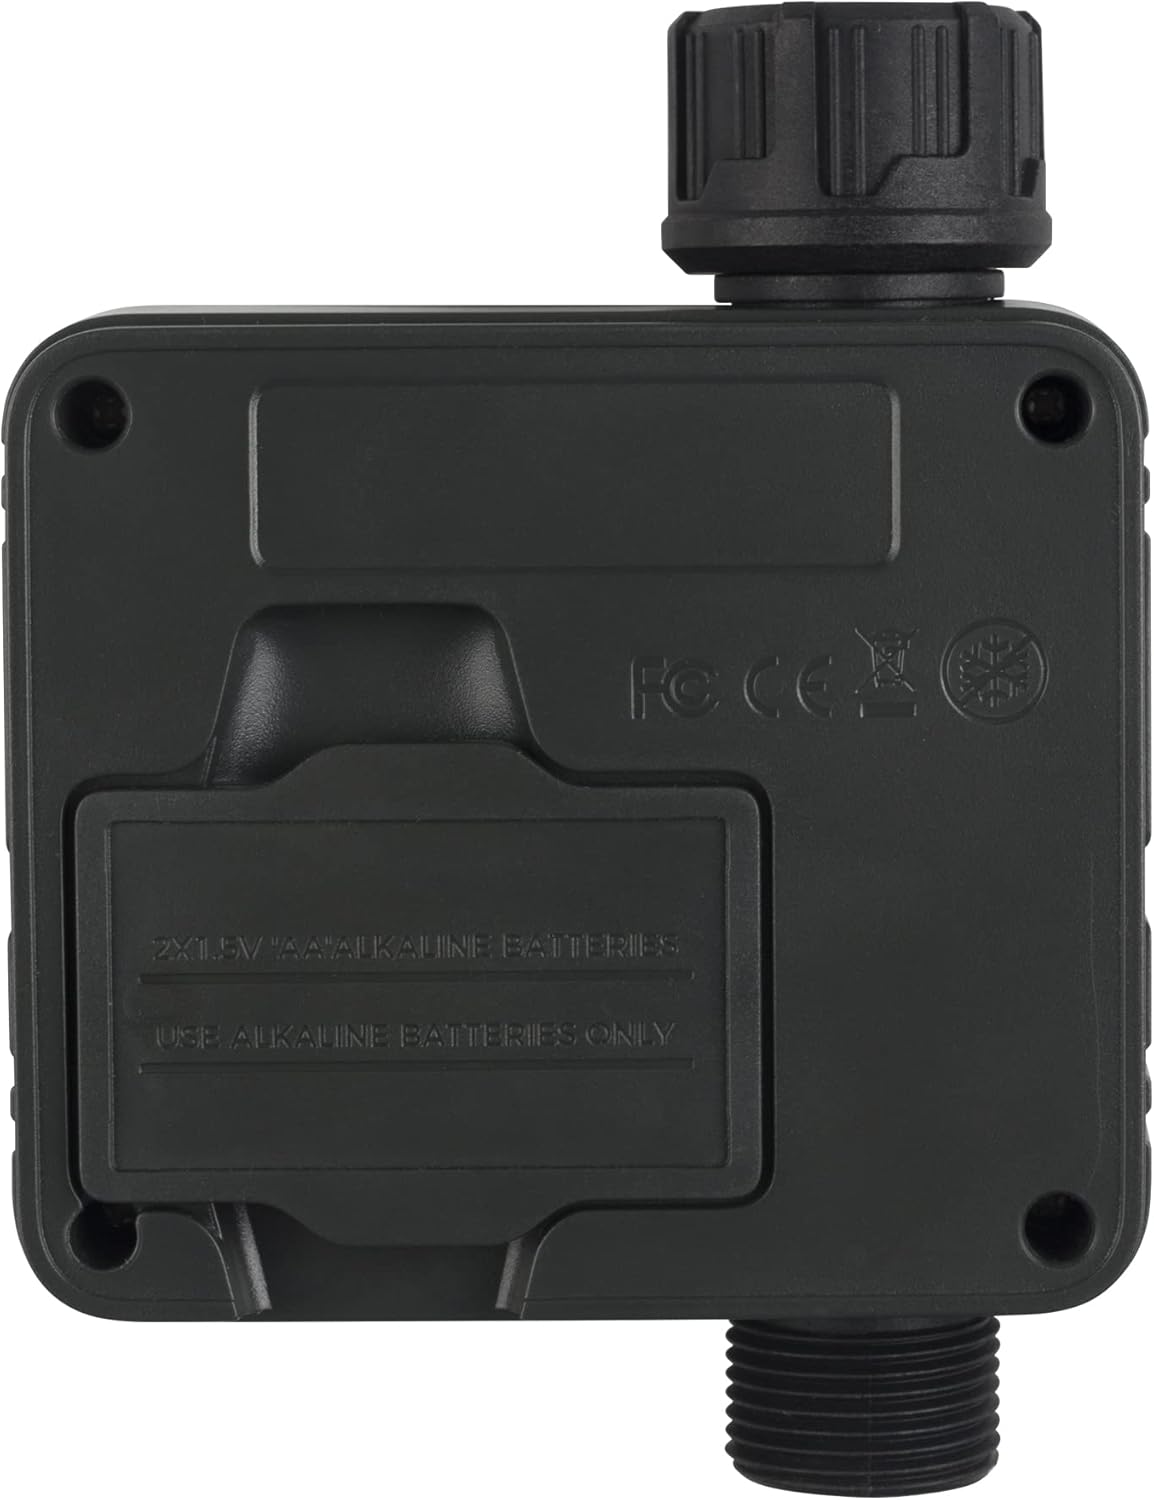
3.1.1. irudia: Bateriaren konpartimentuaren kokapena
Atzealdea view of the timer clearly shows the battery compartment, indicating where to insert the two AA alkaline batteries.
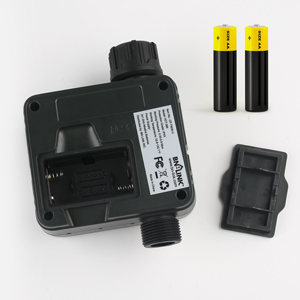
3.1.2. irudia: Bateria sartzea
Xehetasun bat view of the battery compartment with batteries ready to be inserted, demonstrating the proper orientation.
3.2 Connecting the Timer
- Ensure the timer is off or in standby mode.
- Screw the timer onto your outdoor faucet (tap) securely. Hand-tighten only.
- Connect your garden hose to the outlet at the bottom of the timer. Ensure a tight connection to prevent leaks.
- Ireki txorrota guztiz. Tenporizadoreak uraren emaria kontrolatuko du.
4. Funtzionamendu-argibideak
4.1 Uneko ordua ezartzea
- Sakatu OK button to enter the time setting mode. The hour digit will flash.
- Erabili + eta - ordua doitzeko botoiak.
- Sakatu OK to confirm the hour and move to minutes.
- Doitu minutuak erabiliz + eta -.
- Sakatu OK to confirm minutes and move to the day of the week.
- Adjust the day of the week (Su, Mo, Tu, We, Th, Fr, Sa) using + eta -.
- Sakatu OK to save the current time and exit setting mode.
4.2 Programming Irrigation Schedules (P1-P6)
The timer supports 6 independent programs (P1 to P6), allowing for flexible watering schedules.

Figure 4.2.1: 6 Individual Auto Watering Programs
This image highlights the timer's capability to manage up to six distinct watering schedules, offering great flexibility for different plant needs or garden zones.
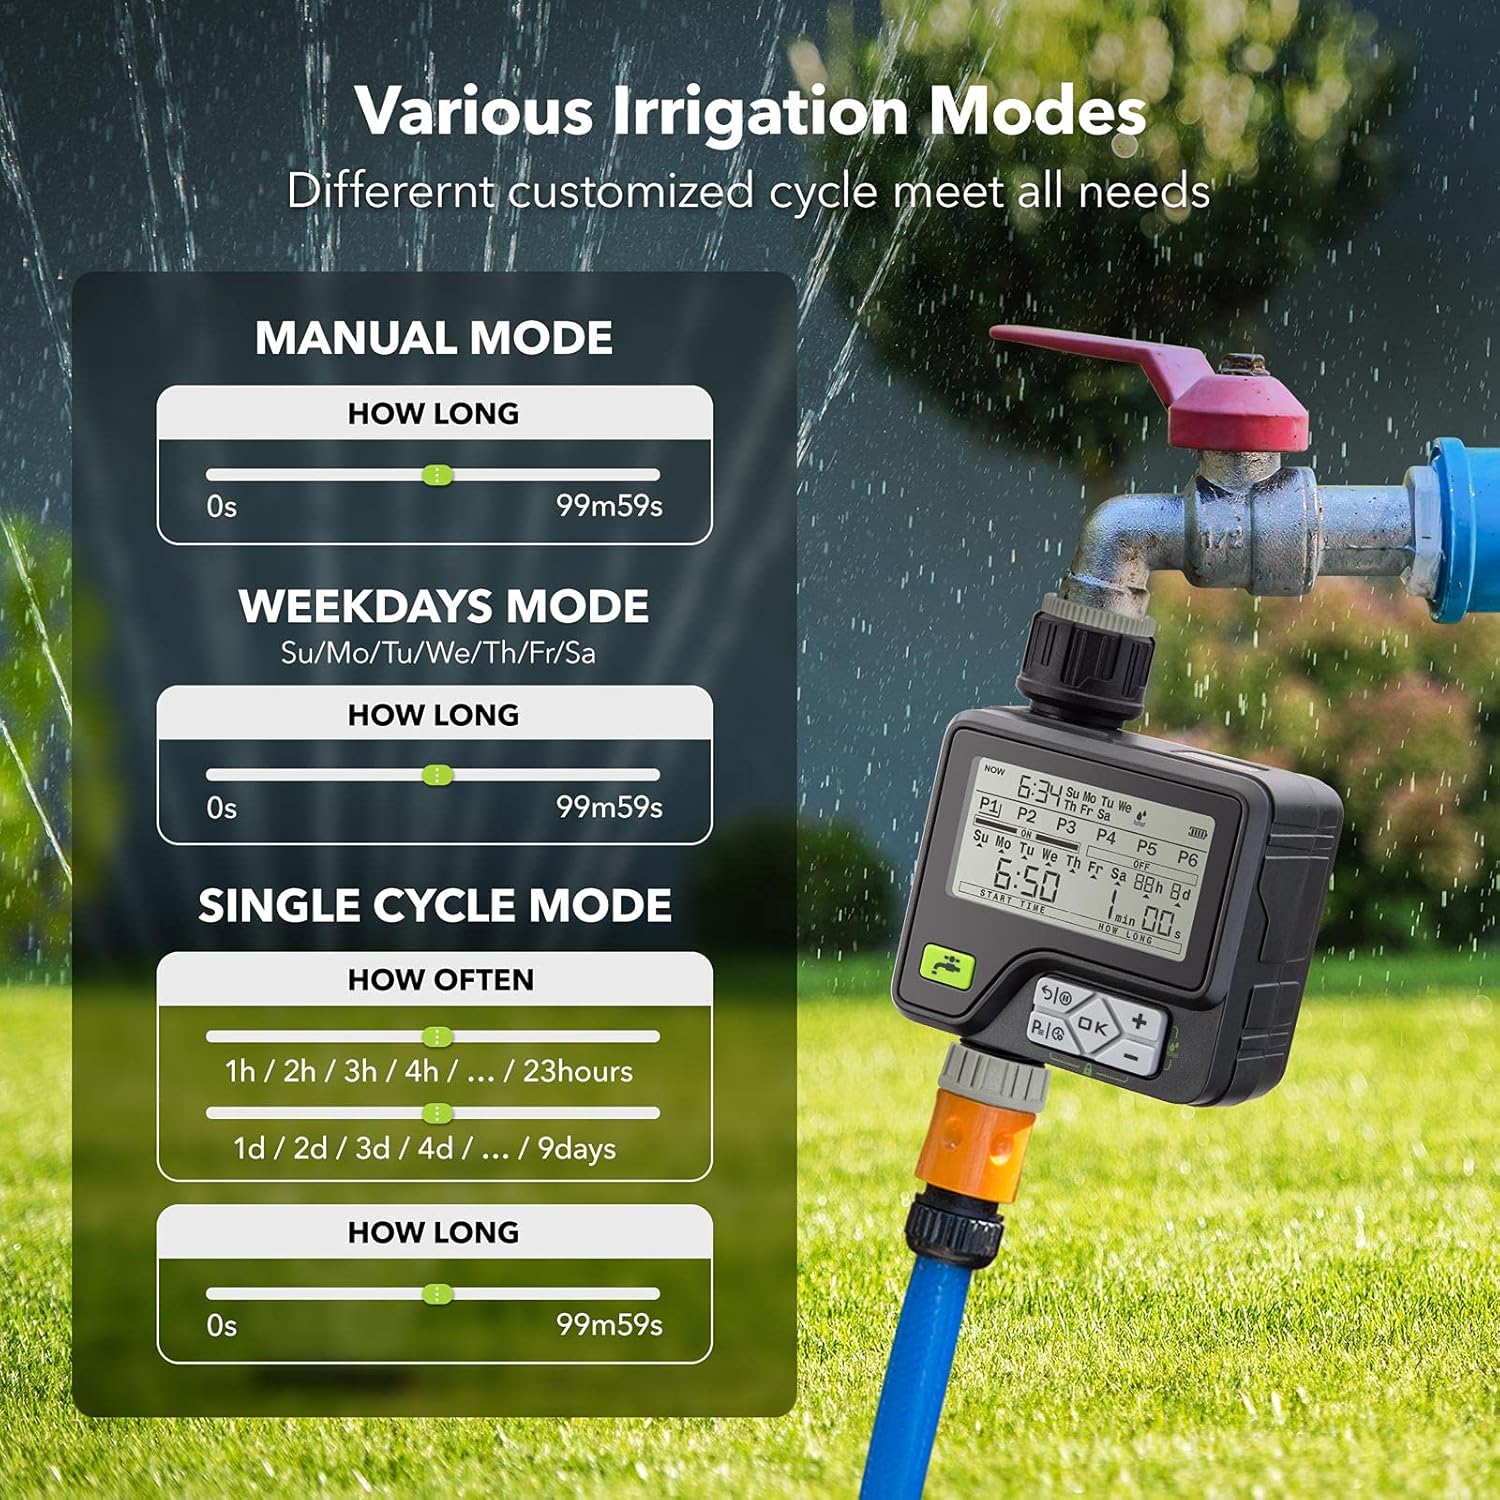
Figure 4.2.2: Various Irrigation Modes
This graphic details the different programming options available, including manual watering, weekday-specific schedules, and single-cycle modes with adjustable frequency and duration.
- Sakatu P|↺ button repeatedly to cycle through programs P1 to P6.
- Once the desired program (e.g., P1) is selected, press OK to enter its settings.
- Ezarri hasiera-ordua: The 'START TIME' will flash. Use + eta - to set the desired start time (in 24-hour format). Press OK baieztatzeko.
- Set Watering Duration: The 'HOW LONG' (minutes/seconds) will flash. Use + eta - to set the duration (from 1 second to 99 minutes 59 seconds). Press OK baieztatzeko.
- Set Watering Frequency: The day/interval setting will flash. Choose between:
- Week Cycle Mode: Select specific days of the week (Su, Mo, Tu, We, Th, Fr, Sa) for watering. Use + eta - to toggle days ON/OFF.
- Day Cycle Mode: Set intervals from every 1 hour to every 15 days. Use + eta - to adjust the interval.
- Repeat for other programs (P2-P6) as needed.
4.3 Eskuzko ureztatze modua
To water immediately without affecting your programmed schedules:
- Sakatu Eskuzko ureztatzea button (faucet icon).
- The 'HOW LONG' duration will flash. Use + eta - to set the desired manual watering duration (from 1 second to 99 minutes 59 seconds).
- Sakatu OK to start manual watering. The timer will begin watering immediately for the set duration.
- To stop manual watering prematurely, press the Return/Pause botoia.
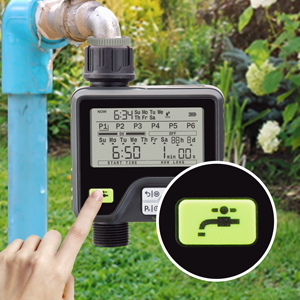
Figure 4.3.1: Manual Watering Button
This image shows the dedicated button for initiating manual watering, allowing for immediate water flow outside of programmed schedules.
4.4 Rain Sensor Function
The built-in rain sensor automatically detects rainfall and pauses programmed watering to prevent over-watering and save water. Once the sensor dries, the timer will resume its schedule.

Figure 4.4.1: Upgraded Rain Sensor Technology
This image highlights the location of the rain sensor on the top of the timer, which intelligently detects rainfall to automatically adjust watering schedules.
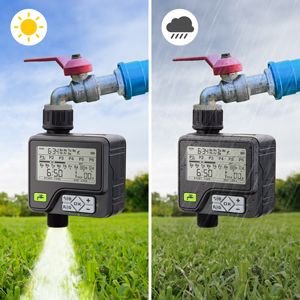
Figure 4.4.2: Rain Sensor in Action (Sunny vs. Rainy)
This comparison illustrates how the rain sensor automatically turns off the timer during rain, preventing unnecessary watering and conserving water.
4.5 Haurren Blokeo Funtzioa
The child lock prevents accidental changes to settings or unintended activation by children or pets.
- To activate Child Lock: Hold the P|↺ eta - buttons simultaneously for 3 seconds. A lock icon will appear on the display.
- To deactivate Child Lock: Hold the P|↺ eta - buttons simultaneously for 3 seconds. The lock icon will disappear.

Figure 4.5.1: Safe Child Lock
This image points out the child lock icon on the timer's screen and the specific button combination required to engage or disengage this safety feature.
5. Mantentzea
5.1 Garbiketa
- Regularly check the filter washer inside the inlet connection for debris. Clean if necessary.
- Garbitu tenporizadorearen kanpoaldea leun batekin, damp oihal. Ez erabili garbitzaile edo disolbatzaile urratzailerik.
5.2 Neguko biltegiratzea
- Before the first frost, disconnect the timer from the faucet and hose.
- Kendu bateriak.
- Store the timer in a dry, frost-free location indoors to prevent damage from freezing water.
6. Arazoak
| Arazoa | Kausa posiblea | Irtenbidea |
|---|---|---|
| Timer not turning on/display blank | Bateria gutxi edo agortuta; Bateriaren instalazio okerra. | Replace with new 1.5V AA alkaline batteries; Ensure correct polarity. |
| No water flow at scheduled time | Faucet is off; Low water pressure; Program not set correctly; Rain sensor active; Child lock active. | Ensure faucet is fully open; Check water supply; Verify program settings (start time, duration, frequency); Check rain sensor for moisture; Deactivate child lock. |
| Konexioetatik ura isurtzen | Loose connections; Missing or damaged washer; Damaged hose/faucet threads. | Tighten connections; Ensure rubber washer is properly seated in the inlet; Replace washer if damaged; Check hose/faucet for damage. |
| Timer continuously watering | Valve stuck open; Manual mode activated and not turned off. | Try pressing the Return/Pause button; If issue persists, contact customer support. |
| Rain sensor not working | Sensor dirty or obstructed; Extreme cold affecting sensor. | Clean the sensor area; Ensure timer is not exposed to freezing temperatures. |
7. Zehaztapenak
| Atributua | Balioa |
|---|---|
| Marka | BN-LINK |
| Eredua | B097PC1X1R |
| Kolorea | Beltza |
| Materiala | Plastikoa |
| Produktuaren neurriak | 6.8 x 14.1 x 17.9 cm |
| Elementuaren pisua | 510 g |
| Energia iturria | 2 x 1.5V AA pila alkalinoak (ez daude barne) |
| Iragazgaitzaren balorazioa | IP65 |
| Uraren Gehieneko Presioa | 10 kg |
8. Bermea eta Laguntza
For warranty information or technical support, please refer to the product packaging or contact BN-LINK customer service directly. Keep your purchase receipt as proof of purchase for any warranty claims.