Sarrera
The Keychron Q2 is a fully customizable wired mechanical keyboard featuring a compact 65% layout. Constructed with a solid full aluminum frame, the Q2 is designed for easy assembly and offers a premium typing experience. It supports full QMK and VIA programming for extensive customization and features hot-swappable switches for personalized tactile feedback.

Image: The Keychron Q2 Wired Custom Mechanical Keyboard, showcasing its compact 65% layout and blue color scheme.
Konfigurazio Gida
1. Paketearen edukia
Hasi aurretik, ziurtatu osagai guztiak daudela:
- Keychron Q2 Keyboard Kit (Aluminum Case, PCB, Steel Plate, Sound Absorbing Foam, Case Foam, Gaskets)
- USB motako C motako C motako kablea
- USB A motako C motako egokitzailea
- Switch Puller
- Keycap tiratzailea
- Bihurkin
- Hex Gakoa
- Stabilizers (4 sets)
Note: All tools are typically located at the bottom of the packaging.

Image: Diagram illustrating the contents of the Keychron Q2 package, including the keyboard, cables, and tools.
2. Teklatua konektatzea
- Locate the USB Type-C port on the back of the Keychron Q2 keyboard.
- Connect one end of the provided USB Type-C to Type-C cable to the keyboard.
- Connect the other end of the cable to your computer's USB Type-C port. If your computer only has USB Type-A ports, use the included USB Type-A to Type-C adapter.
- Ensure the operating system switch (located on the back edge of the keyboard) is set to the correct position for your system (Mac or Windows).
- Teklatua automatikoki ezagutuko du zure sistema eragileak.

Irudia: Gertutik view of the Keychron Q2 keyboard with a USB-C cable connected, showing the Mac/Win switch.
Funtzionamendu-argibideak
1. QMK/VIA pertsonalizazioa
The Keychron Q2 supports full QMK and VIA programming, allowing you to remap keys, create macros, and customize lighting effects. To use VIA software:
- Deskargatu VIA softwarea Keychron ofizialetik webgunea (keychron.com/pages/qmk-via).
- Connect your Q2 keyboard to your computer via the USB cable.
- Launch the VIA software. The software should automatically detect your Q2 keyboard. If not, you may need to import the Q2 keymap JSON file, also available on the Keychron webgunea.
- Use the graphical interface to drag and drop functions, assign macros, and configure lighting for each key. Changes are applied in real-time.

Image: Screenshot of the VIA software interface, demonstrating how to remap keys on the Keychron Q2 keyboard.
2. Beroan alda daitezkeen etengailuak
The Q2's PCB supports both 3-pin and 5-pin MX style mechanical switches, allowing for easy switch replacement without soldering.
- Emandako giltza-tapa ateratzeko tresna erabiliz, kontu handiz kendu ordezkatu nahi duzun giltza-tapa etengailutik.
- Use the provided switch puller to gently grip the top and bottom clips of the switch. Pull the switch straight up to remove it from the PCB.
- Lerrokatu etengailu berriaren pinak PCBko zuloekin. Ziurtatu pinak zuzen daudela tolestu ez daitezen.
- Sakatu etengailu berria ondo bere lekuan klik egin arte.
- Lotu berriro giltza-tapoia.

Irudia: Gertutik view of the Keychron Q2's PCB with several switches removed, demonstrating the hot-swappable feature.
3. Keycaps and RGB Lighting
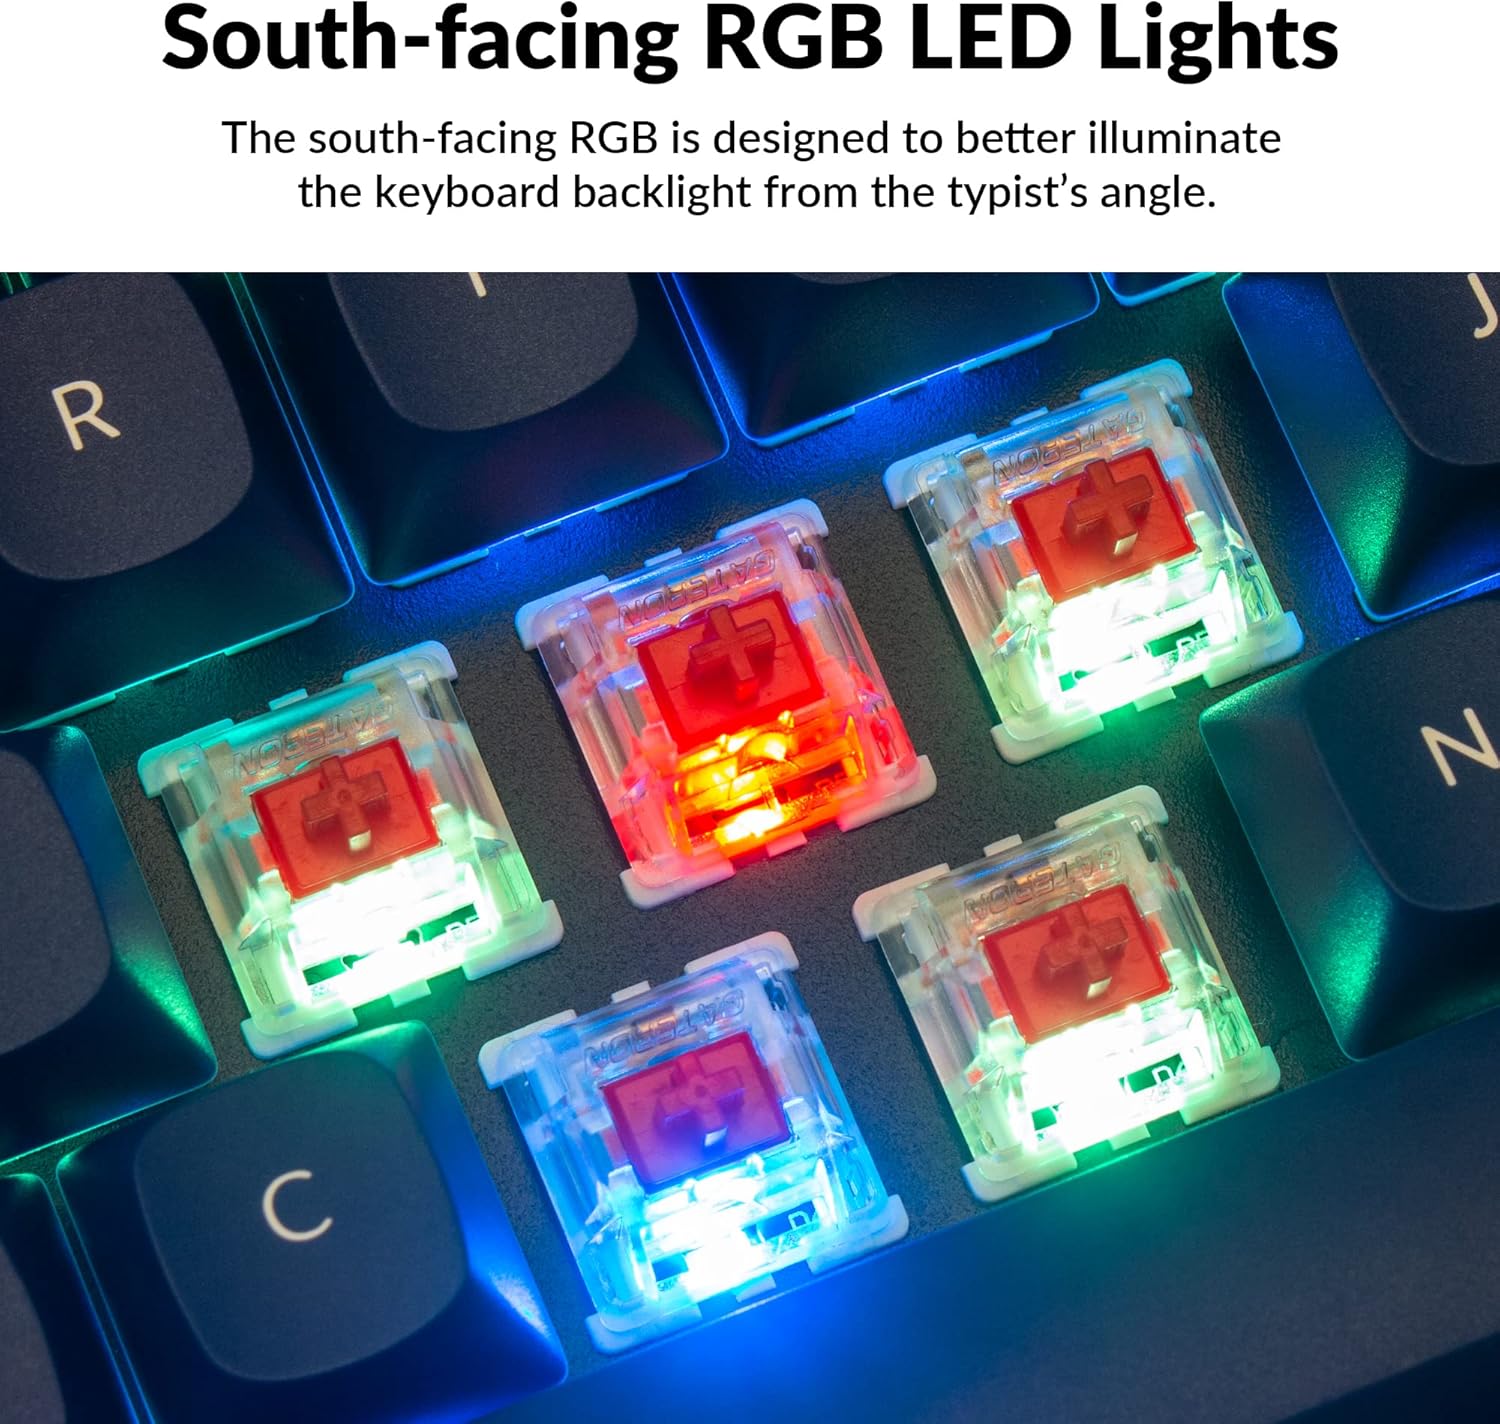
The Q2 comes with premium non-shine-through PBT keycaps, known for their durability and oil resistance. The keyboard features south-facing RGB LEDs, designed to provide better illumination of the backlight from the typist's perspective.
Irudia: Xehetasun zehatza view of the Keychron Q2's double-shot PBT keycaps, highlighting their texture and legends.

Image: A close-up of the Keychron Q2's south-facing RGB LEDs illuminating the switches from below.
Mantentzea
1. Teklatua garbitzea
Aldian-aldian garbitzeak teklatuaren errendimendua eta itxura mantentzen laguntzen du.
- Hautsa kentzea: Erabili aire konprimituzko lata bat tekla-tapoien arteko hautsa eta hondakinak kentzeko.
- Tekla-tapoien garbiketa: For deeper cleaning, remove the keycaps using the provided keycap puller. Wash them with mild soap and water, then ensure they are completely dry before reattaching.
- Kasuen garbiketa: Garbitu aluminiozko kaxa oihal leun batekin,amp oihal. Saihestu akabera kaltetu dezaketen produktu kimiko gogorrak.
2. Switch and Stabilizer Maintenance
The hot-swappable design allows for easy maintenance of switches and stabilizers.
- Etengailuaren ordezkapena: If a switch becomes faulty, replace it using the hot-swapping procedure described in the Operating Instructions.
- Stabilizer Lubrication: For optimal performance and reduced wobbliness on larger keys (space bar, shift, enter), the PCB-mounted screw-in stabilizers can be lubricated. This typically involves disassembling the keyboard to access the stabilizers.

Image: An exploded diagram of the Keychron Q2, showing its various components like keycaps, switches, top case, gaskets, plate, PCB, sound absorbing foam, case foam, bottom case, and silicone gaskets, illustrating ease of disassembly.
Arazoak konpontzea
Ohiko arazoak eta irtenbideak:
- Teklatuak ez du erantzuten:
- Ziurtatu USB kablea ondo konektatuta dagoela bai teklatura bai ordenagailura.
- Verify the Mac/Windows switch on the back of the keyboard is set to the correct operating system.
- Try connecting the keyboard to a different USB port or a different computer to rule out port issues.
- Berrabiarazi ordenagailua.
- Giltza espezifikoak ez dira funtzionatzen:
- Remove the keycap and switch for the non-functional key. Inspect the switch pins for bends or damage. Straighten bent pins carefully or replace the switch if damaged.
- Ziurtatu etengailua PCBan guztiz sartuta dagoela.
- Check VIA software to ensure the key has not been accidentally remapped or disabled.
- RGB argiztapen arazoak:
- Ziurtatu teklatua behar bezala konektatuta dagoela.
- Use the VIA software to check and adjust lighting settings.
- Perform a factory reset if lighting issues persist (refer to Keychron's official support for specific reset procedures).
- Keyboard Disconnecting Randomly:
- Probatu beste USB kable batekin.
- Ensure the USB port on your computer is stable and providing sufficient power.
- Eguneratu zure ordenagailuaren USB kontrolatzaileak.
If you encounter issues not covered here, please refer to the official Keychron support resources.
Zehaztapenak
| Ezaugarri | Xehetasuna |
|---|---|
| Marka | Keychron |
| Ereduaren izena | Q2 |
| Modelo zenbakia | Q2-J1 |
| Teklatuaren diseinua | 65% (68 Keys), QWERTY |
| Konektibitate Teknologia | Wired (USB-A, USB-C) |
| Gailu bateragarriak | PC (Linux, MacOS, Windows) |
| Aldatu mota | Gateron G Pro Red (Linear), Hot-swappable |
| Atzeko argiztapena | RGB (Hegoaldera begira) |
| Materiala | Full Aluminum Frame, PBT Keycaps |
| Produktuaren neurriak | 12.89"L x 4.76"Z x 1.33"A |
| Ezaugarri bereziak | QMK/VIA Programmable, Double Gasket Design |
Bermearen informazioa
Keychron products typically come with a standard manufacturer's warranty. For detailed information regarding the warranty period, coverage, and terms and conditions for your Keychron Q2 keyboard, please refer to the official Keychron webwebgunean edo produktuarekin batera datorren berme-txartelean. Gorde erosketaren frogagiria berme-erreklamazioetarako.
Laguntza eta Baliabideak
For further assistance, software downloads (VIA), firmware updates, and frequently asked questions, please visit the official Keychron support page:
- Keychron Ofiziala Webgunea: www.keychron.com
- QMK/VIA Software & Firmware: www.keychron.com/pages/qmk-via
- Keychron Store: Bisitatu Keychron denda Amazonen
You can also find community forums and additional user guides online for advanced customization and troubleshooting tips.