
1. Sarrera
This manual provides detailed instructions for the operation and maintenance of your Generic G318A Wireless Signal Bug Detector. Please read this manual thoroughly before using the device to ensure proper function and safety. This device is designed to detect various wireless signals, including those from hidden cameras, GPS trackers, and eavesdropping devices.
2. Paketearen edukia
- 1 x G318A Detector Unit
- 2 x Antena
- 1 x korronte egokitzailea
- 1 x Erabiltzailearen eskuliburua
3. Produktua amaitu daview eta Kontrolak
Familiarize yourself with the components and controls of your G318A detector as shown in the diagram below.
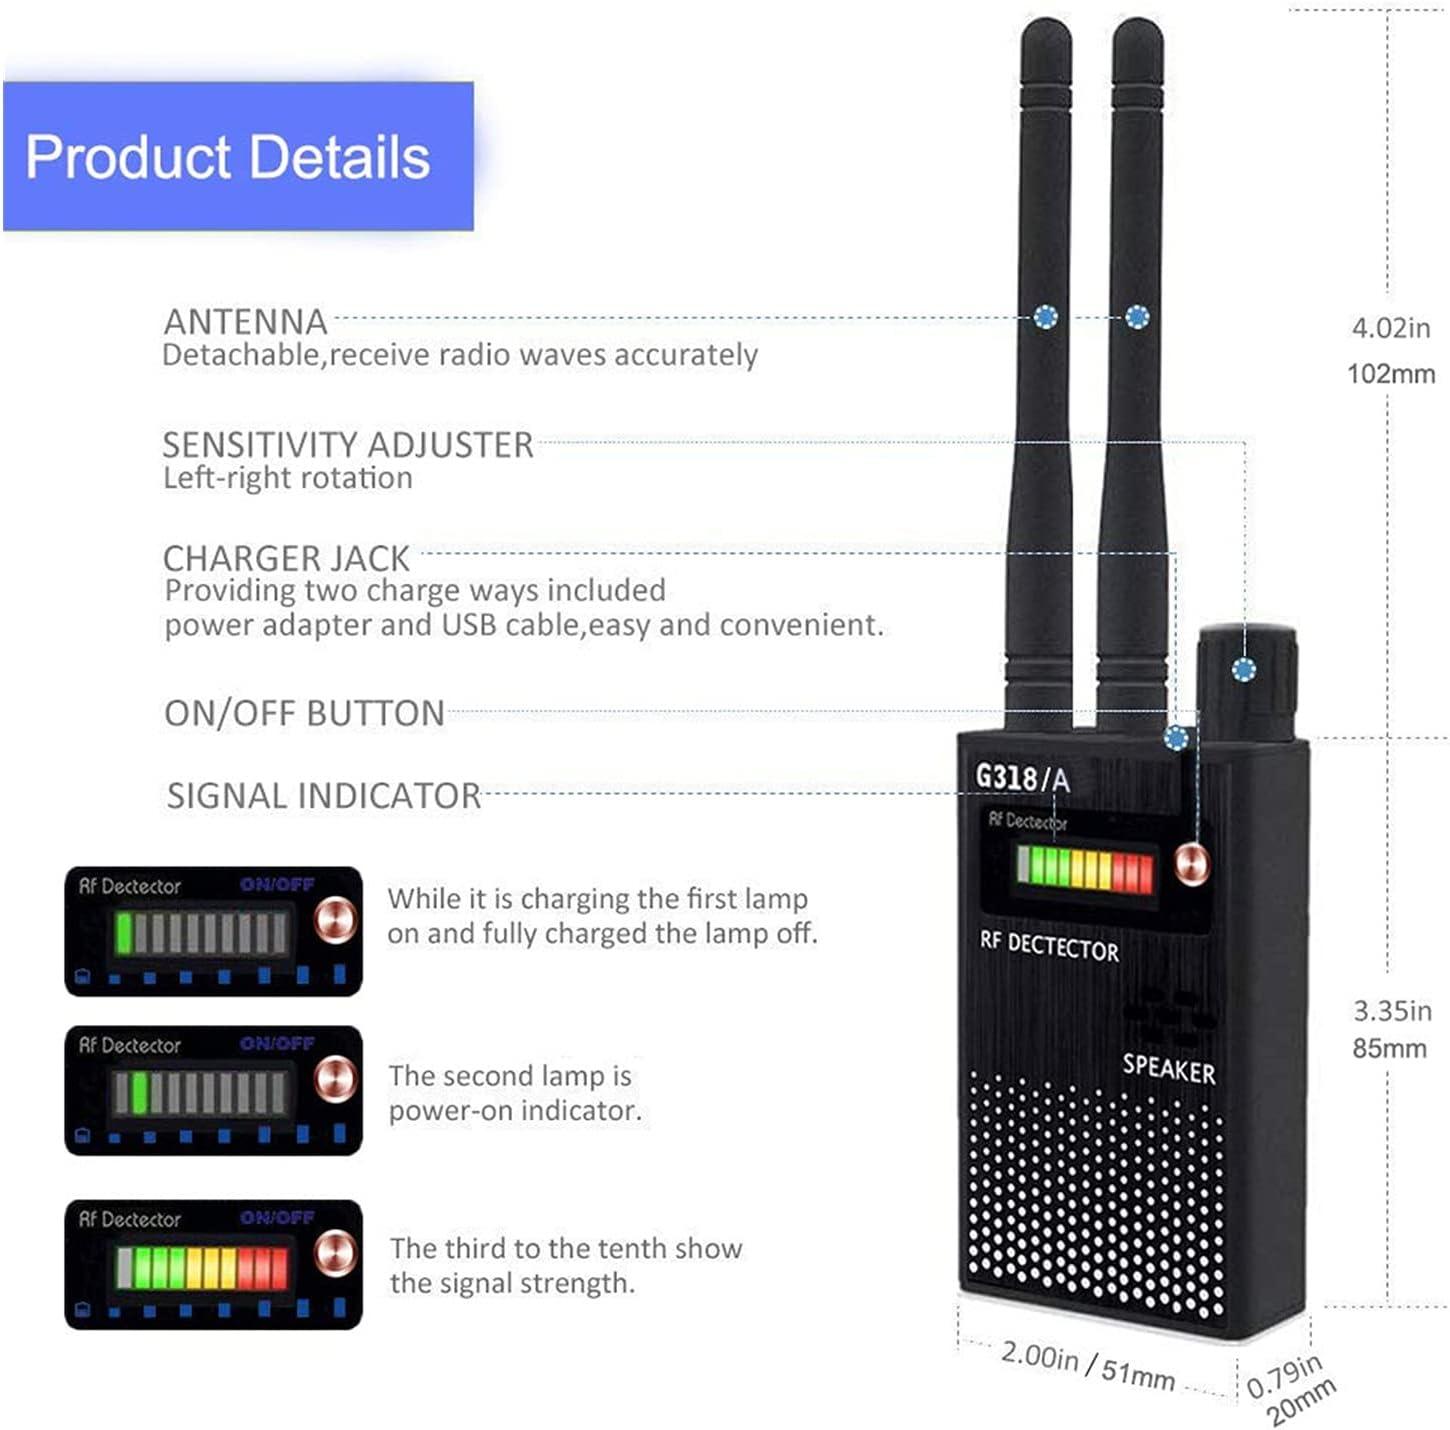
Osagaiak eta funtzioak:
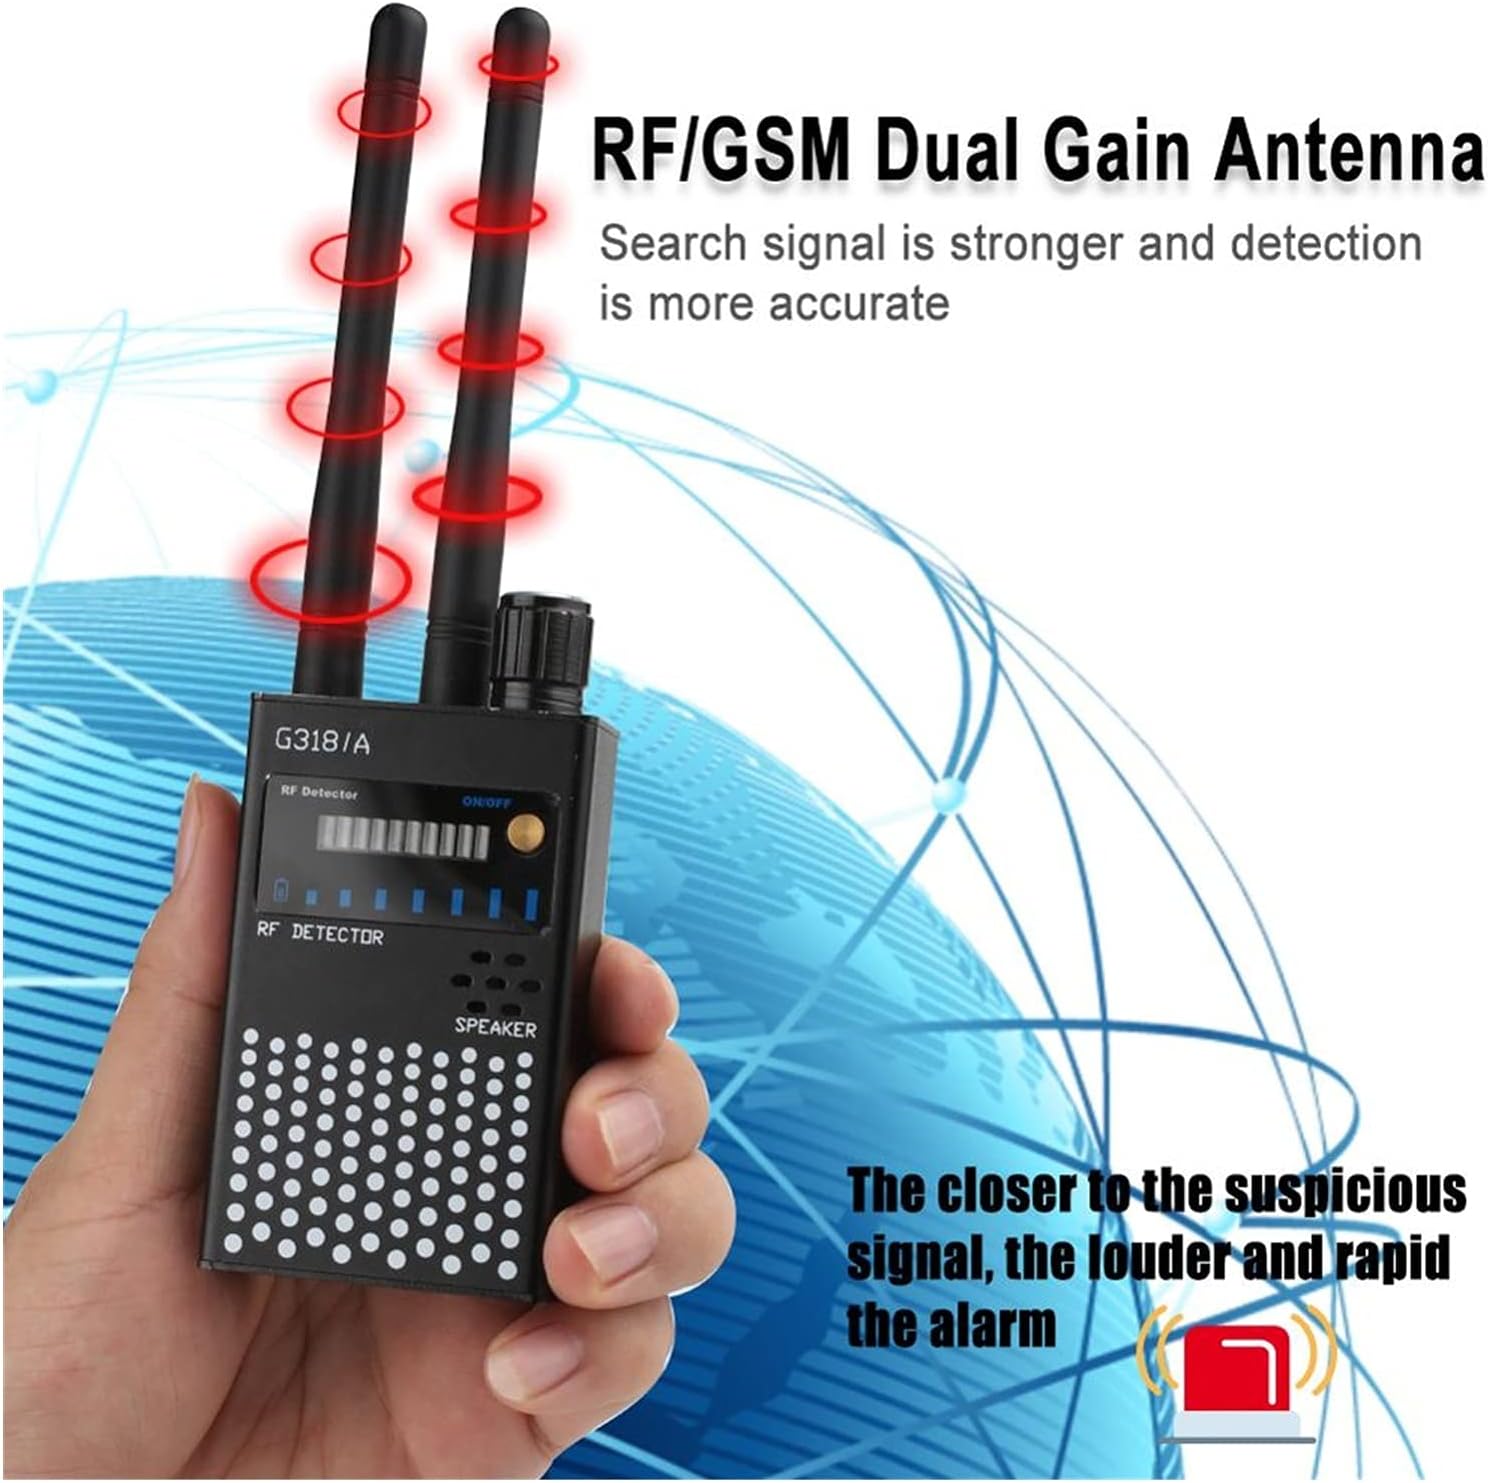
- antenak: Two detachable antennas for receiving radio waves. One is for RF frequencies, the other for GSM frequencies.
- Sentikortasunaren doitzailea: A knob to adjust the detection sensitivity. Rotate left to decrease sensitivity, and right to increase sensitivity.
- Charger Jack: Port for connecting the power adapter or USB cable to charge the device.
- ON/OFF botoia: Power switch for turning the device on or off.
- Signal Indicator (LEDs): A 10-level LED display indicating signal strength and device status.

- First LED (leftmost): Charge indicator. It lights up during charging and turns off when the battery is fully charged.
- Second LED: Power-on indicator. It will extinguish if the battery power is insufficient.
- Third to Tenth LEDs: Signal strength indicator. These LEDs light up sequentially from left to right as the detected signal strength increases. If all lights flash, an urgent 'beep' sound will be produced, indicating a very strong signal.
4. Konfigurazioa
- Lotu antenak: Carefully screw the two provided antennas into the designated ports on the top of the detector unit.
- Kargatzeko gailua: Connect the power adapter to the charger jack on the device and plug it into a power outlet. The first LED will light up, indicating charging. Charge the device until the first LED turns off, signifying a full charge.
5. Funtzionamendu-argibideak
5.1 Basic Detection
- Piztu: Press the ON/OFF button to turn on the device. The power-on indicator LED (second LED) will light up.
- Initial Sensitivity Adjustment: Start by rotating the sensitivity adjuster knob to the left (lower sensitivity) to prevent false alarms from common signals in your environment.
- Eskaneatu eremua: Slowly sweep the detector around the area you wish to inspect. Observe the signal indicator LEDs and listen for the alarm tone.
- Seinalearen Adierazpena: As you approach a signal source, more LEDs will light up, and the alarm tone will become louder and more rapid.
- Increase Sensitivity: If no signals are detected or to find weaker signals, gradually rotate the sensitivity knob to the right (increase sensitivity).
5.2 Pinpointing a Signal Source
- When the detector indicates a signal, begin to reduce the sensitivity gradually by rotating the knob to the left.
- Simultaneously, move the detector closer to the suspected area.
- Continue to reduce sensitivity and move the detector until the signal indication is strongest in a very localized area. This process helps to pinpoint the exact location of the hidden device.
6. Aplikazioak
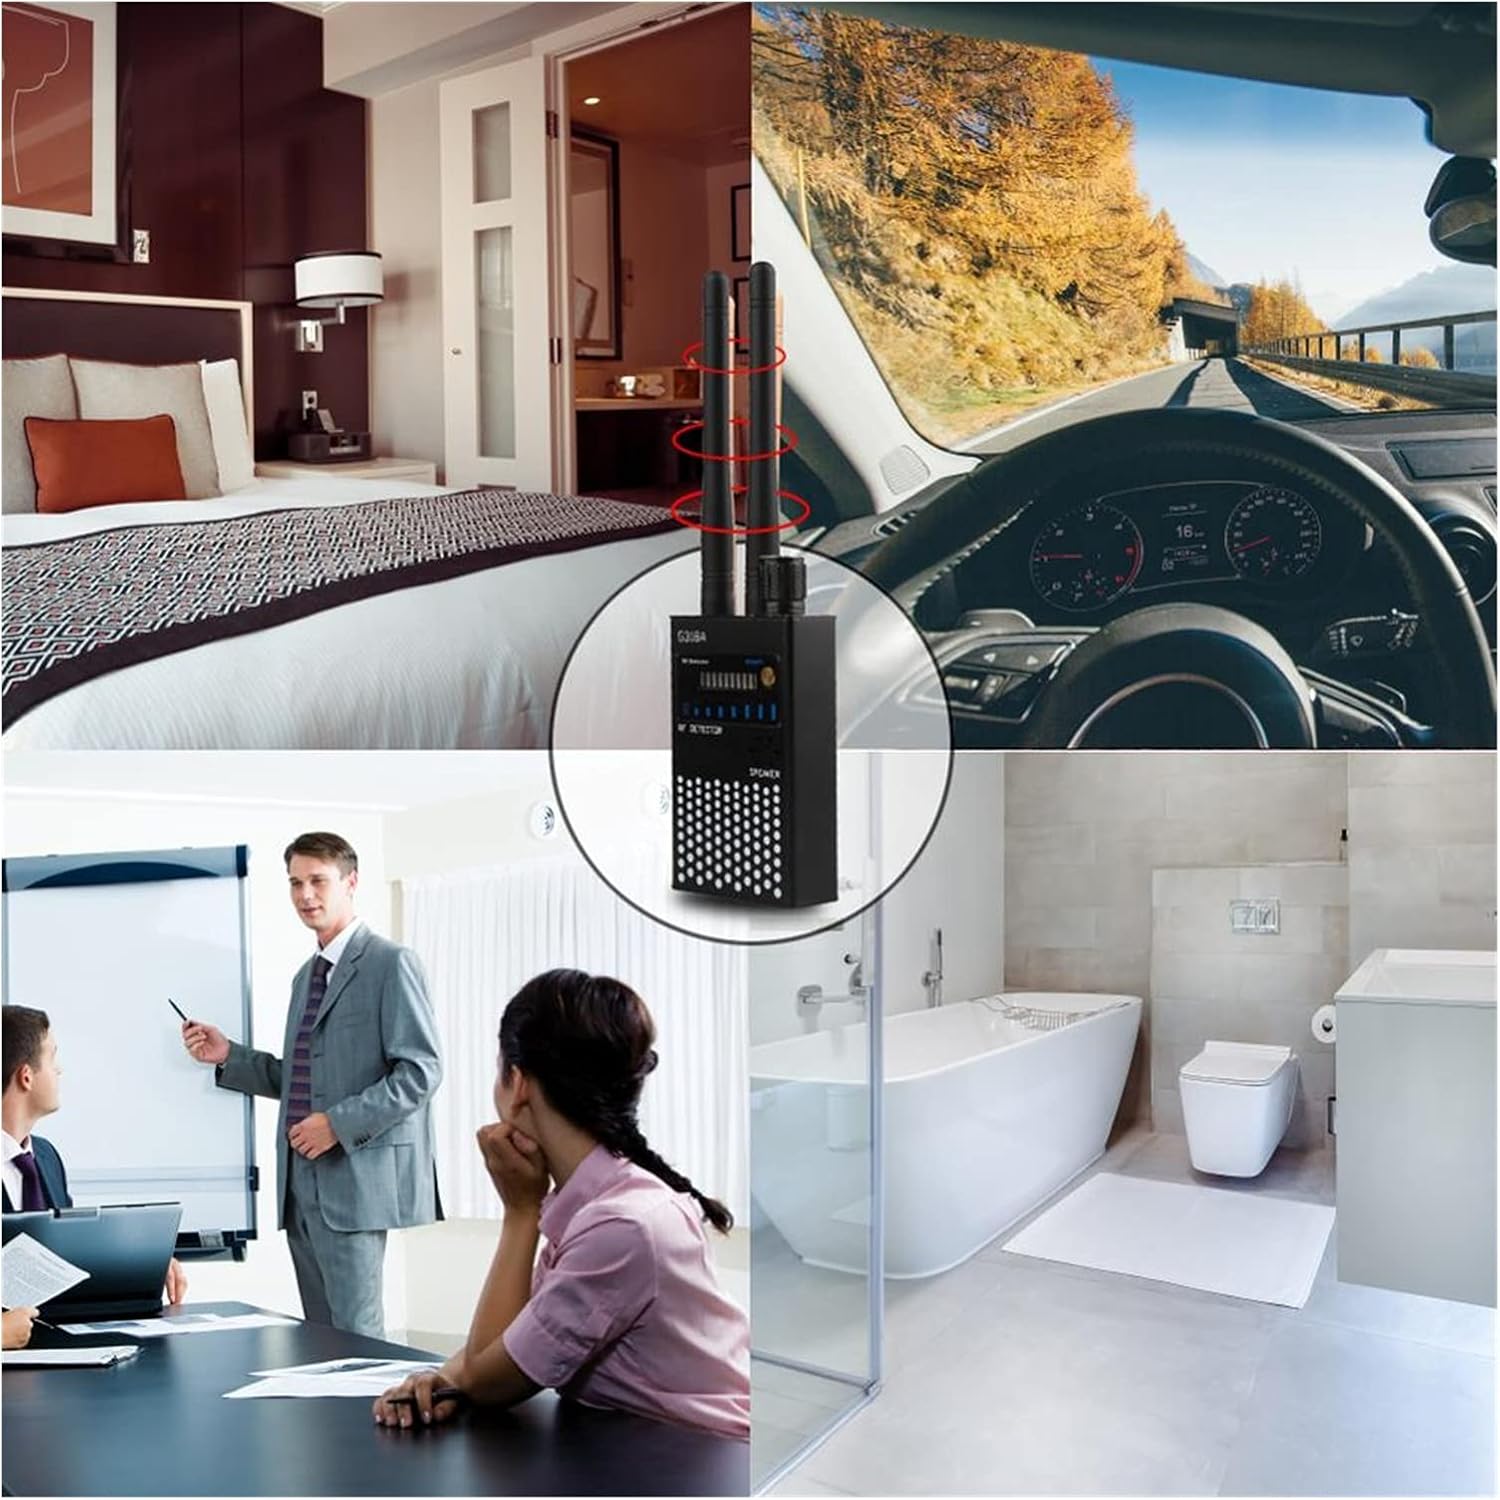
The G318A Wireless Signal Bug Detector is suitable for various applications where privacy and security are concerns:
- Preventing eavesdropping in confidential meetings or private conversations.
- Detecting hidden cameras in hotel rooms, dressing rooms, or bathrooms.
- Locating GPS trackers on vehicles.
- Inspecting offices, schools, or workshops for unauthorized surveillance devices.
- Protecting personal privacy against unauthorized tracking or recording.

7. Zehaztapenak
| Kolorea | Beltza |
| Materiala | Metala |
| Maiztasun barrutia | 1MHz - 8000MHz |
| Dynamic Detection Range | > 73 dB |
| Detekzio-sentsibilitatea | <0.03mW |
| Detection Range (approx.) | 2.4G: 10 square meters (standard 10mW) 1.2G: 15 square meters (standard 10mW) |
| Adierazpen modua | 9-level LED light indication, variable tone indication |
| Elikatze Hornidura | Built-in 1000mAh 3.7V polymer battery |
| Laneko Korrontea | 60mA |
| Lanaldia | 8 - 12 ordu |
| Neurriak (gutxi gorabehera) | 5 x 2 x 18.7 cm (1.96 x 0.78 x 7.36 hazbete) |
| Pisua | 300 g |

8. Mantentzea
- Keep the device dry and clean. Use a soft, dry cloth to wipe the surface.
- Saihestu gailua muturreko tenperatura, eguzki-argi zuzena edo hezetasun handiaren eraginpean jartzea.
- Do not attempt to disassemble or repair the device yourself, as this will void any potential warranty and may cause damage.
- Charge the battery regularly, even if the device is not in frequent use, to maintain optimal battery health and prolong its lifespan.
9. Arazoak
| Arazoa | Kausa posiblea | Irtenbidea |
|---|---|---|
| Gailua ez da pizten | Low battery or device not powered on correctly. | Recharge the device fully. Ensure the ON/OFF button is pressed firmly. |
| No signal detection | Antennas not properly attached, sensitivity too low, or no signals present. | Ensure antennas are securely attached. Increase sensitivity by rotating the knob to the right. Verify the device is powered on. |
| Constant alarm or false alarms | Sensitivity too high, or presence of strong ambient RF interference (e.g., Wi-Fi routers, mobile phones). | Reduce sensitivity by rotating the knob to the left. Move away from known signal-emitting devices. |
| Bateriaren iraupen laburra | Incomplete charging or aging battery. | Ensure the device is fully charged until the charge indicator LED turns off. Battery capacity may decrease over time with usage. |
10. Segurtasun informazioa
- This device is intended for detection purposes only. Do not use it for illegal activities or in a manner that violates privacy laws.
- Mantendu gailua haurren eskura.
- Ez jarri gailua uretara edo beste likido batzuetara.
- Dispose of the battery and device according to local environmental regulations.
- Avoid operating the device in environments with explosive gases or flammable materials.
11. Bermea eta Laguntza
For warranty information and technical support, please refer to the seller's policy or contact the point of purchase. As this is a Generic brand product, specific warranty details may vary by retailer.