1. Sarrera
This manual provides detailed instructions for the setup, operation, maintenance, and troubleshooting of your Wildgame Innovations Mirage PRO LIGHTSOUT Trail Camera. Please read this manual thoroughly before using your camera to ensure optimal performance and longevity.
The Mirage PRO LIGHTSOUT is designed for capturing high-quality photos and videos of wildlife with its 32MP photo resolution and 720p HD video capabilities. It features a 75-foot illumination range and a fast trigger speed of less than 3/4 second, utilizing 40 high-intensity invisible IR LEDs for discreet night vision. The camera comes bundled with essential accessories, including an 8X AA battery pack and a 16GB SD card, to get you started immediately.
2. Paketearen edukia
- Wildgame Innovations Mirage PRO LIGHTSOUT Trail Camera (Model: SP32B20W18-21)
- 8X AA bateriak
- 16 GB SD txartela
- Tree Strap for mounting
- Erabiltzailearen eskuliburua (dokumentu hau)
3. Kamera amaitu daview
Familiarize yourself with the camera's external features and controls.

1. irudia: Aurrealdea view of the Wildgame Innovations Mirage PRO LIGHTSOUT Trail Camera, showcasing its camouflaged casing, lens, and IR emitters.

2. irudia: Aldea view of the trail camera, illustrating its compact design and mounting points.
4. Konfigurazioa
4.1. Bateriaren instalazioa
- Locate the battery compartment on the camera. This is typically found on the bottom or side, secured by a latch.
- Open the latch and carefully open the battery door.
- Insert the 8 included AA batteries, ensuring correct polarity (+/-) as indicated inside the compartment.
- Close the battery door securely until the latch clicks into place.
4.2. SD txartelaren instalazioa
- With the battery compartment open, locate the SD card slot.
- Insert the included 16GB SD card into the slot with the label facing up (or as indicated by the diagram near the slot) until it clicks into place.
- To remove the SD card, gently push it in until it clicks, then release, and it will spring out.
4.3. Kamera muntatzea
- Select a suitable location for your camera, such as a tree or post, ensuring a clear view kontrolatu nahi duzun eremuarena.
- Thread the provided tree strap through the mounting slots on the back of the camera.
- Securely fasten the strap around the chosen mounting surface, ensuring the camera is stable and pointed in the desired direction.
- Adjust the camera's angle as needed.
5. Funtzionamendu-argibideak
5.1. Piztu/Itzaltzea
- To power on the camera, locate the power switch (typically inside the battery compartment or on the control panel) and slide it to the 'ON' position.
- The camera will usually display a startup screen or enter a setup mode.
- Itzaltzeko, irristatu etengailua 'OFF' posiziora.
5.2. Basic Settings and Modes
The camera features a push-button controller for navigating menus and adjusting settings. Refer to the on-screen prompts for specific options.
- Modu aukeraketa: Use the control buttons to select between Photo, Video, or Photo+Video modes.
- Ebazpena: Set photo resolution to 32MP and video resolution to 720p HD for optimal quality.
- Aktibatzeko atzerapena: Adjust the delay between detections to prevent excessive captures.
- Data eta ordua: Ezarri data eta ordu egokia denbora zehatza lortzekoamps on your captures.
- Sentikortasuna: Adjust the PIR sensor sensitivity based on environmental conditions to minimize false triggers.
5.3. Silent Shield Technology and Night Vision
The Mirage PRO LIGHTSOUT incorporates Silent Shield technology, ensuring quiet operation to avoid disturbing wildlife. Its 40 high-intensity invisible IR LEDs provide a 75-foot illumination range for clear night vision without emitting a visible flash.
5.4. Irudiak eta bideoak ateratzea
Once configured, the camera will automatically capture images or videos when motion is detected within its 75-foot range. The trigger speed is less than 3/4 second, ensuring minimal delay in capturing fast-moving subjects.

3. irudia: Example of a daytime image captured by the camera, showing a deer in a natural habitat.
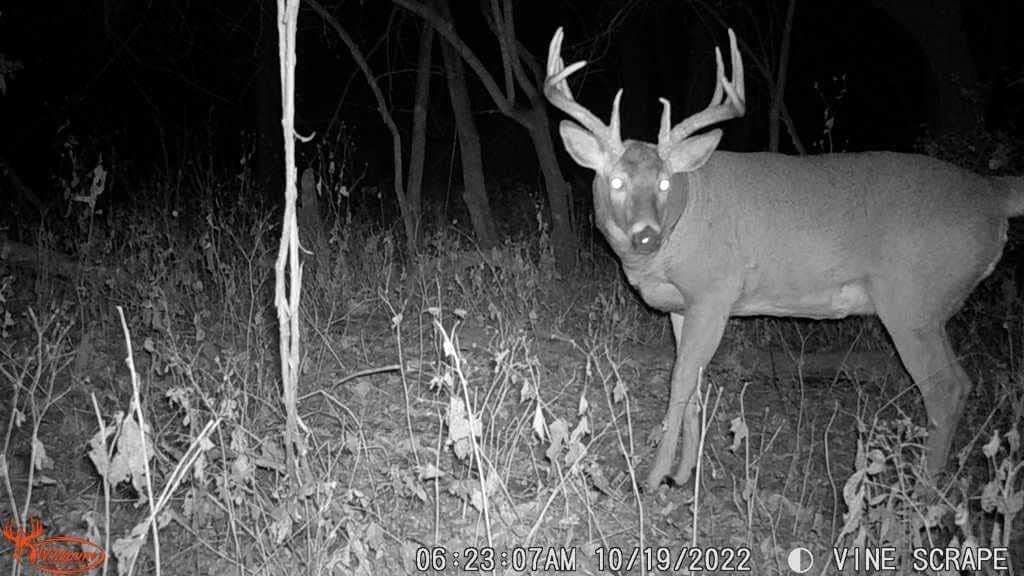
4. irudia: Example of a nighttime image captured by the camera, demonstrating its invisible IR night vision capabilities on a deer.

5. irudia: A daytime capture of a coyote, showcasing the camera's ability to detect and photograph various wildlife.
6. Mantentzea
6.1. Bateria ordezkatzea
When the battery indicator shows low power, replace all 8 AA batteries with new ones. Always use high-quality alkaline or lithium batteries for best performance, especially in cold weather.
6.2. SD txartelaren kudeaketa
Regularly check the SD card capacity. Format the SD card periodically (after backing up important files) to maintain optimal performance and prevent data corruption. A 16GB SD card can store a significant number of photos and videos, but frequent checks are recommended.
6.3. Garbiketa
- Gently wipe the camera lens and IR sensor window with a soft, lint-free cloth to remove dirt or smudges.
- Garbitu kameraren kanpoaldea iragarkiarekinamp oihal. Ez erabili produktu kimiko gogorrak edo material urratzaileak.
- Ensure the battery and SD card compartments are free of moisture and debris.
7. Arazoak
7.1. Kamera ez da pizten
- Ziurtatu bateriak behar bezala sartuta daudela, polaritate egokia errespetuz.
- Egiaztatu bateriak guztiz kargatuta dauden edo berriekin ordezkatu.
- Egiaztatu etengailua 'ON' posizioan dagoela.
7.2. No Images/Videos Captured
- Check if the SD card is properly inserted and not full. Format the SD card if necessary (after backing up data).
- Ensure the camera is in an active mode (Photo, Video, or Photo+Video).
- Adjust PIR sensor sensitivity. Obstructions or extreme temperatures can affect detection.
- Verify the camera's placement and ensure the target area is within the detection range.
7.3. Irudi/Bideo Kalitate Txarra
- Clean the camera lens and IR sensor window.
- Ensure the camera is stable and not subject to movement.
- Check battery levels; low power can affect performance.
- For night images, ensure no reflective surfaces are too close to the camera, causing IR washout.
8. Zehaztapenak
| Ezaugarri | Zehaztapena |
|---|---|
| Ereduaren izena | Mirage PRO LIGHTSOUT |
| Elementuaren eredu-zenbakia | SP32B20W18-21 |
| Argazki Ebazpena | 32 megapixelekoa |
| Bideo Ebazpena | 720p HD |
| Argiztapen-eremua | 75 oin |
| Argiztapen mota | 40 high-intensity invisible IR LEDs |
| Abiarazle Abiadura | Segundo 3/4 baino gutxiago |
| Pilak | 8 AA bateria (barne) |
| Memoria | 16GB SD card (included) |
| Konektibitate-protokoloa | SD txartela |
| Ezaugarri bereziak | Night Vision, Silent Shield Technology |
| Muntatze Mota | Zuhaitz-uhala |
| Produktuaren neurriak | 10.16 x 6.35 x 15.24 cm |
| Produktuaren pisua | 673 g |
9. Bermea eta Laguntza
Wildgame Innovations products are manufactured to high-quality standards. For specific warranty information, please refer to the warranty card included with your purchase or visit the official Wildgame Innovations website. For technical support, troubleshooting assistance beyond this manual, or to inquire about replacement parts, please contact Wildgame Innovations customer service through their official channels.