
1. Sarrera
Thank you for choosing the DELLA Umbra Series 9000 BTU WiFi Mini Split AC with Heat Pump. This manual provides essential information for the safe and efficient operation, installation, and maintenance of your unit. Please read this manual thoroughly before installation and use, and retain it for future reference.
Segurtasun informazio garrantzitsua
This appliance is designed for professional installation only. Attempting DIY installation without proper qualifications may result in injury, property damage, or voiding the warranty. Always consult a qualified HVAC technician for installation and complex maintenance tasks.
- Ziurtatu elikatze-iturria unitatearen zehaztapenekin bat datorrela.
- Ez blokeatu airearen sarrerak edo irteerak.
- Mantendu haurrak eta maskotak kanpoko unitatetik urrun.
- Turn off power before any maintenance or cleaning.
- Use only specified refrigerants (R32).
2. Produktua amaitu daview
The DELLA Umbra Series Mini Split AC is an energy-efficient system designed for cooling and heating spaces up to 450 sq.ft. It features WiFi connectivity, Alexa compatibility, and a heat pump for year-round comfort.
Ezaugarri nagusiak:
- Energia eraginkorra: 19 SEER2 rating with DC Inverter technology for up to 30% power savings.
- Funtzio adimendunak: 4D airflow (up-down, left-right), I Feel mode, 24-hour timer, sleep mode, eco energy-saving mode, multiple fan speeds, turbo function.
- Sentsore adimenduna: Remote control senses room temperature for optimal comfort and energy savings.
- Funtzionamendu isila: Operates at an ultra-silent 42 dBa.
- Estaldura zabala: Cools and heats up to 450 sq.ft, operating in temperatures as low as 19°F.
- R32 Hozgarria: Uses environmentally friendly R32 refrigerant.
Osagaien diagrama:

Figure 2.1: Main components included with the DELLA Umbra Series Mini Split AC.
Produktua View:

Figure 2.2: DELLA Umbra Series 9000 BTU WiFi Mini Split AC.
3. Konfigurazioa eta instalazioa
Professional installation is mandatory for this system. This is not a DIY mini split AC. Line-set vacuuming is required during installation. Any alteration of line-set length requires adjusting freon levels. Please consult a qualified HVAC professional for proper installation to ensure safety and optimal performance.
Instalazioa amaituview Bideoa:
Video 3.1: General guidance on installing your DELLA Mini Split AC unit. This video is for informational purposes only; professional installation is required.
Instalazio urrats nagusiak (laburpena):
- Lekuak markatzea: Use the provided template to mark the locations for the line set wall hole and the mini split bracket.
- Muntatzeko euskarria: Securely attach the mini split bracket to the wall using the provided screws. Ensure the bracket is properly leveled.
- Routing Lines: Route the line set, drain hose, and electrical wiring through the wall opening.
- Mounting Indoor Unit: Securely mount the indoor mini split unit onto the bracket.
- Taping Lines: Tape the drain hose and line sets together for a neat and organized installation.
- Securing Electrical Wires: Use zip ties to secure the electrical wires around the taped line sets and drain hose.
- Positioning Outdoor Condenser: Place the outdoor condenser unit in its designated location.
- Connecting Line Set: Connect the unit line set to the condenser line set and tighten down firmly. Use a digital torque wrench if available to ensure proper tightening according to specifications.
- Konexio elektrikoak: Connect the electrical wires (red, black, green ground) to their corresponding terminals on the condenser unit. Each wire is designated with a specific letter and number.
- Sistema xurgatzea: Connect a vacuum pump to the system via a gauge. Open the valves on the gauge and activate the vacuum. Monitor the micron reading closely and close the valves once it reaches 350 microns. Turn off the vacuum pump.
- Indarra berreskuratzea: Restore power to the outdoor unit.
- Initiating Cooling: Turn on the mini split unit and set it to the lowest cold setting. Allow a few minutes for the outdoor condenser fan to initiate.
- Opening Valves: Gradually open the high side (top) valve using a service wrench. Monitor the gauge as readings will decrease into the negative range. After the high side valve is open, promptly open the low side (bottom) valve. Monitor the gauge closely as the readings will increase, which is expected.
Your DELLA mini split unit installation is complete once these steps are followed and the unit is operating correctly.
Instalazioa Aurreview Bideoa:
3.2. bideoa: Aurrebista labur batview of the DELLA Mini Split AC installation process, highlighting key steps.
4. Funtzionamendu-argibideak
Your DELLA Umbra Series Mini Split AC can be controlled via the included remote control, the Della+ mobile app, or voice commands through Alexa.
Urruneko kontrola:

Figure 4.1: DELLA Mini Split AC Remote Control.
Use the remote control to adjust temperature, select operating modes, set fan speed, and activate special functions like Sleep Mode or Turbo. Refer to the remote control's specific instructions for detailed button functions.
Della+ Mobile App:
The Della+ app allows you to control your unit remotely, set schedules, and utilize smart features like Geo-Location.
Video 4.2: Learn how to set up and customize Geo-Location using the Della+ App for smart AC controls.
4.3. bideoa: Aurrebista labur batview demonstrating the features and interface of the Della+ App.

Figure 4.2: Della+ App Interface.
- Deskargatu: Bilatu "Della+" in your mobile app store.
- Parekatzea: Follow the in-app instructions to pair your device with the AC unit.
- Moduak: Select from Cool, Heat, Dry (dehumidify), Fan Only, or ECO mode.
- Fan abiadura: Adjust fan speed from Quiet, Low, Mid, High, to Turbo.
- Aire-fluxua: Control vertical and horizontal oscillation for optimal air distribution.
- Ordutegia eta tenporizadorea: Set weekly schedules or countdown timers for automatic operation.
- Kokapen geografikoa: Configure automatic AC control based on your location.
Voice Control (Alexa):
The unit seamlessly integrates with Amazon Alexa for convenient voice control. Ensure your Della+ app is linked to your Alexa account.

Figure 4.3: Voice Control Compatibility with Alexa.
5. Mantentzea
Regular maintenance ensures optimal performance and longevity of your DELLA Mini Split AC unit. Always disconnect power before performing any maintenance.
Iragazkien garbiketa:
The indoor unit features washable air filters. Clean them every two weeks or more frequently depending on usage and air quality.
- Ireki barruko unitatearen aurrealdeko panela.
- Kendu aire-iragazkiak.
- Garbitu iragazkiak ur epelarekin eta detergente leun batekin.
- Garbitu ondo eta utzi airean guztiz lehortzen berriro sartu aurretik.
- Itxi aurrealdeko panela.
Barruko Unitatearen Garbiketa:
Garbitu barneko unitatearen gainazala oihal leun etaamp cloth. Do not use harsh chemicals or abrasive cleaners. The unit also features PureClean tech to prevent dust buildup and defrost the indoor unit, contributing to cleaner air.
5.1. irudia: Barnekoa view of the indoor unit highlighting PureClean technology.
Kanpoko Unitatearen Garbiketa:
Periodically clean the outdoor unit's coils and fins to remove dirt, leaves, and debris. Use a soft brush or vacuum cleaner. Ensure the area around the outdoor unit is clear of obstructions for proper airflow.

Figure 5.2: Outdoor unit with gold-plated fins for corrosion prevention.
6. Arazoak
Bezeroarentzako arreta-zerbitzuarekin harremanetan jarri aurretik, mesedez berriroview arazo eta irtenbide ohikoenak hauek dira:
| Arazoa | Kausa posiblea | Irtenbidea |
|---|---|---|
| Unitatea ez da martxan jartzen. | No power, circuit breaker tripped, remote control batteries low. | Egiaztatu energia-iturria, berrezarri etengailua, ordezkatu urrutiko agintearen bateriak. |
| Hozte/berotze nahikoa ez. | Aire-iragazki zikinak, kanpoko unitatea blokeatuta, modu-ezarpen okerra, hozgarri gutxi. | Clean air filters, clear obstructions from outdoor unit, select correct mode, contact professional for refrigerant check. |
| Zarata ezohikoa unitatetik. | Pieza solteak, haizagailuaren oztopoa, ohiko funtzionamendu-hotsak (adibidez, hozgarri-fluxua). | Check for loose parts or obstructions. If noise persists or is unusual, contact support. |
| Barneko unitatetik ur-ihesak. | Blocked drain hose, improper installation angle. | Egiaztatu eta garbitu hustubideko mahuka. Arazoak jarraitzen badu, profesional batek berriro instalatu beharko du. |
| Urruneko kontrola ez dabil. | Batteries dead, remote out of range, signal obstruction. | Replace batteries, ensure clear line of sight to indoor unit, operate within range. |
For issues not listed here or if solutions do not resolve the problem, please contact DELLA customer support.
7. Zehaztapenak
| Ezaugarri | Xehetasuna |
|---|---|
| Modelo zenbakia | 9K1VR-19S-JPB-I+O |
| Tamaina | 9,000 BTU - 115V -- 19 SEER2 |
| Hozteko Ahalmena | 9000 BTU/h |
| Berokuntza Ahalmena | 10000 BTU/h |
| Elikatze Hornidura | 115V~/60Hz/1PH |
| Sarrerako potentzia maximoa | 1200 W |
| Aire fluxuaren bolumena | 560 m³/h |
| Max. Fusible Tamaina | 20A |
| Soinu Maila | 42 dezibelio |
| Produktuaren neurriak | 31.18 x 7.91 x 11.5 hazbete |
| Elementuaren pisua | 58.6 kilo |
| Ezaugarri bereziak | Alexa and WiFi Enabled, DeHumidifier, Fast Cooling and Heating, Remote Control |
| Hozgarri mota | R32 |

7.1 irudia: Produktuaren neurriak.
8. Bermea eta Laguntza
DELLA is committed to providing high-quality products and excellent customer service.
Bizi osorako berme mugatua:
Your DELLA Umbra Series Mini Split AC comes with a limited lifetime warranty, offering peace of mind against manufacturing defects. This warranty is designed to cover the product for its expected lifespan under normal use and service. Please refer to the warranty card included with your product for full terms and conditions.

Figure 8.1: DELLA Lifetime Coverage.
Bezeroarentzako laguntza:
Our dedicated customer support team is available to assist you with any questions or concerns regarding your DELLA product.
- Telefono-laguntza: Available Monday - Friday, 6 AM - 4 PM PST.
- Zuzeneko txata: 24/7 support for immediate assistance.
Please have your model number (9K1VR-19S-JPB-I+O) and purchase information ready when contacting support.
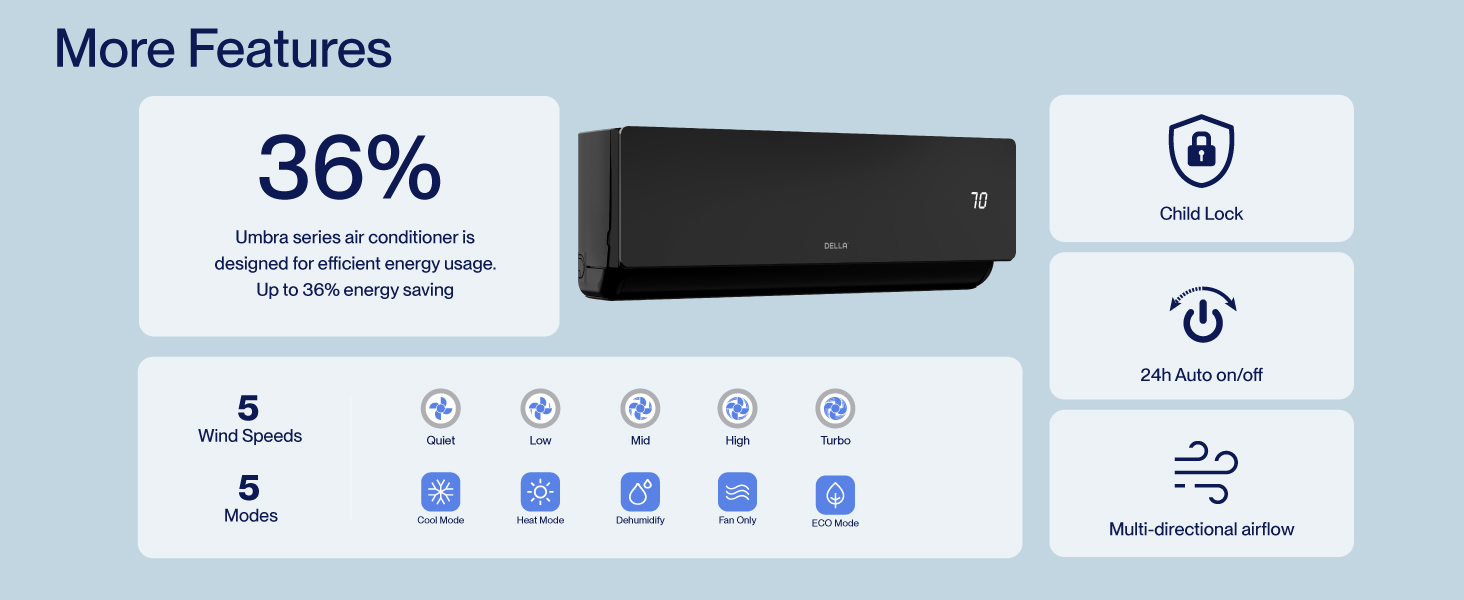
Figure 8.2: DELLA Customer Support Options.