Sarrera
Thank you for choosing Cadrim Puck Lights. This manual provides detailed instructions for the safe and efficient use of your new 6-pack of 13-color changeable LED dimmable under cabinet lights with two wireless remote controls. These battery-powered lights are designed to enhance various indoor spaces with customizable illumination.
Kutxan dagoena
Mesedez, egiaztatu osagai guztiak daudela instalazioarekin jarraitu aurretik.
- 6 x Cadrim Puck Lights
- 2 x Haririk gabeko urrutiko aginte
- 12 x Muntatzeko torlojuak
- 8 x Adhesive Pads for mounting
- 1 x Erabiltzailearen eskuliburua

Image: Contents of the Cadrim Puck Lights package, including six puck lights, two remote controls, screws, and adhesive pads.
Konfigurazio Argibideak
1. Bateriaren instalazioa
Each puck light requires 3 AAA batteries (not included). We recommend using high-quality alkaline batteries for optimal performance.
- Twist the back cover of the puck light counter-clockwise to open it.
- Insert 3 AAA batteries into the battery compartment, ensuring correct polarity (+/-).
- Align the back cover and twist clockwise to securely close it.

Image: Step 1 - Twist to open the back cover of the puck light.
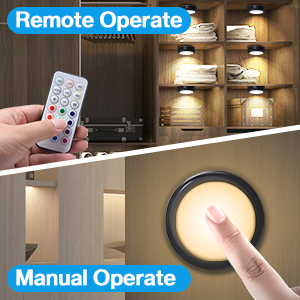
Image: Step 2 - Install 3 AAA batteries into the compartment.
2. Argiak muntatzea
The puck lights offer two installation methods: using screws or adhesive pads.
Adhesive Pad Installation:
- Clean the surface where you intend to mount the light, ensuring it is dry and free of dust or grease.
- Peel off one side of the adhesive pad and attach it firmly to the back of the puck light.
- Peel off the other side of the adhesive pad and press the light firmly onto the desired surface for at least 30 seconds.
- For optimal adhesion, allow 6 hours before applying significant pressure or adjusting the light.
Torlojuen instalazioa:
- Twist the back cover of the puck light counter-clockwise to separate it from the light unit.
- Position the back cover on the desired mounting surface and mark the screw holes.
- Use the provided screws to fix the back cover securely to the surface.
- Align the puck light unit with the fixed back cover and twist clockwise until it locks into place.
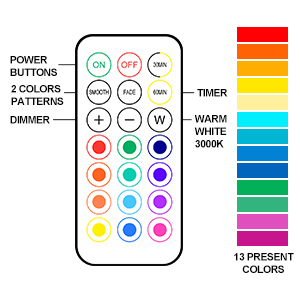
Image: Step 3 - Attach adhesive pad to the back of the light.
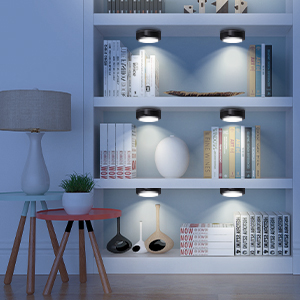
Image: Step 4 - Stick the light to the surface and press firmly.
Funtzionamendu-argibideak
1. Urruneko agintea erabiltzea
The included wireless remote controls allow for convenient operation of your puck lights.
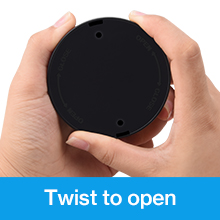
Image: Remote control layout with buttons for power, dimming, colors, and modes.
- ON/OFF: Press the 'ON' button to turn on the lights, and 'OFF' to turn them off.
- Distira doitzea: Use the '+' and '-' buttons to increase or decrease the brightness (10 levels).
- Kolore aukeraketa: Choose from 13 different colors using the color buttons on the remote.
- Aurrez ezarritako koloreak: The 'W' button activates warm white light (2800-3300K). Red, Green, and Blue buttons activate their respective colors directly.
- Modu dinamikoak:
- LEUNA: Enables an automatic color transformation mode, smoothly transitioning between colors.
- LAUSGARRIA: Activates a breathing light mode, where colors gently fade in and out.
- Tenporizadorearen funtzioa: Press '30MIN' or '60MIN' to set the lights to automatically turn off after 30 or 60 minutes, respectively. The lights will restart at the last used setting.
2. Manual Control (Touch)
Each puck light can also be controlled directly by touch.
- ON/OFF: Short press the center of the lampshade to turn the light on or off.
- Basic Color Change: Short press the center of the lampshade repeatedly to cycle through the four basic preset colors: warm white, red, green, and blue.
- Distira doitzea: Long press the center of the lampshade to adjust the brightness of the current color.

Image: A hand demonstrating touch control on a puck light mounted under a cabinet.
3. Produktuaren Aplikazioa Examples
Cadrim Puck Lights are versatile and can be used in various settings to create desired ambiance or provide task lighting.
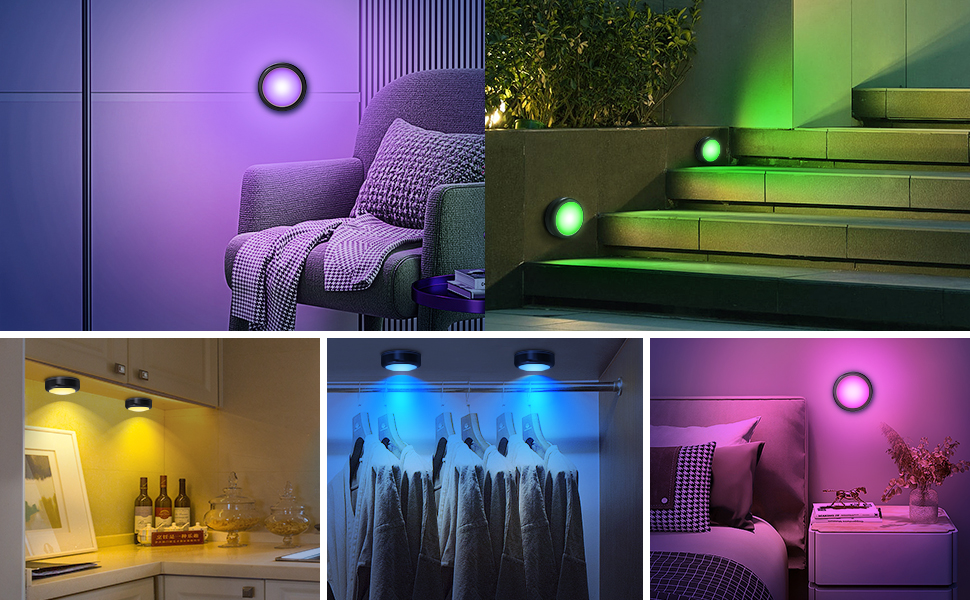
Image: Cadrim Puck Lights installed under kitchen cabinets, providing warm white illumination.
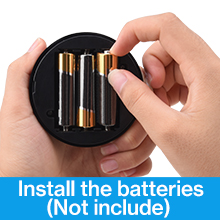
Image: Cadrim Puck Lights illuminating a bookshelf with a soft glow.
4. Produktu Ofizialen Bideoak
Watch these official videos from the seller for more insights on installation and features.
Video: Demonstration of Cadrim Under Cabinet Lights in Black. This video showcases the lights installed under cabinets and highlights their features and functionality.
Video: Cadrim RGB Puck Lights with Remote Review. This video provides a detailed overview of the RGB puck lights, demonstrating their color-changing capabilities and remote control functions.
Mantentzea
1. Bateria ordezkatzea
When the lights dim significantly or stop responding, it's time to replace the batteries. Follow the battery installation steps in the 'Setup Instructions' section.
2. Garbiketa
To clean the puck lights, gently wipe them with a soft, dry cloth. Avoid using abrasive cleaners or solvents, as these may damage the finish or electronic components. The lights are not water-resistant; do not immerse them in water.
Arazoak konpontzea
- Argiak ez dira pizten:
- Egiaztatu bateriak behar bezala sartuta dauden, polaritate egokia errespetatuz.
- Ordeztu bateria zaharrak AAA bateria berriekin.
- Urruneko kontrola ez dabil:
- Ziurtatu urrutiko agintearen eta argien artean oztoporik ez dagoela.
- Ordeztu bateria urrutiko agintean.
- Ensure the remote is pointed directly at the lights for best reception.
- Itsasgarrizko alfonbrak itsaspena galtzen ari dira:
- Ensure the mounting surface was clean and dry before initial application.
- For textured surfaces or areas with high humidity (like kitchens), consider using the screw installation method for a more secure hold.
- Replace with stronger double-sided adhesive tape if necessary.
- Argiak ilunak dira:
- Increase brightness using the '+' button on the remote.
- Ordeztu bateriak baxuak badira.
Zehaztapenak
| Marka | Cadrim |
| Kolorea | Beltza |
| Materiala | Polikarbonatoa |
| Argi-tresnaren forma | Puck |
| Gela Mota | Sukaldea |
| Produktuaren neurriak | 1.57"L x 1.57"Z x 1.57"A |
| Erabilera espezifikoak | Kabinete |
| Barruko/Kanpoko erabilera | Barruan |
| Energia iturria | Bateriaren bidez |
| Instalazio mota | Gainazaleko muntaia |
| Ezaugarri Berezia | Kolorea aldatzen, lausotu daiteke |
| Kontrol-metodoa | Urrunekoa |
| Argi iturri mota | LED |
| Argi-iturri kopurua | 6 |
| liburukiatage | 4.5 Volt |
| Argi Kolorea | Warm white, red, green, blue (13 color options via remote) |
| Elementuaren pisua | 0.77 libra (12.3 ontza) |
| Wattage | 1.2 watt |
| Distira | 55 lumen |
| Uraren Erresistentzia Maila | Ez Urarekiko Erresistentea |
Bermea eta Laguntza
For warranty information or technical support, please refer to the product packaging or contact Cadrim customer service directly. Keep your purchase receipt for warranty claims.