
1. Sarrera
Thank you for choosing the Speaka Professional SP-TMS-200 Monitor Stand. This manual provides essential information for the safe and efficient installation, operation, and maintenance of your monitor stand. Please read these instructions carefully before assembly and retain them for future reference.
Segurtasun Informazioa
- Ziurtatu osagai guztiak daudela eta kalterik gabe muntatu aurretik.
- Do not exceed the maximum weight capacity or screen size specified for this stand.
- Always use appropriate tools and follow assembly steps precisely.
- Mantendu haurrak eta maskotak urrun muntatzean.
- If you encounter any difficulties, consult a qualified professional.
2. Produktuaren ezaugarriak
The Speaka Professional SP-TMS-200 Monitor Stand offers enhanced ergonomics and organization for your workspace. Key features include:
- 10 Height Adjustments: Achieve optimal viewing height for improved comfort.
- 360° Rotatable VESA Plate: Allows for flexible screen orientation (landscape or portrait).
- Tool-Free Adjustment: Easily modify settings without additional tools.
- Anti-Slip Silicone Pads: Provides enhanced stability and protects your desk surface.
- Cable Clip: Organizes cables for a tidy and professional appearance.
3. Paketearen edukia
Please verify that all parts are included in your package. Refer to the product packaging for a detailed list of components and hardware.

1. irudia: Aurrealdea view of the Speaka Professional SP-TMS-200 Monitor Stand, showing the base, adjustable pole, and VESA mounting plate.
4. Konfiguratzeko argibideak
Follow these general steps to assemble your monitor stand. Specific hardware and detailed steps may vary; always refer to the included assembly guide for precise instructions.
- Deskonprimitu osagaiak: Kontu handiz atera pieza guztiak paketetik eta jarri gainazal garbi eta lau batean.
- Erantsi oinarria: Secure the vertical pole to the base using the provided screws and tools. Ensure it is firmly tightened.
- Mount VESA Plate: Attach the VESA mounting plate to the back of your monitor using the appropriate screws for your display. Ensure the screws are not overtightened.
- Install Monitor: Carefully slide the monitor (with the attached VESA plate) onto the top of the vertical pole. Secure it in place according to the stand's design, typically with a locking screw or mechanism.
- Kableen kudeaketa: Route your monitor cables through the integrated cable clip on the stand's pole for a neat setup.

2. irudia: Angelua view of the monitor stand, highlighting the height adjustment markings on the vertical pole.
5. Funtzionamendu-argibideak
Once assembled, the monitor stand allows for various adjustments to optimize your viewesperientzia.
Altuera doitzea
The stand features 10 height settings. To adjust the height, loosen the locking mechanism on the vertical pole, slide the monitor to your desired height, and then securely tighten the locking mechanism. Ensure the monitor is stable after adjustment.
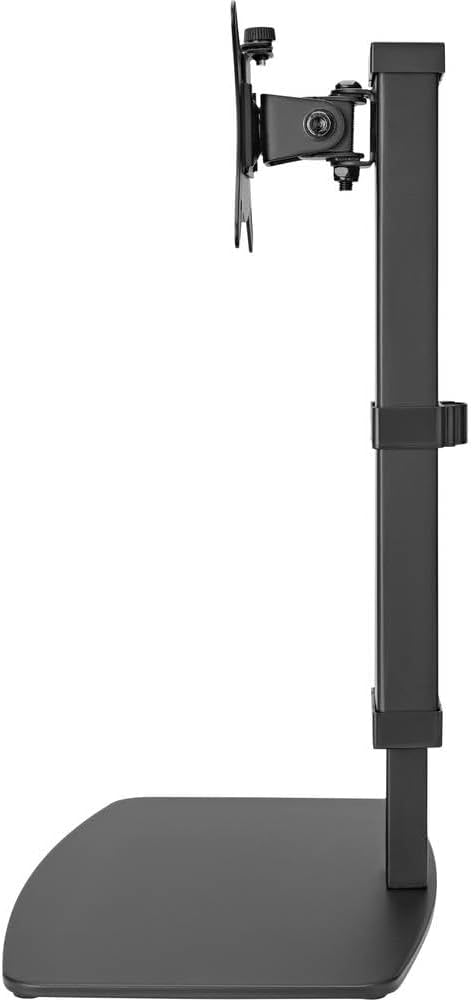
3 irudia: Albokoa view of the monitor stand, illustrating the range of height adjustment possible with the vertical pole.
Tilt and Swivel Adjustment
The VESA plate allows for tilting and swiveling your monitor. Gently adjust the monitor to your preferred angle. The 360° rotation feature enables easy switching between landscape and portrait orientations.
Kableen kudeaketa
Utilize the integrated cable clip on the rear of the stand's pole to route and secure your monitor and power cables. This helps maintain a clean and organized workspace.
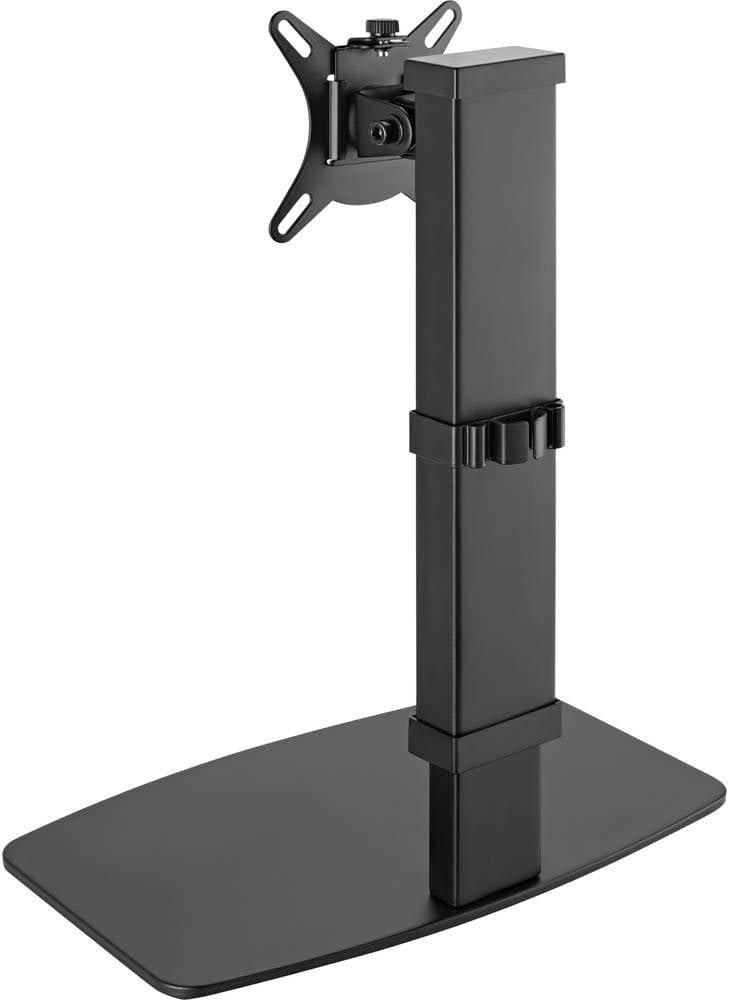
4. irudia: Atzekoa view of the monitor stand, showing the cable management clip on the vertical pole.
6. Mantentzea
Regular maintenance ensures the longevity and optimal performance of your monitor stand.
- Garbiketa: Garbitu euskarria zapi leun eta lehor batekin. Orban egoskorren kasuan, garbitu apur batamp Xaboi leun batekin zapi bat erabil daiteke, eta ondoren lehortu. Saihestu garbitzaile edo disolbatzaile urratzaileak.
- Ikuskapenak: Aldian-aldian egiaztatu torloju eta konexio guztiak ondo estututa daudela ziurtatzeko. Beharrezkoa bada, berriro estutu.
- Mugimendua: Ensure the height adjustment mechanism moves smoothly. Do not force any adjustments.
7. Arazoak
If you encounter issues with your monitor stand, consider the following common solutions:
- Euskarriak ezegonkorra da: Ensure all assembly screws are securely tightened. Verify the monitor's weight and size are within the stand's specifications. Check that the anti-slip pads on the base are intact and making full contact with the surface.
- Altuera doitzeko zailtasuna: Ensure the height locking mechanism is fully disengaged before attempting to adjust. Do not apply excessive force. Check for any obstructions.
- Monitor not level: Check that the VESA plate is securely attached to both the monitor and the stand. Adjust the tilt mechanism if necessary.
Arazoak jarraitzen badute, jarri harremanetan bezeroarentzako arreta-zerbitzuarekin.
8. Zehaztapenak
| Marka | Speaka Professional |
| Modelo zenbakia | SP-10092880 |
| Gailu bateragarriak | Monitors (17" to 32") |
| Altuera doitzea | 10 ezarpen |
| VESA Plate Rotation | 360° |
| Kolorea | Various (typically black) |
9. Bermea eta Laguntza
This Speaka Professional product comes with a 1 urteko bermea for spare parts, as per the manufacturer's terms.
For technical support, warranty claims, or further assistance, please refer to the contact information provided with your purchase or visit the official Speaka Professional webgunea.