
1. Sarrera
This manual provides detailed instructions for the installation, operation, and maintenance of your Voktta 100A DC Power Meter. This device is designed to accurately measure DC voltage, current, power, and energy consumption in various applications, including RVs, solar systems, and battery monitoring. Please read this manual thoroughly before use to ensure proper function and safety.
2. Segurtasun informazioa
- Ensure all power is disconnected before installation or wiring to prevent electric shock.
- This device is intended for DC circuits only. Do not connect to AC power.
- Observe correct polarity (+/-) during wiring to avoid damage to the meter and connected equipment.
- Use appropriate wire gauges (30-12 AWG copper wires recommended) for connections to handle the expected current.
- Ez gainditu gehienezko bolumenatage (100V DC) or current (100A) ratings.
- Mantendu gailua hezetasunetik, hautsetik eta muturreko tenperaturetatik urrun.
- Do not attempt to disassemble or modify the meter. Refer all servicing to qualified personnel.
3. Produktua amaitu daview
3.1 Ezaugarri nagusiak
- Neurketa-tarte zabala: DC boltage 6.5-100V, current 0-100A, power 0-10kW, energy 0-9999kWh.
- LCD pantaila: Bolumena aldi berean erakusten dutage, korrontea, potentzia eta energia.
- Power-off Data Storage: All parameters are automatically saved when power is lost.
- Energy Reset Function: Accumulated energy data can be manually reset.
- Over-threshold Alarm: Backlight and power display flash if active power exceeds a set threshold.
- Manual Backlight Control: Backlight can be manually turned on or off.
3.2 Produktuaren neurriak

1. irudia: Voktta 100A DC Power Meter with labeled dimensions (89.6mm x 44.6mm x 24.4mm).
3.3 Bistaratzeko funtzioak
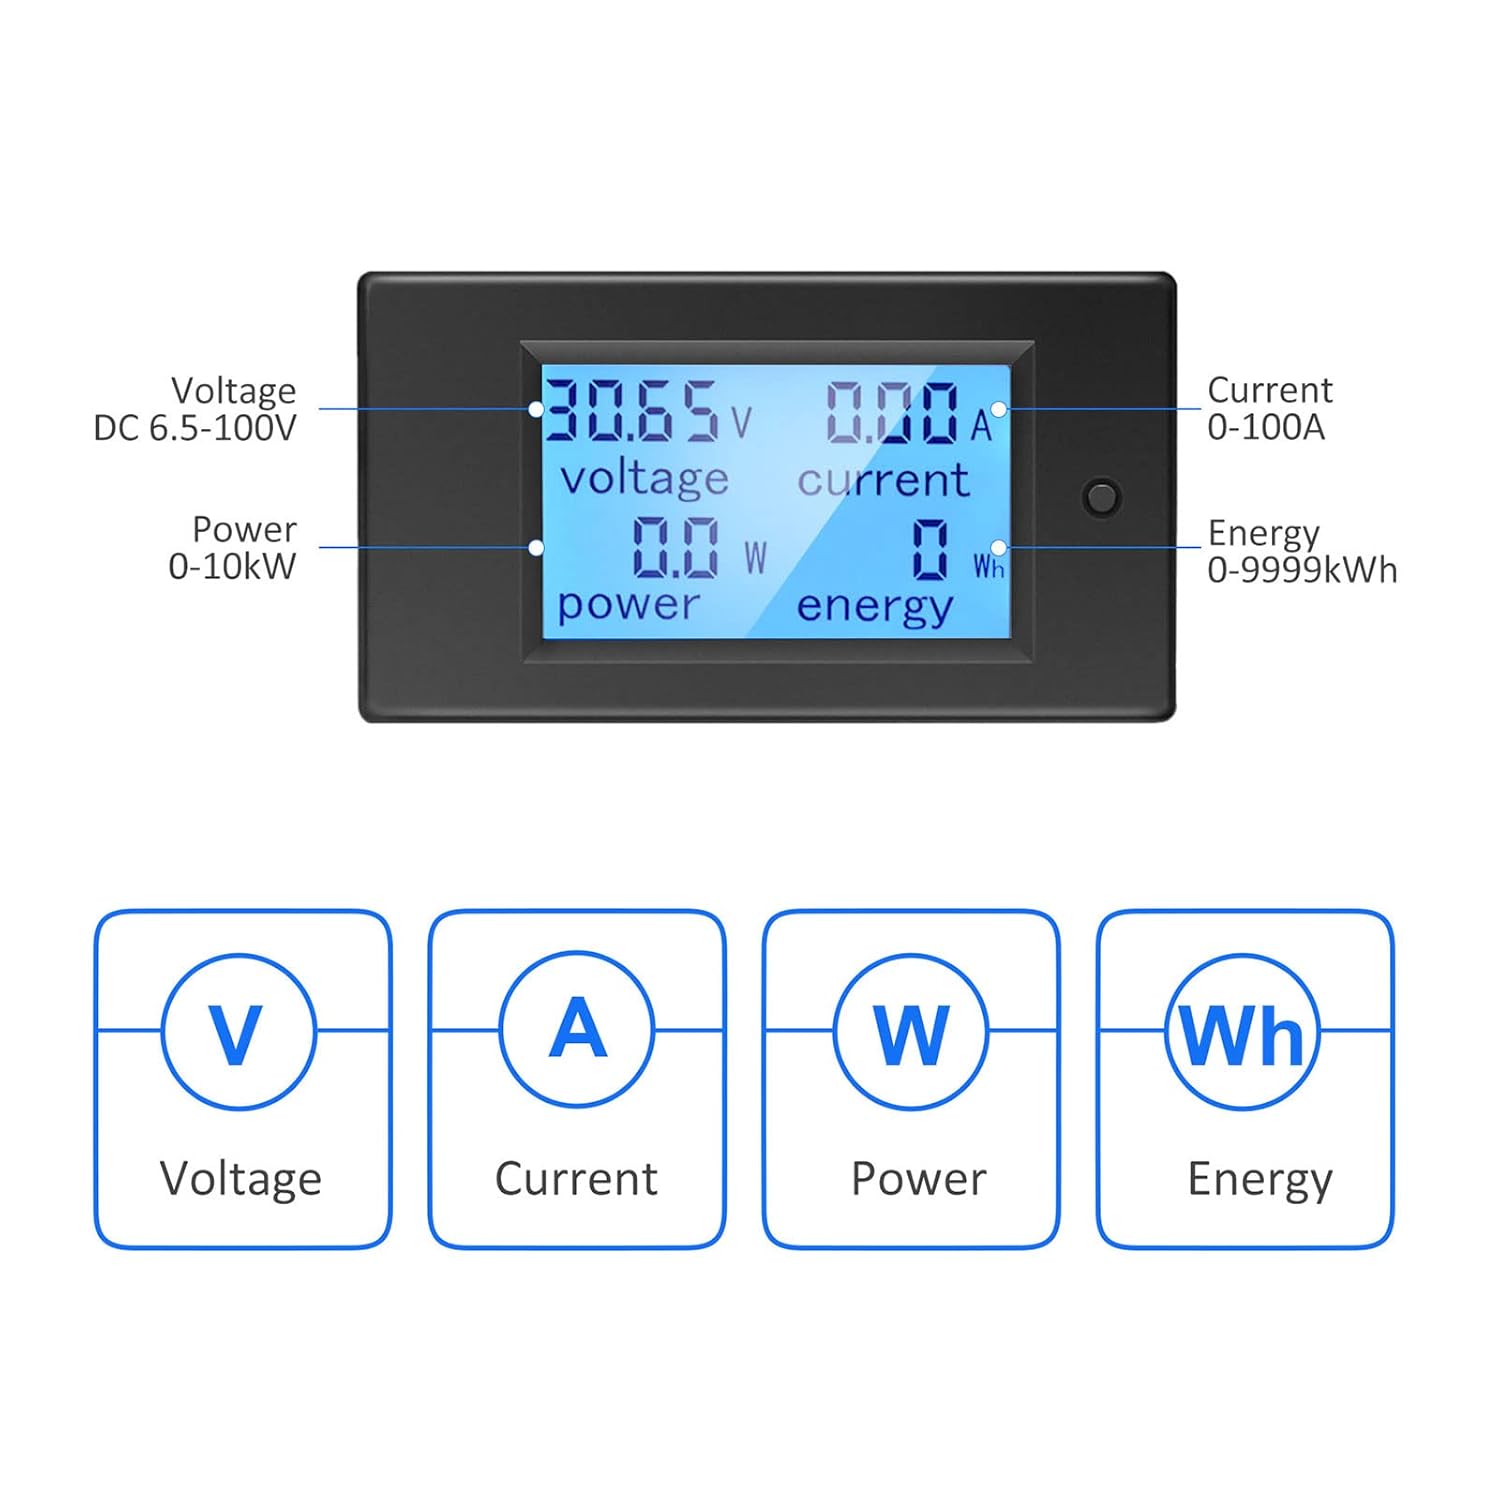
2. irudia: LCD display showing Voltage (V), Current (A), Power (W), and Energy (Wh) measurements.
4. Zehaztapenak
| Parametroa | Balioa |
|---|---|
| Modelo zenbakia | B0B87458J7 |
| Bolumen eragileatage Barrutia | Korronte zuzena 6.5 V - 100 V |
| Uneko Neurketa-Eremua | 0 - 100A |
| Potentzia neurtzeko tartea | 0 - 10 kW |
| Energy Measurement Range | 0 - 9999kWh |
| Neurketa Mota | Voltmeter, Ammeter, Wattmeter, Energy Meter |
| Bistaratzeko mota | LCD atzeko argiarekin |
| Dakarten osagaiak | 1*Digital Voltmeter Ammeter DC 100A, 1*100A/75mV Shunt |
| Compliant Specifications | IEC 61010-1 |
| Produktuaren neurriak (L x W x H) | 10 x 10 x 10 millimeters (approximate) |
| Pisua | 220 grams (approximate) |
| Jatorrizko Herrialdea | Txina |
5. Konfigurazioa eta instalazioa
5.1 Basic Wiring Instruction
The meter requires a 100A/75mV shunt for current measurement. The shunt must be installed in series with the load. The meter itself connects with four wires (not included) to the shunt and the power source.
- 1. urratsa: Install the 100A/75mV shunt in series with the DC circuit, between the power source (e.g., battery) and the load. Ensure correct polarity.
- 2. urratsa: Connect the meter to the shunt and the power source using four wires. The meter's small wires are for its own power supply and voltage measurement, while the shunt handles the main current. Recommended wire gauge for connections to the meter is 30-12 AWG copper wires.

3. irudia: Basic wiring diagram for the Voktta DC Power Meter with shunt.
5.2 Solar System Wiring Instruction
This diagram illustrates wiring for a solar system where an inverter connects directly to the battery. The meter's four wires do not carry large current; they are for measurement and power. Any copper wire from 30 AWG to 12 AWG can be used for these connections.

4. irudia: Solar system wiring diagram with the Voktta DC Power Meter.
You do not need to wire both meters if monitoring a solar system; just connect the voltmeter(s) to monitor the specific parameters you require.
6. Funtzionamendu-argibideak
- Piztu: Once correctly wired, the meter will power on and display real-time voltage, current, power, and accumulated energy.
- Atzeko argiaren kontrola: The backlight can be manually toggled on or off using the button on the front panel.
- Over-threshold Indication: If the active power exceeds a predefined threshold, the backlight and power display will flash to alert the user.
- Energy Data Reset: To reset the accumulated energy (kWh) data, press and hold the button on the front panel for approximately 5 seconds until the energy reading resets to zero.
- Itzaltzeko memoria: The meter automatically saves all settings and accumulated energy data when power is disconnected. This data will be restored upon power-up.
7. Mantentzea
- Garbitu pantaila eta casinGarbitu zapi leun eta lehor batekin. Ez erabili garbitzaile edo disolbatzaile urratzailerik.
- Regularly check all wiring connections to ensure they are secure and free from corrosion.
- Ziurtatu funtzionamendu-ingurunea zehaztutako tenperatura eta hezetasun tarteen barruan dagoela.
8. Arazoak
- Ez dago pantailarik:
- Check if the power supply to the meter is connected correctly and within the 6.5-100V DC range.
- Egiaztatu kableatu-konexio guztiak ondo daudela.
- Irakurketa okerrak:
- Ensure the shunt is correctly installed in series with the load and its connections are tight.
- Check for correct polarity of all connections.
- Verify that the current does not exceed the 100A rating of the shunt and meter.
- Backlight Flashing:
- This indicates that the active power has exceeded the set threshold. This is a normal warning function.
- Energy Data Not Resetting:
- Ensure you are pressing and holding the reset button for at least 5 seconds.
9. Laguntza
If you encounter any issues or have questions not covered in this manual, please do not hesitate to contact Voktta customer support. We are committed to providing assistance and will do our best to help you resolve any problems.