1. Sarrera
This manual provides detailed instructions for the installation, operation, and maintenance of your SOGTICPS BL912-40A-WIFI MPPT Solar Charge Controller. This advanced charge controller is designed for off-grid solar applications, compatible with 12V/24V battery systems, including Gel, Flooded, and Lithium types. It features efficient MPPT tracking, an LCD display, dual USB outputs, and WiFi connectivity for remote monitoring.
Ezaugarri nagusiak:
- Innovative MPPT (Maximum Power Point Tracking) technology for up to 99% tracking efficiency.
- 12V/24V sistemaren bolumena automatikoatage detekzioa.
- Integrated LCD display for real-time monitoring of temperature, charge current, discharge current, and power generation.
- Comprehensive system protection: over-temperature, over-current, short-circuit, open-circuit, and reverse polarity.
- Compatibility with Gel, Flooded, and Lithium battery types.
- Dual 5V 2A USB outputs for charging mobile devices.
- WiFi communication for remote parameter adjustment and monitoring via a dedicated application.
- Industrial-grade main control chip with 16AD sampling zehaztasuna.
- Two-way MOS tube anti-reverse circuit for high-power charging and low heat generation.
2. Segurtasun-argibideak
Mesedez, irakurri arretaz argibide guztiak instalatu eta erabili aurretik. Argibide hauek ez jarraitzen badituzu, unitateari kalteak, lesio pertsonalak edo ondasunen kalteak eragin ditzake.
- Ziurtatu konexio guztiak estuak eta zuzenak direla gehiegizko bolumena saihesteko.tage erorketa eta arrisku potentzialak.
- Install the controller indoors, away from direct sunlight, high temperatures, and moisture.
- Kontrolatzaileak beroa sortzen du funtzionamenduan zehar; ziurtatu aireztapen egokia dagoela.
- Connect the battery first, then the solar panel, and finally the load. Disconnect in the reverse order: load, solar panel, then battery.
- Do not connect any inverter directly to the load terminals of the controller.
- Ensure the solar panel's open-circuit voltage (Voc) does not exceed the controller's maximum input voltage.
- Use appropriate circuit breakers or fuses for the battery and solar panel circuits.
- Mantendu haurrak eguzki-energia sistematik urrun.
- Ez saiatu kontrolatzailea zeuk desmuntatzen edo konpontzen. Jarri harremanetan langile kualifikatuekin zerbitzua jasotzeko.
3. Produktua amaitu daview
The SOGTICPS BL912-40A-WIFI solar charge controller features a robust design with an intuitive LCD display and multiple connection points.

Irudia: Aurrealdea view of the SOGTICPS BL912-40A-WIFI Solar Charge Controller, highlighting its security protection features such as short-circuit, overload, overcharge, under-voltage, eta gain-boltagbabesa
Osagaiak:
- LCD pantaila: Shows real-time system status and parameters.
- Kontrol-botoiak: For navigating menus and setting parameters.
- Solar Panel Input Terminals: Connect to solar panels.
- Bateriaren terminalak: Connect to the battery bank.
- Kargatu irteerako terminalak: Connect to DC loads.
- Dual USB Ports (5V 2A): Kanpoko gailuak kargatzeko.
- WiFi antena: Haririk gabeko komunikaziorako.
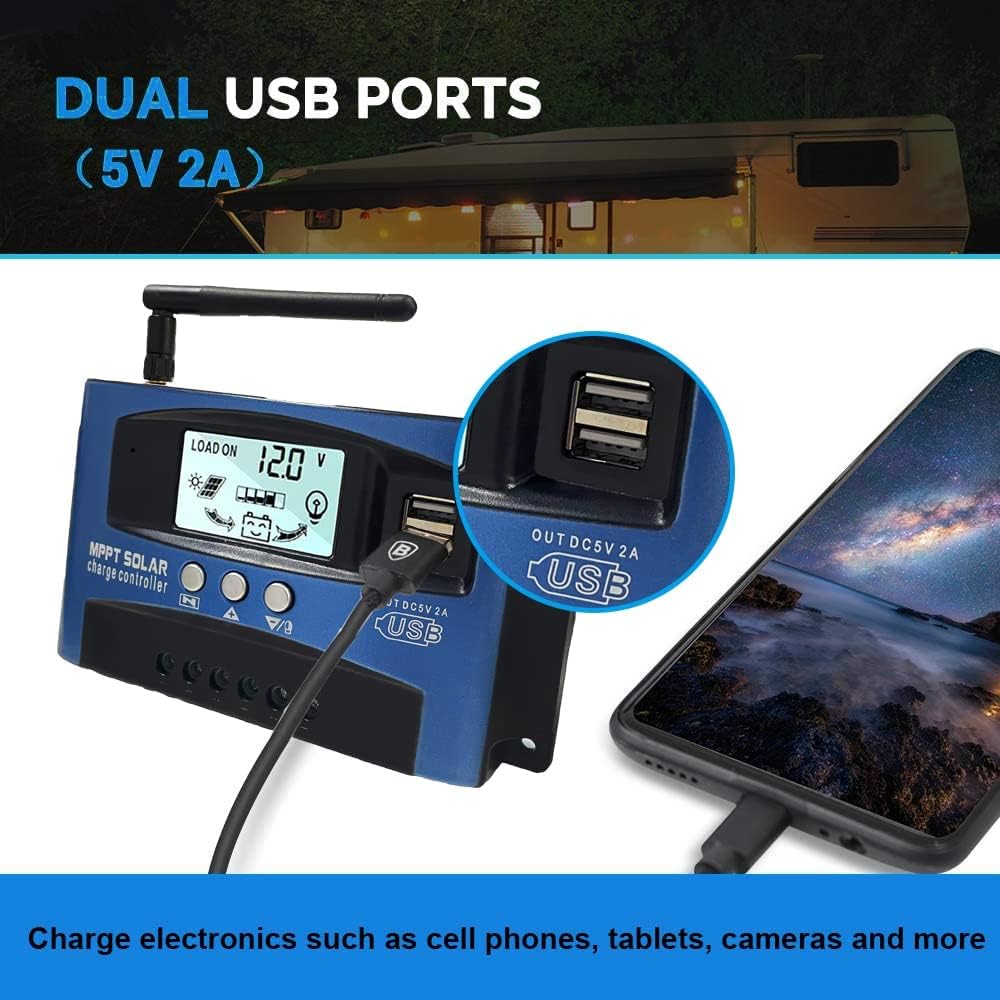
Irudia: Gertutik view of the SOGTICPS BL912-40A-WIFI Solar Charge Controller, showing the dual 5V 2A USB ports in use, charging a smartphone.
4. Konfigurazioa eta instalazioa
Proper installation is critical for the safe and efficient operation of your solar charge controller. Follow the connection order precisely.
Konexio Ordena:
- Connect the Battery First: Connect the battery to the charge controller's battery terminals. Ensure correct polarity (+ to + and - to -). The controller will automatically detect 12V or 24V system voltage.
- Eguzki-panelak konektatu: Connect the solar panels to the charge controller's solar input terminals. Again, observe correct polarity.
- Connect DC Load (Optional): Connect your DC loads to the load output terminals.
Garrantzitsua: When disconnecting, reverse the order: first disconnect the load, then the solar panels, and finally the battery. Failure to follow this order may damage the controller or other components.
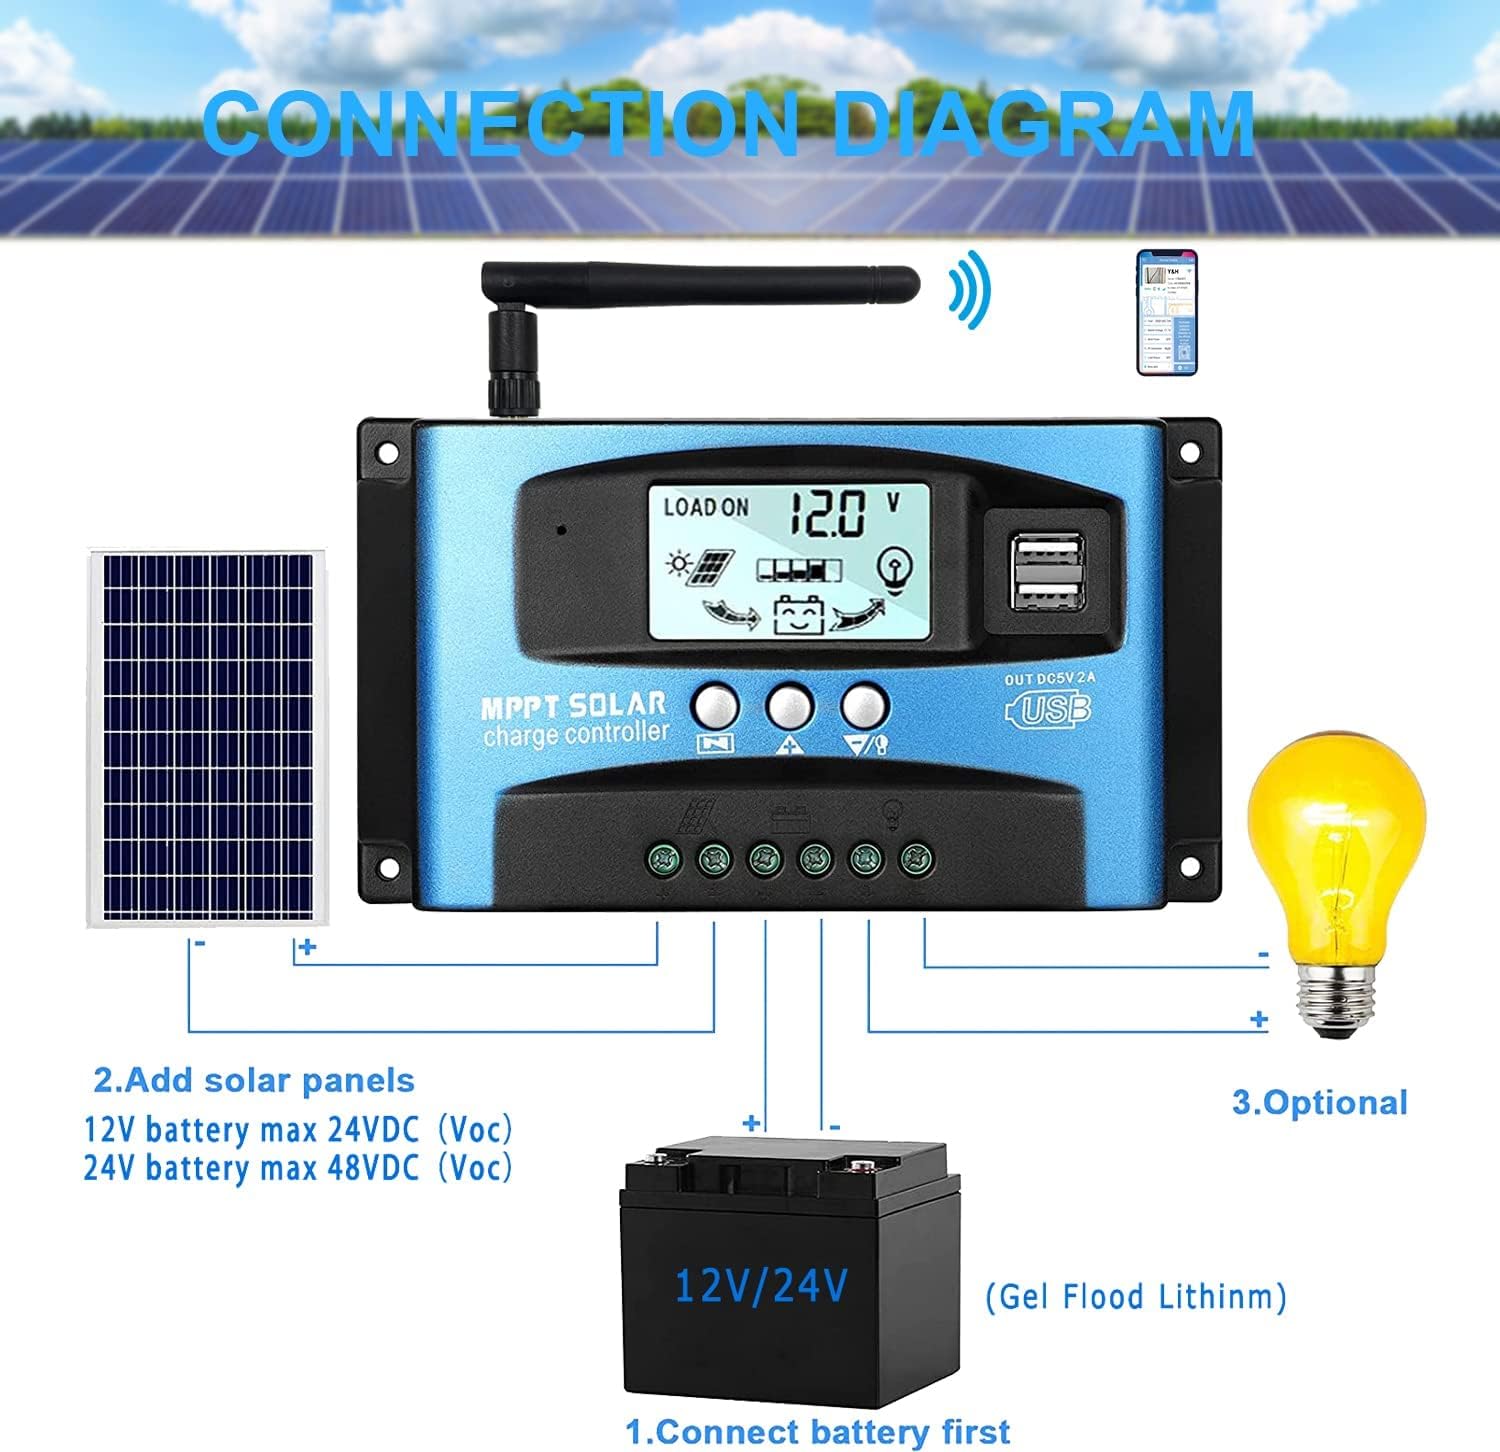
Irudia: A clear connection diagram illustrating the proper wiring sequence for the solar charge controller, connecting to a battery, solar panels, and an optional DC load. It emphasizes connecting the battery first.
Bateriaren bateragarritasuna:
The controller is compatible with various battery types, including Gel, Flooded (Lead-Acid), and Lithium batteries. Ensure the correct battery type is selected in the controller settings for optimal charging.

Irudia: Visual representation showing the SOGTICPS BL912-40A-WIFI Solar Charge Controller's compatibility with Gel, Flooded, and Lithium battery types, indicated by arrows pointing between battery icons and the controller.
5. Funtzionamendu-argibideak
LCD Display and Navigation:
The LCD provides real-time information about your solar system. Use the control buttons to navigate through the display interfaces and adjust parameters.

Irudia: A series of LCD screen captures demonstrating the browsing interface and parameter setting process for the SOGTICPS BL912-40A-WIFI Solar Charge Controller. It shows main display, float voltage, discharge reconnect, discharge stop, load work mode, battery type, and work parameter display.
- Nabigazio interfazea: Sakatu MENUA button to cycle through different display interfaces, showing information such as main display, float voltage, discharge reconnect voltage, deskarga-geldialdi bolumenatage, load work mode, battery type, and other work parameters.
- Ezartzeko parametroak: In interfaces 2-8, press the MENUA button to enter the setting mode. Use the UP eta BEHERA buttons to adjust the values. Press MENUA berriro baieztatzeko eta ezarpen modutik irteteko.
WiFi monitorizazioa:
The controller supports WiFi connectivity, allowing you to monitor and control your solar system remotely via a smartphone application.

Irudia: The SOGTICPS BL912-40A-WIFI Solar Charge Controller shown alongside a smartphone displaying its monitoring application interface. This illustrates the wireless monitoring capability of the PV system.
- Aplikazioaren instalazioa: Download the dedicated application for your smartphone (Android). Refer to the QR code or instructions provided with the product for app download.
- Konexioa: Follow the in-app instructions to connect your controller to your local WiFi network.
- Urruneko monitorizazioa: Konektatu ondoren, egin dezakezu view real-time data such as temperature, charge current, discharge current, accumulated power generation, battery voltage, and adjust charging modes from anywhere.
6. Mantentzea
Mantentze-lan erregularrak zure eguzki-karga-kontrolagailuaren iraupena eta errendimendu optimoa bermatzen ditu.
- Egiaztatu konexioak: Aldian-aldian ikuskatu kableatu-konexio guztiak, ondo estuak eta korrosiorik gabe daudela ziurtatzeko.
- Kontrolatzaile garbia: Mantendu kontrolatzailea garbi eta hautsik eta hondakinik gabe. Erabili zapi lehor bat garbitzeko.
- Aireztapena: Ensure the installation area has adequate ventilation to prevent overheating.
- Bateriaren ikuskapena: Regularly check battery terminals for corrosion and ensure battery fluid levels (for flooded batteries) are correct.
- Sistemaren jarraipena: Use the LCD display or the WiFi app to monitor system performance and identify any anomalies early.
7. Arazoak
Eguzki-karga kontrolagailuarekin arazoak badituzu, jo ezazu honako arazo eta irtenbide ohikoenei:
| Arazoa | Kausa posiblea | Irtenbidea |
|---|---|---|
| Ez dago pantaila LCDan | Bateria ez dago konektatuta edo bolumen baxuatage; alderantzizko polaritatea. | Egiaztatu bateriaren konexioak eta boltage. Ziurtatu polaritate zuzena dagoela. |
| Bateria ez da kargatzen | Solar panels not connected; insufficient sunlight; faulty solar panel; incorrect battery type setting. | Check solar panel connections and ensure adequate sunlight. Verify solar panel functionality. Confirm battery type setting. |
| Karga ez dabil | Load disconnected; battery low voltage protection; overload protection. | Check load connections. Charge battery. Reduce load or check for short circuits. |
| WiFi app issues (connection/language) | Incorrect WiFi setup; app region/language settings; firmware issues. | Ensure correct WiFi network and password. Check app settings for language. Contact support if issues persist. |
8. Zehaztapenak
| Parametroa | Balioa |
|---|---|
| Eredua | BL912-40A-WIFI |
| Karga-korronte nominala | 40 A |
| Sistema Boltage | 12V/24V Auto-detection |
| Gehienezko PV Sarrerako Potentzia (12V) | 480 W |
| Gehienezko PV Sarrerako Potentzia (24V) | 960 W |
| Gomendatutako Eguzki Panela Voltage | 18V for 12V battery; 36V for 24V battery |
| Autokontsumoa | <10 mA |
| Funtzionamendu-tenperatura | -14 °F eta 140 °F (-10 °C eta 60 °C) |
| Bistaratzeko mota | LCDa |
| USB irteera | Dual 5V 2A |
| Komunikazioa | WiFi |
| Neurriak (paketea) | 18 x 11 x 5 cm |
| Pisua (Paketea) | 330 gramo |
| Fabrikatzailearen Erreferentzia | 2-BL912-40A-WIFI-DE |
| UPC | 732246237116 |
9. Bermea eta Laguntza
For warranty information and technical support, please refer to the documentation included with your purchase or contact SOGTICPS customer service. Keep your purchase receipt as proof of purchase.