1. Sarrera
Thank you for choosing the G-MARK Karaoke Base 3 Wireless Microphone System. This system is designed to provide high-quality audio for various applications including home karaoke, church events, weddings, and DJ parties. It features a 2-channel UHF wireless receiver, two cordless handheld microphones, and versatile connectivity options including 3.5mm AUX and Bluetooth. Please read this manual thoroughly before operation to ensure proper setup and optimal performance.
2. Produktua amaitu daview
2.1 Barne dauden osagaiak
Paketeak honako elementu hauek ditu:
- 1 x UHF Receiver with 2 x Antennas
- 2 x Eskuko mikrofonoak
- 1 x korronte egokitzailea
- 1 x 1/4" to 1/4" cable adapter
- 1 x 1/8" to 1/8" cable adapter
- 2 x Anti-Slip Rings
- 2 x Sponge Mic Covers
- 1 x Erabiltzailearen eskuliburua (dokumentu hau)
2.2 Ezaugarri nagusiak
- Advanced Audio Configuration: Built-in echo reverb device and UHF wireless system (550-595MHz frequency range) for reduced interference. Automatic frequency recognition and matching.
- Cardioid Pattern Microphones: Uni-directional pickup pattern minimizes background noise, ensuring clear vocal reproduction.
- Robust Audio Sound: Two handheld microphones with quality mic cores. Adjustable echo reverberation, treble, and bass for customized audio effects.
- Bluetooth bateragarria: Receiver supports Bluetooth music streaming for connection with PCs and other devices.
- Stable Wireless Performance: Dual-channel design with a large dynamic signal range, offering up to 100 feet of wireless operation.
- Anitzeko bateragarritasuna: Features XLR, 6.35mm (1/4"), and 3.5mm (1/8") output jacks. Can connect directly to Bluetooth speakers with AUX input or TV soundbars.

Image: Dynamic Core with Cardioid Pickup Pattern. This diagram illustrates the uni-directional sound pickup pattern of the microphone, designed to focus on the sound source directly in front of it while minimizing ambient noise.
3. Konfiguratzeko argibideak
3.1 Hargailuaren konexioa
- Potentzia-konexioa: Connect the provided power adapter to the DC 12V input on the receiver and plug it into a power outlet.
- Antena instalatzea: Screw the two antennas securely into their respective ports on the receiver.
- Audio irteera: Connect the receiver to your audio system (speaker, amplifier, soundbar, PC) using one of the following methods:
- XLR irteera: For professional audio equipment.
- 6.35mm (1/4") Output Jack: Use the provided 1/4" to 1/4" cable adapter if needed.
- 3.5mm (1/8") AUX Output Jack: Use the provided 1/8" to 1/8" cable adapter if connecting to devices with a 3.5mm AUX input, such as Bluetooth speakers or TV soundbars.
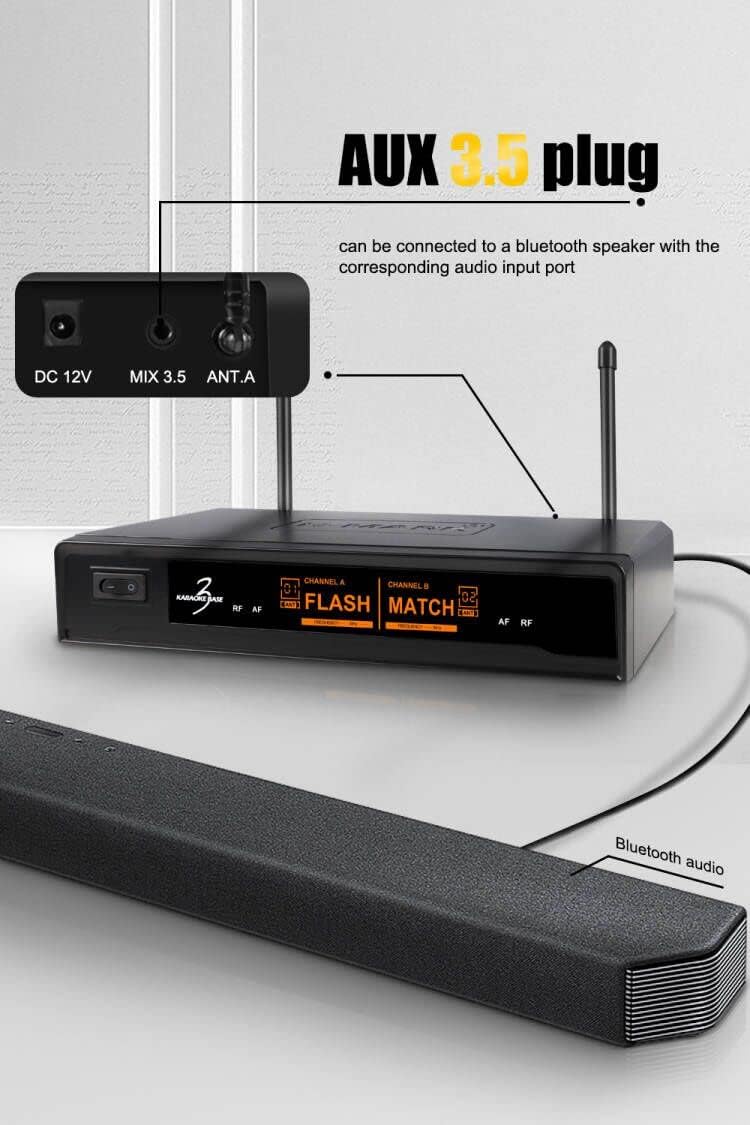
Image: AUX 3.5mm Plug Connection. This image demonstrates how to connect the receiver's 3.5mm AUX output to a Bluetooth speaker or soundbar using the appropriate cable.
3.2 Mikrofonoaren konfigurazioa
- Insert batteries into each handheld microphone (batteries not included).
- Turn on the receiver and the microphones. The system will automatically recognize and match the suitable frequencies.
3.3 Bluetooth parekatzea
To stream music via Bluetooth:
- Ziurtatu hartzailea piztuta dagoela.
- On your smartphone, PC, or other Bluetooth-enabled device, navigate to the Bluetooth settings.
- Bilatu available devices. The receiver should appear as "BASE 3".
- Select "BASE 3" to pair. Once connected, you can stream music through the receiver to your connected audio system.
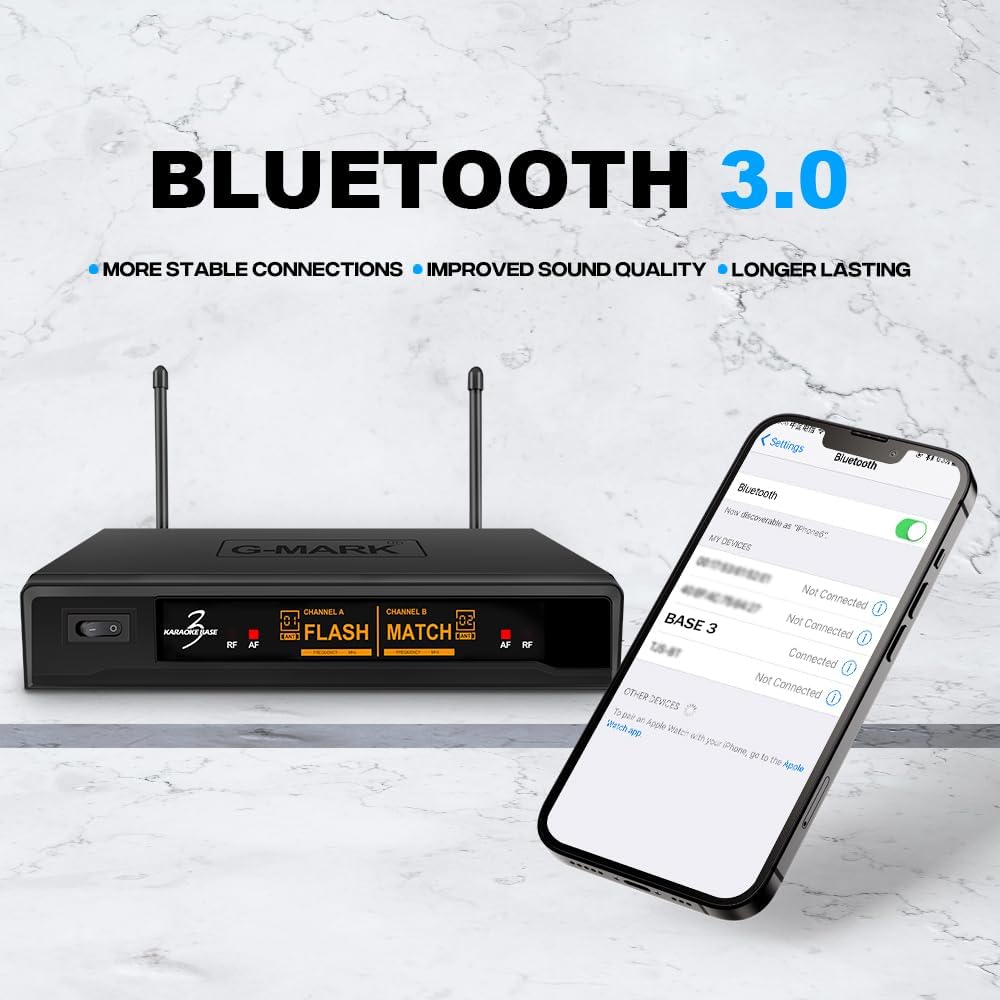
Image: Bluetooth 3.0 Connectivity. This image shows a smartphone's Bluetooth settings screen, indicating how to find and connect to the "BASE 3" receiver for wireless audio streaming.
4. Funtzionamendu-argibideak
4.1 Mikrofonoaren kontrolak
Each handheld microphone features controls for adjusting audio effects:

Image: Professional Microphone with Sound Effect Adjustments. This illustration highlights the various controls on the handheld microphone, including adjustments for Echo, Treble, Bass, Volume, and the Power switch.
- ECHO +/-: Adjusts the echo reverberation strength.
- TREBLE +/-: Adjusts the high-frequency response of your voice.
- BASSO +/-: Adjusts the low-frequency response of your voice.
- VOL +/-: Adjusts the microphone's output volume.
- ON/OFF: Power switch for the microphone.
Experiment with these controls to find the optimal sound for your voice and environment.
4.2 Echo Reverb Function
The system includes a built-in echo reverb function to enhance vocal performance, making your voice sound fuller and more spacious. Adjust the ECHO setting on the microphone to achieve the desired effect.

Image: Built-in Echo Reverb Function. This graphic visually represents the integrated echo reverb capability of the system, designed to enrich vocal output.

Image: 5 Levels of Reverb Adjustment. This image, a screenshot from a video, demonstrates the microphone's display indicating the availability of 5 distinct levels for reverb adjustment, allowing users to fine-tune the echo effect.
5. Mantentzea
- Garbiketa: Erabili zapi leun eta lehor bat hargailua eta mikrofonoak garbitzeko. Ez erabili garbitzaile likidorik edo disolbatzailerik.
- Biltegiratzea: Gorde sistema erabiltzen ez duzunean, leku fresko eta lehor batean, eguzki-argitik eta muturreko tenperaturetatik babestuta.
- Bateria ordezkatzea: Replace microphone batteries promptly when performance degrades to ensure optimal operation.
- Mikrofonoen estalkiak: Use the provided sponge mic covers to protect the microphone capsules and reduce plosive sounds.
6. Arazoak
| Arazoa | Kausa posiblea | Irtenbidea |
|---|---|---|
| Ez dago soinurik mikrofonotik |
|
|
| Interferentziak edo soinu-kalitate eskasa |
|
|
| Bluetooth gailua ez da parekatzen |
|
|
7. Zehaztapenak
| Ezaugarri | Xehetasuna |
|---|---|
| Marka | G-MARKA |
| Ereduaren izena | Karaoke Base 3 |
| Konektibitate Teknologia | XLR, 1/4" Output Jack, 1/8" Output Jack |
| Konektore mota | 3.5 mm-ko Jack, XLR |
| Ezaugarri bereziak | Haririk gabekoa, Haririk gabekoa |
| Gailu bateragarriak | Smartphone, Karaoke Makina |
| Kolorea | Beltza |
| Eredu polarra | Norabide bakarra (kardioidea) |
| Inpedantzia | 600 ohmio |
| Mikrofonoaren forma-faktorea | Mikrofono Sistema |
| Energia iturria | Battery Powered (Microphones), Power Adapter (Receiver) |
| Seinaleen eta zarataren arteko erlazioa | 80 dB |
| Kanal kopurua | 2 |
| Maiztasun Erantzuna | 50-15000 Hz |
| UHF maiztasun sorta | 550-595 MHz |
| Wireless Range | Gehienez 100 oin (gutxi gorabehera 30 metro) |
8. Bermea eta Laguntza
For warranty information or technical support, please contact G-MARK customer service through your purchase platform or the official G-MARK website. Please have your product model number (Karaoke Base 3) and purchase details ready when contacting support.