Sarrera
This instruction manual provides detailed guidance for the installation and maintenance of the HUIZHEN Replacement Parts Kit for the Dreametech D10 Plus Robot Vacuum Cleaner (Model RLS3D). Regular replacement of these components ensures optimal performance and extends the lifespan of your robot vacuum.
Bateragarritasunari buruzko ohar garrantzitsua: This kit is specifically designed for the Dreametech D10 Plus (RLS3D) model. It is ez bateragarriak with the Dreametech D10s Plus (RLS6AD) or Dreametech D10 Plus Gen2 models. Please verify your robot vacuum model before installation.


Paketearen edukia
The HUIZHEN Replacement Parts Kit includes the following components:
- 2 x Main Roller Brushes
- 4 x Side Brushes (White, 3-Arm Spin)
- 4 x HEPA iragazki
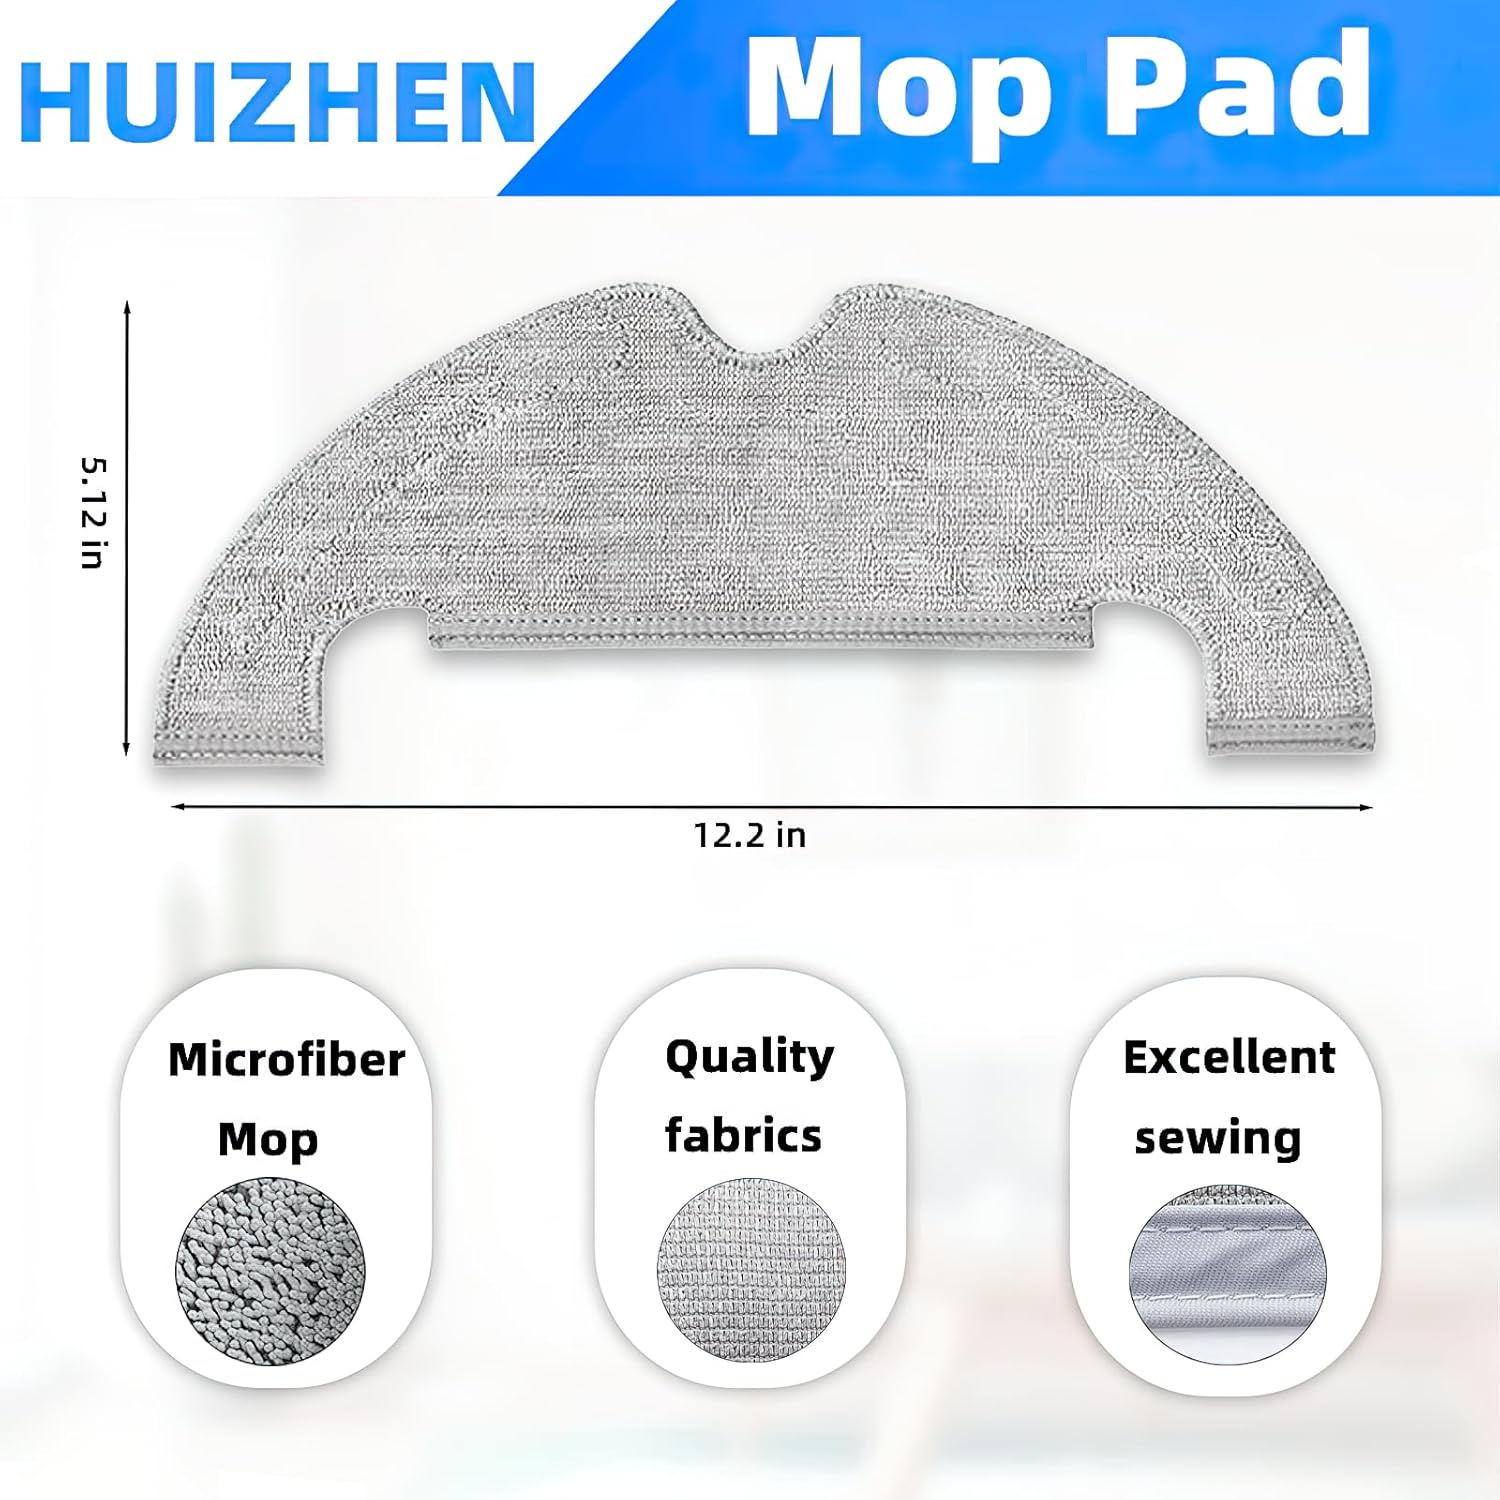
- 4 x Microfiber Mop Pads
- 4 x Dust Bags (4L capacity)

Instalazio Gida
1. Main Roller Brush Installation
- Turn off the robot vacuum and place it upside down on a clean, flat surface.
- Locate the brush guard cover, usually secured by clips or screws. Open or remove it.
- Remove the old main roller brush.
- Insert the new main roller brush into its designated slot, ensuring the ends align with the brush bearings.
- Close or re-secure the brush guard cover.

2. Alboko eskuilaren instalazioa
- Turn off the robot vacuum and place it upside down.
- Locate the side brushes. They are typically held in place by a screw or a snap-on mechanism.
- Remove the old side brush. If secured by a screw, use a screwdriver to loosen it.
- Align the new side brush with the corresponding slot and press it firmly or secure it with the screw.
Aholkua: If side brushes are bent or curled from shipping, please soak them in warm water for a few minutes to recover their shape. This will not affect the quality or performance.

3. HEPA Filter Installation
- Open the dustbin compartment of your robot vacuum.
- Kendu zakarrontzia.
- Locate the old HEPA filter within the dustbin and remove it.
- Insert the new HEPA filter into the designated slot in the dustbin, ensuring a snug fit.
- Reinsert the dustbin into the robot vacuum and close the compartment.


4. Mop Pad Installation
- Locate the mop pad attachment on the underside of the robot vacuum.
- Remove the used mop pad.
- Attach the new microfiber mop pad to the mop pad holder, ensuring it is securely fastened.
5. Hauts-poltsaren instalazioa
- Open the auto-empty station's dust bag compartment.
- Kontu handiz kendu hauts-poltsa betea, irekidura itxita dagoela ziurtatuz hautsa isuri ez dadin.
- Insert a new HUIZHEN 4L dust bag into the compartment, aligning it correctly.
- Itxi hauts poltsaren konpartimendua ongi.

Mantentze-lanen eta ordezkapen-egutegia
To maintain optimal cleaning performance and extend the life of your Dreametech D10 Plus robot vacuum, it is recommended to replace consumable parts regularly. The replacement frequency may vary based on usage and environment (e.g., presence of pets, carpeted areas).
| Osagaia | Gomendatutako Ordezko Maiztasuna |
|---|---|
| Arrabolaren eskuila nagusia | 6-12 hilabetero |
| Alboko eskuilak | 3-6 hilabetero |
| HEPA iragazkiak | 3-6 hilabetero |
| Mop Pads | Every 1-3 months (or as needed, based on usage) |
| Hauts Poltsak | As needed (when full, typically every 1-2 months) |
Regularly inspect all components for wear and tear. Clean brushes and filters frequently between replacements to maintain efficiency.
Arazoak konpontzea
- Side brushes are bent: If side brushes appear bent or curled upon arrival, soak them in warm water for a few minutes. This will help them regain their original shape.
- Garbiketa-errendimendu murriztua: Ensure all components (main brush, side brushes, HEPA filter, mop pad) are correctly installed and not excessively worn. Replace parts according to the recommended schedule.
- Dust bag not fitting: Verify you have the correct dust bag for the Dreametech D10 Plus auto-empty station. HUIZHEN dust bags are designed for a 4L capacity. Ensure proper alignment during installation.
- Piezak ez dira egokitzen: Double-check your robot vacuum model number. This kit is exclusively for Dreametech D10 Plus (RLS3D) and not compatible with D10s Plus (RLS6AD) or D10 Plus Gen2.
Zehaztapenak
- Marka: HUIZHEN
- Eredu bateragarria: Dreametech D10 Plus (RLS3D)
- Materiala: ABS materials, Soft nylon bristles, HEPA filter media, Microfiber fabric, 4-layer dust bag material
- Pakete kopurua: 18 pieza
- Dakarten osagaiak: 2 Main Roller Brushes, 4 Side Brushes, 4 HEPA Filters, 4 Mop Pads, 4 Dust Bags
- Hauts poltsaren edukiera: 4 Liters (HUIZHEN upgraded design)
Laguntza
For further assistance or inquiries regarding your HUIZHEN Replacement Parts Kit, please contact your retailer or refer to the official Dreametech D10 Plus user manual for specific robot vacuum operation details.