
1. Sarrera
The WEP 960-IV Plastic Welder Kit is designed for efficient and durable repair of various plastic items. This kit provides the necessary tools and materials to mend cracks, join broken parts, and reinforce plastic structures found in automotive components, household items, RC models, and sporting gear. The welder operates at 110V 60W and can reach temperatures up to 1112 °F (600 °C) for effective plastic melting.
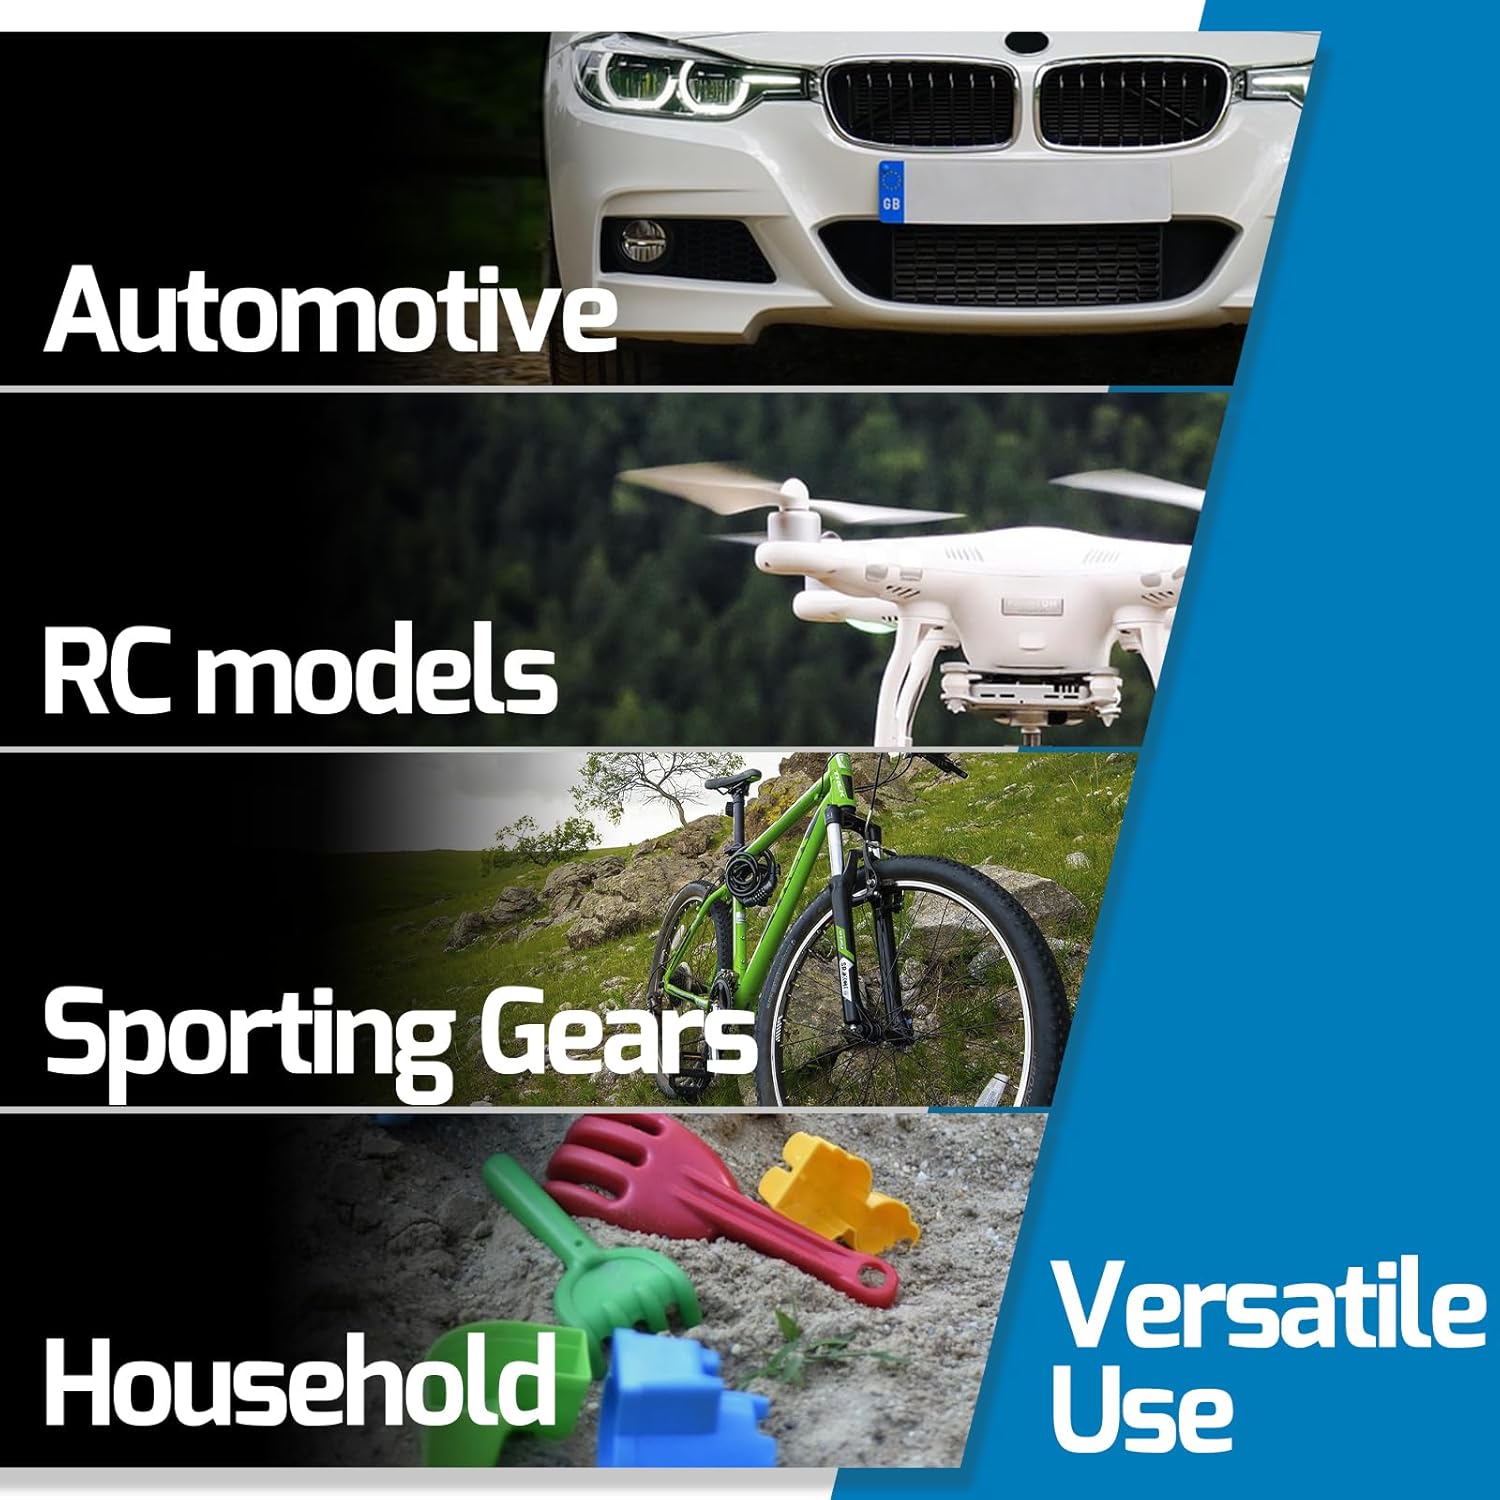
Figure 1: Versatile applications for the WEP 960-IV Plastic Welder Kit.
2. Segurtasun informazioa
- Segurtasun elektrikoa: This product is rated for 110-127V USA specifications. EZ connect this iron to a 220V power socket. Ensure the power outlet is properly grounded.
- Beroaren arriskua: The plastic welder heats up to 1112 °F (600 °C). Always handle with extreme care to prevent burns. Allow the unit to cool completely before storing.
- Aireztapena: Erabili soldadorea ondo aireztatutako gune batean, urtzen ari den plastikoaren lurrunak arnastea saihesteko.
- Babes pertsonalerako ekipamendua: Wear appropriate safety glasses and heat-resistant gloves during operation.
- Material sukoiak: Keep the work area clear of flammable liquids, gases, and materials.
- Haurrak eta maskotak: Mantendu gailua haurren eta maskoten eskura.
- Switch potentziala: Utilize the built-in power switch on the grip to turn the welder ON or OFF.
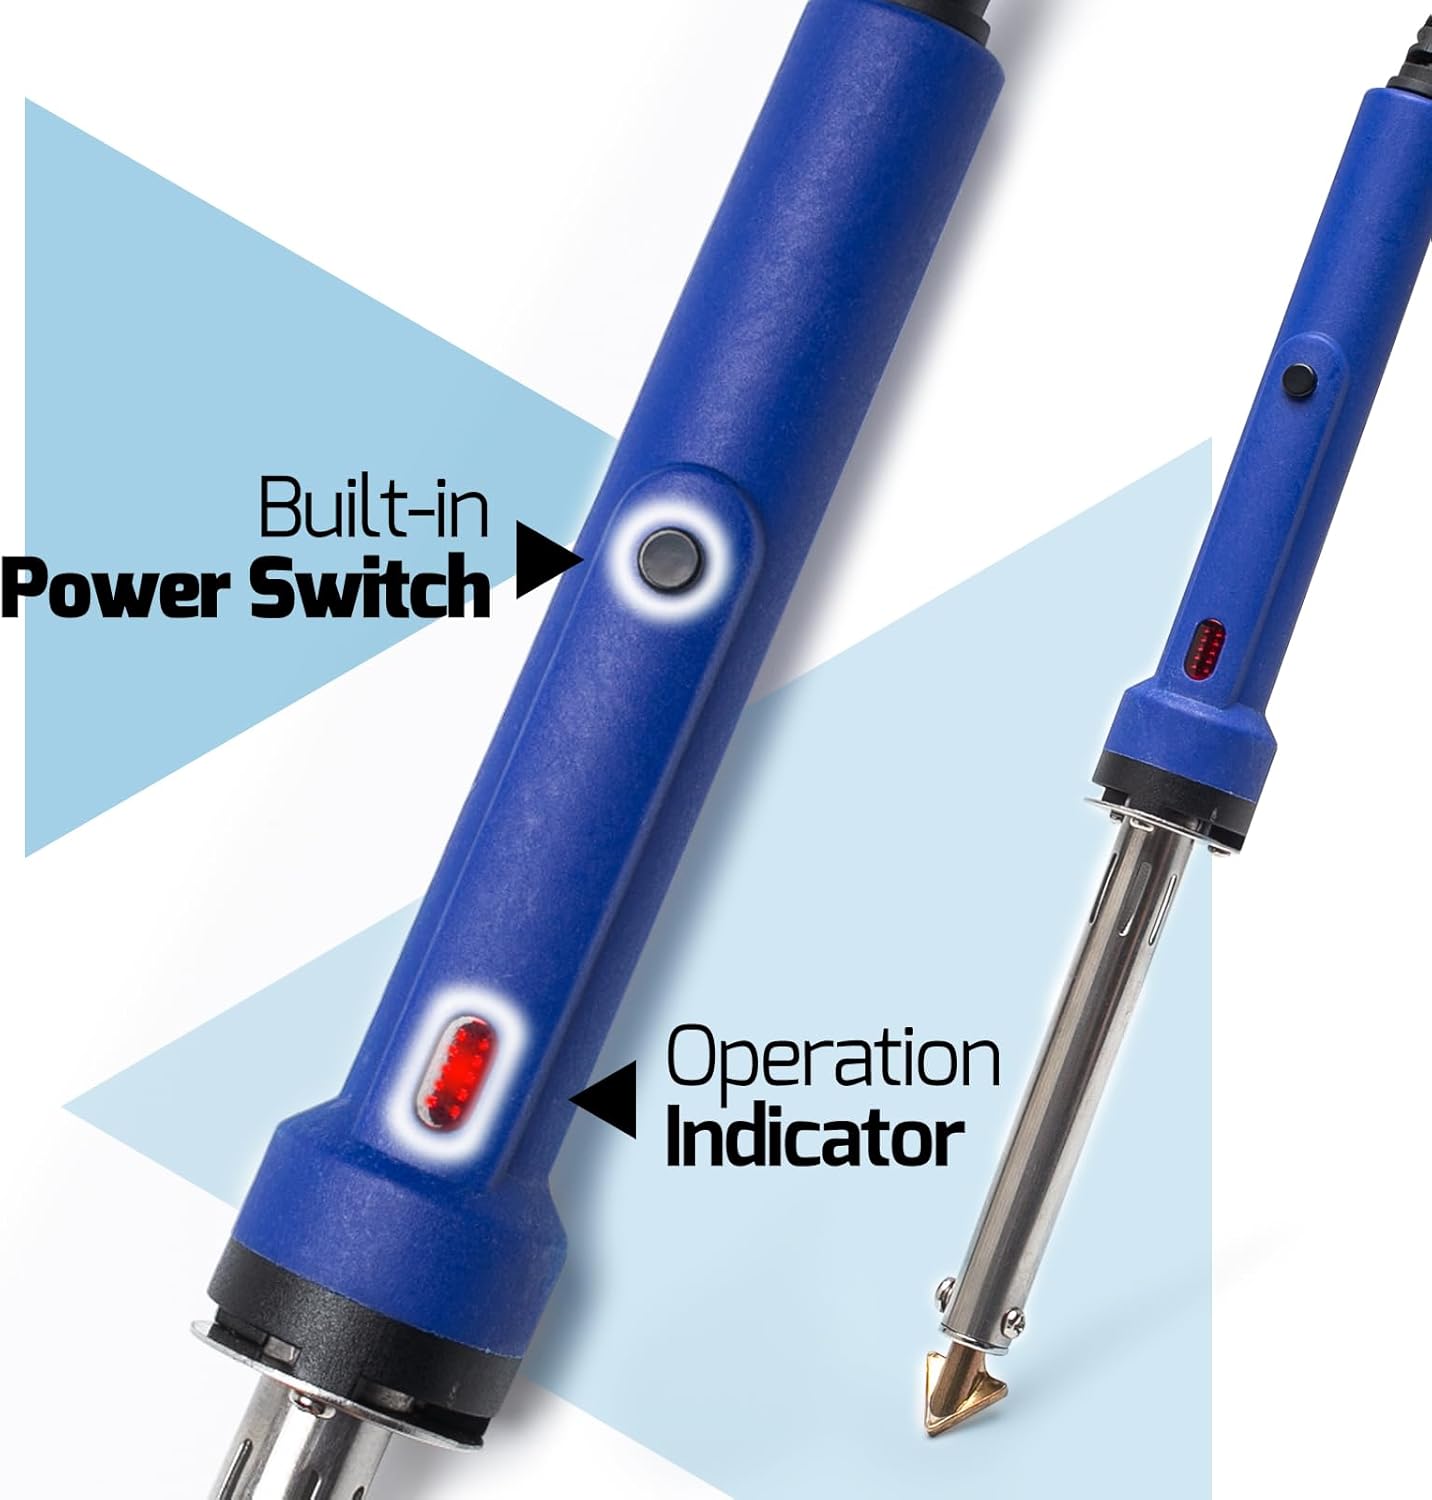
Figure 2: The plastic welder features a built-in power switch and operation indicator for safe use.
3. Paketearen edukia
Your WEP 960-IV Plastic Welder Kit includes the following items:
- 1 x WEP 960-IV Plastic Welder (110V 60W)
- 3 x Copper Tips (Small, Medium, Large triangular sizes)
- 40 x Plastic Rods (various types for different plastics)
- 5 x Sandpapers
- 1 x Steel Mesh for reinforcement
- 1 x bihurkin
- 1 x Steel Brush
- 1 x Welder Stand
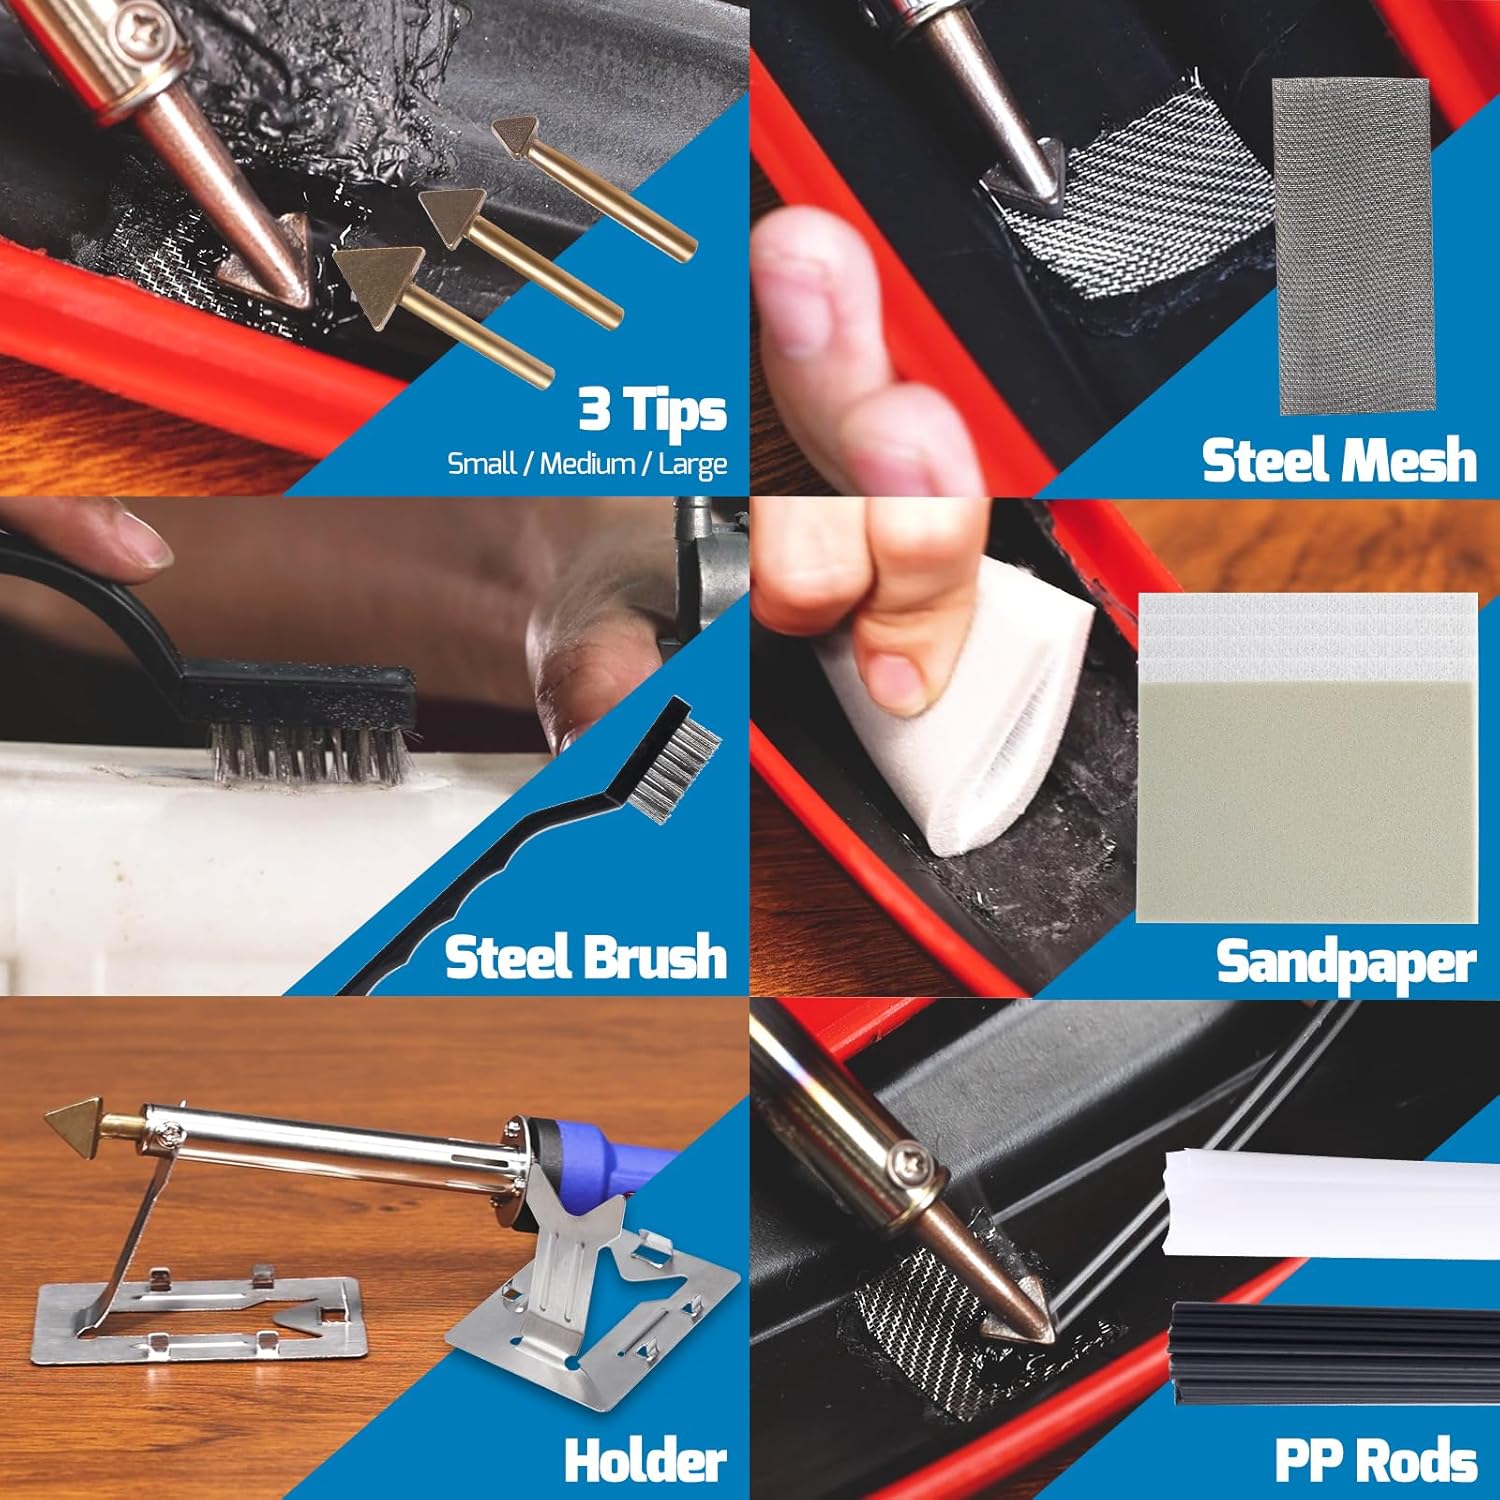
Figure 3: All essential accessories included in the WEP 960-IV Plastic Welder Kit.
4. Konfigurazioa
Before operating the plastic welder, ensure proper setup:
- Deskonprimitu osagaiak: Carefully remove all items from the packaging and verify that all listed components are present.
- Attach Desired Tip: Select the appropriate triangular copper tip (small, medium, or large) for your repair task. Use the provided screwdriver to loosen the screw on the welder barrel, insert the tip, and then tighten the screw securely.
- Place Welder on Stand: Always place the hot welder on the included metal stand when not actively in use to prevent damage to surfaces and reduce burn risk.
- Konektatu energiara: Plug the 2-prong US specification power cord into a 110-127V AC power outlet.
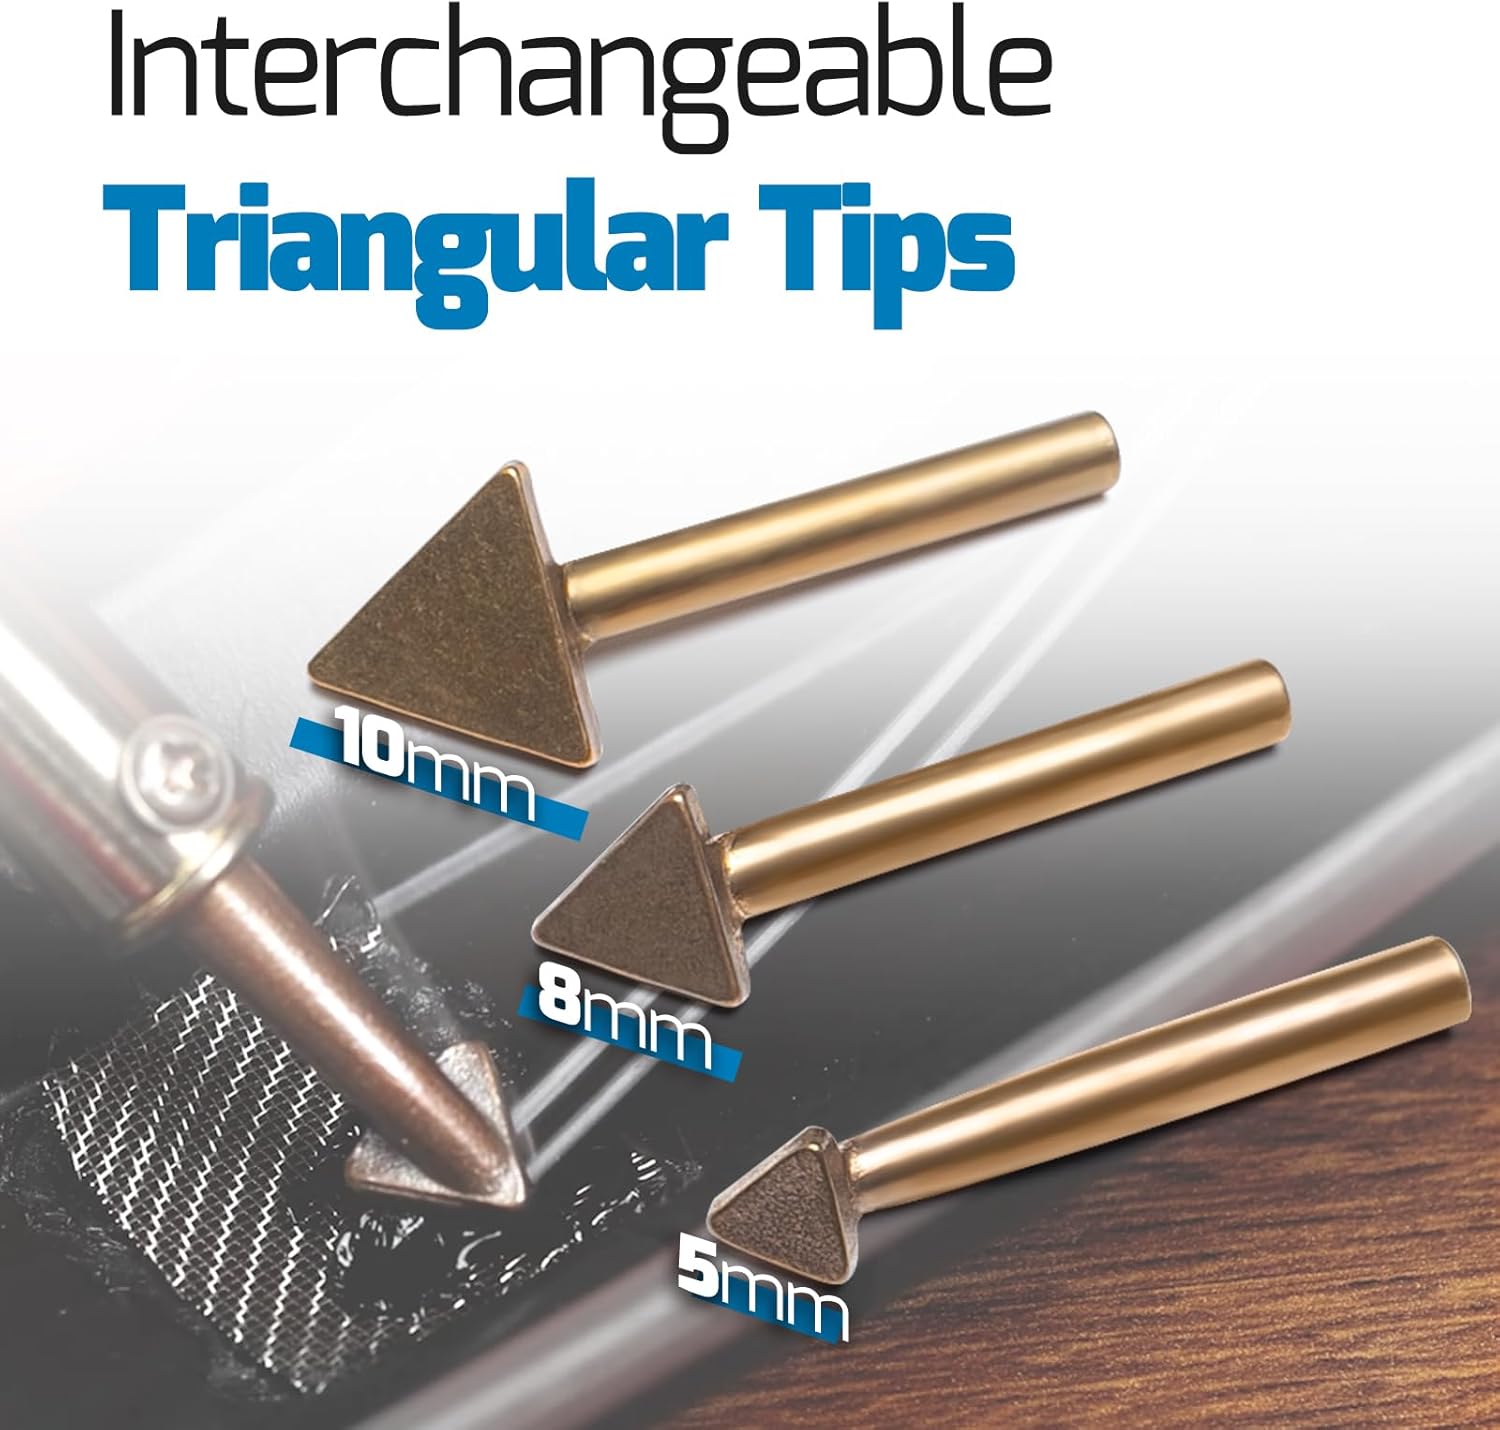
Figure 4: Interchangeable triangular tips for various repair sizes.

Figure 5: The plastic welder with its 2-prong US specification power cord.
5. Funtzionamendu-argibideak
Follow these steps for effective plastic repair:
- Pre-heat the Welder: Turn on the welder using the power switch. Allow approximately 3 minutes for the welder to reach its operating temperature of up to 1112 °F (600 °C).
- Prepare the Repair Area: Clean the plastic surface to be repaired. If necessary, trim a piece of the steel mesh to cover the damaged area.
- Initial Weld (Optional): For some repairs, you may first use the welder to melt and join the edges of the plastic crack before applying reinforcement.
- Insert Reinforcement: Place the trimmed steel mesh over the crack or damaged area. Using the hot welder tip, gently press the mesh into the plastic, embedding it slightly below the surface.
- Apply Plastic Rods: Select a plastic rod compatible with the material being repaired. Hold the plastic rod against the hot welder tip and the embedded mesh. The rod will melt and flow into the mesh, creating a strong bond and filling the gap. Continue this process until the repair area is fully covered and reinforced.
- Smooth and Finish: Use the welder tip to smooth out the melted plastic, ensuring a consistent and strong repair.
- Polish (Optional): Once the plastic has cooled, use the provided sandpaper to smooth the repaired surface for a cleaner finish. The steel brush can be used for initial cleaning or to remove excess material.

Figure 6: Allow the welder to pre-heat for approximately 3 minutes.
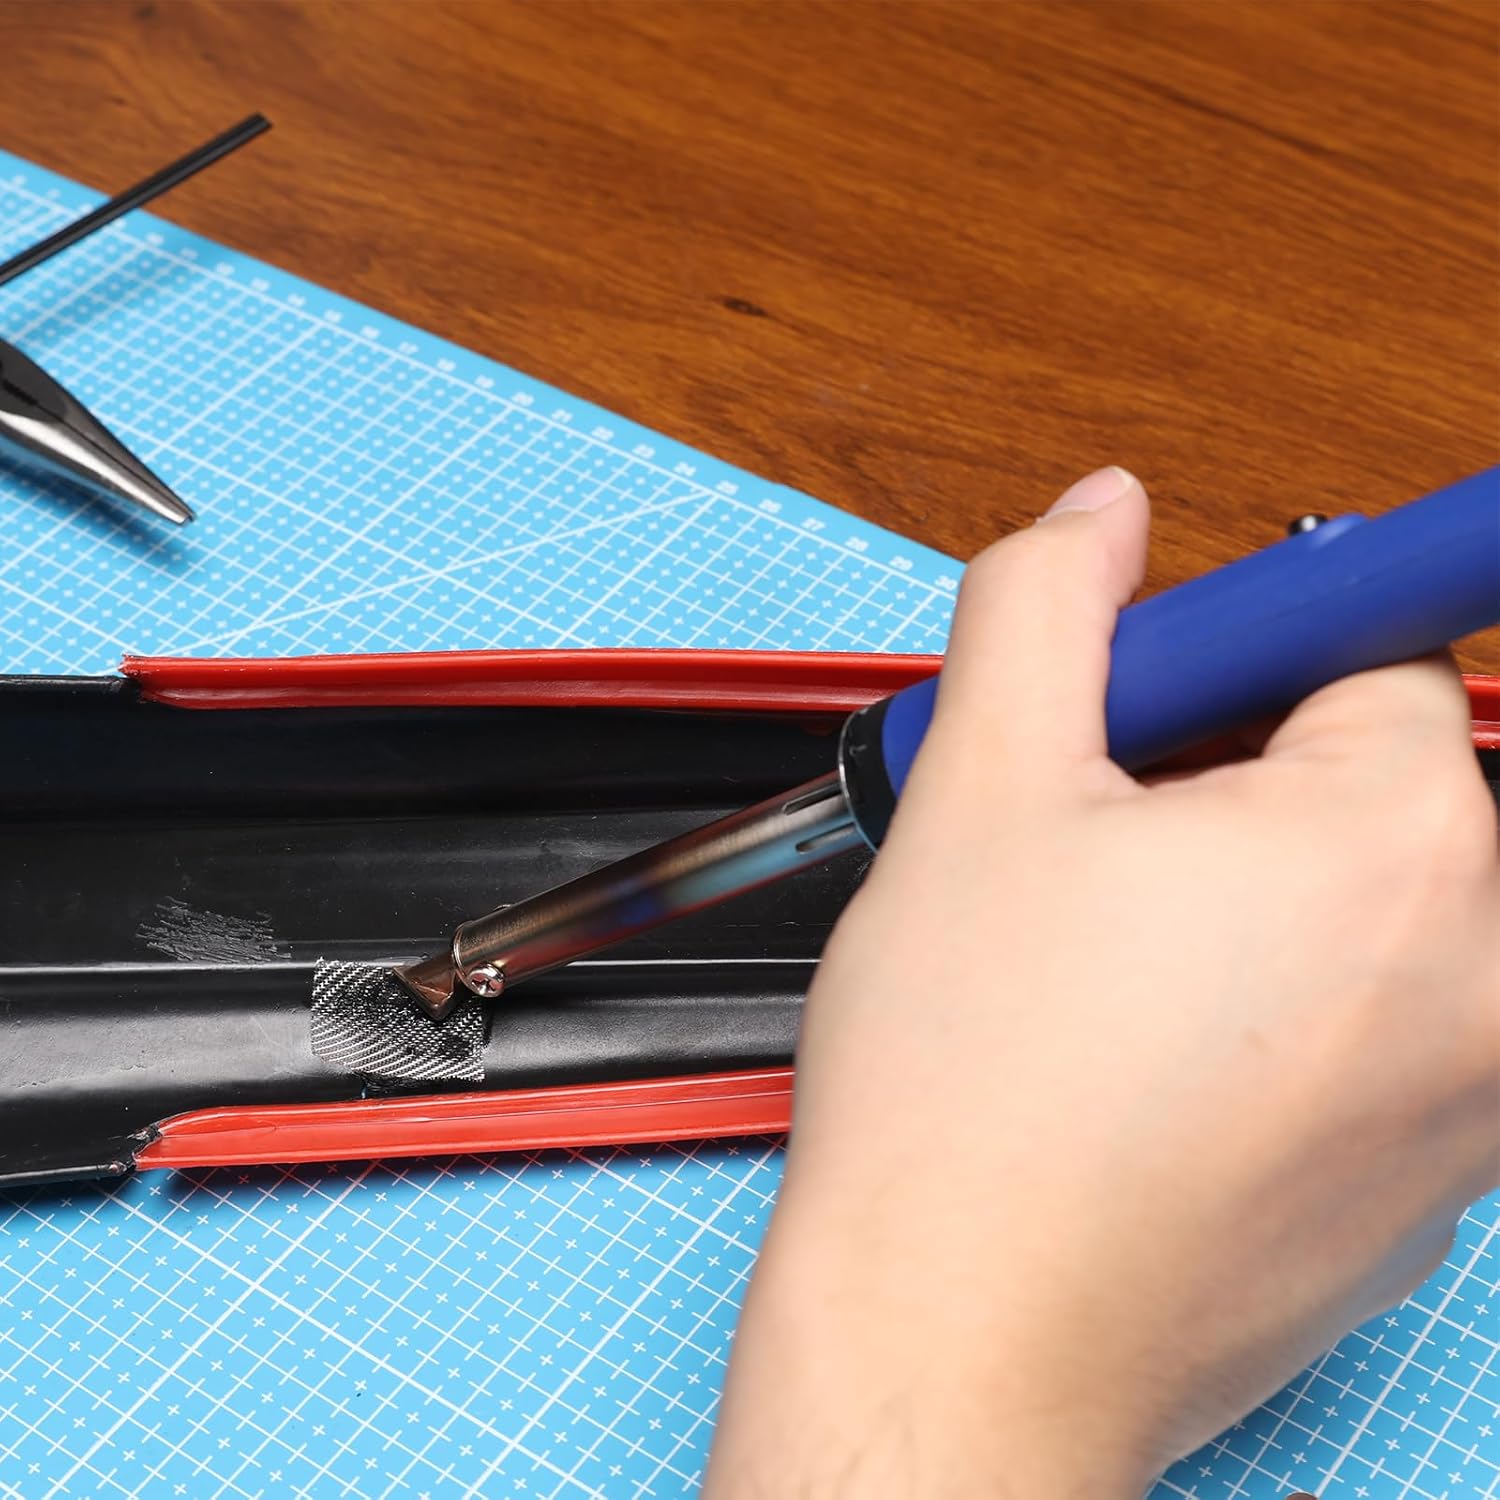
7. irudia: Adibample of plastic welding with steel mesh reinforcement.
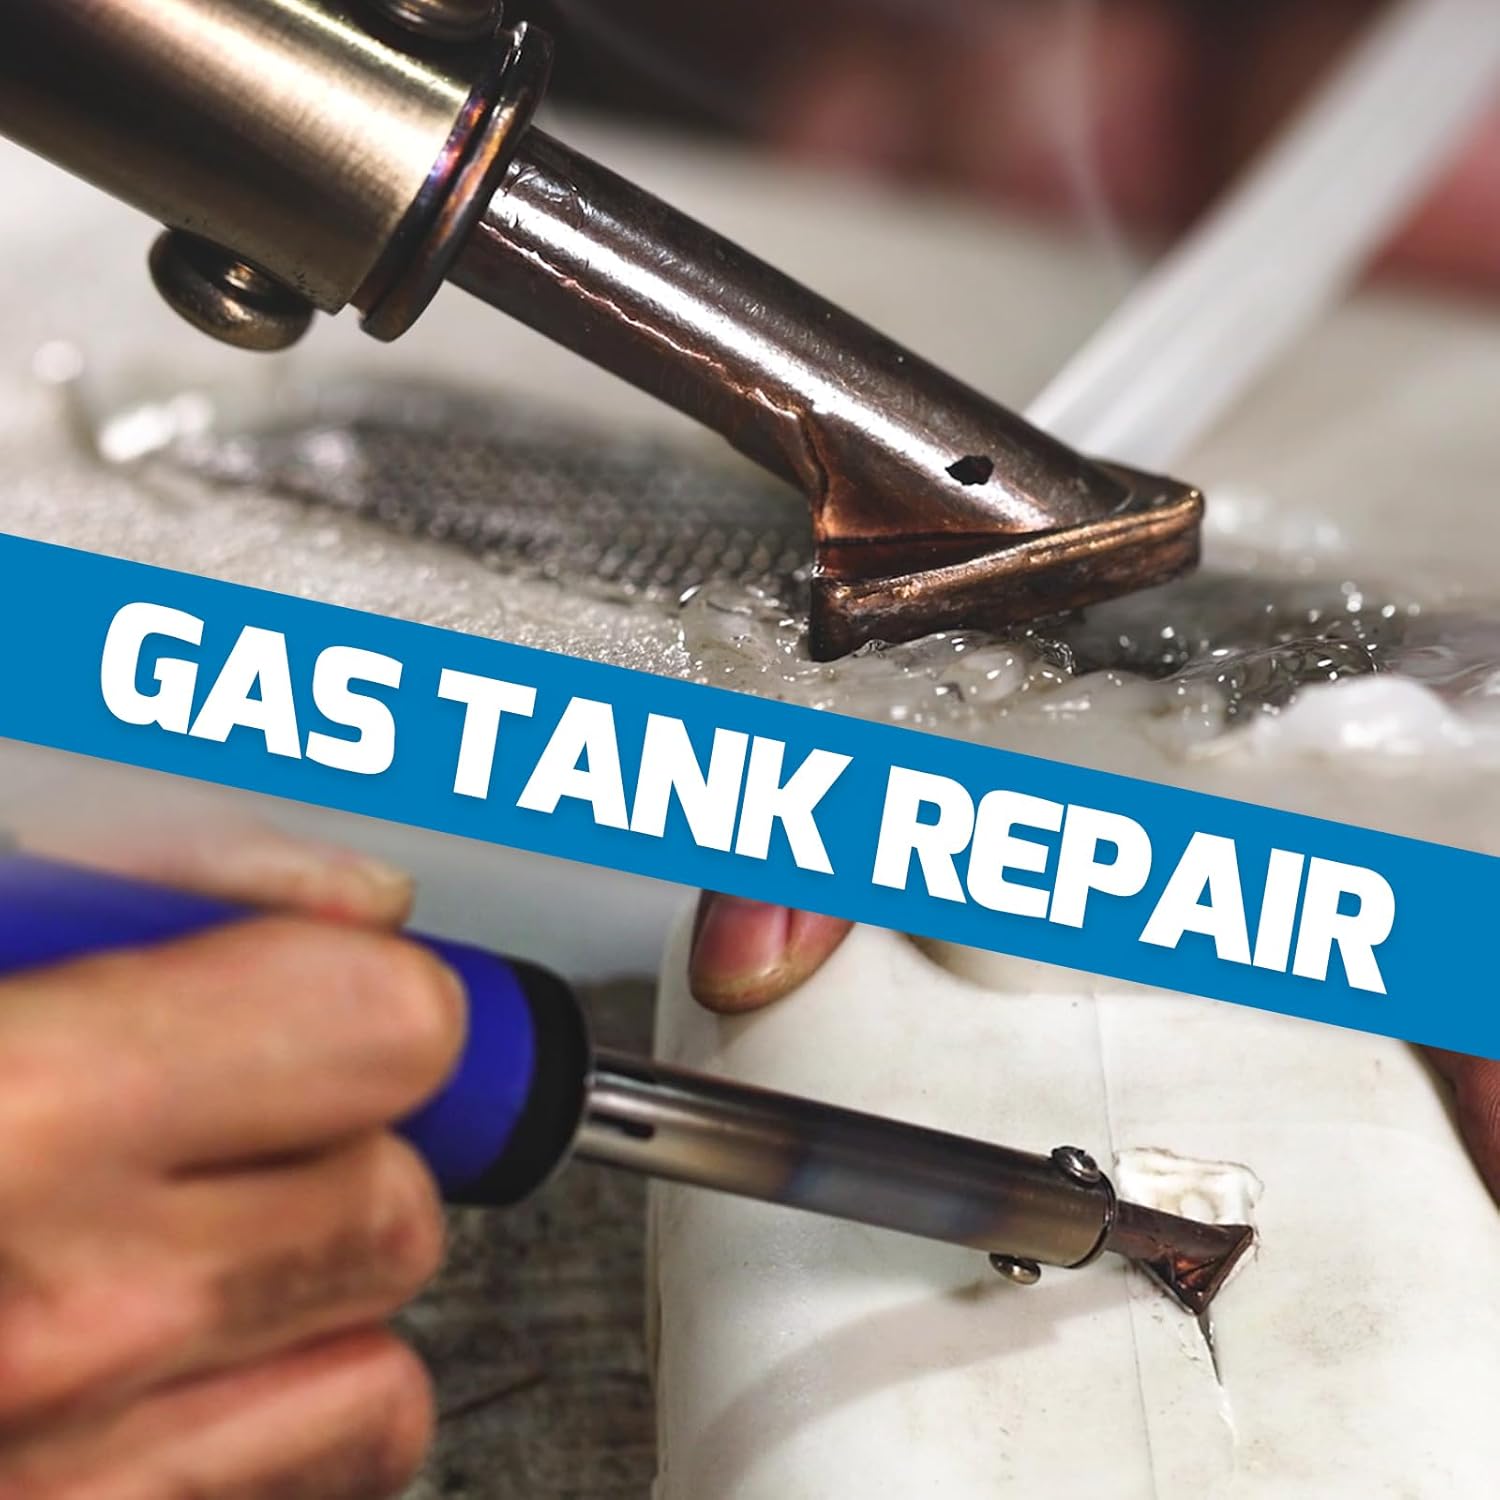
8. irudia: Adibample of gas tank repair using the plastic welder.
5.1. Bideo didaktikoa
Watch this video for a visual guide on how to use the WEP 960-IV Plastic Welder Kit for various repairs.
Video 1: Step-by-step guide on using the WEP 960-IV Plastic Welder Kit for plastic repair.
6. Mantentzea
- Aholkuen garbiketa: After each use, or when changing tips, use the steel brush to gently clean any melted plastic residue from the copper tip. Ensure the welder is unplugged and cooled before cleaning.
- Biltegiratzea: Store the plastic welder and its accessories in a dry, cool place, away from direct sunlight and moisture.
- Ikuskapena: Periodically inspect the power cord for any signs of damage (cuts, fraying). If damage is found, discontinue use immediately and replace the cord or unit.
7. Arazoak
- Welder Not Heating:
- Ziurtatu kablea ondo konektatuta dagoela 110-127V-ko entxufe batera.
- Check if the power switch on the grip is in the 'ON' position and the operation indicator light is illuminated.
- Egiaztatu korronte-hartunea funtzionatzen duela beste gailu batekin probatuz.
- Plastic Not Melting Effectively:
- Allow the welder to pre-heat for the recommended 3 minutes.
- Ensure the copper tip is clean and free of excessive residue, which can hinder heat transfer.
- Confirm that the plastic material is suitable for welding with this type of tool.
- Kea/Usain gehiegizkoa:
- Ensure adequate ventilation in your workspace.
- Some initial smoke or odor may occur during the first few uses as manufacturing residues burn off; this is typically normal. If it persists or is excessive, discontinue use.
8. Zehaztapenak
| Ezaugarri | Zehaztapena |
|---|---|
| Modelo zenbakia | WEP 960-IV |
| Energia iturria | AC |
| liburukiatage | 110-127 volt |
| Wattage | 60W |
| Tenperatura maximoa | 1112 °F (600 °C) |
| Produktuaren neurriak | 2.69 x 2.69 x 23.01 cm |
| Elementuaren pisua | 465 g |
| Fabrikatzailea | Guangzhou Yihua Electronic Equipment Co., Ltd. |
9. Bermea eta Laguntza
This WEP Plastic Welder Kit is covered by a 1-year USA technical support warranty. For assistance, please contact our dedicated team, available 24 hours a day. Refer to your purchase documentation for specific contact details.