
CNYST 2023041804
Flow Velocity Meter Tester User Manual
Marka: CNYST | Eredua: 2023041804
1. Sarrera
This manual provides comprehensive instructions for the operation and maintenance of the CNYST Flow Velocity Meter Tester. This portable device is designed for accurate measurement of flow rate and velocity in open channels, making it suitable for various applications including hydrological stations, factories, mines, environmental monitoring stations, agricultural drainage and irrigation, and hydrogeological surveys.

Figure 1.1: The CNYST Flow Velocity Meter Tester and its main components.

Figure 1.2: Typical application scenarios for the flow velocity meter.
2. Produktuaren osagaiak
The CNYST Flow Velocity Meter Tester kit includes the following main components:
- Main Meter Unit: The handheld device with LCD display and control buttons.
- Velocity Sensor (Propeller Type): Used for measuring water speed.
- Velocity Sensor (Paddle Type): Alternative sensor for specific flow conditions.
- Konektatzeko kablea: To link the sensor to the main meter unit.
- Measuring Rods: Multiple sections that can be assembled to achieve desired measurement depth.
- Muntatzeko euskarria: To attach the sensor to the measuring rod.
- Osagarriak: Includes tools for assembly and a carrying case.

2.1 Irudia: Gainetikview of all components included in the kit.

Figure 2.2: The main meter unit.
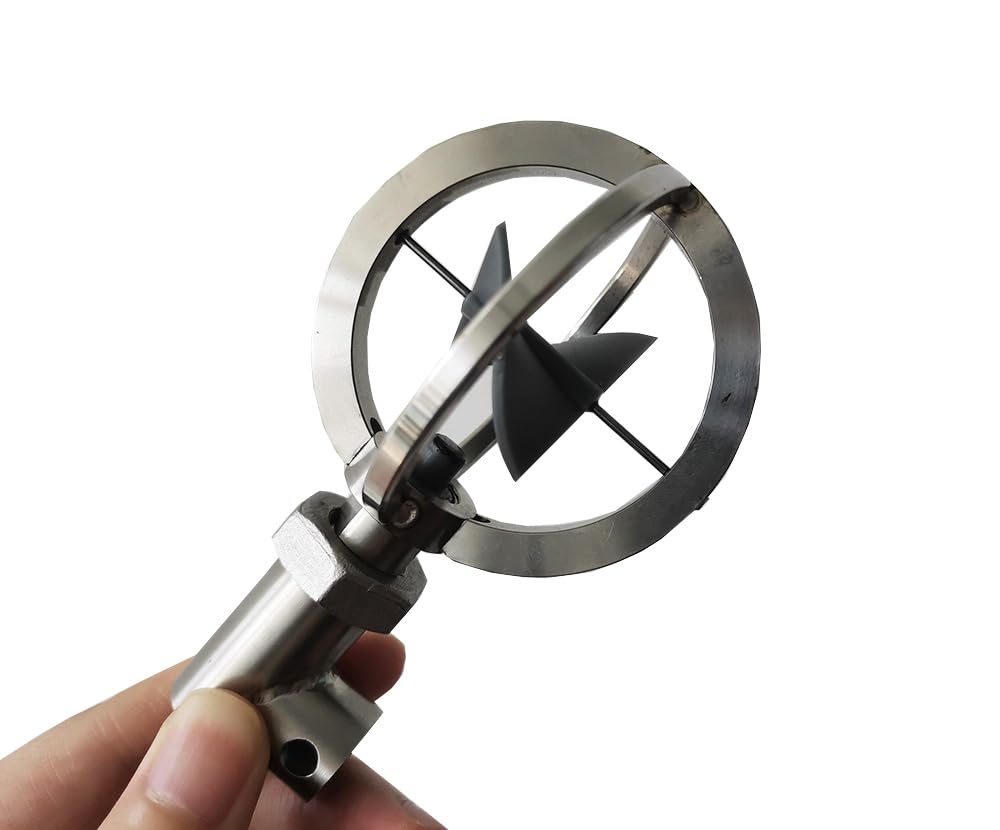
Figure 2.3: Propeller type velocity sensor.

Figure 2.4: Paddle type velocity sensor.
3. Konfigurazioa eta Muntaketa
Follow these steps to assemble your flow velocity meter:
- Lotu sentsorea: Connect the desired velocity sensor (propeller or paddle) to the mounting bracket. Ensure it is securely fastened.
- Konektatu kablea: Plug the sensor's connecting cable into the main meter unit.
- Assemble Measuring Rods: Screw together the required number of measuring rod sections to achieve the desired depth for your measurement. Attach the assembled rod to the mounting bracket.
- Sartu bateriak: Open the battery compartment on the main meter unit and insert 4 No. 7 batteries (not included). Ensure correct polarity.
Video 3.1: A detailed video demonstrating the assembly process of the Flow Velocity Meter.
4. Funtzionamendu-argibideak
To operate the CNYST Flow Velocity Meter Tester:
- Piztu: Sakatu BOTEREA button on the main meter unit to turn on the device. The LCD display will illuminate.
- Kokalekua: Carefully lower the assembled measuring rod with the attached sensor into the water channel to the desired measurement depth. Ensure the sensor is fully submerged and oriented correctly with the flow.
- Neurketa: The device will automatically begin measuring the flow velocity. The LCD display will show the current velocity (V) and other relevant parameters such as the number of rotations (N) and time (T).
- Irakurgaiak: Observe the readings on the LCD display. The velocity is calculated using the formula: V = KN/T + C (m/s), where K and C are instrument constants.
- Itzali: After completing your measurements, press and hold the BOTEREA gailua itzaltzeko botoia.

Figure 4.1: Close-up of the meter's LCD display and control buttons.
5. Mantentzea
Proper maintenance ensures the longevity and accuracy of your flow velocity meter:
- Garbiketa: After each use, especially in turbid water, rinse the sensor and measuring rods with clean water. Wipe all components dry before storage.
- Biltegiratzea: Store the device and its components in the provided carrying case in a dry, cool place, away from direct sunlight and extreme temperatures.
- Bateria ordezkatzea: Replace batteries when the low battery indicator appears on the display or when the device fails to power on. Always use new batteries of the specified type (4 No. 7 batteries).
- Sentsoreen ikuskapena: Regularly inspect the velocity sensors for any debris, damage, or wear. Ensure the propeller or paddle rotates freely.
6. Arazoak
Gailuarekin arazoak badituzu, jo ezazu honako arazo eta irtenbide ohikoenei:
| Arazoa | Kausa posiblea | Irtenbidea |
|---|---|---|
| Gailua ez da pizten. | Bateriak gutxi edo agortuta; bateriaren polaritate okerra. | Ordeztu bateriak beste batzuekin, polaritate zuzena ziurtatuz. |
| Irakurketa okerrak. | Sensor fouled with debris; damaged sensor; incorrect K/C values. | Clean the sensor thoroughly; inspect for damage and replace if necessary; consult the full product manual for calibration or factory reset procedures if applicable. |
| Pantaila hutsik dago edo keinuka ari da. | Low batteries; loose cable connection. | Replace batteries; ensure the sensor cable is securely connected to the main unit. |
7. Zehaztapen Teknikoak
| Parametroa | Balioa |
|---|---|
| Velocity Measurement Formula | V = KN/T + C (m/s) (automatic calculation) |
| Velocimetry Range | 0.01 - 10.00 m/s |
| Flow Measurement Error | ≤%1.5 |
| Bistaratzea | LCD pantaila |
| Neurketa-metodoa | Rod positioning measurement |
| Tenperatura tartea | -10°C eta 50°C artean |
| Elikatze Hornidura | 4 x No. 7 batteries (AAA) |
| Atzeko argia | LED atzeko argia |
| Ostalariaren tamaina | 75 mm x 135 mm x 25 mm |
| Produktuaren neurriak | 2.95 x 5.31 x 0.98 hazbete; 4.41 kilo |
| Elementuaren eredu-zenbakia | 2023041804 |
| Fabrikatzailea | CNYST |
8. Bermea eta Laguntza
For warranty information, technical support, or service inquiries, please refer to the contact information provided with your purchase or visit the official CNYST webgunea. Gorde erosketa-agiria erosketaren frogagiri gisa berme-erreklamazioetarako.
Fabrikatzailea: CNYST
Webgunea: CNYST Official Store on Amazon
Ask a question about this manual
Ask about setup, troubleshooting, compatibility, parts, safety, or missing instructions. Manuals+ will review the question and use this page’s manual context to help answer it.