1. Sarrera
This manual provides essential information for the safe and effective operation, setup, and maintenance of the YESWELDER TIG-205P PRO welding machine. This versatile 3-in-1 unit supports ARC, DC TIG, and Pulsed TIG welding processes, offering up to 200A output for various material thicknesses. Please read this manual thoroughly before operating the machine to ensure proper use and to prevent injury or damage.

Figure 1.1: YESWELDER TIG-205P PRO Welding Machine and Accessories.
2. Segurtasun informazioa
Welding operations involve significant risks. Always adhere to safety guidelines to protect yourself and others. This machine incorporates safety features such as automatic shutdown for overheating and overload, and an IP21 protection standard for water resistance.

Figure 2.1: Built-in Safety Features.
Segurtasun-neurri orokorrak:
- Always wear appropriate personal protective equipment (PPE), including welding helmet, gloves, protective clothing, and safety shoes.
- Ensure adequate ventilation in the welding area to disperse fumes.
- Protect bystanders from arc rays and hot metal.
- Ez soldatu material sukoietatik gertu.
- Ziurtatu makina behar bezala lurrarekin lotuta dagoela.
- Deskonektatu energia mantentze-lanak edo doikuntzak egin aurretik.
3. Produktua amaitu daview eta Ezaugarri nagusiak
The TIG-205P PRO is designed for versatility and ease of use, featuring a large LED display and multiple welding functions.
3.1 Prozesu Anitzeko Gaitasuna
This machine offers three welding processes in one compact unit: ARC (Stick), DC TIG, and Pulsed TIG. This allows for a wide range of applications and material types.

Figure 3.1: 3-in-1 Multi-Process Synergic Welder.
3.2 Large LED Display
The large LED screen provides clear visibility of welding parameters such as current, operating mode, and welding mode, making adjustments intuitive.

Figure 3.2: Enhanced LED Panel for Easy Parameter Reading.
3.3 High Frequency (HF) Arc Start
HF arc ignition ensures non-contact arc starting for TIG welding, providing reliable and stable performance without electrode contamination.
3.4 5-Pin Foot Pedal Interface
A dedicated 5-pin interface allows for connection of an optional foot pedal, enabling convenient control over arc ignition and current adjustment during welding.
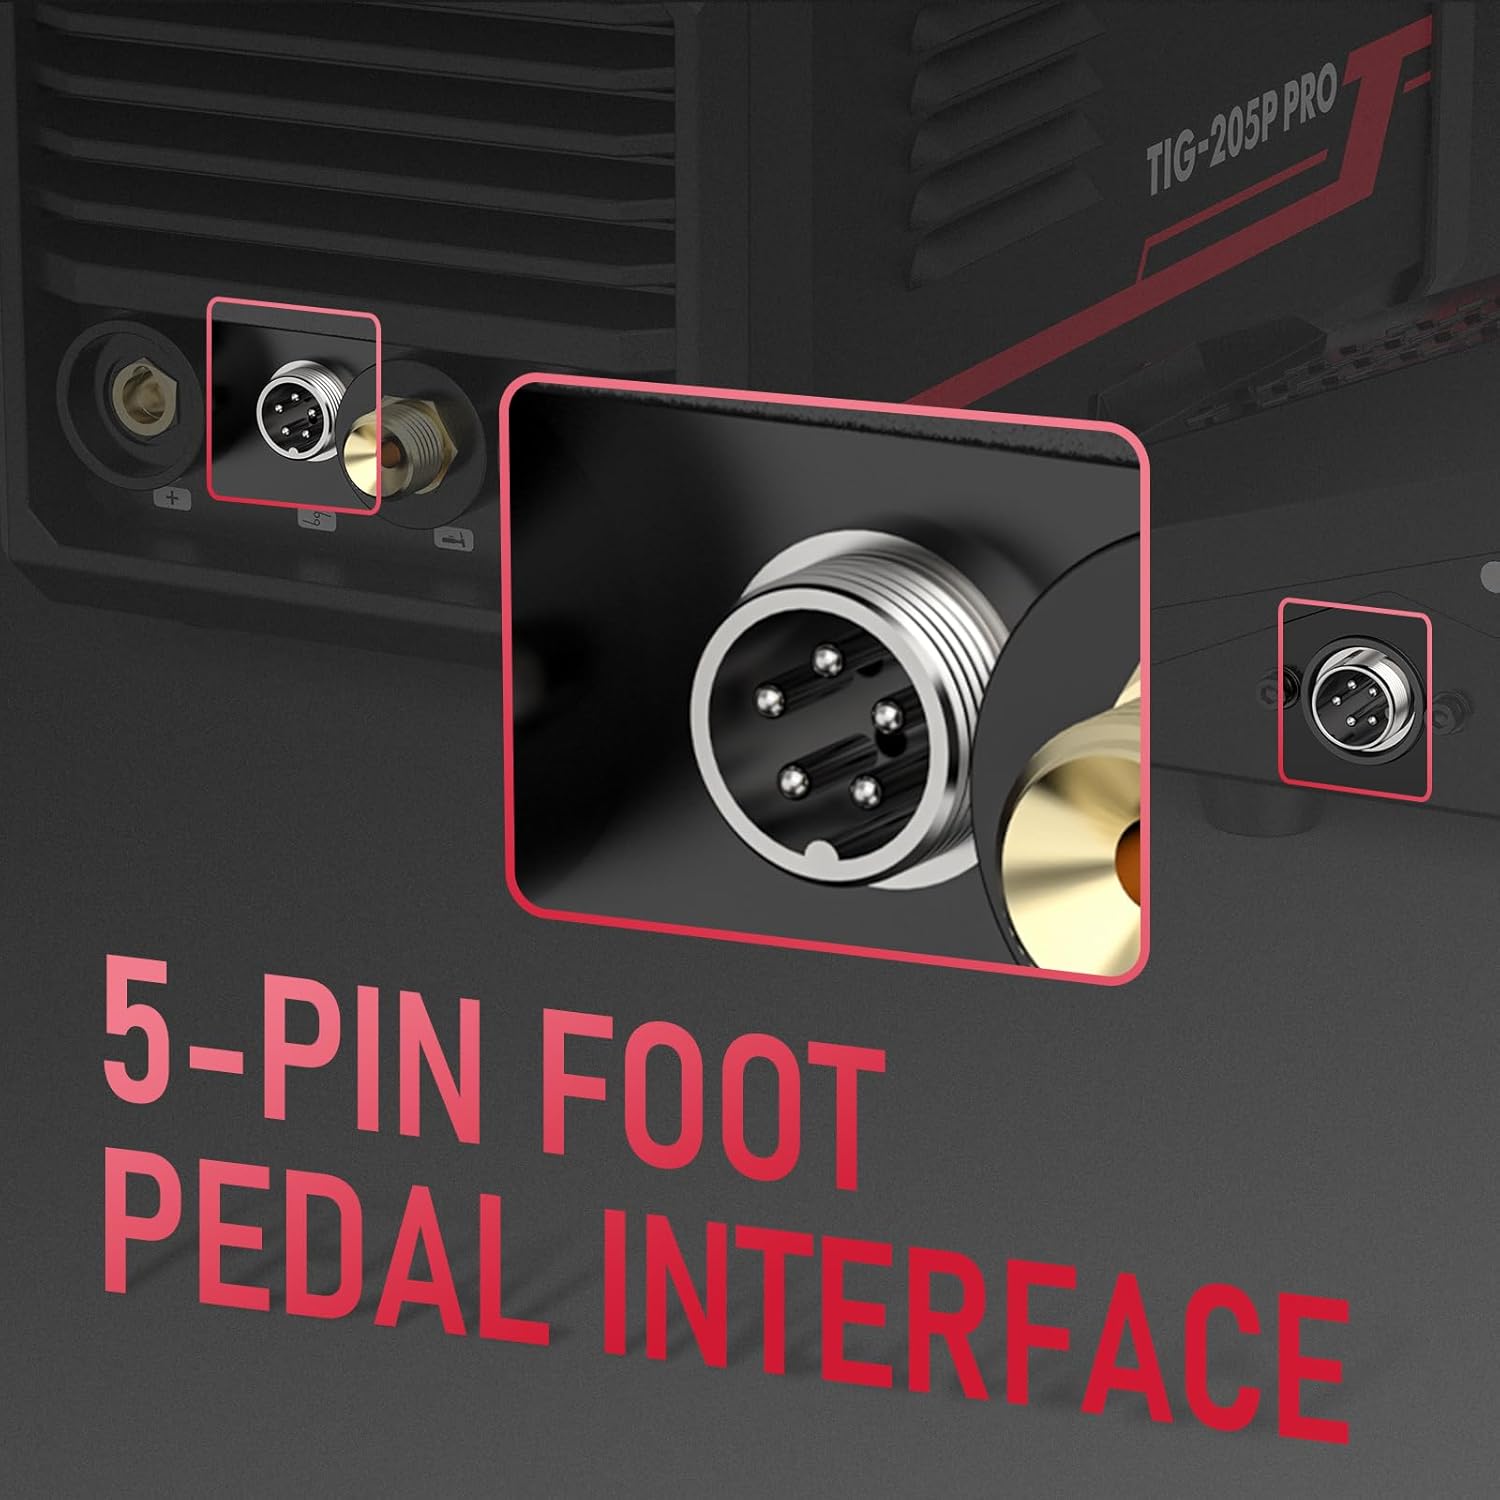
Figure 3.3: 5-Pin Foot Pedal Interface.
3.5 Portable Design
Weighing only 4.8 kg, the TIG-205P PRO is highly portable, making it suitable for various work environments.

Figure 3.4: Portable and Compact Design.
3.6 IGBT Inverter Technology
Integrated advanced IGBT inverter technology ensures excellent arc stability and produces high-quality welds.

Figure 3.5: IGBT Inverter Technology.
4. Panelaren Sarrera
Familiarize yourself with the control panel and its functions for efficient operation.

4.1 irudia: Aurreko panela goianview.

Figure 4.2: Intelligent Digital Screen Display and Controls.
Kontrol-paneleko elementuak:
- Welding Mode Button: Selects between Stick, HF TIG, and Pulse TIG modes.
- Operation Mode Buttons (Left/Right): Navigates through different adjustable parameters.
- Welding Function Button: Toggles specific welding functions like Hot Start, Arc Force, Spot Time, Steps Mode.
- Parameter Adjusting Knob: Adjusts the value of the selected parameter (e.g., current, voltage, pulse frequency).
- Bistaratze digitala: Shows current settings and operational data.
- Adierazleak: Lights for Pre Gas, Slope Up, Duty Cycle, Pulse Hz, Slope Down, Post Gas, I Start, I Stop, Warning.
5. Osagarriak barne
The YESWELDER TIG-205P PRO typically comes with the following accessories:

Figure 5.1: Accessories Included with the TIG-205P PRO.
- TIG-205P PRO Welder Unit
- 3m Ground Clamp
- 3m-ko elektrodo euskarria
- TIG Torch Consumables
- 4m WP-17 TIG Torch
- 3m Argon Gas Hose
6. Konfigurazioa
Follow these steps for initial setup of your welding machine:
- Lekua: Place the welding machine on a stable, level surface in a well-ventilated area, away from moisture and direct sunlight.
- Potentzia-konexioa: Connect the power cable to a suitable 230V power outlet. Ensure the power source meets the machine's requirements.
- Beheko Clamp Konexioa: Konektatu lurra clamp cable to the appropriate output terminal (usually marked with a '-' or ground symbol) on the front panel. Secure the ground clamp to the workpiece or welding table.
- TIG zuziaren konexioa: Connect the TIG torch to the designated TIG torch connection port. Ensure the gas hose from the torch is connected to the gas inlet on the machine's rear panel, and then to your argon gas cylinder via a regulator.
- Electrode Holder Connection (for ARC welding): If performing ARC welding, connect the electrode holder cable to the '+' output terminal.
- Oin-pedalaren konexioa (aukerakoa): If using a foot pedal, connect its 5-pin connector to the foot pedal interface on the machine.
7. Funtzionamendu-argibideak
This section outlines the basic operation for different welding modes.

Figure 7.1: TIG-205P PRO in Operation.
7.1 Piztea eta moduaren hautaketa
- Turn on the main power switch located on the rear panel.
- Erabili Soldadura moduko botoia on the front panel to cycle through ARC (Stick), DC TIG, and PULSED TIG modes. The selected mode will be indicated on the LED display.
7.2 Parameter Adjustment
Modu bat hautatu ondoren, erabili Operation Mode Buttons (left/right arrows) to highlight the parameter you wish to adjust (e.g., welding current, pulse frequency, pre-gas time). Rotate the Parameter Adjusting Knob to change the value. The large LED display will show the current setting.
7.3 TIG Welding (DC TIG / HF TIG)
For TIG welding, ensure your argon gas cylinder is open and the flow rate is set appropriately. The machine features High Frequency (HF) arc start for clean, non-contact ignition.

Figure 7.2: High Frequency Arc Start in TIG Welding.
7.4 Pulsed TIG Welding
Pulsed TIG mode provides better control over heat input, reducing distortion and improving weld appearance, especially on thin materials. Adjust pulse frequency (Hz) and duty cycle as needed.

Figure 7.3: Pulse Function for Enhanced Welding Control.
7.5 ARC (Stick) Welding
For ARC welding, select the ARC mode. The machine features adjustable Arc Force and Hot Start functions to improve arc stability and ignition. Anti-stick and VRD (Voltage Reduction Device) are integrated for user safety.
8. Mantentzea
Mantentze-lan erregularrak zure soldadura-makinaren iraupena eta errendimendu optimoa bermatzen ditu.
- Garbiketa: Periodically clean the machine's exterior with a dry cloth. Use compressed air to blow out dust from the cooling vents. Ensure the machine is unplugged before cleaning.
- Kableen ikuskapena: Regularly inspect all cables (power, ground, torch) for cuts, fraying, or damage. Replace damaged cables immediately.
- Torch Maintenance: Clean the TIG torch collet, collet body, and ceramic nozzle regularly. Replace worn-out consumables.
- Biltegiratzea: Gorde makina hautsik gabeko ingurune lehor batean erabiltzen ez duzunean.
9. Arazoak
Atal honetan ohiko arazoei eta haien balizko irtenbideei buruzko informazioa aurkituko duzu.
| Arazoa | Kausa posiblea | Irtenbidea |
|---|---|---|
| Makina ez da pizten. | No power supply; Power switch off; Internal fault. | Check power cord and outlet; Turn on power switch; Contact customer support. |
| Arkurik ez edo arku ahula. | Improper ground connection; Incorrect current setting; Worn electrode/torch consumables. | Ensure good ground contact; Increase current; Replace electrode/consumables. |
| Overheating indicator on. | Exceeded duty cycle; Insufficient ventilation. | Allow machine to cool down; Ensure clear airflow to vents. |
| Soldadura kalitate eskasa. | Incorrect parameters; Contaminated workpiece; Improper technique. | Adjust settings; Clean workpiece; Review welding technique. |
10. Zehaztapenak
Technical specifications for the YESWELDER TIG-205P PRO welding machine.

10.1. irudia: Ezaugarri teknikoak.
| Zehaztapena | Balioa |
|---|---|
| Eredua | TIG-205P PRO |
| Fabrikatzailea | BAI SOLDARIA |
| Sarrera boltage (U1) | 230V |
| Output Current (I2) | Up to 200A (TIG), 160A (ARC) |
| Duty Cycle (X) | 60% at 200A (TIG), 60% at 160A (ARC) |
| Kargarik gabeko Voltage (U0) | 65V |
| Hozteko modua | Fan hoztea |
| Isolamendu-maila | F |
| Babes-araua | IP21S |
| Neurriak (paketea) | 44.9 x 36.79 x 28.9 cm |
| Pisua (Paketea) | 9.36 kg |
11. Bermea eta Laguntza
For warranty information and technical support, please refer to the documentation included with your purchase or contact YESWELDER customer service directly. Keep your proof of purchase for warranty claims.