HT123
Generic HT123 Digital Multimeter User Manual
Eredua: HT123
1. Sarrera
The Generic HT123 is a compact, auto-ranging digital multimeter designed for accurate measurement of AC/DC voltage, resistance, and non-contact voltage (NCV). Featuring a 2,000-count display with True RMS, backlight, and data hold functions, it is suitable for both beginners and experienced users for various electrical testing tasks.

1.1. irudia: Aurrealdea view of the Generic HT123 Digital Multimeter, showcasing its compact design and clear LCD display.
2. Segurtasun informazioa
Always observe basic safety precautions when using this multimeter to prevent personal injury or damage to the meter or equipment under test.
- Ez gainditu neurketa-tarte bakoitzerako zehaztutako sarrera-balio maximoak.
- Kontu handiz ibili zirkuitu biziekin lan egitean.
- Ziurtatu proba-kableak egoera onean daudela eta behar bezala konektatuta daudela neurketak egin aurretik.
- Ez erabili neurgailua hondatuta badago edo bateriaren estalkia behar bezala itxita ez badago.
- Funtzioak aldatu aurretik, kendu proba-kableak zirkuitutik.
- Irakurketa zehatzak bermatzeko, aldatu bateriak bateria baxuaren adierazlea agertzen denean.
3. Paketearen edukia
Egiaztatu elementu guztiak paketean daudela:
- 1 x Generic HT123 Digital Multimeter
- 1 x Proba-kable pare bat (gorria eta beltza)
- 1 x Erabiltzailearen eskuliburua (ingelesez)
4. Produktuaren ezaugarriak
The HT123 Digital Multimeter offers a range of features for efficient and safe electrical testing:
- Auto Multimeter: Intelligent recognition of AC and DC voltage, automatically switching ranges without manual gear changes.
- True RMS Function: Uhin-forma ez-sinusoidalen neurketa zehatzak ematen ditu.
- 2,000 zenbakien pantaila: High-resolution digital display for precise readings.
- NCV (Kontakturik gabeko boltage) Detekzioa: Enhances safety by detecting live voltage kontaktu zuzenik gabe.
- Erresistentzia neurketa: Measures resistance up to 600kΩ.
- Jarraitasun proba: Audible buzzer for quick circuit continuity checks.
- Datuak gordetzea: Freezes the displayed reading for convenient recording.
- Atzeko argia: Ikusgarritasuna hobetzen du argi gutxiko inguruneetan.
- Linterna: Integrated light for illuminating the test area.
- Itzali automatikoa: Bateriaren iraupena aurrezten du, jarduerarik gabe egon ondoren automatikoki itzaltzen baita.
- Bateria baxuaren adierazlea: Bateria aldatu behar denean abisatzen du.

Image 4.1: The HT123 Multimeter connected with test leads, illustrating its various measurement capabilities including AC/DC voltage, continuity, resistance, data hold, NCV, and backlight.
5. Konfigurazioa
5.1 Bateriaren instalazioa
The multimeter requires two 1.5V AAA batteries (not included) for operation.
- Ziurtatu multimetroa itzalita dagoela eta deskonektatu proba-kable guztiak.
- Bilatu bateriaren konpartimentuaren estalkia gailuaren atzealdean.
- Erabili bihurkin bat bateriaren estalkiko torlojua askatzeko.
- Kendu bateriaren estalkia.
- Sartu bi 1.5 V-ko AAA pila, konpartimentuaren barruan adierazten den polaritatea (+/-) errespetatuz.
- Jarri bateriaren estalkia eta estutu torlojua ongi.
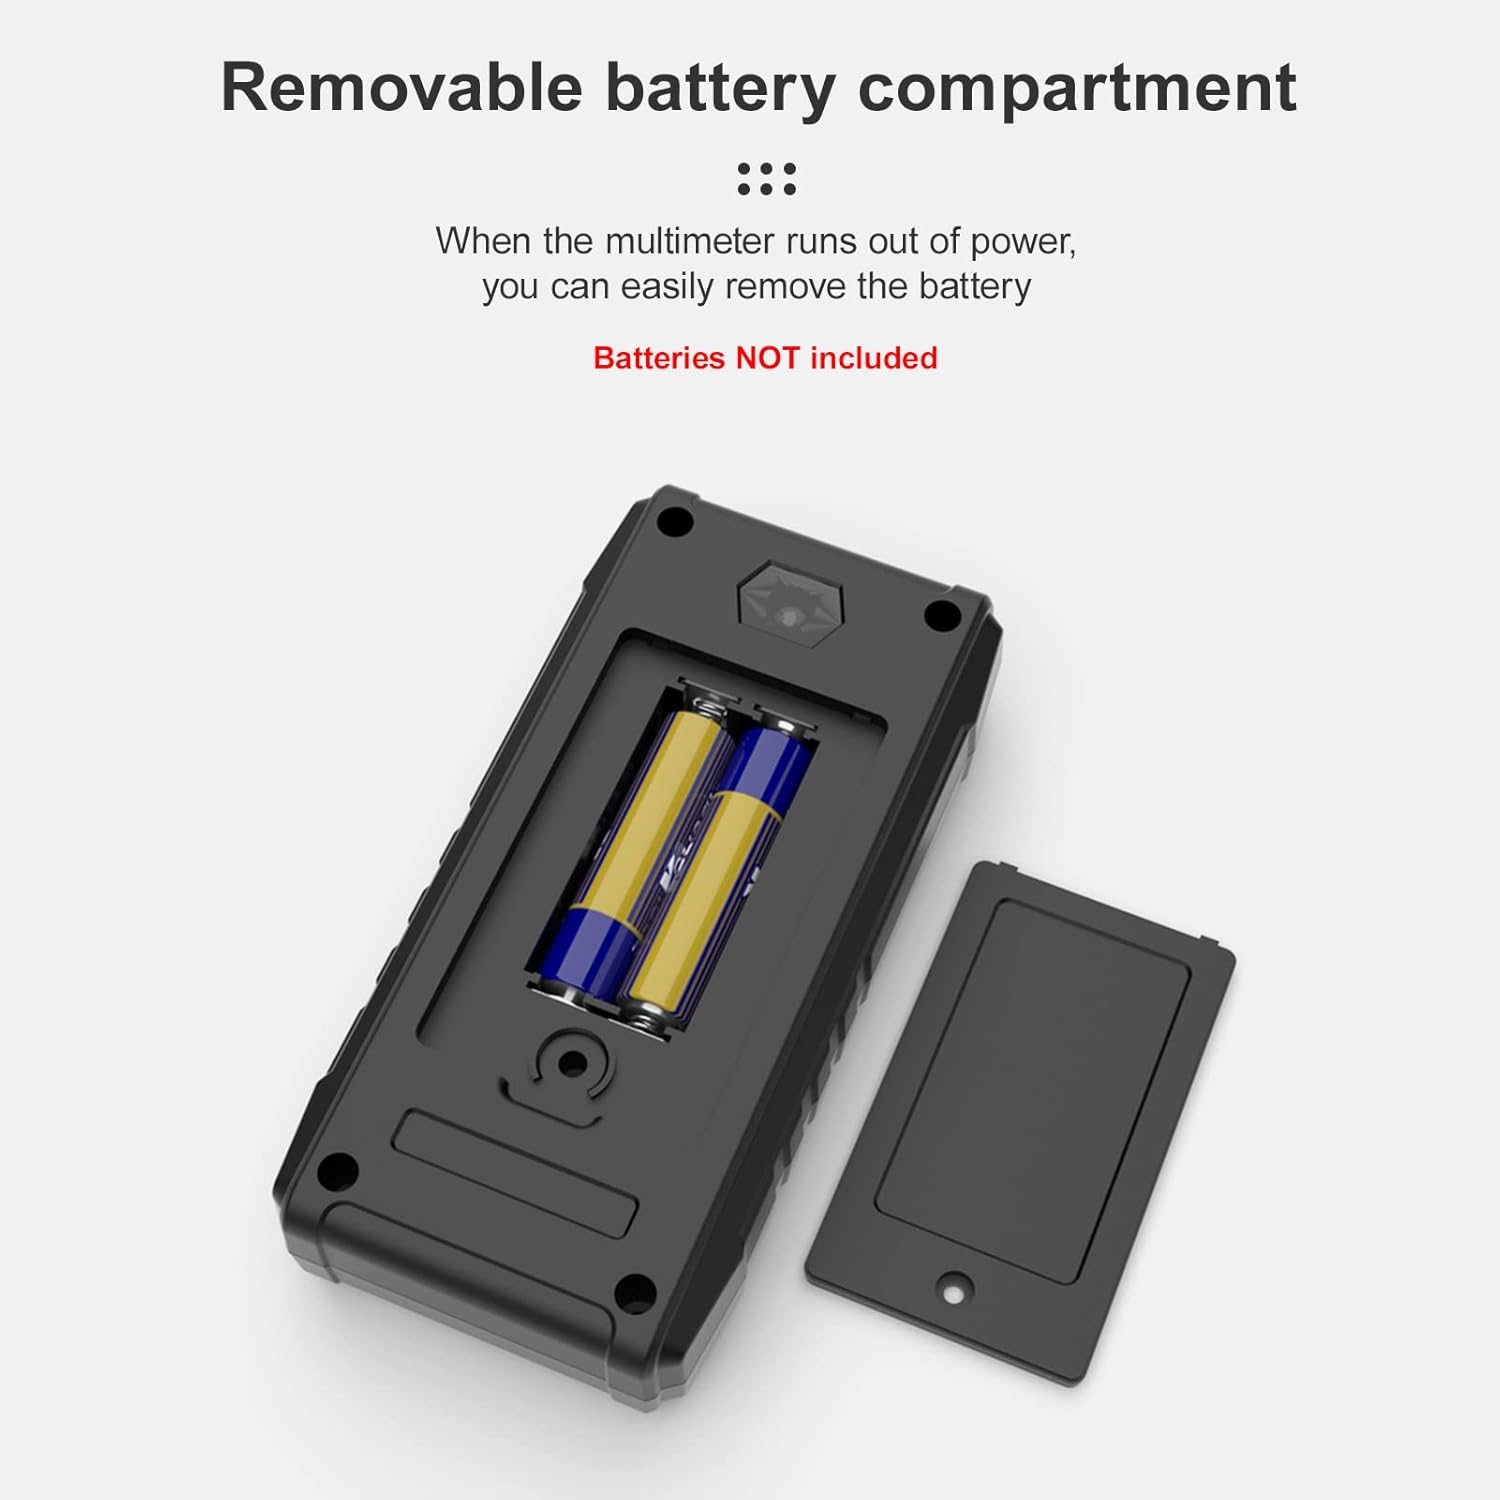
5.1. irudia: View of the removable battery compartment on the back of the multimeter, showing the placement for two AAA batteries.
6. Funtzionamendu-argibideak
The HT123 features intelligent auto-ranging, simplifying operation by automatically detecting the measurement type (AC/DC voltage, resistance, continuity) and selecting the appropriate range.
6.1 Funtzionamendu Orokorra
- Press the red power button to turn on the multimeter. The display will illuminate.
- Connect the black test lead to the 'COM' input jack and the red test lead to the 'INPUT' jack.
- The multimeter will automatically enter auto-measurement mode, indicated by 'AUTO' on the display.
- To activate the backlight or flashlight, press the light bulb button. Press again to cycle through modes or turn off.
- To hold a reading on the display, press the 'H/NCV' button briefly. Press again to release.
- The multimeter will automatically power off after approximately 15 minutes of inactivity.
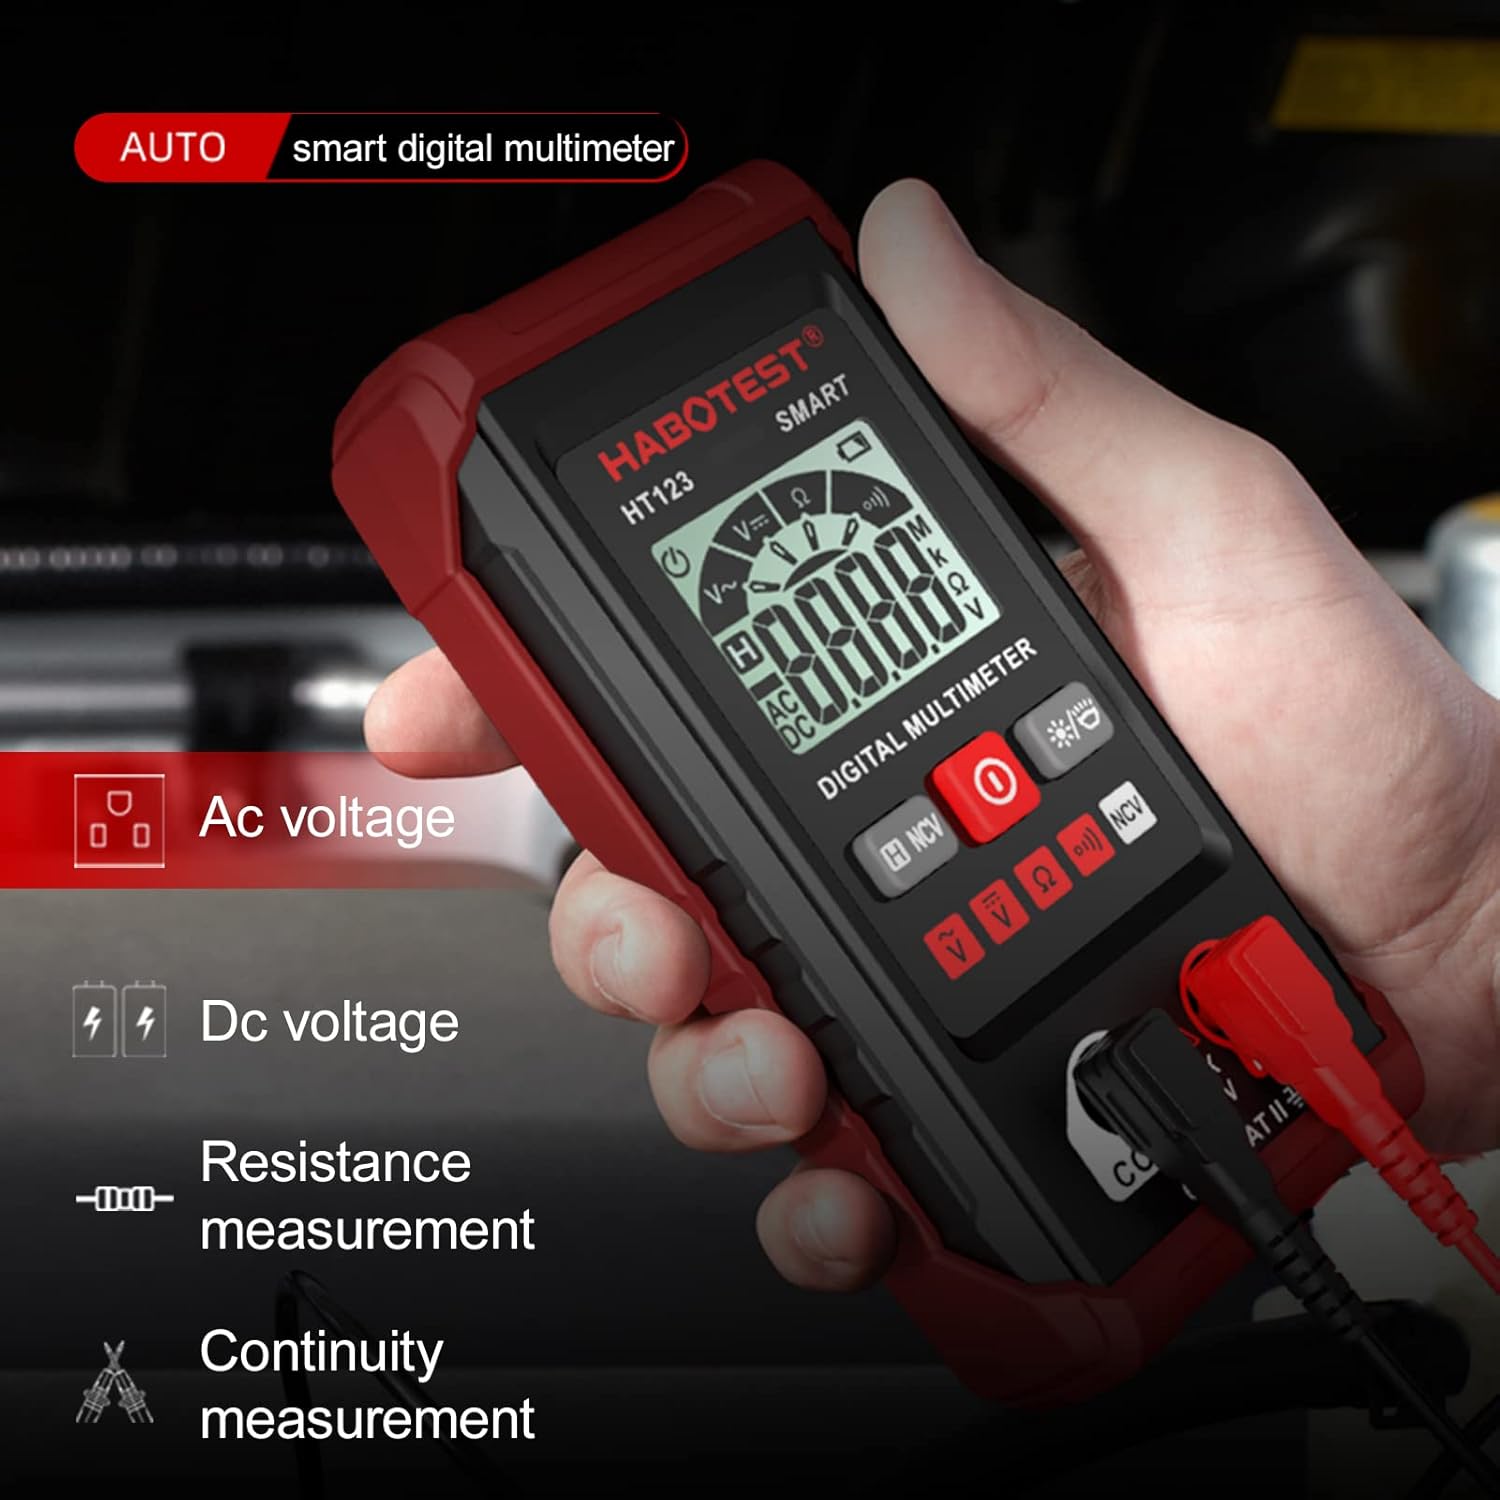
Image 6.1: A hand holding the HT123 Multimeter, with icons on the display indicating its auto-detection capabilities for AC voltage, DC boltage, erresistentzia eta jarraitutasuna.
6.2 AC/DC Voltage Neurketa
- Ensure the multimeter is in auto-measurement mode.
- Konektatu proba-kableak paraleloan neurtu nahi duzun zirkuituarekin edo osagaiarekin.
- Multimetroak automatikoki detektatuko du AC edo DC bolumenatage eta irakurketa erakutsi.

Image 6.2: The HT123 Multimeter measuring AC voltage from a wall outlet, displaying a reading of 220.3V.
6.3 Erresistentzia Neurketa
- Ziurtatu zirkuitua deskonektatuta dagoela erresistentzia neurtu aurretik.
- Konektatu proba-kableak osagaiaren kableen artean.
- The multimeter will automatically detect and display the resistance value in Ohms (Ω), kilo-Ohms (kΩ), or Mega-Ohms (MΩ).
6.4 NCV (Kontakturik Gabeko Bolumena)tage) Detekzioa
- Press and hold the 'H/NCV' button for approximately 2 seconds to enter NCV mode. 'NCV' will appear on the display.
- Move the top end of the multimeter (where the NCV sensor is located) near a live AC voltage iturria.
- The multimeter will emit an audible beep and the indicator light will flash, with the frequency increasing bolumenera hurbiltzen den heineantage iturria.
- Press and hold the 'H/NCV' button again to exit NCV mode.

Image 6.3: The HT123 Multimeter performing non-contact voltage detection near a wall outlet, indicated by the NCV icon and signal strength bars on the display.
6.5 Jarraitasun proba
- Ziurtatu zirkuitua desenergizatuta dagoela.
- Connect the test leads across the component or wire.
- If the resistance is below approximately 50Ω, the multimeter will emit a continuous beep, indicating continuity.

Image 6.4: A collage demonstrating various measurement applications of the HT123 Multimeter, including AC voltage, DC boltage, resistance, continuity, and NCV detection.
7. Mantentzea
7.1 Garbiketa
Garbitu neurgailua iragarkiarekinamp oihala eta detergente leuna. Ez erabili urratzaileak edo disolbatzaileak.
7.2 Bateria ordezkatzea
Replace the batteries immediately when the low battery indicator appears on the display to ensure accurate measurements. Refer to Section 5.1 for battery installation instructions.
7.3 Biltegiratzea
If the meter is not to be used for an extended period, remove the batteries to prevent leakage and store the device in a cool, dry place.
8. Arazoak
- Ez dago pantailarik: Egiaztatu bateriaren instalazioa eta ziurtatu bateriak ez daudela agortuta. Ordeztu behar izanez gero.
- Irakurketa okerrak: Ensure test leads are properly connected. Check battery level. Ensure the measurement function is appropriate for the task.
- Jarraitasun-txisturik ez: Verify the circuit is de-energized. Ensure the component is not open-circuited.
9. Zehaztapenak
| Parametroa | Zehaztapena |
|---|---|
| DC bolumenatage Barrutia | 0.8V - 600V (Max: 610V) |
| AC Boltage Barrutia | 0.8V - 600V (Max: 610V) |
| Erresistentzia sorta | Up to 600kΩ |
| Bistaratu zenbaketak | 2,000 zenbaketa |
| NCV Detekzioa | Bai |
| Display with Gear Display | Bai |
| Datuak gordetzea | Bai |
| Atzeko argia | Bai |
| Linterna | Bai |
| Bateria baxuaren adierazlea | Bai |
| Auto-itzali | Bai |
| Elikatze Hornidura | 2 x 1.5V AAA bateria (ez daude barne) |
| Materiala | ABS |
| Elementuaren tamaina | 122 x 61 x 29 mm (4.81 x 2.40 x 1.14 in) |
| Elementuaren pisua | 100 g (3.54 oz) |

Image 9.1: A diagram illustrating the key components and dimensions of the HT123 Multimeter, alongside a table of its technical specifications.
10. Bermea eta Laguntza
For warranty information or technical support, please refer to the contact details provided with your purchase or contact the manufacturer directly. Keep your purchase receipt as proof of purchase.
Ask a question about this manual
Ask about setup, troubleshooting, compatibility, parts, safety, or missing instructions. Manuals+ will review the question and use this page’s manual context to help answer it.