1. Sarrera
This manual provides detailed instructions for the installation, operation, and maintenance of your Denash X79SE Plus LGA 2011 Motherboard. This motherboard is designed to support Xeon E5 V1 V2 series processors and DDR3 memory, offering robust performance for various computing needs. Please read this manual thoroughly before installation and use to ensure proper setup and functionality.
2. Ezaugarri nagusiak
- NVME M.2 Interface: Equipped with an NVME M.2 hard drive interface, providing theoretical bandwidth up to 4 Gbit/s for high-speed storage.
- LGA 2011 entxufea: Supports Xeon E5 V1 V2 series processors.
- PCIe 3.0 x16 Slot: Features a dedicated slot for graphics cards, ensuring high-performance visual output.
- Gigabit-Ethernet: Integrated RTL8111H Gigabit LAN for stable and fast network connectivity.
- DDR3 memoria euskarria: Four DDR3 memory slots supporting up to 128GB (1066/1333/1600 MHz).
- 8-Layer PCB Design: Constructed with an 8-layer printed circuit board for enhanced stability and reliability.
- High-Capacity Power Supply: Utilizes a robust 1x8 and 1x24 pin power supply design for stable performance.
- USB 2.0 portuak: Includes six USB 2.0 ports for peripheral connectivity.

Figure 2.1: M.2 NVME/NGFF Slot for high-speed storage.

Figure 2.2: Gigabit Ethernet port for reliable network connection.

Figure 2.3: Solid capacitors ensuring stable power delivery and extended motherboard life.

Figure 2.4: Illustration of the durable 8-layer PCB material.
3. Konfigurazioa eta instalazioa
3.1 Paketearen edukia
Egiaztatu elementu guztiak zure paketean daudela:
- 1 x Denash X79SE Plus Motherboard
- 1 x I/O Backplate
- 1 x SATA datu-kablea

Figure 3.1: Motherboard, I/O backplate, and SATA cable included in the package.
3.2 Plaka amaierako diseinua
Ezagutu plaka baseko osagai eta konektore desberdinak.
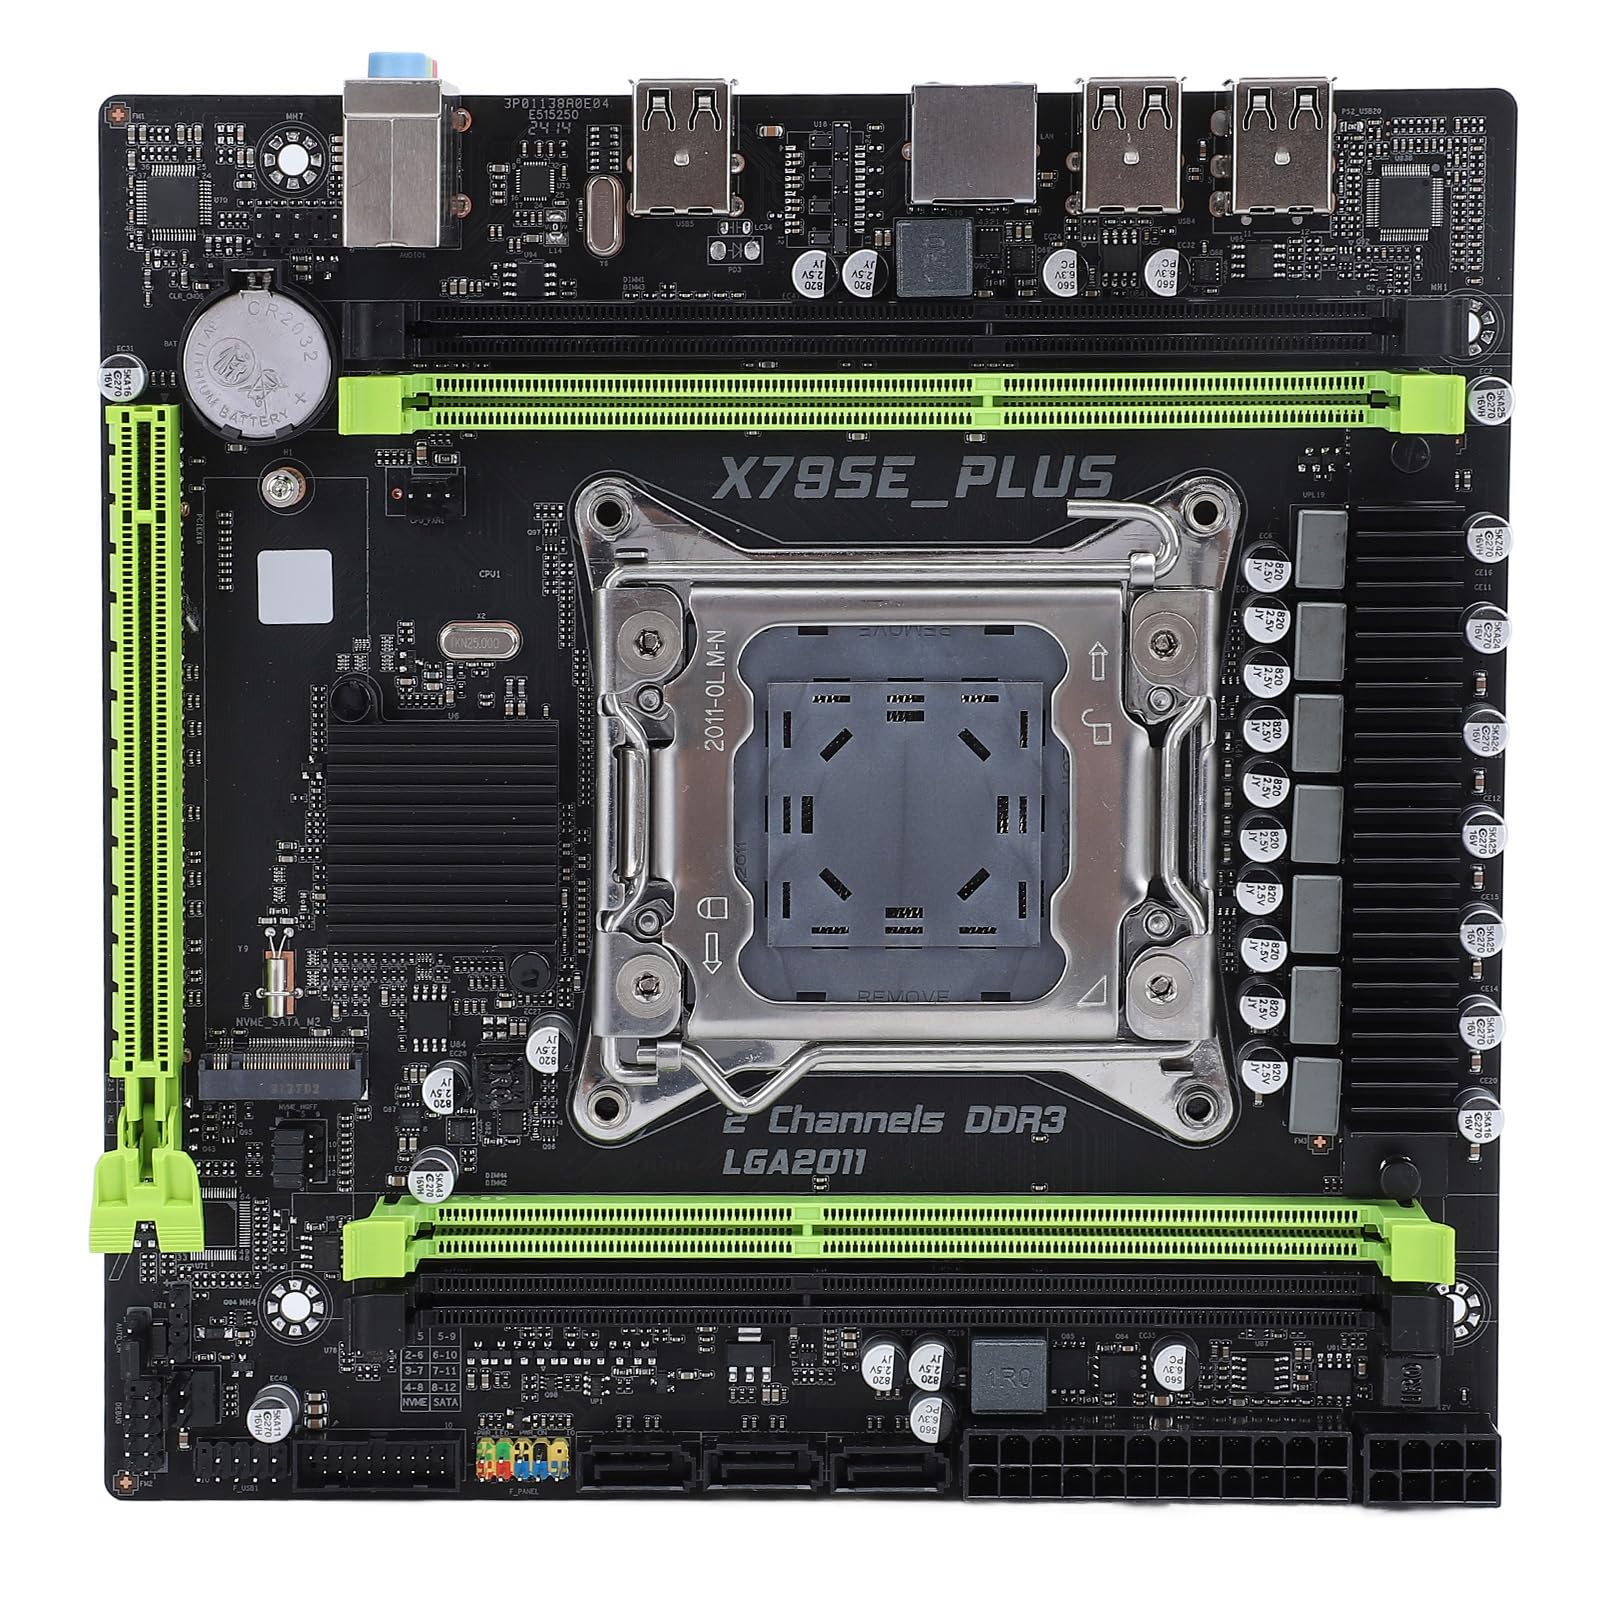
3.2 Irudia: Gainetikview of the Denash X79SE Plus motherboard.
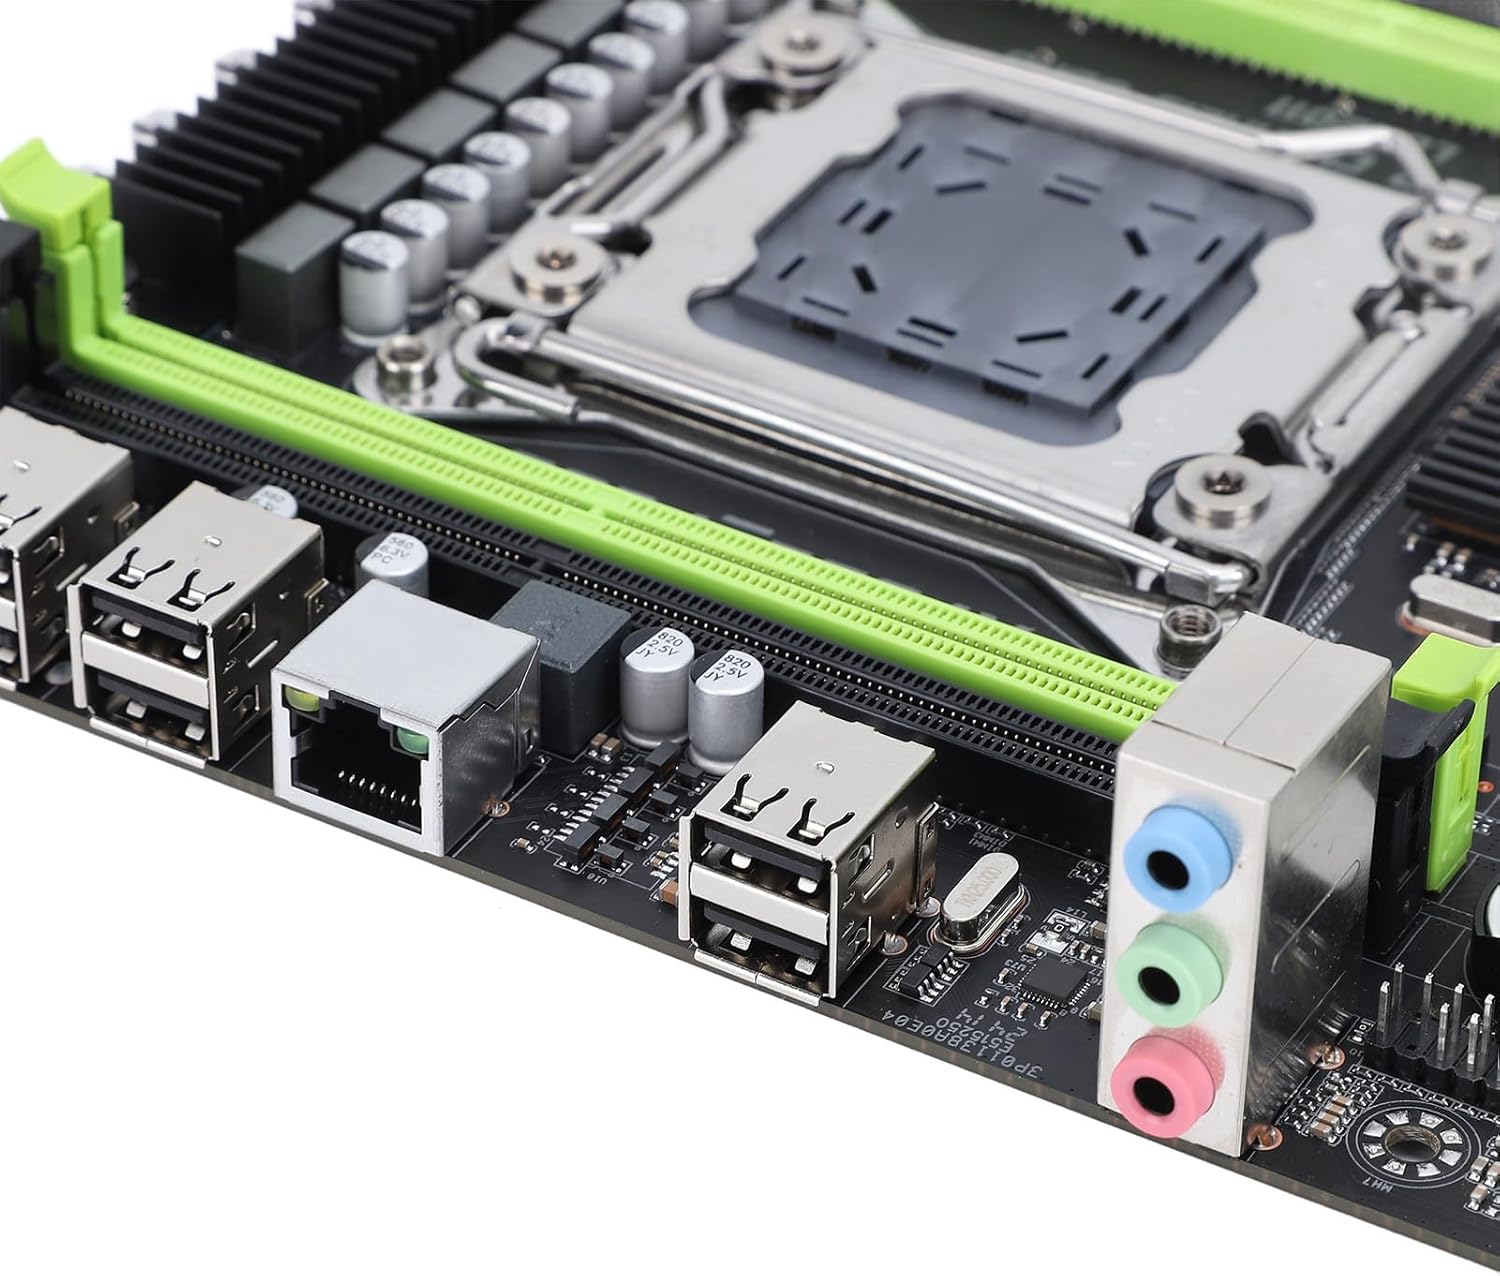
Figure 3.3: Rear I/O panel with USB, Ethernet, and audio ports.

Figure 3.4: SATA 2.0 ports and DDR3 memory slots.
3.3 Osagaien instalazio gida
Follow these steps to install essential components onto your motherboard:
- CPU instalazioa:
- Carefully open the LGA 2011 CPU socket lever.
- Align the CPU (Xeon E5 V1/V2 series) with the socket, ensuring the triangular mark on the CPU matches the mark on the socket.
- Jarri CPUa astiro-astiro socketean, indarrik eman gabe.
- Itxi entxufearen palanka CPUa finkatzeko.
- Apply thermal paste and install the CPU cooler.
- Memory (DDR3) Installation:
- Open the clips on both ends of the DDR3 memory slots.
- Align the memory module's notch with the slot's key.
- Sakatu gogor memoria-moduluaren bi muturretan, klipak bere lekuan sartu arte.
- Biltegiratze gailuaren instalazioa:
- M.2 NVME SSD: Insert the M.2 SSD into the M.2 slot at an angle, then push it down and secure it with a screw.
- SATA unitateak: Connect SATA data cables from your storage drives (HDD/SSD) to the SATA 2.0 ports on the motherboard. Connect SATA power cables from your power supply to the drives.
- Graphics Card (PCIe 3.0 x16) Installation:
- Open the retention clip on the PCIe 3.0 x16 slot.
- Align your graphics card with the slot and press down firmly until it is fully seated and the retention clip locks.
- Secure the graphics card to your PC case with a screw.
- Elikatze-horniduraren konexioa:
- Konektatu elikatze-iturriaren 24 pineko ATX elikatze-konektorea plaka baseko elikatze-hartune nagusira.
- Connect the 8-pin CPU power connector to the corresponding socket near the CPU.
- Connect any additional power cables required for your graphics card or other components.
- Aurreko paneleko konektoreak:
- Connect the front panel headers (power button, reset button, HDD LED, power LED, USB 2.0, audio) from your PC case to the corresponding pins on the motherboard. Refer to your PC case manual for specific pin assignments.
4. Funtzionamendu-argibideak
4.1 Lehenengo piztea
After assembling all components and connecting power, press the power button on your PC case. The system should power on, and you should see a display on your monitor.
4.2 BIOS konfigurazioa
To enter the BIOS/UEFI setup utility, press the designated key (usually DEL or F2) during the initial boot sequence. In the BIOS, you can configure boot order, system time, CPU settings, and other hardware parameters.
4.3 Sistema eragilearen instalazioa
Once the BIOS is configured, you can proceed with installing your preferred operating system (e.g., Windows, Linux). Boot from your OS installation media (USB drive or DVD) and follow the on-screen instructions.
5. Mantentzea
5.1 Garbiketa
Regularly clean your computer's interior to prevent dust buildup, which can lead to overheating and reduced performance. Use compressed air to remove dust from fans, heatsinks, and other components. Ensure the system is powered off and unplugged before cleaning.
5.2 BIOS eguneraketak
BIOS updates can provide improved compatibility, stability, and new features. Check the manufacturer's website for the latest BIOS versions and follow their instructions carefully. Incorrect BIOS updates can damage your motherboard.
6. Arazoak
6.1 Gai arruntak
- Potentziarik gabe:
- Check all power connections (24-pin ATX, 8-pin CPU, GPU).
- Ziurtatu elikatze-iturriaren etengailua 'ON' posizioan dagoela.
- Egiaztatu aurrealdeko paneleko pizteko botoiaren konexioa plaka basearekin.
- Ez dago pantailarik:
- Ensure the monitor is connected to the graphics card (not the motherboard's integrated graphics, if applicable).
- Berriro jarri grafiko-txartela eta memoria-moduluak.
- Test with a different monitor or display cable.
- Sistemaren ezegonkortasuna/matxurak:
- Egiaztatu CPU eta GPU tenperaturak.
- Ensure all components are properly seated.
- Exekutatu memoria diagnostiko tresnak.
- Update drivers for all components.
- Boot Device Not Found:
- Check SATA/M.2 cable connections to storage drives.
- Verify boot order in BIOS.
- Ensure the operating system is correctly installed on the drive.
7. Zehaztapen Teknikoak
| Ezaugarri | Zehaztapena |
|---|---|
| Marka | Denash |
| Ereduaren izena | X79SE Plus |
| Modelo zenbakia | Denashsh8g1qz45g |
| CPU Socketa | LGA 2011 (Supports Xeon E5 26XXV1/V2) |
| Memoria zirrikituak | 4 x DDR3 (Max 128GB, 1066/1333/1600 MHz) |
| SATA interfazea | 3 x SATA 2.0 |
| M.2 zirrikituak | 1 x M.2 2280 NVMe 3.0x4, 1 x M.2 2280 NGFF SATA 2.0 Protocol Port SSD |
| Graphics Card Slot | 1 x PCIe 3.0 x16 |
| Audio Txipa | HD 5.1 Channel Sound Chip |
| Sare Txartela | 1 x Gigabit Ethernet (RTL8111H) |
| USB atakak | 6 x USB 2.0 |
| Forma-faktorea | Mikro ATX |
| Bateria integratua | CR2032x1 240 mAh |
| Bermea | 2 urteko fabrikatzailea |
8. Bermea eta Laguntza
The Denash X79SE Plus LGA 2011 Motherboard is covered by a 2 urteko fabrikatzailearen bermea from the date of purchase. This warranty covers defects in materials and workmanship under normal use. For warranty claims or technical support, please contact your retailer or the manufacturer directly. Keep your proof of purchase for warranty validation.