1. Produktua amaitu daview
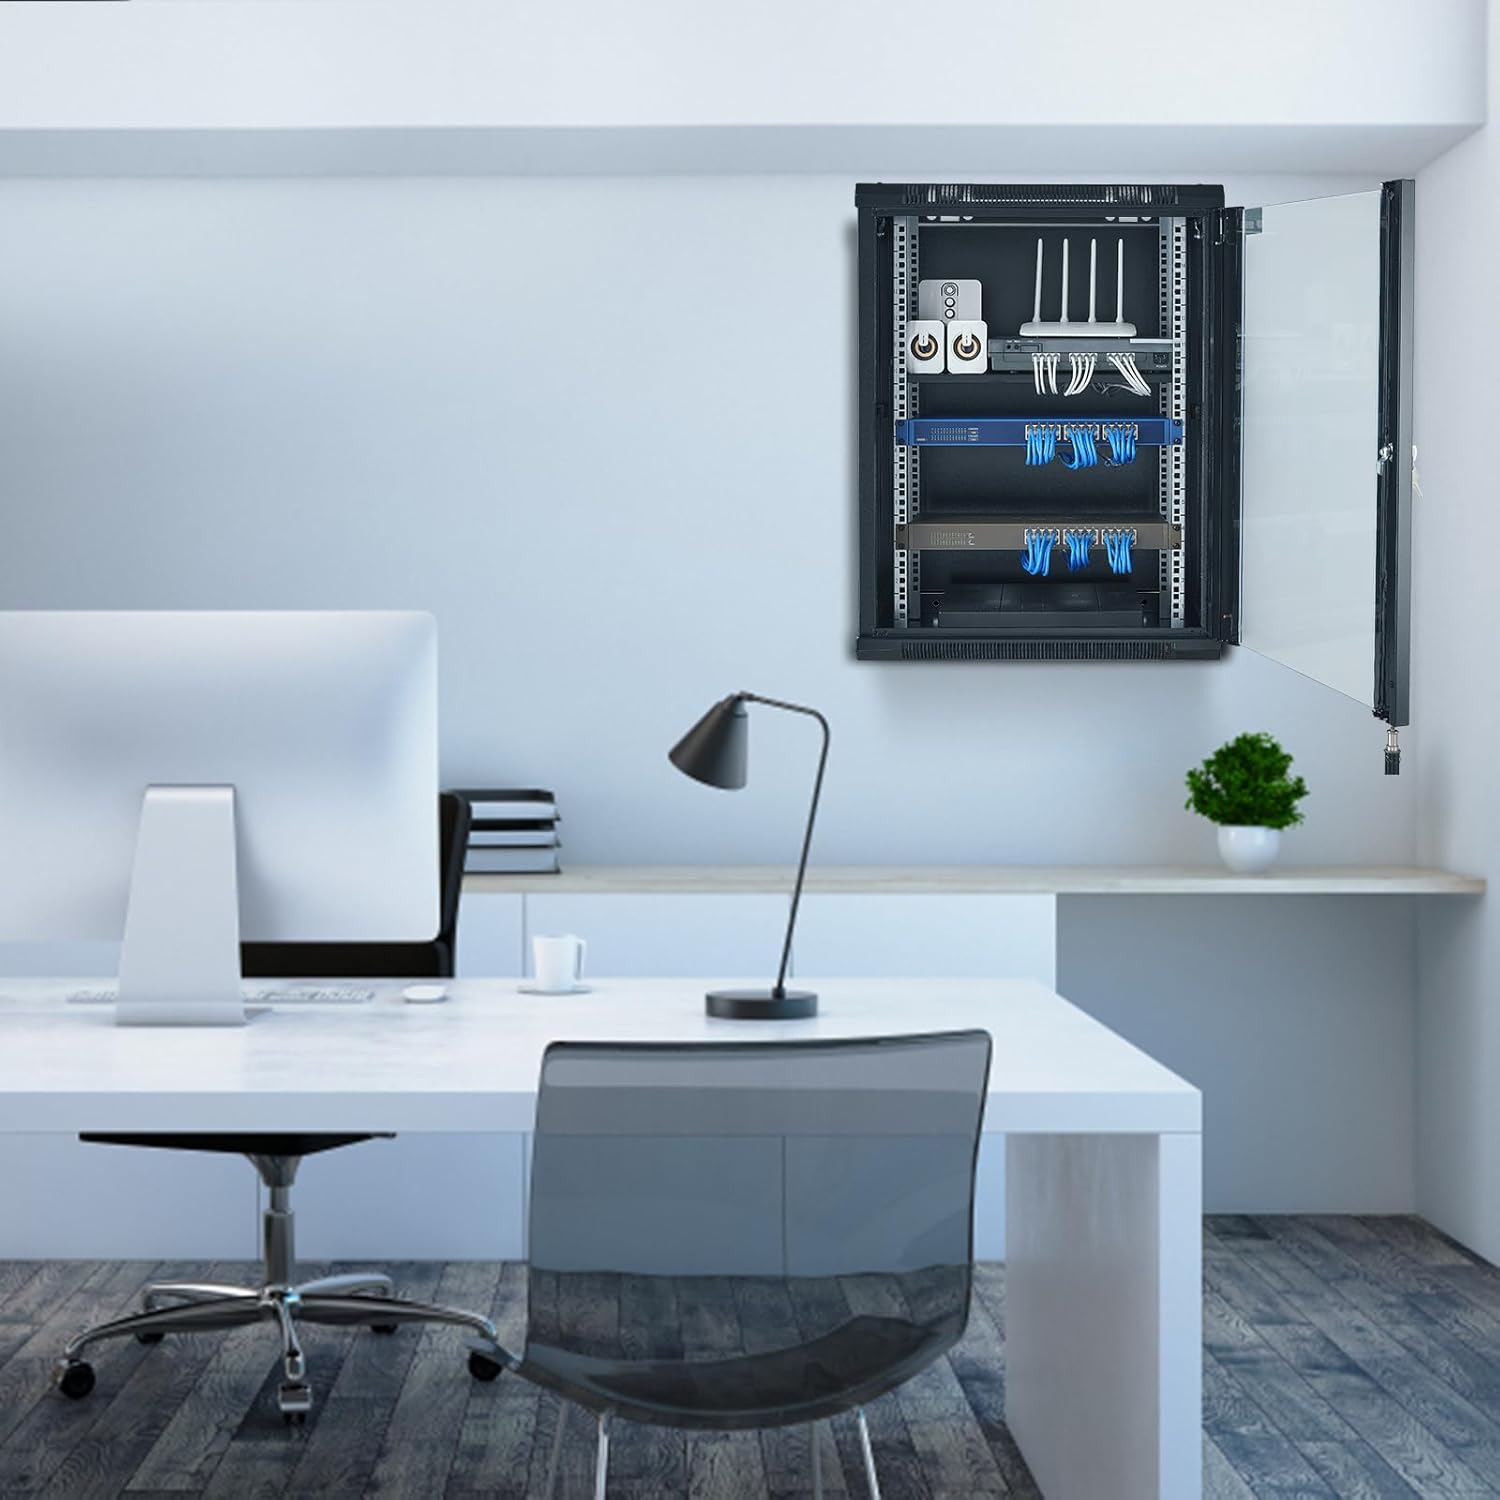
The VEVOR 15U Wall Mount Network Server Cabinet, Model SPT-604-15, is designed to organize and secure IT and A/V equipment in various environments such as offices, classrooms, and retail spaces. This cabinet offers a compact solution with an 18-inch internal depth, efficient heat dissipation, and robust construction for reliable performance.

Image 1.1: VEVOR 15U Wall Mount Network Server Cabinet, front view.
2. Segurtasun-argibideak
Please read and understand all safety instructions before assembling, installing, or operating this product. Failure to follow these instructions may result in injury or damage to the product or connected equipment.
- Ertz zorrotzak: Exercise caution during assembly. Some components may have sharp edges. Wear protective gloves if necessary.
- Pisua: The cabinet is heavy. Use appropriate lifting techniques and seek assistance when moving or mounting the unit.
- Karga-gaitasuna: Do not exceed the specified load capacities: 500 lbs (ground-mounted) or 200 lbs (wall-mounted). Overloading can cause instability and damage.
- Muntaketa: Ensure the wall structure can support the cabinet's weight and its contents. Use appropriate hardware for your wall type (e.g., concrete, wood studs).
- Aireztapena: Do not obstruct ventilation openings. Proper airflow is essential to prevent equipment overheating.
- Segurtasun elektrikoa: Ensure all installed electrical equipment is properly grounded and meets local electrical codes.
- Instalazio segurua: Verify all screws and fasteners are tightened securely before placing equipment inside or using the cabinet.
3. Paketearen edukia
Muntaketa hasi aurretik, egiaztatu osagai guztiak daudela eta kalterik gabe daudela. Piezarik falta edo kaltetuta badago, jarri harremanetan VEVOR bezeroarentzako arreta-zerbitzuarekin.
- Cabinet Frame Components (Top, Bottom, Side Panels, Rear Panel)
- Front Glass Door with Lock and Keys
- Adjustable Mounting Rails (Square-hole)
- Mounting Hardware (Screws, Nuts, Washers, Wall Anchors for masonry)
- Side Panel Locks and Keys
- Argibide eskuliburua
4. Muntatzeko jarraibideak
Assembly requires careful attention to detail. It is recommended to have a second person assist with certain steps.
4.1 Beharrezko tresnak
- Phillips buru bihurkina
- Wrench (if applicable for specific fasteners)
- Neurketa Zinta
- Maila
- Zulagailua (horman muntatzeko)
- Protective Gloves (recommended)
4.2 Muntaketa pausoz pauso
- Deskonprimitu osagaiak: Carefully remove all parts from the packaging. Lay them out on a clean, flat, and protected surface.
- Muntatu markoa: Attach the side panels to the top and bottom panels. Ensure proper alignment of screw holes. Some users have reported tight fits; if holes do not align, gently adjust components or use a drill with a metal bit if absolutely necessary, though this should be a last resort.
- Atzeko panela instalatu: Secure the rear panel to the assembled frame using the provided hardware.
- Install Adjustable Mounting Rails: Insert the square-hole mounting rails into the cabinet. These rails are fully adjustable to accommodate various equipment depths. To ease installation of interior brackets, consider flipping the cabinet on its side. Ensure the rails are oriented correctly for equipment mounting.
- Attach Front Door: Mount the front glass door to the cabinet hinges. Ensure the door opens and closes smoothly. Install the lock mechanism for the front door.
- Alboko panelak erantsi: Secure the removable side panels. Install the side panel locks.

Image 4.1: Illustration of multiple wiring holes and adjustable rails for easy installation.
5. Instalazioa
The VEVOR 15U Network Server Cabinet can be installed as a ground-mounted unit or a wall-mounted unit.
5.1 Ground-Mounted Installation
For ground-mounted use, ensure the cabinet is placed on a stable, level surface. The maximum load capacity for ground-mounted configuration is 500 lb (226.8 kg). Consider placing a protective pad underneath to prevent scratches from the cabinet's base screws.
5.2 Horma-instalazioa
For wall-mounted installation, the maximum load capacity is 200 lb (90.72 kg). Carefully select a wall location that can safely support the combined weight of the cabinet and all intended equipment.
- Zehaztu muntaketa kokalekua: Choose a sturdy wall section, preferably with wood studs or concrete.
- Markatu zulatzeko puntuak: Hold the cabinet against the wall at the desired height and use a level to ensure it is straight. Mark the drilling points for the mounting holes on the rear panel.
- Zulatzeko zulo pilotuak: Drill pilot holes at the marked locations. Use appropriate drill bits for your wall material. For masonry, insert the provided wall anchors. For wood studs, ensure screws are long enough to penetrate securely.
- Armairu segurua: With assistance, lift the cabinet and align the mounting holes with the drilled holes. Insert and tighten the mounting screws securely. Do not overtighten.
- Egiaztatu egonkortasuna: Gently test the cabinet's stability on the wall before loading equipment.
5.1 irudia: Adibideaample of the cabinet installed in a wall-mounted configuration.

Image 5.2: Load-bearing capacities for ground and wall mounting.
6. Funtzionamendu-argibideak
Once assembled and installed, the cabinet is ready for equipment integration.
- Ekipoen instalazioa: Mount your IT or A/V equipment onto the adjustable square-hole rails using appropriate rack-mount hardware (not included).
- Kableen kudeaketa: Utilize the multiple wiring holes located on the top, bottom, and rear panels for organized cable routing. This helps maintain airflow and reduces clutter.
- Segurtasuna: Use the provided keys to lock the front glass door and side panels. This safeguards your valuable equipment from unauthorized access.
- Aireztapena: Ensure the strategically placed ventilation vents and cooling holes are unobstructed to maintain optimal airflow and prevent overheating of internal components.

Image 6.1: Secure door lock design for front door and side panels.

Image 6.2: Heat dissipation features for optimal temperature regulation.
7. Mantentzea
Regular maintenance ensures the longevity and optimal performance of your server cabinet.
- Garbiketa: Periodically wipe down the exterior surfaces with a soft, damp cloth. Avoid abrasive cleaners. For the glass door, use a standard glass cleaner.
- Hautsa kentzea: Use compressed air or a vacuum cleaner with a brush attachment to remove dust from ventilation openings and inside the cabinet. Dust accumulation can impede airflow and lead to overheating.
- Hardwarearen egiaztapena: Annually inspect all mounting hardware and fasteners for tightness. Retighten if necessary.
- Door and Lock Inspection: Check the door hinges and lock mechanisms for smooth operation. Lubricate if needed.
8. Arazoak
This section addresses common issues that may arise during the use of the VEVOR 15U Network Server Cabinet.
- Issue: Cabinet components do not align during assembly.
Irtenbidea: Ensure all parts are correctly oriented. Loosen adjacent screws slightly, adjust the component, and then retighten. If a hole is slightly off, a metal file or drill may be used with extreme caution, but this indicates a manufacturing variance. - Issue: Door or side panel lock does not engage.
Irtenbidea: Check if the latch mechanism is obstructed or bent. Ensure the door/panel is fully closed and aligned. Minor adjustments to the latch or strike plate may be required. - Arazoa: Armairuaren barruko ekipoak gehiegi berotzen ari dira.
Irtenbidea: Verify that all ventilation openings are clear and unobstructed. Ensure proper cable management to allow for maximum airflow. Consider adding active cooling solutions if the environment or equipment generates significant heat. - Issue: Cabinet feels unstable after wall mounting.
Irtenbidea: Immediately remove all equipment. Re-evaluate the wall structure and the type of mounting hardware used. Ensure screws are securely fastened into studs or appropriate anchors. Consult a professional if unsure about wall integrity.
9. Zehaztapenak
| Ezaugarri | Zehaztapena |
|---|---|
| Elementuaren eredu-zenbakia | SPT-604-15 |
| Altuera | 15U |
| Max. Installation Depth | 18 hazbeteko / 457.2 mm |
| Max. Load-Bearing (Ground-Mounted) | 500 lb / 226.8 kg |
| Max. Load-Bearing (Wall-Mounted) | 200 lb / 90.72 kg |
| Pisu garbia | 52.9 lb / 24 kg |
| Neurri orokorrak (L x W x H) | 23.6 x 17.7 x 30.3 hazbeteko / 600 x 450 x 770 mm |
| Materiala | Altzairu aleazioa |
| Gailu bateragarriak | Server, CPU, Network Switches, Routers, A/V Devices |
| Kolorea | Beltza |

Image 9.1: Detailed dimensions and load capacities of the cabinet.
10. Bermea eta Laguntza
VEVOR products are designed for durability and performance. For warranty information, product support, or to report missing/damaged parts, please contact VEVOR customer service through their official webproduktua erosi zen gunea edo dendaria.
Gorde erosketa-agiria berme-erreklamazioetarako.