Sarrera
Thank you for choosing the hygger HG-162 New Mode 24/7 Timer LED Aquarium Light. This light is designed to provide optimal lighting conditions for freshwater plants and fish, simulating natural light cycles with advanced timer functions and multiple spectrum modes. This manual provides detailed instructions for setup, operation, maintenance, and troubleshooting to ensure the best performance and longevity of your aquarium light.

Figure 1: hygger HG-162 LED Aquarium Light with external controller.
Konfigurazio Argibideak
- Deskonprimitu Argia: Carefully remove all components from the packaging. Ensure the LED light fixture, adjustable brackets, and external controller are present.
- Erantsi euskarriak: Insert the adjustable metal brackets into the slots on both ends of the light fixture. These brackets are designed to fit various tank lengths.
- Adjust to Tank Size: Place the light fixture on top of your aquarium. Extend or retract the brackets to securely fit the length of your tank. The light is suitable for tanks from 12 inches to 18 inches long.
- Konektatu energia: Connect the power adapter to the external controller, then plug the controller into the light fixture. Finally, plug the power adapter into a suitable electrical outlet.

Figure 2: Dimensions and adjustable brackets for the 19W hygger HG-162 light.

Figure 3: Power connection for the hygger aquarium light.
Funtzionamendu-argibideak
The hygger HG-162 features an external controller for easy operation. Familiarize yourself with the buttons and indicators:
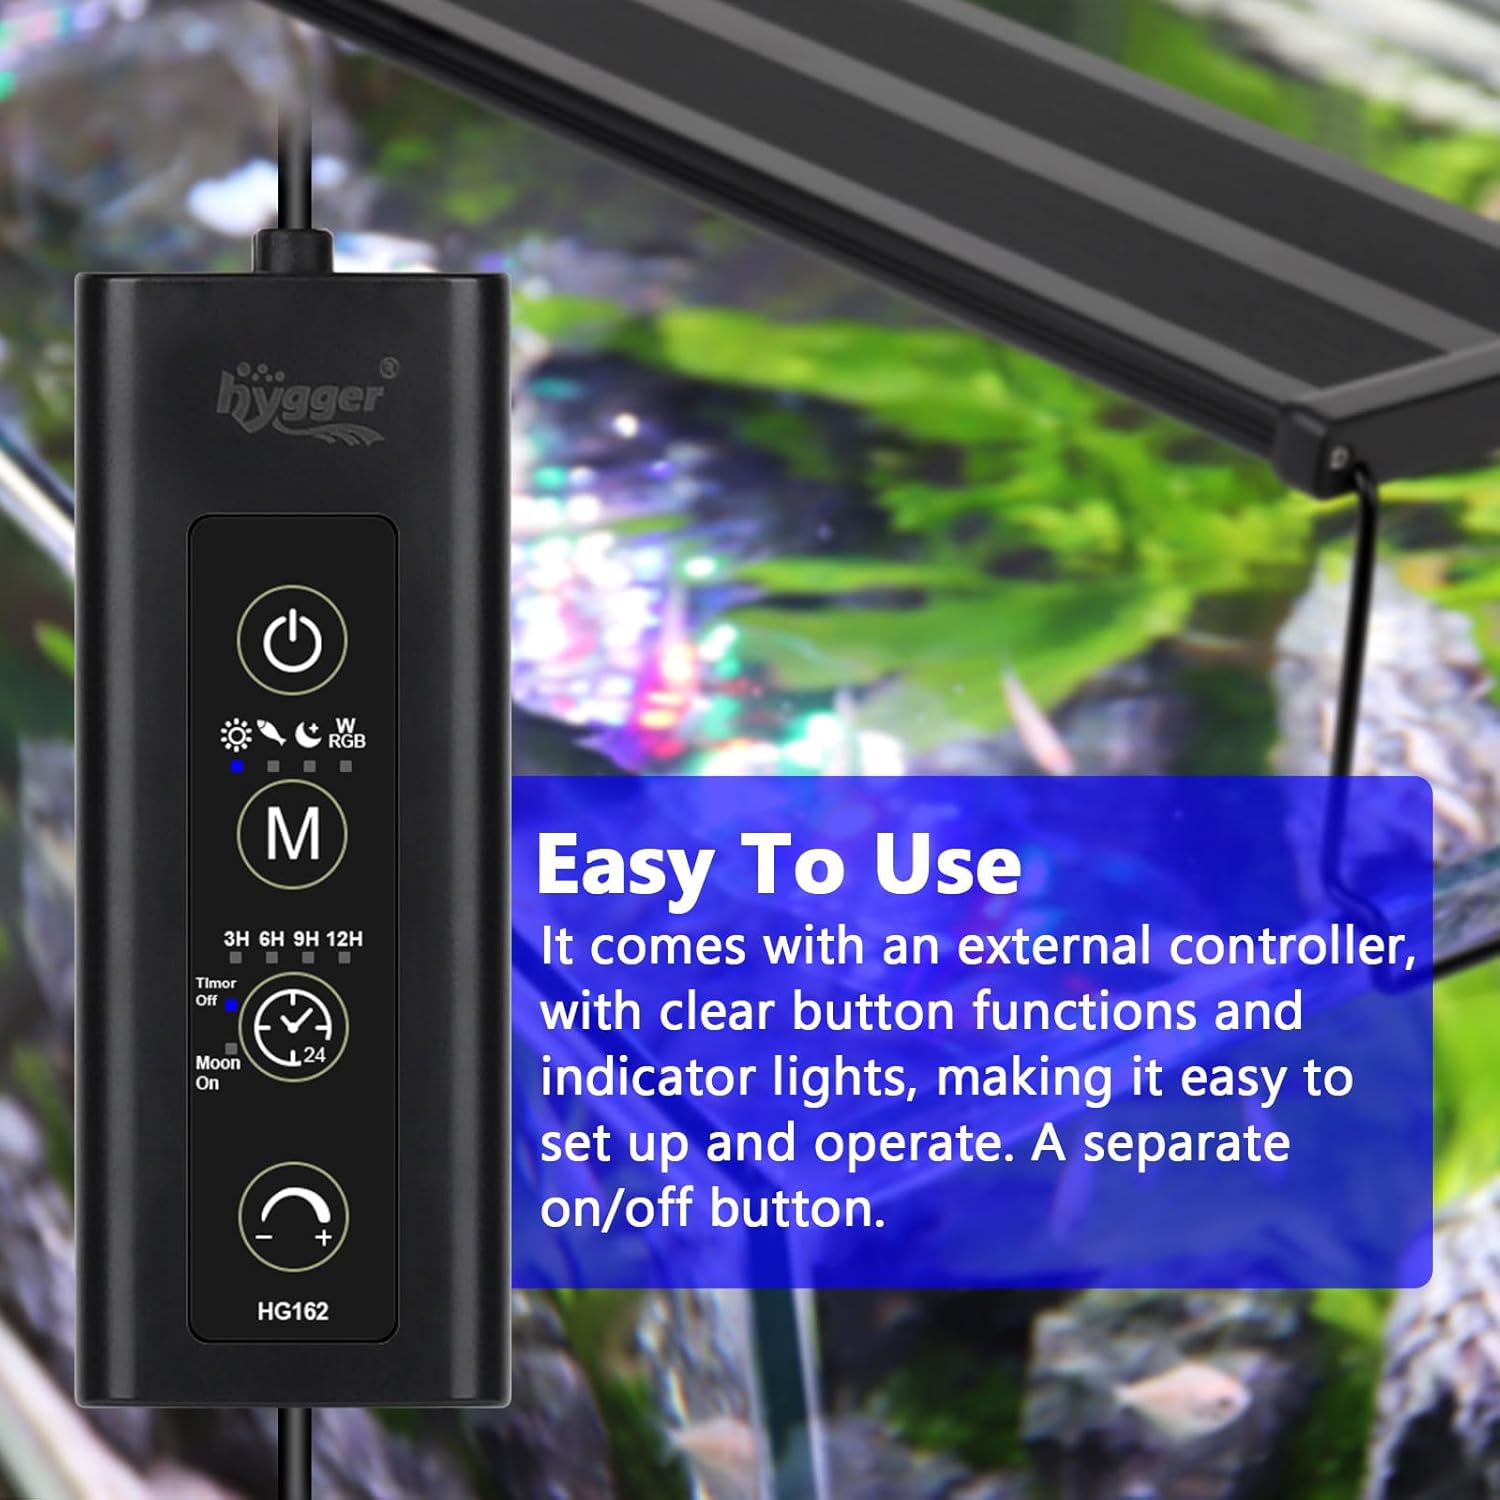
Figure 4: External Controller Layout.
Kontrolagailuaren funtzioak:
- Pizteko botoia: Press once to switch the light on or off.
- Modu botoia (M): Cycles through the four main lighting modes.
- Tenporizadorearen botoia: Selects the desired lighting duration for the 24/7 cycle (3H, 6H, 9H, or 12H).
- Moonlight Button: Activates or deactivates the additional 3-hour blue moonlight mode.
- Brightness Buttons (+/-): Adjusts the light intensity (10 levels, from 10% to 100%).
24/7 Timer Mode
This mode simulates a natural day-night cycle with gradual brightness changes. You can select a total lighting duration of 3, 6, 9, or 12 hours. The light will automatically transition through sunrise, day, sunset, and night phases.

Figure 5: 24/7 Light Cycle Diagram.
Argiztapen moduak
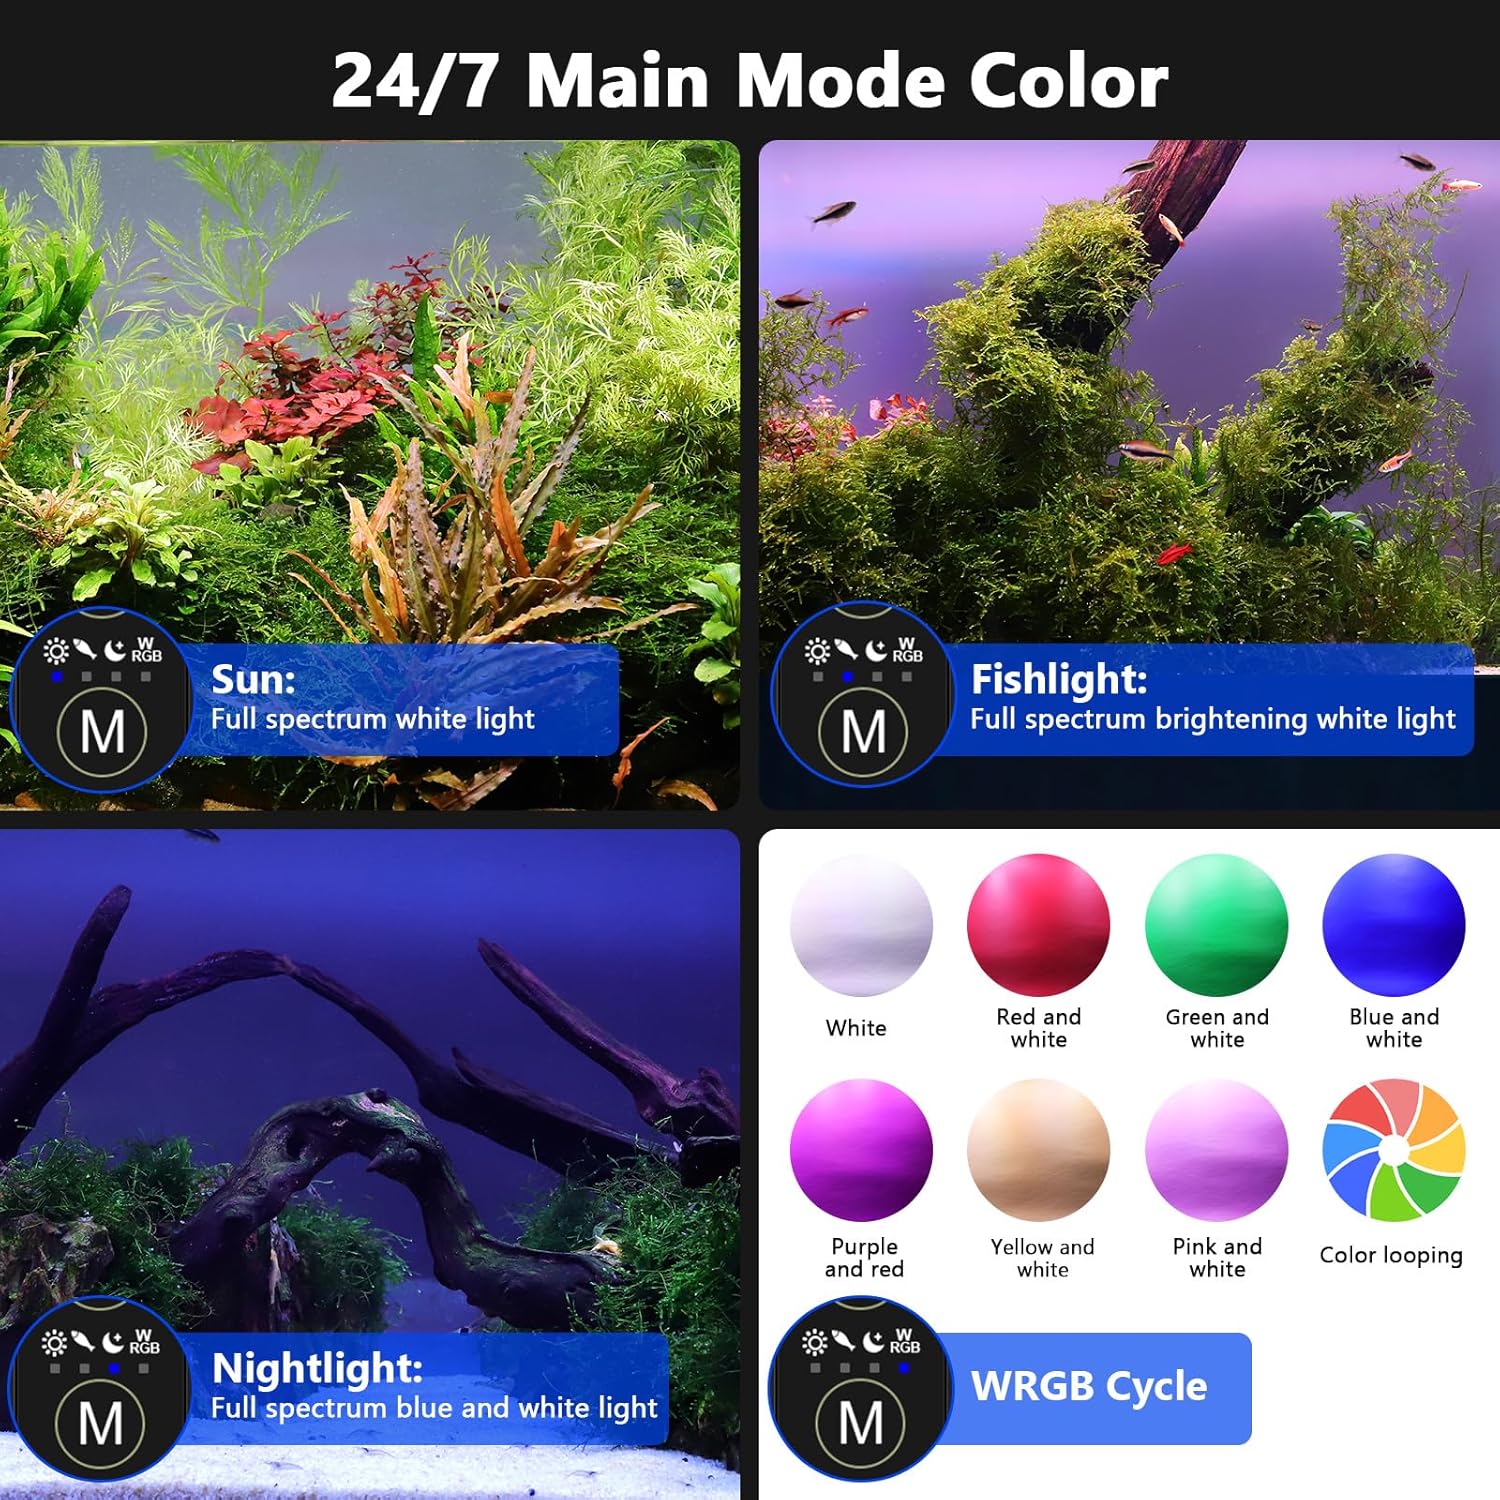
The light offers four distinct lighting modes to suit various aquarium needs:
- Eguzki modua: Full spectrum white light, ideal for general viewing and plant growth.
- Fishlight Mode: Full spectrum brightening white light, enhancing fish colors.
- Gaueko argi modua: Full spectrum blue and white light, simulating moonlight.
- WRGB Cycle Mode: Cycles through various colors including White, Red and white, Green and white, Blue and white, Purple and red, Yellow and white, Pink and white, and a continuous color loop.
6 Irudia: Gainetikview of the Four Lighting Modes.
3 Hours Moonlight Mode
An additional 3-hour blue moonlight can be activated to run after the main lighting mode completes. This provides a gentle blue glow for nocturnal viewing without disturbing fish or plants.

Figure 7: 24/7 Cycle with 3-Hour Moonlight.
Distira doitzea
The light offers 10 levels of dimmable brightness, allowing you to fine-tune the intensity to your preference and the needs of your aquarium inhabitants.

Figure 8: 10-Level Dimmable Brightness.
Memoria Funtzioa
The light is equipped with a memory function. In the event of a power outage, the light will automatically resume its previous settings once power is restored, eliminating the need for manual reprogramming.

Figure 9: Memory Function and Heat Dissipation Icons.
Mantentzea
Proper maintenance ensures the longevity and optimal performance of your hygger aquarium light.
- Garbiketa: Regularly wipe the light fixture with a soft, damp cloth to remove dust, water spots, and algae. Ensure the light is unplugged before cleaning.
- Uraren esposizioa: The light is splashproof, meaning it can withstand splashes from the aquarium. However, it is ez iragazgaitza and should not be submerged in water. Avoid direct contact with excessive water to prevent damage.
- Beroa xahutzea: The aluminum shell design aids in heat dissipation. Ensure adequate airflow around the fixture to prevent overheating.

Figure 10: Splashproof design, not waterproof.
Arazoak konpontzea
- Argia ez pizten:
- Egiaztatu konexio elektriko guztiak ondo finkatuta daudela ziurtatzeko.
- Verify the power outlet is functioning correctly by plugging in another device.
- Ensure the power button on the controller has been pressed. - Light Output Appears Poor or Uneven:
- Adjust the brightness settings using the +/- buttons on the controller.
- Ensure the light fixture is positioned correctly over the tank and is the appropriate size for your aquarium.
- Clean the LED surface to remove any obstructions like water spots or algae. - Light Control Unit Emits High-Pitched Noise:
- Unplug the unit and plug it back in to reset.
- If the noise persists, discontinue use and contact hygger customer support for assistance. - Light Runs Hot:
- Ensure the light is not covered or obstructed, allowing for proper heat dissipation.
- Verify the light is operating within its intended parameters. While some warmth is normal, excessive heat may indicate an issue.
Zehaztapenak
| Ezaugarri | Xehetasuna |
|---|---|
| Ereduaren izena | HG-162 |
| Boterea | 19W |
| Aplikazioa (arrain-tangaren luzera) | 12in ~ 18in |
| Kelvin (RGBW) | 8500 ~ 10000K |
| Lumenak | 556 |
| CRI (RGBW) | 55.4 |
| PAR Average | 14.447 W/㎡ |
| PPFD Average | 62.785 umol/㎡/s |
| LED kantitatea | 34 PCS (RGB: 4 / RED: 6 / GREEN: 6 / BLUE: 10 / WHITE: 8) |
| Elikatze-kablearen luzera | 57.09in + 58.46in + 17.72in |
| Sarrera boltage | AC100-240V 50/60Hz |
| Irteera boltage | DC 24V |
| Materiala | Aluminioa |
| Produktuaren neurriak | 12" L x 3.5" W x 3.5" H |
| Uraren Erresistentzia | Splashproof (Not Waterproof) |
Produktu Ofizialaren Bideoak
Video 1: Demonstration of the hygger LED Aquarium Light's various color modes and effects in a planted fish tank.
Video 2: Detailed guide on using the hygger LED Aquarium Light controller, explaining power, mode, timer, and brightness settings.
Bermea eta Laguntza
For warranty information, technical support, or any questions regarding your hygger HG-162 LED Aquarium Light, please refer to the included user manual or contact hygger customer service directly through their official webproduktua erosi zen gunea edo dendaria.