1. Sarrera
This manual provides detailed instructions for the installation, operation, and maintenance of your SOGTICPS BL912-60A-02US MPPT Solar Charge Controller. This device is designed to manage power flow from your solar panels to your battery bank, ensuring efficient charging and protecting your batteries from overcharge and over-discharge.
Oharra: This controller utilizes MPPT technology to detect the maximum charging current, which can increase efficiency by 10%-30% compared to standard controllers. It is important to note that this is a compatible MPPT charge controller with PWM intelligent features, not a "true MPPT" controller with a large transformer coil inside.
Ezaugarri nagusiak:
- 12V/24V sistemaren bolumena automatikoatage aitorpena.
- Advanced MPPT (Maximum Power Point Tracking) technology for optimized charging.
- Multi-function LCD display for system status monitoring.
- Dual USB ports (DC 5V 2A output) for charging external devices.
- Comprehensive protection features: over-charging, over-discharging, reverse polarity, short circuit, and open circuit protection.
- Tenperatura konpentsazioa kargatze zehatza lortzeko.

1. irudia: Aurrealdea view of the SOGTICPS BL912-60A-02US MPPT Solar Charge Controller, showing the LCD display, control buttons, and dual USB ports.
2. Konfigurazioa eta instalazioa
Proper installation is crucial for the safe and efficient operation of your solar charge controller. Please follow these steps carefully.
2.1 Connection Order
Garrantzitsua: Always connect components in the following sequence to prevent damage to the controller or other system components.
- Konektatu bateria: First, connect the battery to the charge controller. Ensure the battery has sufficient voltage for the controller to recognize the correct battery type (12V or 24V).
- Konektatu eguzki-panela: Next, connect the solar panel(s) to the charge controller.
- Karga konektatu (aukerakoa): Finally, connect your DC load to the charge controller's load terminals.
Disassembly Order: When disconnecting, reverse the order: first disconnect the solar panel, then the battery, and finally the load.
2.2 Kableatu-diagrama
Refer to the diagrams below for correct wiring connections.

2. irudia: Labeled components of the SOGTICPS BL912-60A-02US controller, indicating LCD display, control buttons (Menu, Page Up, Page Down/Manual), and dual USB ports. Connection terminals for solar panel, battery, and load are also shown.

3. irudia: Basic wiring diagram showing connections from a solar panel to the controller and from the controller to a DC load. Note the positive (+) and negative (-) terminals.
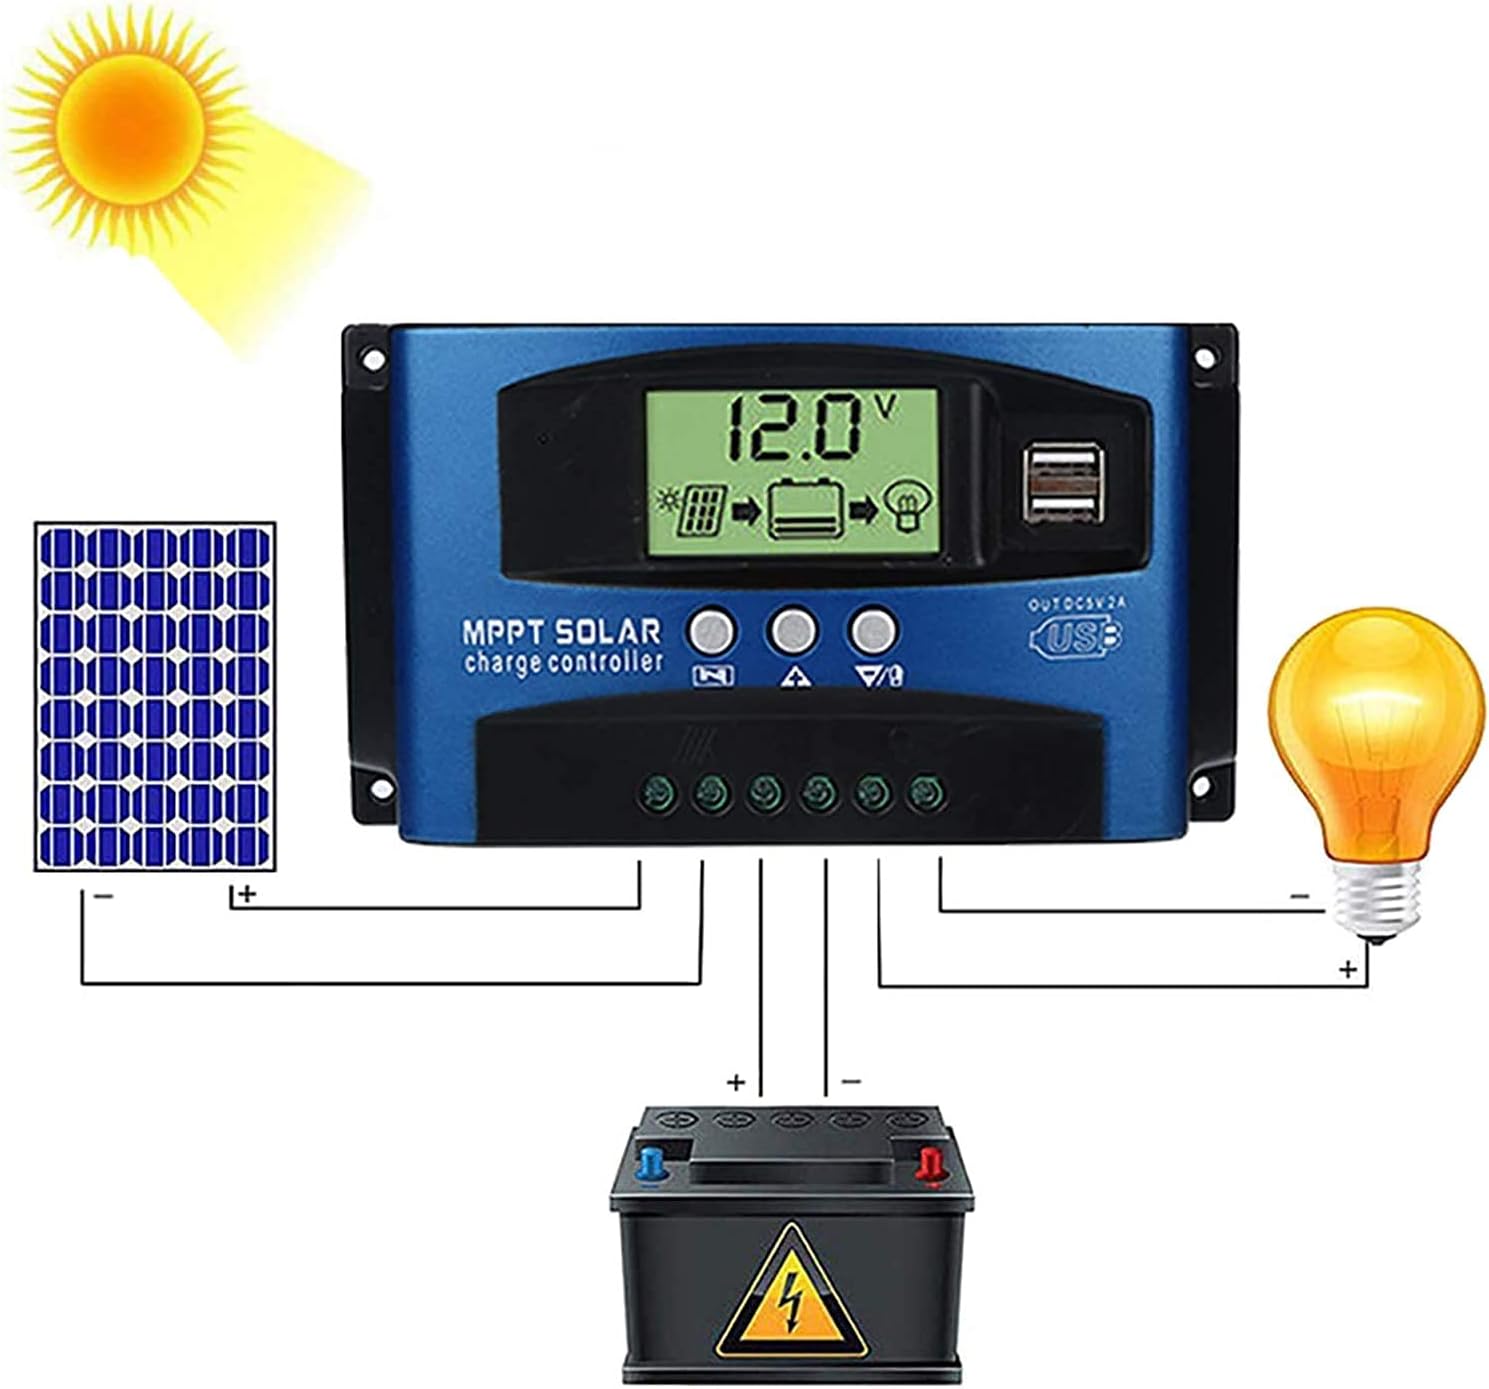
4. irudia: Comprehensive wiring diagram illustrating the connection of a solar panel, the SOGTICPS charge controller, a battery, and a DC load. This diagram shows the correct sequence and polarity for all connections.
2.3 Solar Panel and Battery Voltage Bateragarritasuna
- For a 12V battery system, the working voltage (Voc) of the solar panel should be between 17V and 23V.
- For a 24V battery system, the working voltage (Voc) of the solar panel should be between 36V and 46V.
- Ziurtatu eguzki panela voltage is within these ranges to prevent damage to the controller.
2.4 Inverter Connection
If using an inverter, connect it directly to the battery terminals, not to the load terminals of the charge controller.
3. Funtzionamendua
3.1 LCD pantaila eta botoiak
The LCD display provides real-time information about your system's status. The three buttons below the display are used for navigation and settings adjustment.
- Menuko botoia: Press to cycle through display screens and enter/exit settings menus.
- Orria igotzeko botoia: Used to increase values or navigate upwards in menus.
- Page Down/Manual Button: Used to decrease values, navigate downwards in menus, or manually control the load output.
3.2 Battery Type Recognition
The controller automatically detects 12V or 24V battery systems. Ensure the battery is connected first and has sufficient voltage for proper detection.
3.3 USB irteera
The dual USB ports provide a DC 5V 2A output for charging compatible electronic devices.
4. Mantentzea
Mantentze-lan erregularrak zure eguzki-karga-kontrolagailuaren iraupena eta errendimendu optimoa bermatzen ditu.
- Garbiketa: Mantendu kontrolatzailea garbi eta hautsik eta hondakinik gabe. Erabili zapi lehor bat garbitzeko.
- Konexioak: Aldian-aldian egiaztatu kableatu-konexio guztiak ondo finkatuta daudela eta korrosiorik gabe daudela ziurtatzeko.
- Aireztapena: Ensure the controller is installed in a well-ventilated area to prevent overheating.
- Ingurumen-baldintzak: Avoid exposing the controller to direct sunlight, rain, or excessive humidity.
5. Arazoak
Atal honek aurki ditzakezun galdera eta arazo ohikoenei heltzen die.
- Q: How many watts of solar panels can be connected?
A: For a 12V battery system, the maximum recommended solar panel wattage is 720W. For a 24V battery system, the maximum recommended wattage 1440W da.
- Q: Does this controller support lithium batteries?
A: Yes, the controller is compatible with both lead-acid and lithium batteries.
- Q: My solar panel is 36V 200W, can I charge a 12V battery?
A: To charge a 12V battery, the solar panel's working voltage (Voc) should be between 17V and 23V. For a 24V battery, the Voc should be between 36V and 46V. If your 36V panel is used with a 12V battery, the voltage is too high and could damage the controller. Ensure your panel's voltage matches the battery system voltage eskakizunak.
- Q: Can an inverter be connected to the load side of the controller?
A: No, please connect the inverter directly to the battery terminals, not to the load terminals of the controller.
- Q: Does the controller have a requirement for battery capacity?
A: While there's no strict minimum, it's recommended that the battery capacity corresponds to the solar panel current. For example, if your solar panel current is 5A, a 50AH battery is preferable. Using a very large solar panel with a very small battery can be dangerous.
- Q: The controller is not turning on or displaying anything.
A: Ensure the battery is connected first and has sufficient voltage. Check all battery connections for proper polarity and secure contact. If the battery voltage is too low, the controller may not power on.
6. Zehaztapen Teknikoak
| Ezaugarri | Zehaztapena |
|---|---|
| Modelo zenbakia | BL912-60A-02US |
| Marka | SOGTICPS |
| Sistema Boltage | 12V / 24V Auto |
| Karga-korronte maximoa | 60A |
| Max Solar Panel Wattage (12 V) | 720W |
| Max Solar Panel Wattage (24 V) | 1440W |
| Solar Panel Working Voltage (12 V-ko sistema) | 17V-23V (Voc) |
| Solar Panel Working Voltage (24 V-ko sistema) | 36V-46V (Voc) |
| Bistaratzeko mota | LCDa |
| USB irteera | Dual DC 5V 2A |
| Produktuaren neurriak | 6.69 x 3.94 x 1.97 hazbete (17 x 10 x 5 cm) |
| Elementuaren pisua | 10.6 ontza (0.3 kg) |
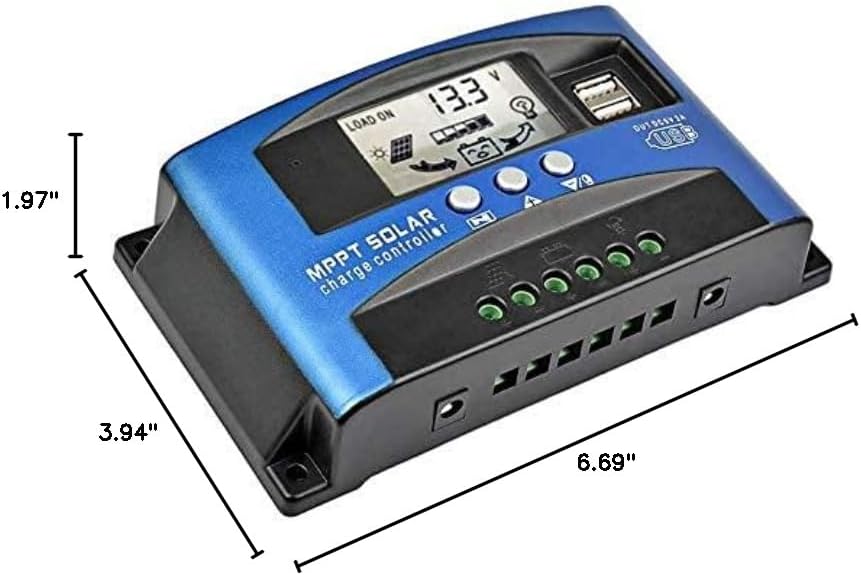
5. irudia: Dimensional drawing of the SOGTICPS BL912-60A-02US solar charge controller, showing its length (6.69"), width (3.94"), and height (1.97").

6. irudia: Examples of typical applications for the solar charge controller, including residential solar systems, garden lighting, street lighting, and integration with wind power systems.
7. Bermea eta Laguntza
7.1 Bermearen informazioa
This SOGTICPS product comes with a 30 eguneko dirua itzultzeko bermea eta a 12 hilabeteko bermea Kalitatearekin lotutako arazoetarako. Gorde erosketaren egiaztagiria berme-erreklamazioetarako.
7.2 Bezeroarentzako laguntza
For any questions, technical assistance, or warranty claims, please contact SOGTICPS customer support. Our professional technicians are available to assist you.
Contact information is typically found on the product packaging or the seller's official webgunea.