ACMER P2 33W
ACMER P2 33W Laser Engraver and Cutting Machine User Manual
Model: P2 33W | Brand: ACMER
Sarrera
This manual provides essential information for the safe and efficient operation of your ACMER P2 33W Laser Engraver and Cutting Machine. This powerful device features a dual laser output, offering 33W (33,000mW) of laser power for precise engraving and cutting across a wide range of materials. Please read this manual thoroughly before initial use to ensure proper setup, operation, and maintenance.
Segurtasun Informazioa
The ACMER P2 33W laser engraver is designed with multiple safety features to protect the user during operation. Adherence to these guidelines is crucial for safe use.
- Segurtasun blokeoa: The machine is equipped with a safety lock that must be engaged before operation.
- Larrialdi-gelditzeko botoia: An emergency stop button is present to immediately halt machine operation in case of an accident.
- Tilt/Movement Sensor: If the laser engraving machine moves or tilts by 15° during processing, it will automatically stop to prevent accidents.
- Built-in Flame Sensor: A flame sensor detects flames and triggers an alarm, providing an additional layer of safety during cutting tasks.
- Observable Shield: Provides a visual barrier while allowing observation of the engraving process.
- Haurren segurtasun blokeoa: Prevents unauthorized use.
- Alarm Lights and Buzzers: Provide audible and visual alerts for various conditions.
1 Irudia: Gainetikview of ACMER P2 Safety Features.
Produktua amaituview eta Osagaiak
The ACMER P2 33W Laser Engraver features a robust all-metal design for stability and precision. Key components are clearly labeled for easy identification and setup.
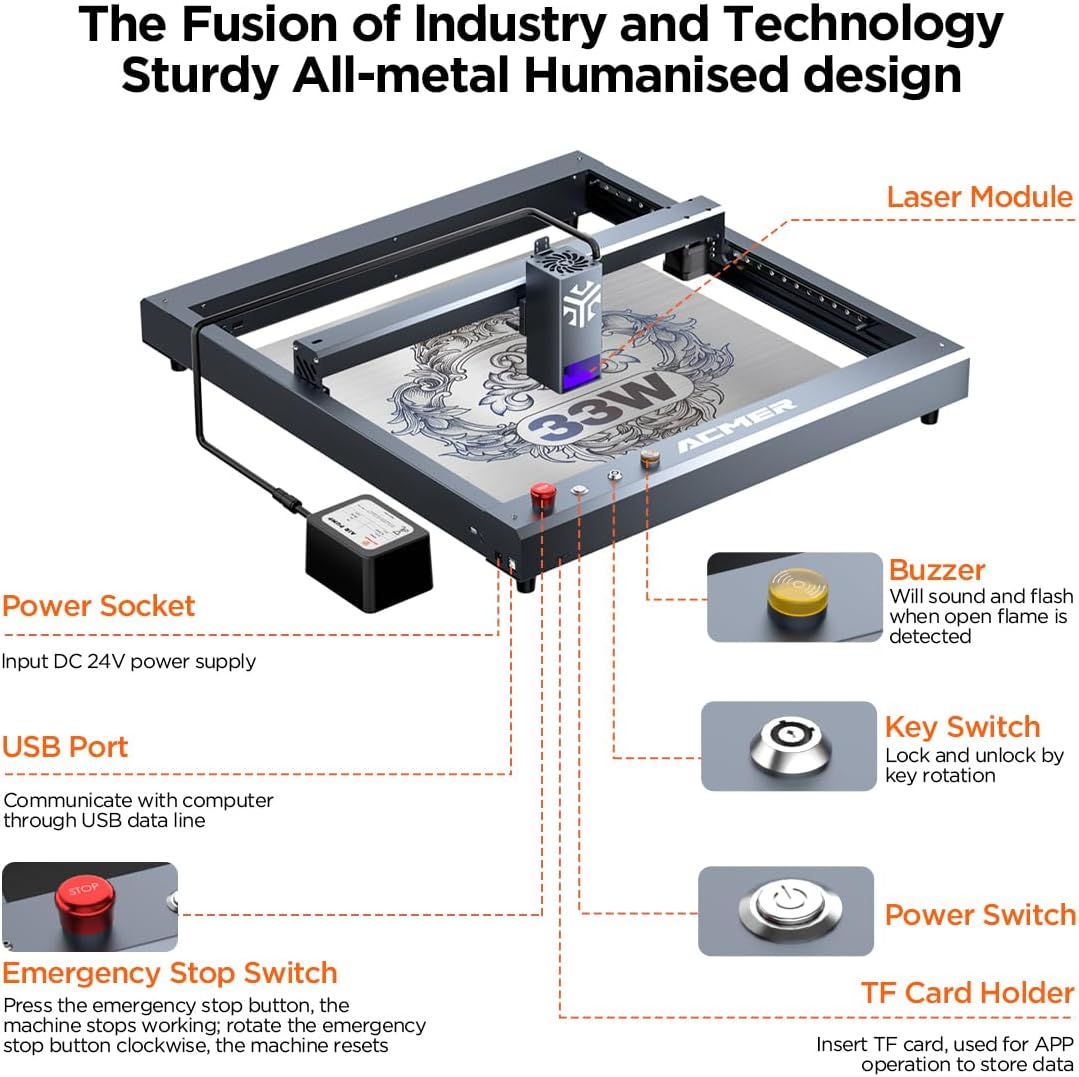
Figure 2: Main Components of the ACMER P2 Laser Engraver.
- Laser modulua: The core component responsible for laser emission, featuring 33W output power.
- Energiaren entxufea: Input for the DC 24V power supply.
- USB ataka: Used for communication with a computer via USB data line.
- Larrialdi gelditzeko etengailua: Press to immediately stop the machine; rotate clockwise to reset.
- Buzzer: Sounds and flashes when an open flame is detected.
- Tekla etengailua: Used to lock and unlock the machine by key rotation.
- Switch potentziala: Unitatearen energia nagusia kontrolatzen du.
- TF Card Holder: Insert TF card for offline use and data transfer via mobile app.

Figure 3: The ACMER P2 33W Laser Engraver with example proiektuak.
Konfigurazio Gida
The ACMER P2 33W Laser Engraver is designed for minimal assembly, with most components pre-assembled. Follow these steps for initial setup:
- Despaketatzea: Carefully remove all components from the packaging. The packaging is designed with labeled compartments for the Material Package, Laser Module, Accessory Package, safety glasses, and air pump.
- Markoaren muntaia: The main frame is largely pre-assembled. Ensure all connections are secure.
- Laser moduluaren instalazioa: Attach the laser module to the designated carriage on the frame.
- Aire-ponparen konexioa: Connect the air pump to the laser engraver as per the instructions.
- Potentzia-konexioa: Konektatu elikadura entxufera.
- Softwarearen instalazioa: Install the necessary engraving software (LaserGRBL, LightBurn, or ACMER APP) on your computer or mobile device.
- Hasierako Kalibrazioa: Perform any initial calibration steps as outlined in the detailed installation and usage instructions provided with the product.
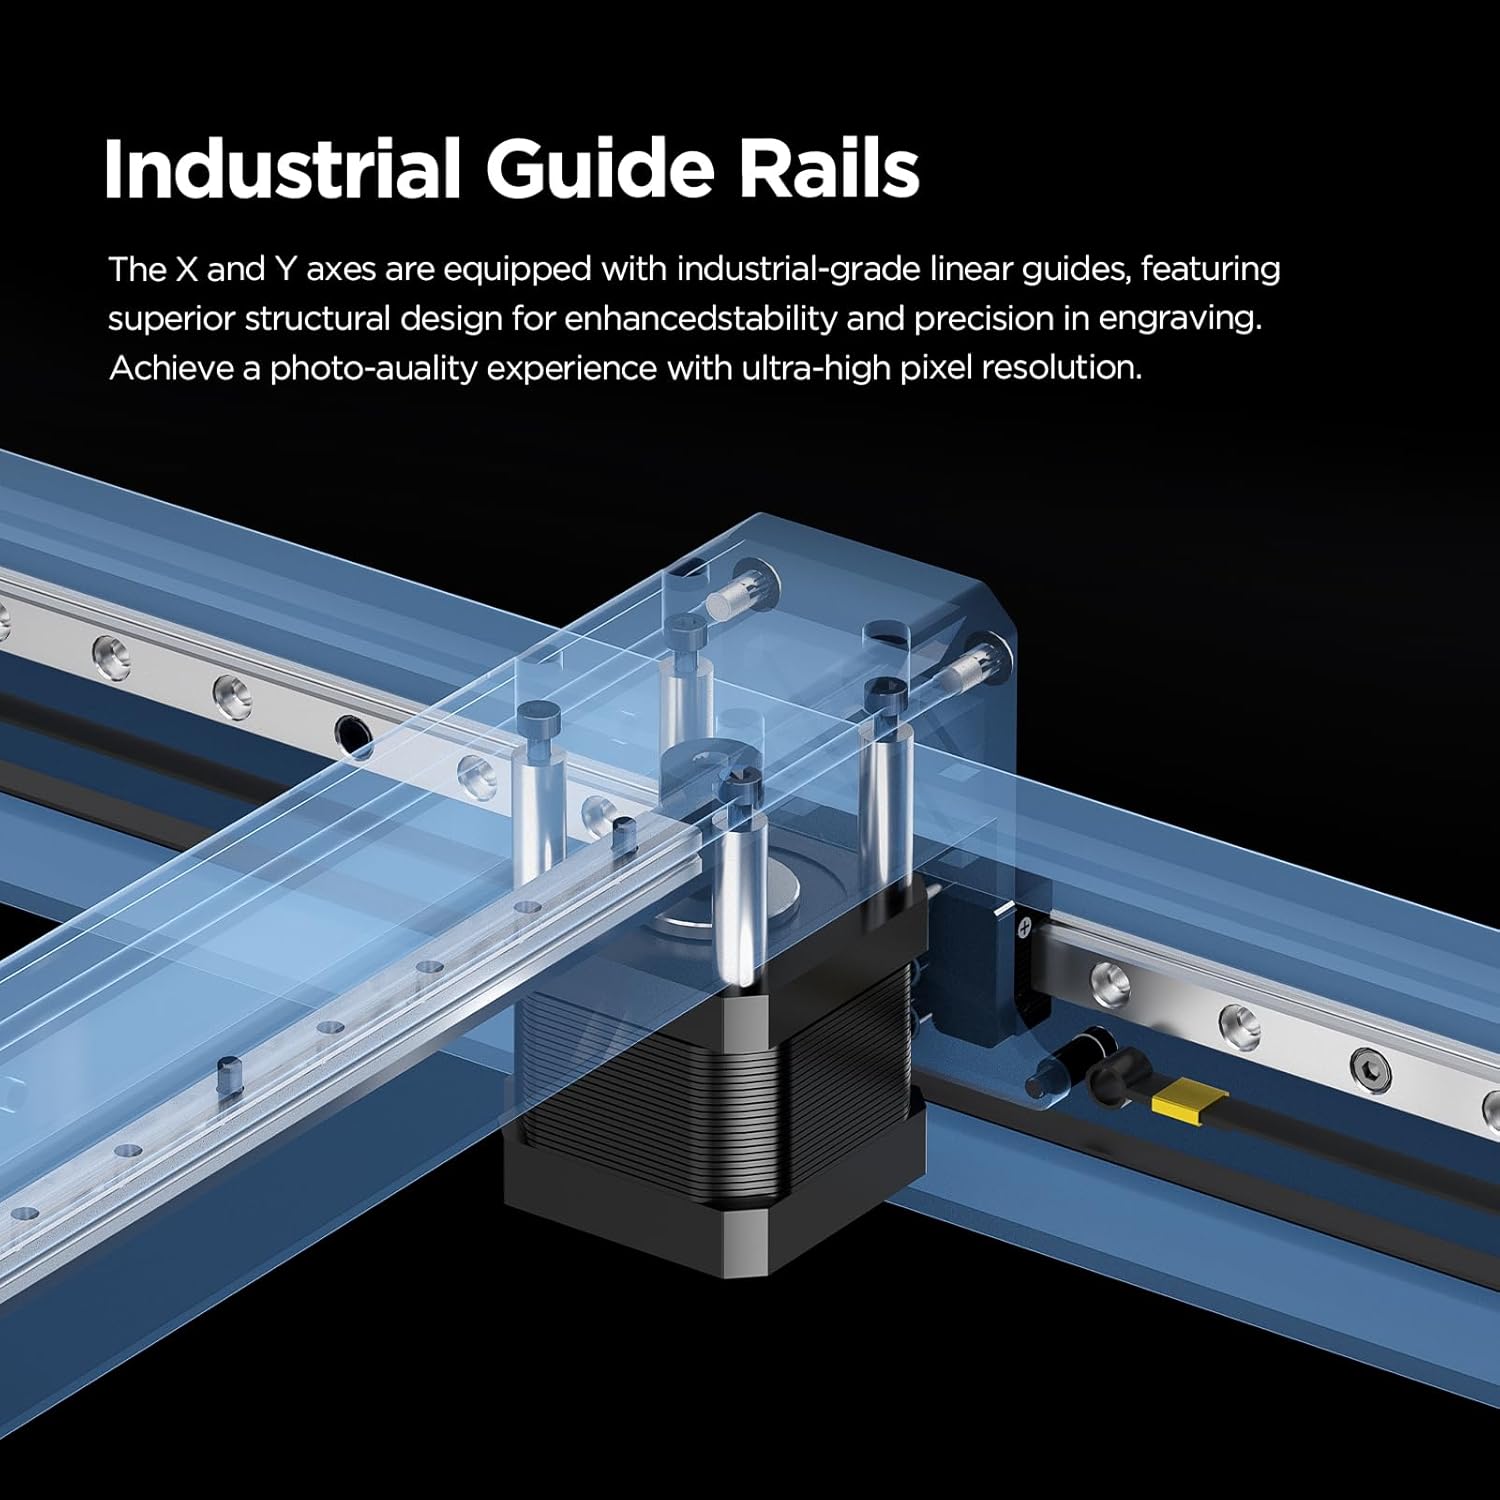
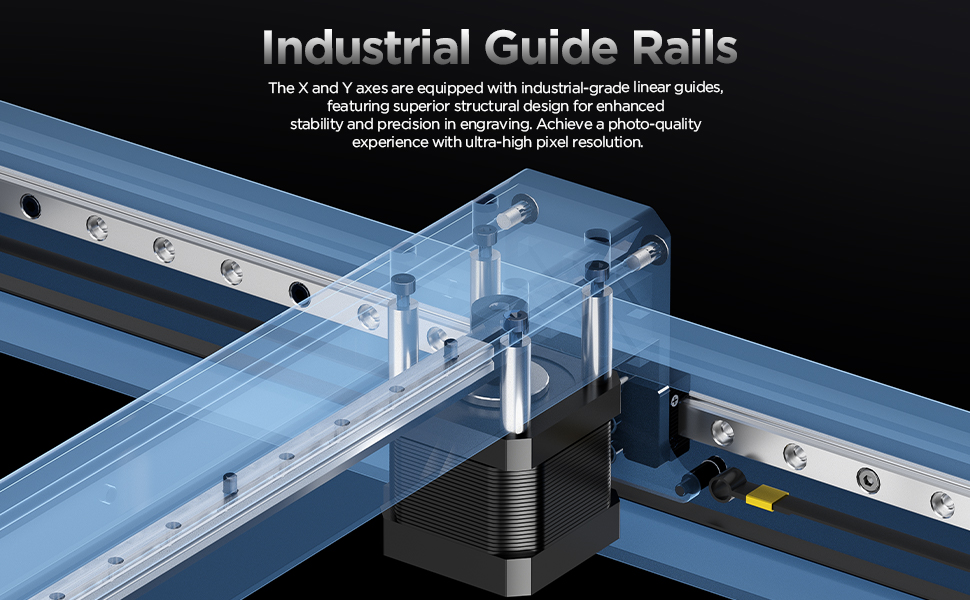
Figure 4: Industrial-grade guide rails for enhanced stability and precision.
Funtzionamendu-argibideak
The ACMER P2 33W Laser Engraver offers high precision and speed for various applications. Follow these guidelines for optimal performance.
Material Compatibility and Cutting Ability
The 33W laser output allows for efficient cutting and engraving of a wide range of materials. The machine can cut 8mm plywood and 18mm acrylic board in a single pass.

Figure 5: Cutting capabilities on different materials.
Compatible materials include, but are not limited to: wood, bamboo, paper, acrylic, leather, PCB board, anodized aluminum, and various metals. The large engraving area of 420x400mm provides ample space for creative projects, with an optional expansion kit for 200% expansion to 420x800mm.
Zehaztasuna eta Abiadura
The P2 33W features an ultra-fine compressed spot size of 0.08mm x 0.06mm, enabling industrial-grade engraving precision for detailed and lifelike images. The maximum engraving speed can reach up to 30,000mm/min, significantly enhancing efficiency.

Figure 6: Comparison of engraving spot size for superior detail.

Figure 7: Speed efficiency comparison.
Software Compatibility and Connectivity
The machine is widely compatible with professional engraving software such as LaserGRBL and LightBurn. It supports Windows, macOS, and mobile applications. Data transfer can be done via Wi-Fi, USB cable, or TF card, allowing for offline use.
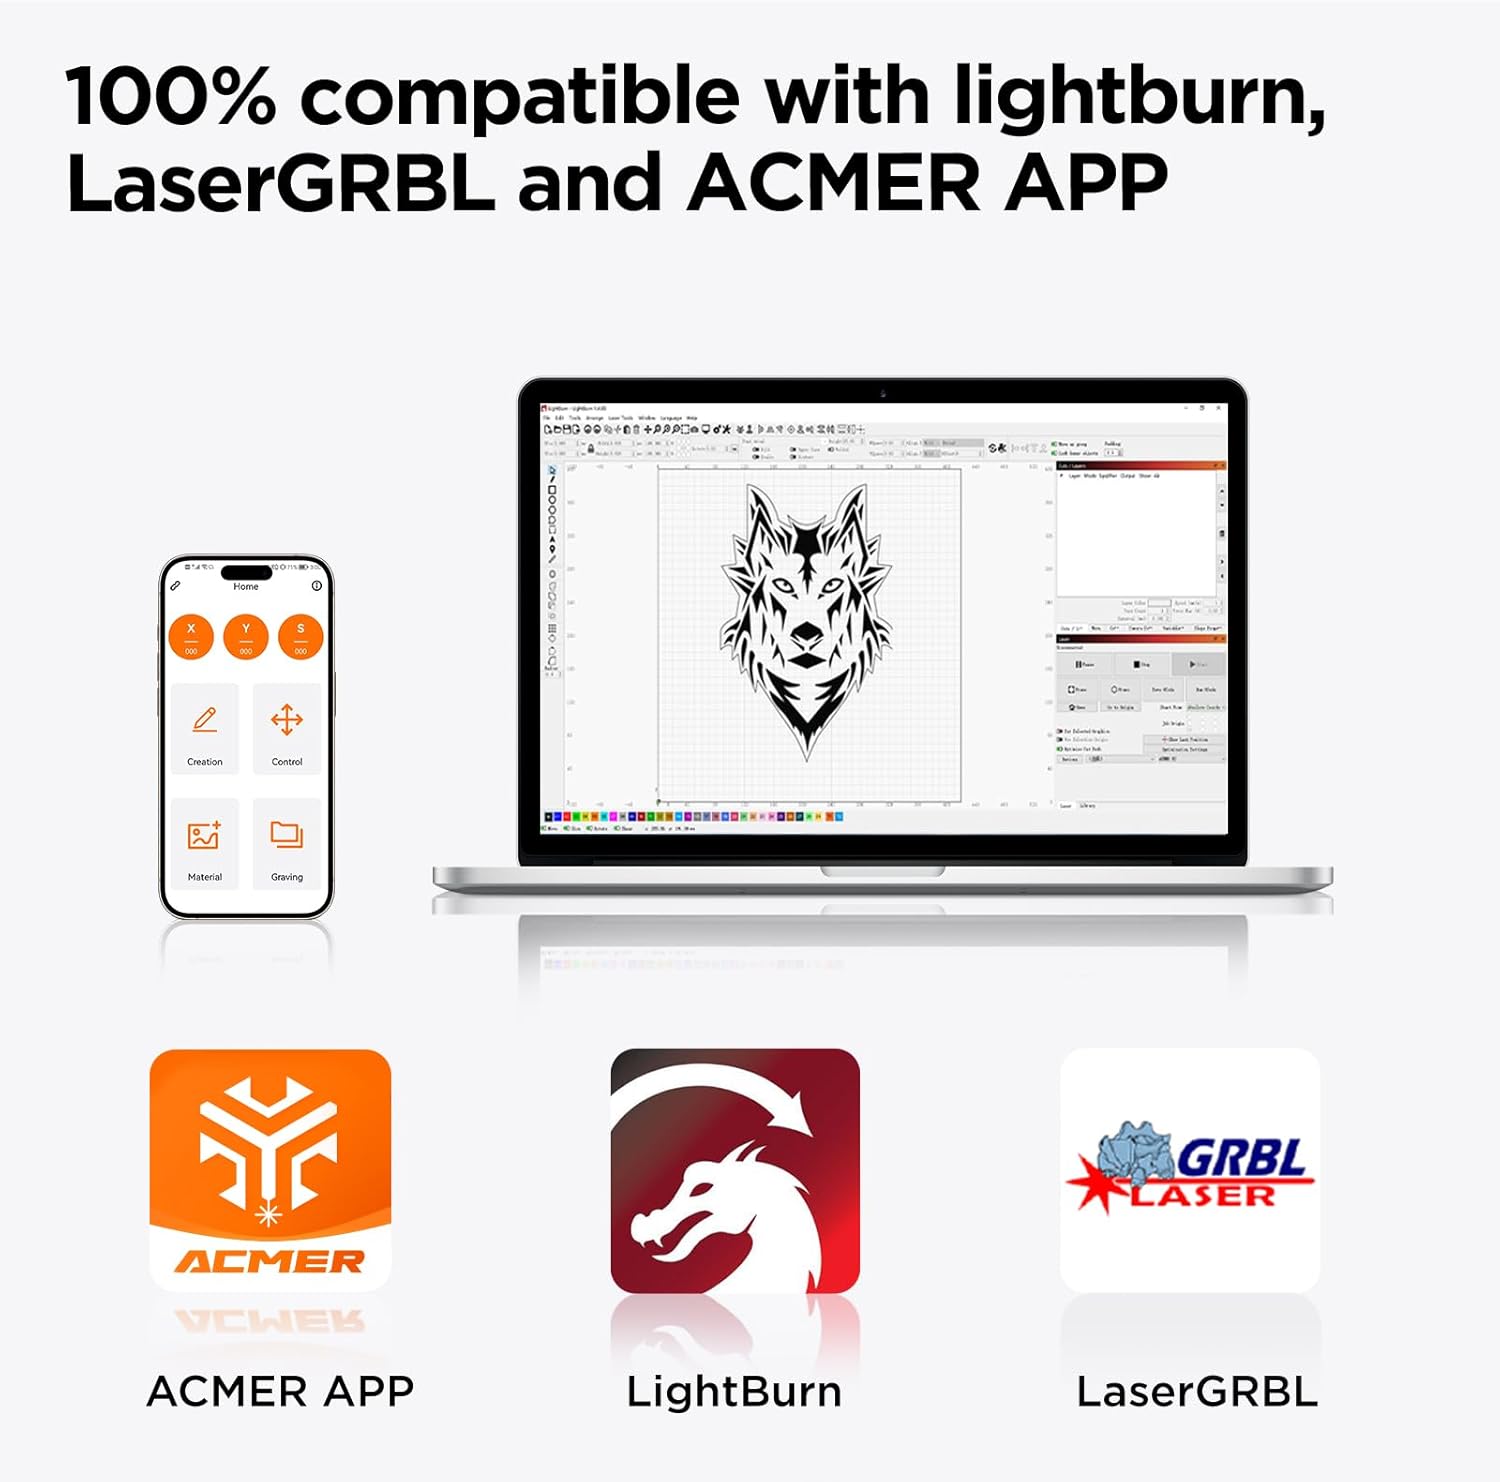
Figure 8: Software and operating system compatibility.
Aukerako osagarriak
Enhance your laser engraving capabilities with optional accessories:
- Rotary 360° Roller: For engraving cylindrical objects like insulated cups.
- Laser Enclosure Box: Improves indoor air quality by eliminating smoke and provides a more environmentally friendly operation.
- Time-lapse Camera: For precise positioning and monitoring of the engraving process.
- Hedapen Kit: Increases the engraving area to 800x420mm for larger projects.

Figure 9: Optional accessories for expanded functionality.
Mantentzea
Regular maintenance ensures the longevity and optimal performance of your ACMER P2 Laser Engraver. Always disconnect power before performing any maintenance.
- Laser lentea garbitzea: Periodically clean the laser lens with a soft, lint-free cloth and lens cleaning solution to maintain engraving quality.
- Lubricating Guide Rails: Apply a small amount of lubricant to the industrial guide rails to ensure smooth movement of the laser module.
- Workspace Cleanliness: Keep the engraving area clean and free of debris to prevent interference with laser operation and to reduce fire hazards.
- Air Pump Filter: Check and clean or replace the air pump filter as needed to ensure efficient air assist.
Arazoak konpontzea
This section provides solutions to common issues you might encounter with your ACMER P2 Laser Engraver.
| Arazoa | Kausa posiblea | Irtenbidea |
|---|---|---|
| Laserrak ez du pizten edo irteera ahula da. | Dirty laser lens, incorrect focus, laser module not properly connected, or power issue. | Clean the laser lens. Adjust the focus. Check all cable connections. Ensure power supply is adequate. |
| Machine not responding to software commands. | Incorrect software settings, USB/Wi-Fi connection issues, or emergency stop engaged. | Verify software settings (COM port, baud rate). Reconnect USB cable or Wi-Fi. Ensure emergency stop button is disengaged. |
| Grabatuaren kalitatea eskasa edo ez-egokia da. | Incorrect speed/power settings, material not flat, or dirty guide rails. | Adjust speed and power settings for the specific material. Ensure material is flat and secured. Clean and lubricate guide rails. |
| Makina ustekabean gelditu da. | Safety sensor triggered (tilt, flame), or power interruption. | Check for tilt or flame. Ensure stable power supply. Reset the machine after addressing the cause. |
For further assistance, please refer to the detailed user manual included with your product or contact ACMER customer support.
Zehaztapenak
| Ezaugarri | Xehetasuna |
|---|---|
| Produktuaren neurriak | 29.13 x 27.36 x 8.86 hazbete |
| Elementuaren eredu-zenbakia | P2 33W |
| Laser irteera potentzia | 33 W (33,000 mW) |
| Makina Potentzia | 144W |
| Grabatuaren zehaztasuna | 0.01 mm |
| Repeatable Positioning Accuracy | 0.001 mm |
| Ultra-fine Compressed Spot Size | 0.08 mm x 0.06 mm |
| Grabatzeko abiadura maximoa | 30,000 mm/min |
| Lan Eremua | 420mm x 400mm (expandable to 420mm x 800mm with kit) |
| Konektibitatea | Wi-Fi, USB cable, TF card (offline use) |
| Softwarearen bateragarritasuna | LaserGRBL, LightBurn, ACMER APP |
| Sistema eragilearen euskarria | Windows, macOS, Mobile Apps |
| Elementuaren pisua | 27.7 kilo |
| Fabrikatzailea | ACMER |
| Eskuragarri dagoen lehen data | 3ko uztailaren 2023a |
Bermea eta Laguntza
ACMER provides comprehensive support for your laser engraver.
- Berme Epea: Produktuak 12 hilabeteko berme-epea du.
- Bezeroarentzako laguntza: A dedicated support team is available 24/7 to provide assistance with any queries or issues you may encounter.
- Ziurtagiriak: The P2 33W laser cutter holds Class 4 laser certification and has been tested according to IEC 60825-1 standards, with NRTL documentation.

10. irudia: Produktuen ziurtagiriak.

Figure 11: 24/7 Online Support availability.
Ask a question about this manual
Ask about setup, troubleshooting, compatibility, parts, safety, or missing instructions. Manuals+ will review the question and use this page’s manual context to help answer it.