ACMER ACMER-M3
ACMER M3 Laser Rotary Roller User Manual
Model: ACMER-M3
Brand: ACMER
1. Sarrera
The ACMER M3 Laser Rotary Roller is an accessory designed to expand the capabilities of your laser engraver, enabling precise 360-degree engraving on cylindrical and irregularly shaped objects. This device is engineered for high accuracy and consistency, making it ideal for personalizing items such as cups, pens, bottles, and more.
Ezaugarri nagusiak hauek dira:
- Grabatu zehatza: Engineered for seamless 360-degree engraving on cylindrical items like cups, pens, bottles, pipes, bowls, drums, tubes, and even over-length plates.
- Versatile Mode Switching: Features a user-friendly toggle switch to easily switch between rotary and non-rotary modes, enhancing flexibility for various engraving projects.
- Plug and Play konfigurazioa: 100% pre-assembled with an adapter cable for instant setup. Connects to the Y-axis of your laser engraver.
- Bateragarritasun zabala: Designed to integrate seamlessly with most laser engraving machines, expanding engraving capabilities across diverse materials and object shapes.
- Eraikuntza fidagarria: Constructed with high-durability rubber and premium components for superior friction, stability, and professional-grade engravings.

Figure 1: ACMER M3 Laser Rotary Roller

Figure 2: Key features of the ACMER M3 Rotary Roller
2. Konfigurazio gida
2.1. Kutxatik ateratzea eta osagaien egiaztapena
Upon receiving your ACMER M3 Laser Rotary Roller, carefully unbox the unit and verify all components are present. The package typically includes the rotary module, adapter cables (A and B), a motor cable, and an instruction manual.
Video 1: Unboxing and initial setup of the ACMER M3 Laser Rotary Roller. This video demonstrates the contents of the package and the initial steps to prepare the rotary module for use.
2.2. Adjusting Roller Width
The rotary roller features 8 adjustable gear divisions to accommodate various object diameters, ranging from 6mm to 164mm. To adjust the working area, loosen the screws on the rotary roller, slide the rollers to the desired position, and then tighten the screws to secure them.

3. irudia: Xehetasuna view of the 8 levels of adjustment for varying object sizes.
2.3. Belt Tension Adjustment
Proper belt tension is crucial for engraving accuracy. The M3 features a user-friendly design for belt adjustment. Rotate the screw that secures the belt clockwise or counter-clockwise to achieve proper tension. Once adjusted, tighten the screw to secure the belt. Pluck the belt gently to ensure it has proper tension.
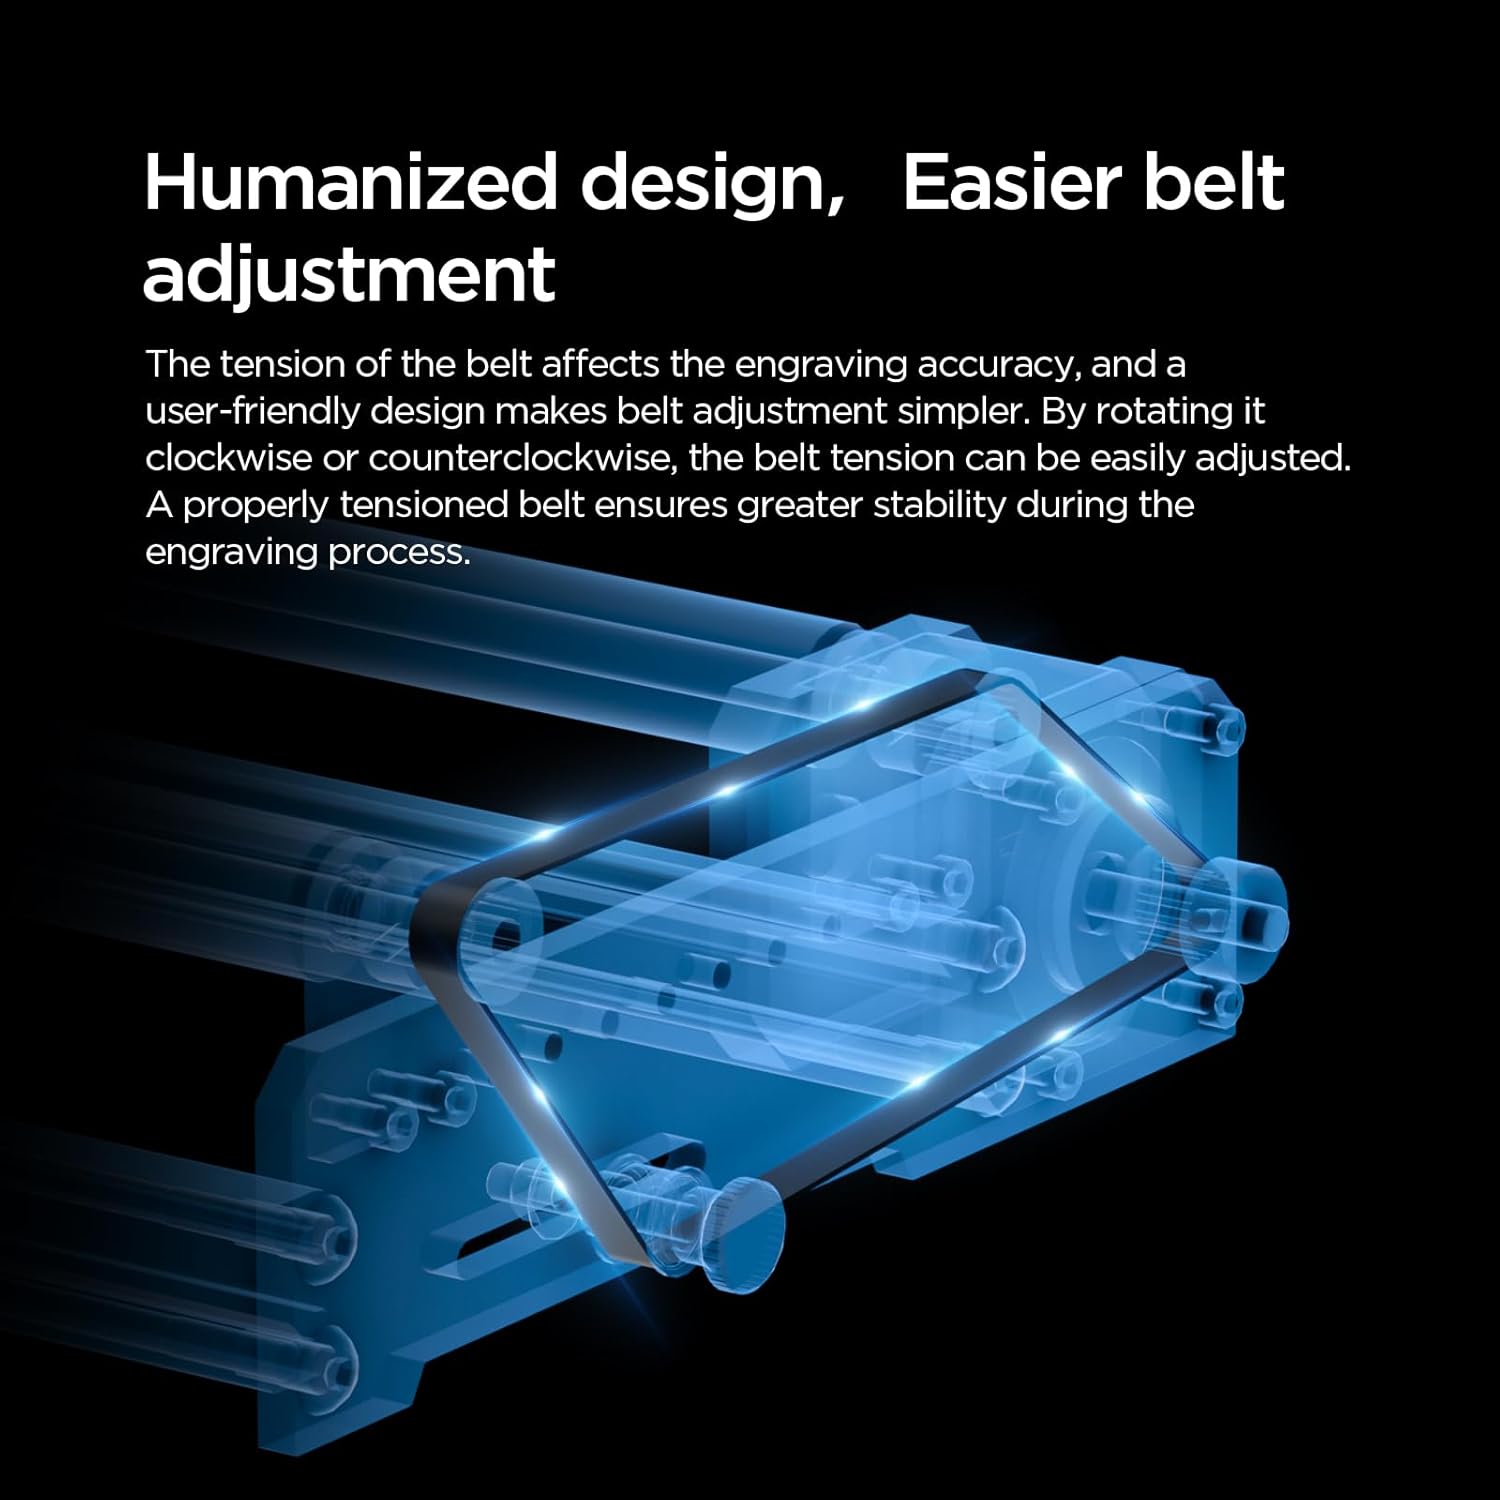
Figure 4: Mechanism for adjusting belt tension on the rotary roller.
2.4. Connecting to Your Laser Engraver
The rotary roller is designed for plug-and-play operation. Take out adapter cable A and the motor cable. Set the Y-R joystick on your laser engraver to the 'R' (Rotary) mode. Insert the male end of the motor cable into the RM female end on your engraver. Then, insert the male end of adapter cable A into the female end of the rotary module.

Figure 5: Connection points for the rotary roller to the laser engraver.
2.5. Software Settings (LightBurn & LaserGRBL)
After connecting the rotary module, you will need to adjust the software settings in your laser engraving program (e.g., LightBurn or LaserGRBL) to properly recognize and control the rotary axis. Refer to the provided images for specific step-by-step instructions for each software.
- LaserGRBL Step Value Adjustment:
- Turn on the machine, connect the USB data cable, and click "Connect" to connect the engraving machine.
- Click "Grbl", then select "Grbl Configuration".
- Scroll down to the "$101" column and change the value to "65", then click "Write" and the setting is complete.
- LightBurn Step Value Adjustment:
- Turn on the machine, connect the USB data cable, and click "Connect" to connect the engraving machine.
- Click "Edit" and select "Machine Settings".
- Click the small arrow next to "Outputs setup" and select "Yes".
- Scroll down to the "Y Steps per mm ($101)" column, and modify it to "65", then click "OK" to complete the setting.

Figure 6: Software configuration steps for LaserGRBL and LightBurn to enable rotary engraving.
3. Funtzionamendu-argibideak
3.1. Placing Objects for Engraving
Place the cylindrical object securely on the rollers of the rotary module. Ensure the object is stable and centered to prevent movement during engraving. For transparent materials like glass, a black coating or paint may be required on the surface to allow the laser to engrave effectively.

Figure 7: Correct placement of a cylindrical object on the rotary module.
3.2. Adjusting Laser Focus
Move the laser head onto the material. Lower the aperture of the laser head and adjust the focus until the laser beam is precisely focused on the surface of the object. This ensures optimal engraving quality.

Figure 8: Steps for adjusting the laser focus on the material.
3.3. Grabatu prozesua
Once the object is placed and the laser is focused, you can initiate the engraving process through your laser engraving software. The rotary module will automatically rotate the object as the laser engraves, creating a seamless 360-degree design.

9. irudia: Adibample of laser engraving on a cylindrical object using the rotary roller.
After engraving, for materials like glass that require a coating, carefully remove the object and use a tissue to wipe off any remaining black paint or residue to reveal the engraved design.

Figure 10: Cleaning the engraved glass object to reveal the design.
4. Mantentzea
To ensure the longevity and optimal performance of your ACMER M3 Laser Rotary Roller, regular maintenance is recommended:
- Garbiketa: Periodically clean the rollers and the main body of the rotary module with a soft, dry cloth to remove dust and debris. Avoid using abrasive cleaners or solvents.
- Gerriko ikuskapena: Regularly inspect the drive belt for any signs of wear, cracks, or looseness. If the belt appears worn or stretched, replace it to maintain engraving accuracy.
- Lubrifikazioa: The moving parts and bearings are generally maintenance-free. Do not apply lubricants unless specifically instructed by ACMER support.
- Biltegiratzea: When not in use, store the rotary roller in a clean, dry environment away from direct sunlight and extreme temperatures.
5. Arazoak
If you encounter issues with your ACMER M3 Laser Rotary Roller, consider the following common troubleshooting steps:
- Roller Not Rotating:
- Ensure the motor cable is securely connected to both the rotary module and the laser engraver's RM port.
- Verify that the Y-R joystick on your engraver is set to 'R' (Rotary) mode.
- Check software settings (LightBurn/LaserGRBL) to ensure the rotary axis is enabled and configured correctly (e.g., $101 value set to 65).
- Inaccurate Engraving / Slippage:
- Ensure the object is placed securely and centered on the rollers.
- Check the belt tension. Adjust if too loose or too tight (refer to Section 2.3).
- Verify that the laser focus is correctly set on the object's surface.
- Confirm that the roller width is appropriately adjusted for the object's diameter.
- Konexio-arazoak:
- Ensure the USB data cable connecting your laser engraver to the computer is functioning correctly.
- Restart both your computer and the laser engraver.
If problems persist, please contact ACMER customer support for further assistance.
6. Zehaztapenak
| Atributua | Xehetasuna |
|---|---|
| Modelo zenbakia | ACMER-M3 |
| Grabatuaren diametro-tartea | 6 mm - 164 mm |
| Grabatu mota | 360° Rotary Engraving |
| Produktuaren neurriak | 11.6 x 7.7 x 3.3 hazbete |
| Elementuaren pisua | 1.9 kilo |
| Bateragarritasuna | ACMER P2, P1, and most laser engravers (LightBurn & LaserGRBL compatible) |
| Materiala | High-durability rubber rollers, premium components |
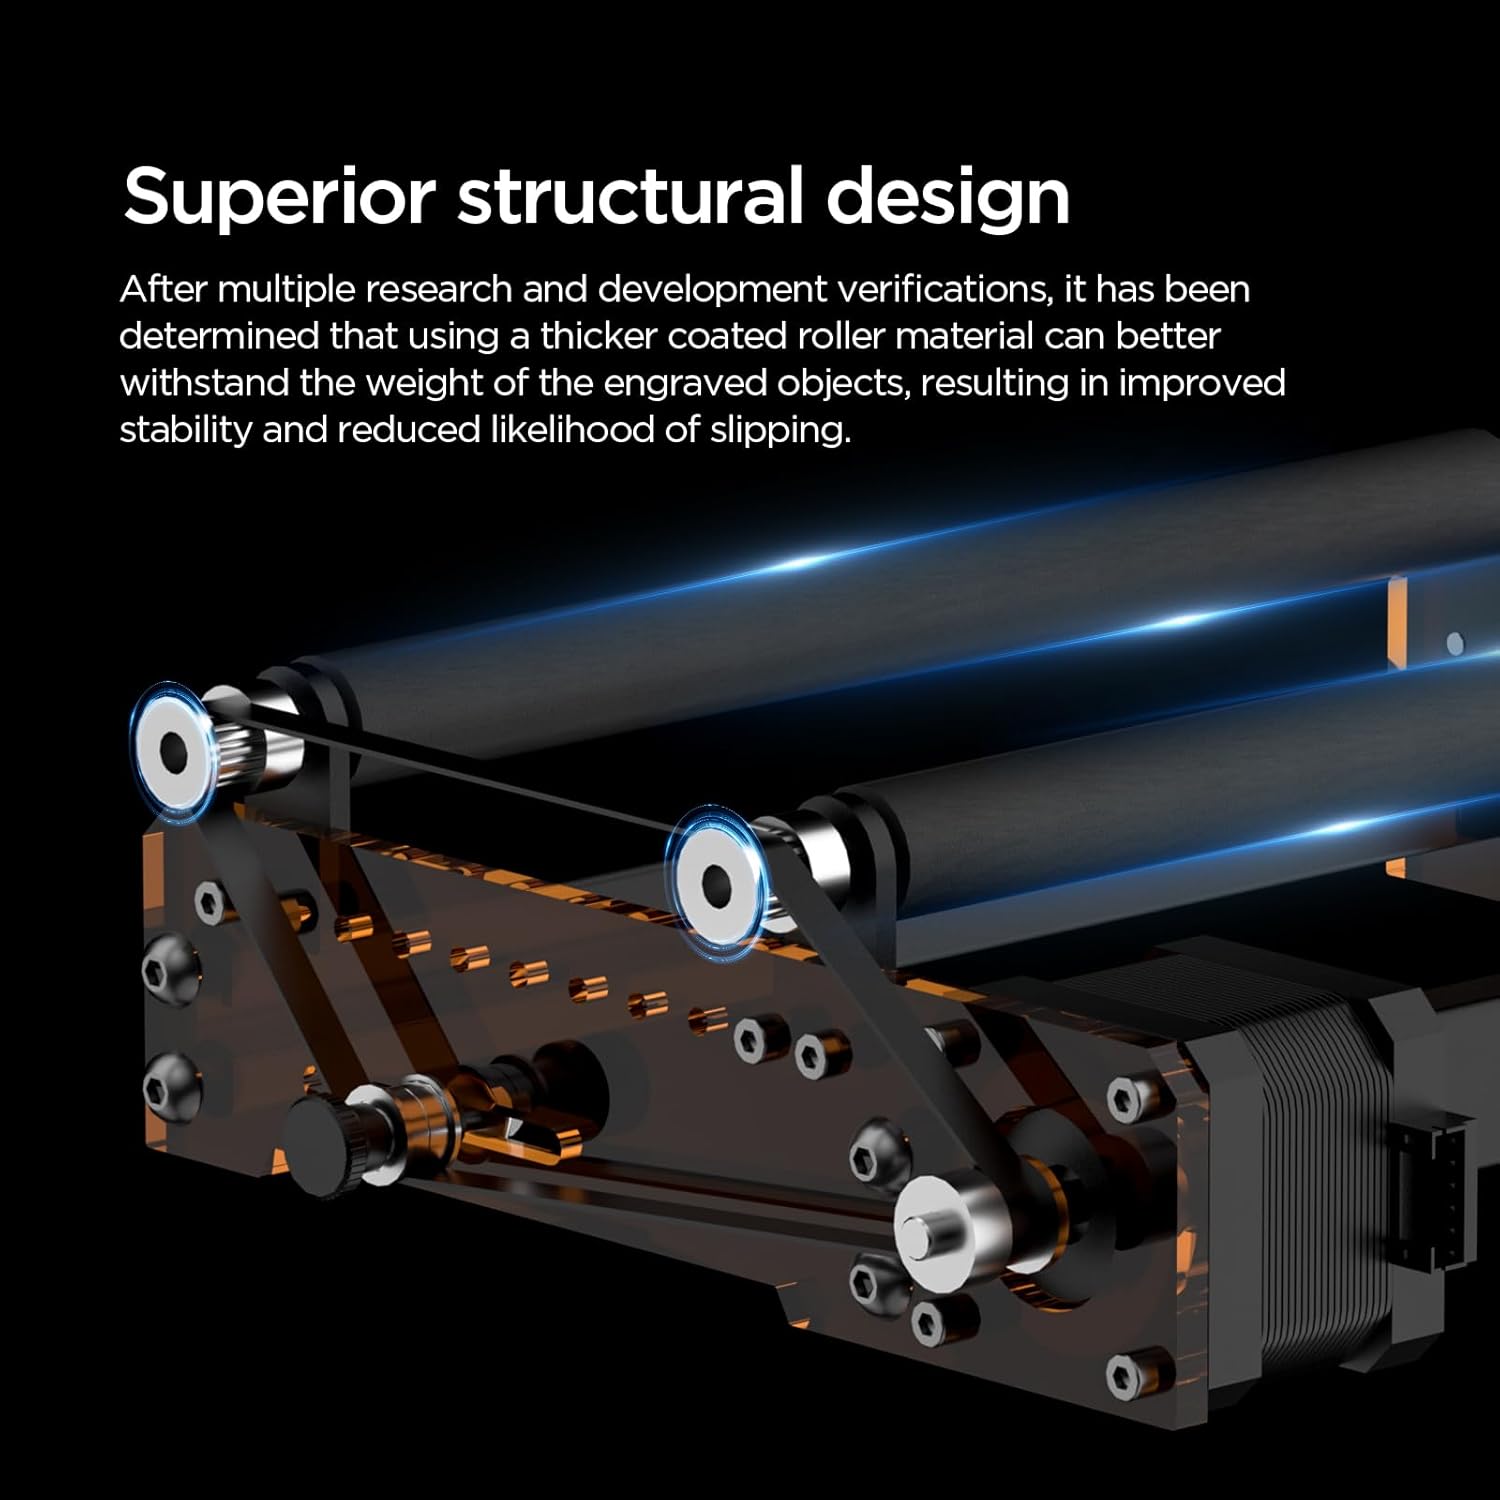
Figure 11: Illustration of the superior structural design for stability.

Figure 12: High-quality stepper motor for seamless 360° rotational engraving.
7. Bermea eta Laguntza
ACMER provides a standard warranty for the M3 Laser Rotary Roller, covering manufacturing defects and malfunctions under normal use. Please refer to the warranty card included in your product packaging for specific terms and conditions.
For technical support, troubleshooting assistance, or warranty claims, please contact ACMER customer service. You can typically find contact information on the official ACMER webgunean edo zure produktuaren dokumentazioan.
ACMER is committed to enhancing your DIY experience and making laser engraving faster and more accessible. We are here to help you bring your creative ideas to life effortlessly.
Ask a question about this manual
Ask about setup, troubleshooting, compatibility, parts, safety, or missing instructions. Manuals+ will review the question and use this page’s manual context to help answer it.