
1. Sarrera
This manual provides detailed instructions for the installation, operation, and maintenance of your ANNKE AU-DT81DX200-V1 4K 8-Channel Digital Video Recorder (DVR). This DVR is designed for security surveillance systems, offering 4K (8MP) high-definition live viewing and recording capabilities. It features advanced H.265+ video compression, AI human/vehicle detection, and supports various camera types for flexible integration.

Image 1.1: The ANNKE 4K 8CH DVR connected to a display, illustrating its 4K Ultra HD video capability.
2. Paketearen edukia
Verify that all items listed below are included in your package. If any items are missing or damaged, contact ANNKE customer support.
- 1x ANNKE 4K 8CH DVR with 2TB Hard Drive
- 1x 5.9 oin/1.8 m HDMI kable
- 1x 3.2 ft/1 m Ethernet Cable
- 1x korronte egokitzailea
- 1x USB sagua
- 1x Erabiltzailearen eskuliburua (dokumentu hau)
- 1x Hormako eranskailua

Image 2.1: Visual representation of all components included in the ANNKE 4K 8CH DVR package.
3. Sistema amaituview
The ANNKE AU-DT81DX200-V1 DVR is a hybrid 5-in-1 system, supporting various camera technologies. It can operate in two primary modes:
- DVR modua: Supports up to 8 BNC (TVI/AHD/CVI/CVBS) cameras and an additional 4 IP cameras.
- NVR modua: Can be configured to support up to 12 IP cameras exclusively.
This flexibility allows for integration with existing analog systems while providing options for future IP camera expansion.
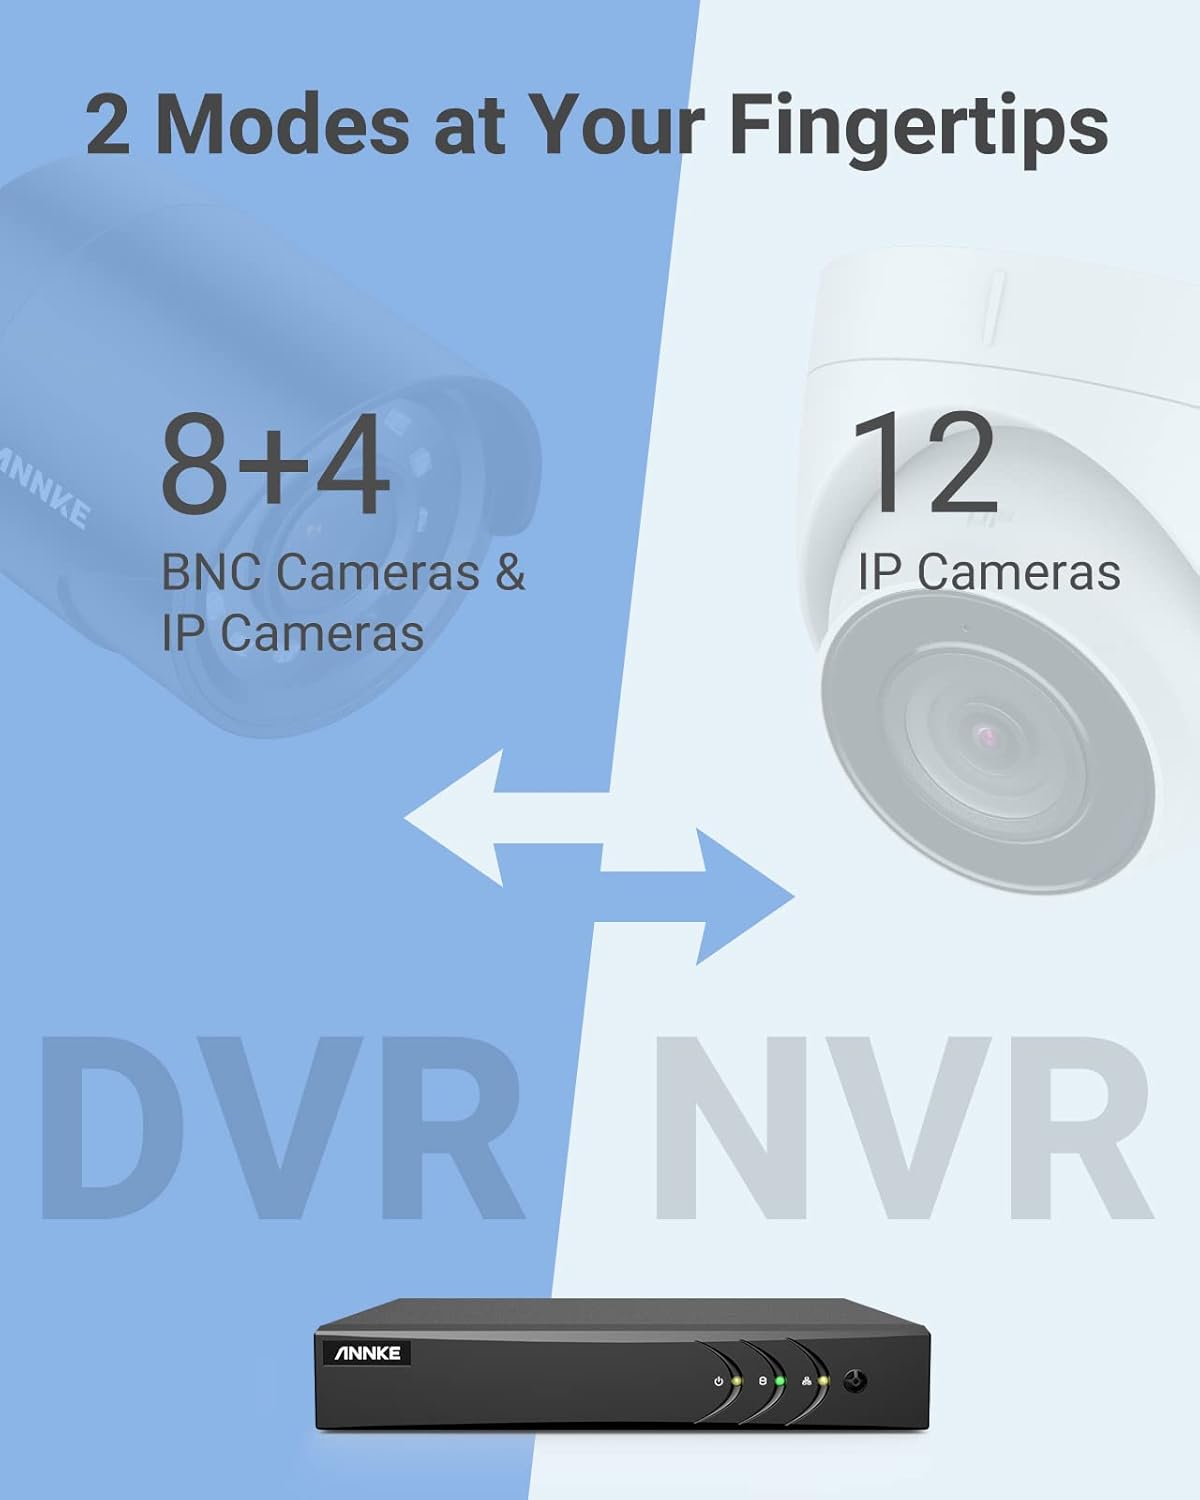
Image 3.1: Illustration of the DVR's dual operational modes, supporting both BNC and IP cameras or IP cameras exclusively.
4. Instalazio gida
4.1 Konfigurazio fisikoa
- Konektatu kamerak: Connect your security cameras to the BNC video input ports on the back of the DVR. For IP cameras, connect them to your network switch/router, and ensure the DVR is also connected to the same network via the Ethernet cable.
- Konektatu monitorearekin: Connect a monitor to the DVR's HDMI or VGA output port using the provided HDMI cable or a VGA cable (not included).
- Konektatu USB sagua: Konektatu USB sagua DVRko USB ataka batean.
- Konektatu energia: Connect the power adapter to the DVR's power input and then plug it into a power outlet. The DVR will power on automatically.
4.2 Hasierako konfigurazioa
Upon first boot, the DVR will guide you through an initial setup wizard. Follow the on-screen prompts to:
- Ezarri pasahitz sendo bat administratzaile kontuarentzat.
- Konfiguratu sareko ezarpenak (DHCP gomendatzen da erabiltzaile gehienentzat).
- Ezarri data eta ordua.
- Scan and add IP cameras if applicable.
5. DVRaren funtzionamendua
5.1 Bizi View
Hasierako konfigurazioaren ondoren, DVRak zuzeneko irudiak bistaratuko ditu view from connected cameras. Use the USB mouse to navigate the interface. Right-click to access the main menu.
5.2 Grabaketa
The DVR is pre-configured for continuous recording. You can customize recording schedules, motion-triggered recording, or alarm-triggered recording via the main menu under Record > Schedule.
5.3 Erreprodukzioa
Berrizview foo grabatuatage:
- Zuzenetik view, right-click and select Erreprodukzioa.
- Hautatu nahi dituzun kamera(k) eta data.
- Use the timeline to navigate through recordings. Events (like motion detection) are often marked on the timeline for quick access.

Image 5.1: The DVR's playback interface, demonstrating how to locate and review recorded events on a timeline.
6. Ezaugarri aurreratuak
6.1 Gizakien/Ibilgailuen Detekzioa AI bidez
The DVR incorporates deep learning-based motion detection 2.0, which can differentiate between human and vehicle movements. This significantly reduces false alarms caused by environmental factors such as leaves or light changes.
- Konfigurazioa: Enable and configure AI detection for each analog channel via the main menu under AI > Motion Detection 2.0.
- Gertaera Adimendunak: Supports line crossing and intrusion detection for specific areas.
- Alertak: Configure the DVR to send app push notifications, email alerts, or trigger a buzzer when human or vehicle motion is detected.
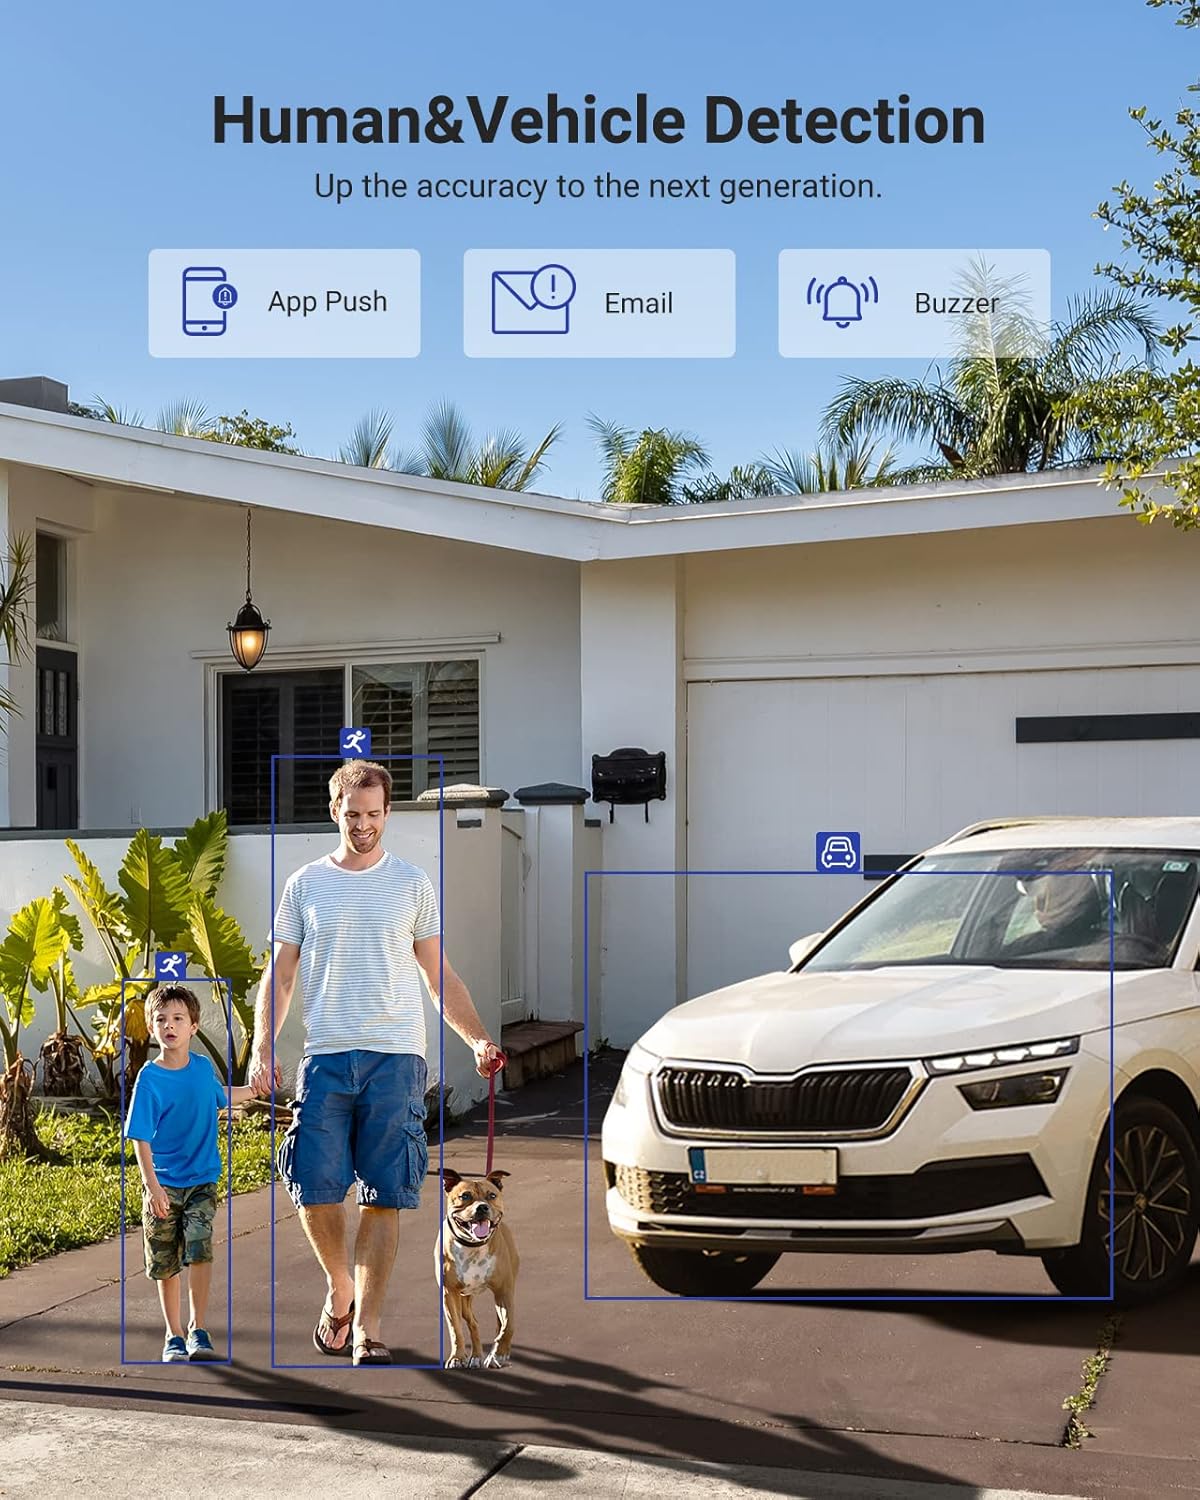
Image 6.1: Visual demonstration of the AI human and vehicle detection capability, showing how the system identifies and distinguishes between people and vehicles.
6.2 Urruneko sarbidea
Access your DVR remotely from anywhere using the ANNKE Vision App or a web arakatzailea.
- ANNKE Vision aplikazioa: Download the app from the App Store (iOS) or Google Play Store (Android). Register an account and add your DVR by scanning the QR code or entering its serial number.
- Web Arakatzailea: Access the DVR's web interfazea bere IP helbidea sartuz a web nabigatzailea zure ordenagailuan.
- Bateragarritasuna: The system is compatible with various devices including smartphones, tablets, laptops, and personal computers. It also supports integration with Alexa for voice control.

Image 6.2: Remote access via the ANNKE Vision App, showing compatibility with mobile devices and Alexa.
7. Bideoen kudeaketa
7.1 H.265+ Bideo Konpresioa
The DVR utilizes advanced H.265+ video compression technology. This technology significantly reduces file sizes, saving up to 80% of storage space compared to H.264 compression, while maintaining video quality. This allows for longer recording durations on the same 2TB hard drive.

Image 7.1: Comparison illustrating the storage efficiency of H.265+ compression versus H.264.
8. Bateragarritasuna
The ANNKE AU-DT81DX200-V1 is a versatile 5-in-1 hybrid DVR, designed to be compatible with a wide range of security cameras:
- HD TVI Input: Supports 8 MP@15 fps, 5 MP@20 fps, 3K@20 fps, 4 MP@30 fps.
- AHD Input: Supports 5 MP@20 fps, 4 MP@30 fps, 1080p@25 fps, 1080p@30 fps.
- HD CVI Input: Supports 4 MP@30 fps, 4 MP@25 fps, 1080p@25 fps, 1080p@30 fps.
- CVBS sarrera: Supports PAL/NTSC standards.
- IPC Input: Supports up to 8MP IP cameras.
This broad compatibility ensures that the DVR can integrate with both older analog cameras and modern IP cameras, providing a flexible upgrade path for existing surveillance systems.

Image 8.1: The DVR's compatibility with various camera technologies, including TVI, CVI, AHD, and IP cameras.
9. Zehaztapenak
| Ezaugarri | Zehaztapena |
|---|---|
| Marka | ANNKE |
| Modelo zenbakia | AU-DT81DX200-V1 |
| Konektibitate Teknologia | Kableatua |
| Bideo Harrapaketa Ebazpena | 4K (8MP) |
| Kanal kopurua | 8 (Analog) + 4 (IP) or 12 (IP) |
| Bideo-konpresioa | H.265 Pro+/H.265 Pro/H.265/H.264+/H.264 |
| Onartutako kamera motak | TVI, AHD, CVI, CVBS, IPC |
| AI Ezaugarriak | Human Detection, Vehicle Detection, Line Crossing, Intrusion Detection |
| Memoria Biltegiratzeko Ahalmena | 2 TB HDD (Up to 10 TB supported) |
| Urruneko Sarbidea | ANNKE Vision App, Web Arakatzailea |
| Gailu bateragarriak | Kamerak, ordenagailu eramangarriak, ordenagailu pertsonalak, telefono adimendunak, tabletak |
| Energia iturria | Kable elektrikoa |
| Kolorea | Beltza |
| Elementuaren neurriak | 17.13 x 12.4 x 3.86 hazbete |
10. Mantentzea
Mantentze-lan erregularrak zure DVR sistemaren errendimendu optimoa eta iraupena bermatzen ditu.
- Garbiketa: Keep the DVR free from dust. Use a soft, dry cloth to clean the exterior. Do not use liquid cleaners.
- Aireztapena: Ziurtatu DVRa ondo aireztatutako leku batean dagoela gehiegi berotzea saihesteko. Ez blokeatu aireztapen-irekidurak.
- Firmware eguneraketak: Aldian-aldian egiaztatu ANNKE ofiziala website for firmware updates. Keeping your DVR's firmware updated can improve performance, add new features, and enhance security.
- Datuen babeskopia: Egin bideo garrantzitsuen babeskopiak aldizkatage kanpoko biltegiratze gailu batera.
- Disko gogorraren osasuna: The DVR's menu may offer options to check the health status of the installed hard drive. Monitor this periodically.
11. Arazoak
This section addresses common issues you might encounter with your DVR.
- Bideo-irteerarik ez:
- Check HDMI/VGA cable connections to both the DVR and the monitor.
- Ziurtatu monitorearen sarrera-iturri zuzena konfiguratuta dagoela.
- Verify the DVR is powered on (power indicator light should be active).
- Kamerarik ez pantailarik:
- Check camera power supply and video cable connections.
- For IP cameras, ensure they are on the same network as the DVR and properly added in the DVR's camera management settings.
- Verify camera compatibility with the DVR (refer to Section 8).
- Urruneko sarbidea ez dabil:
- Ziurtatu DVR-a internetera konektatuta dagoela.
- Check network settings on the DVR (e.g., DHCP enabled, correct IP address).
- Verify the ANNKE Vision App is updated to the latest version.
- Ensure the DVR is properly added to your ANNKE Vision account.
- Mugimendu-alarma faltsuak:
- Adjust the sensitivity of motion detection in the DVR settings.
- Utilize the AI Human/Vehicle Detection feature (Section 6.1) to filter out irrelevant movements.
- Define specific detection zones to exclude areas with frequent non-threatening movement.
If you continue to experience issues, please contact ANNKE customer support.
12. Bermea eta Laguntza
ANNKE produktuek normalean berme mugatua dute. Mesedez, kontsultatu paketean sartutako berme txartela edo bisitatu ANNKEren webgune ofiziala. webzure eskualdeko berme-baldintza zehatzak ikusteko, bisitatu webgunea.
Laguntza teknikoa, produktuen inguruko kontsultak edo bermearen erreklamazioak egiteko, jarri harremanetan ANNKEren bezeroarentzako arreta-zerbitzu ofizialaren bidez. website or the contact information provided in your product documentation. Have your model number (AU-DT81DX200-V1) and purchase details ready when contacting support.
ANNKE Ofiziala Webgunea: www.annke.com