Ozark Outdoor Trail 12-Person Tent (B0F1ZRT2HQ)
Ozark Outdoor Trail 12 Person Easy Set Up Cabin Tent User Manual
Model: Ozark Outdoor Trail 12-Person Tent (B0F1ZRT2HQ)
1. Sarrera
Welcome to the user manual for your Ozark Outdoor Trail 12 Person Easy Set Up Cabin Tent. This tent is designed for comfortable and safe outdoor living, accommodating up to 12 adults. Its instant setup feature and integrated LED lights make it ideal for family camping trips or group adventures. Please read this manual thoroughly before setting up and using your tent to ensure proper operation and longevity.
2. Segurtasun informazioa
Beti eman lehentasuna segurtasunari zure denda erabiltzean. Jarraibide hauek ez jarraitzeak lesioak edo produktua kaltetu dezake.
- Mantendu sugar eta bero iturri guztiak denda-oihal honetatik urrun. Denda suaren aurkako oihalez egina dago, baina ez da suaren aurkakoa.
- Ez erabili gas edo berogailu elektrikorik dendaren barruan.
- Ensure proper ventilation to prevent carbon monoxide buildup if using any combustion devices nearby.
- Do not pitch the tent near open flames, steep slopes, or unstable ground.
- Securely stake down the tent and all guy lines to prevent collapse in windy conditions.
- Keep children away from the tent during setup and takedown to avoid injury from moving parts.
- Do not store flammable liquids or materials inside the tent.
3. Paketearen edukia
Egiaztatu osagai guztiak daudela konfigurazioa hasi aurretik:
- Ozark Outdoor Trail 12 Person Cabin Tent with pre-attached poles
- Rainfly with factory-sealed seams
- 2 Removable Room Dividers
- Garraio Poltsa
- 20 Steel Tent Stakes
- Erabiltzailearen eskuliburua (dokumentu hau)
4. Konfiguratzeko argibideak
The Ozark Outdoor Trail 12 Person Cabin Tent features an easy 2-minute setup process due to its pre-attached pole system. Follow these steps for quick assembly:
- Karpa deskonprimitu: Remove the tent from its carrying bag and lay it flat on the ground at your desired campsite. Ensure the area is clear of sharp objects.
- Unfold and Extend: With a partner, grasp the tent frame and begin to unfold it. The pre-attached poles will naturally extend as you pull the tent outwards.
- Lift and Lock: Continue to lift the center of the tent while extending the leg poles until they click into place, forming the full cabin structure.
- Seguru estakoekin: Once the tent is fully erected, use the provided 20 steel tent stakes to secure the tent corners and all guy lines firmly to the ground. This provides stability, especially in windy conditions.
- Erantsi Rainfly: Drape the rainfly over the tent, aligning it with the tent's structure. Secure the rainfly attachment points to the tent frame or designated loops.

Figure 4.1: Easy 2-Minute Setup Process. This diagram illustrates the four main steps to quickly set up your cabin tent.

Figure 4.2: Fully Set Up Tent in an Outdoor Environment. The tent is shown in a natural setting, demonstrating its size and appearance when erected.
5. Funtzionamendu-argibideak
5.1 Integrated LED Lighting System
The tent features ambient LED-lighted poles for interior illumination. These lights are powered by four D batteries (not included).
- Bateriaren instalazioa: Locate the battery compartment, typically near the main control switch for the lights. Insert four D batteries, ensuring correct polarity.
- Argi ezarpenak: The LED lights offer low, medium, and high power settings. Use the control switch to cycle through these settings to adjust brightness as needed.

5.1. Irudia: Barrualdea View with LED Lights. This image shows the tent's spacious interior with the integrated LED lighting system active, providing ample argiztapena.
5.2 Room Dividers
The tent includes two removable room dividers, allowing you to create up to three separate living and sleeping spaces.
- Instalazioa: Attach the room dividers to the designated loops or hooks inside the tent.
- Kentzea: Detach the dividers when a larger, open space is desired.

Figure 5.2: Tent Interior Layout. This view demonstrates the potential for dividing the tent into multiple rooms using the provided dividers.
5.3 Aireztapena eta Sarbidea
- Windows: The tent features 9 windows for panoramic views and ventilation. Open or close them using the zippers and ties.
- Oihalak: Two oversized side vents improve air circulation.
- Ateak: There are two doors, one in the front and one in the back, for convenient entry and exit.
- Electrical Cord Access: An E-port is provided for convenient electrical cord access, allowing you to bring power into the tent safely.
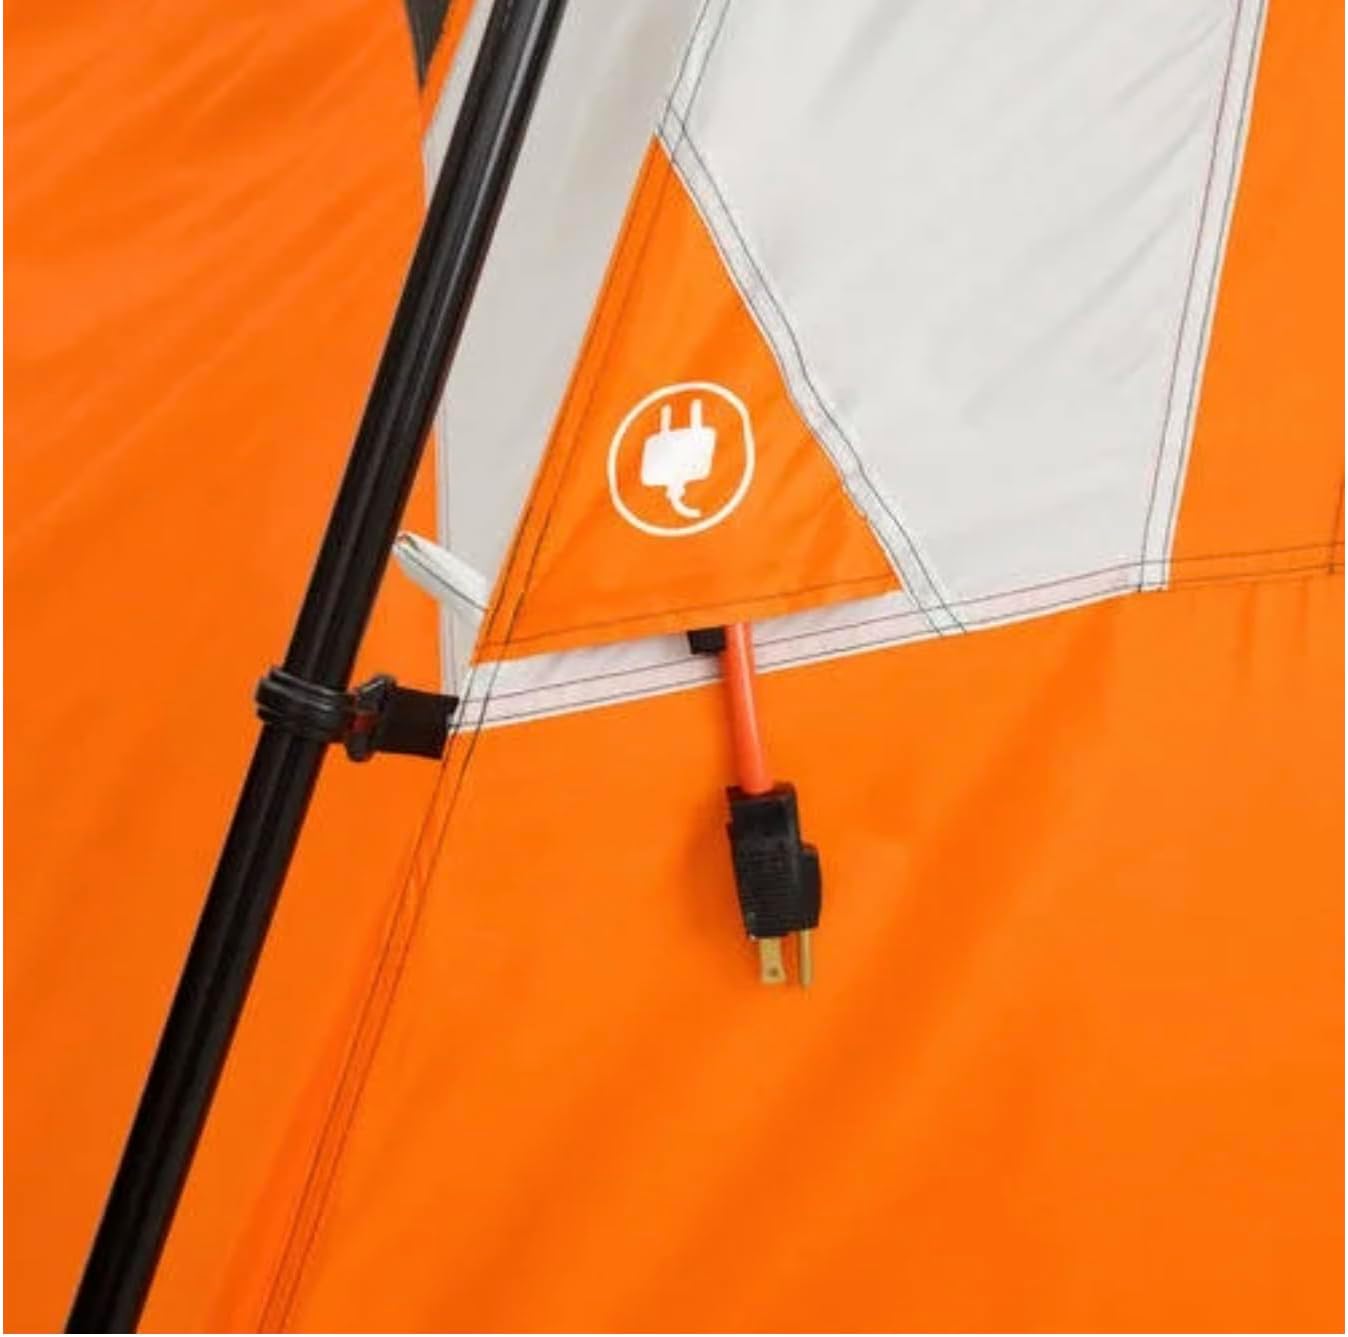
Figure 5.3: Electrical Cord Access (E-Port). This image highlights the dedicated port for safely routing electrical cords into the tent.
5.4 Storage and Media Pockets
- The tent includes two media pockets and two storage pockets for organizing personal items and devices.

Figure 5.4: Interior Storage Pockets. These mesh pockets provide convenient storage for small items, keeping the tent organized.

Figure 5.5: Media Pocket. A dedicated pocket for holding a tablet or similar device, allowing for hands-free viewing inside the tent.
6. Mantentzea
Zaintza eta mantentze egokiak zure karparen bizitza luzatuko du.
- Garbiketa: Garbitu denda belaki leun batekin, xaboi leun batekin eta ur epelarekin. Ez erabili detergente gogorrik, lixibarik edo garbitzaile urratzailerik. Ondo garbitu.
- Lehortzea: Always ensure the tent is completely dry before packing it away to prevent mildew and odor. Air dry in a shaded area.
- Biltegiratzea: Gorde denda bere poltsan leku fresko eta lehor batean, eguzki-argitik eta tenperatura altuetatik babestuta.
- Poloaren zaintza: Inspect poles for damage before and after each use. Clean any dirt or debris from the pole joints.
- Ehunaren zainketa: Avoid prolonged exposure to direct sunlight, which can degrade fabric over time.
7. Arazoak
Hona hemen aurki ditzakezun arazo ohikoen irtenbideak:
| Arazoa | Kausa posiblea | Irtenbidea |
|---|---|---|
| Tent not standing upright/stable | Poles not fully extended or locked; insufficient staking. | Ensure all pre-attached poles are fully extended and locked into place. Securely stake all tent corners and guy lines. |
| LED argiek ez dute funtzionatzen | Dead or incorrectly installed D batteries. | Check battery polarity. Replace with fresh D batteries. Ensure the light switch is in the ON position. |
| Water leaking into tent | Rainfly not properly installed; damaged fabric. | Ensure rainfly is correctly positioned and secured over the tent. Check for tears or punctures in the fabric and repair if necessary. |
| Difficulty zipping doors/windows | Fabric caught in zipper; zipper misalignment. | Gently pull fabric away from the zipper path. Ensure the tent is not overly taut, which can strain zippers. |
8. Zehaztapenak
| Ezaugarri | Xehetasuna |
|---|---|
| Marka | Generic (Ozark Trail) |
| Ereduaren izena | Ozark Outdoor Trail 12-Person Tent |
| ASIN | B0F1ZRT2HQ |
| Okupazioa | 12 Person (fits 3 queen air beds) |
| Neurriak (L x W x H) | 18' x 10' x 80" (216"L x 120"W x 80"H) |
| Erdiko Altuera | 80 hazbetekoa |
| Elementuaren pisua | 47.87 kilo |
| Materiala | Poly Taffeta (Tent), Polyester (Rainfly), Alloy Steel (Poles), Steel (Stakes), Nylon (Tent Floor) |
| Gela kopurua | 3 (with 2 removable dividers) |
| Ate kopurua | 2 (front and back) |
| Windows kopurua | 9 |
| Ezaugarri bereziak | Quick Setup, Rainproof, Integrated LED Lights (low, medium, high settings), E-port, Media Pockets, Storage Pockets |
| LEDentzako energia iturria | 4 D bateriak (ez dago barne) |
| Uraren Erresistentzia | Water-Resistant / Waterproof |
| Urtaroak | 4. denboraldia |
9. Bermearen informazioa
Specific warranty details for this product are typically provided at the point of purchase or on the product packaging. Please retain your proof of purchase for any warranty claims. For general warranty inquiries, refer to the manufacturer's official webwebgunean edo jarri harremanetan bezeroarentzako laguntzarekin.
10. Bezeroarentzako arreta
If you have any questions, require assistance with setup, or encounter issues not covered in this manual, please contact the retailer or manufacturer's customer support. Refer to your purchase documentation for specific contact information.
Erlazionatutako dokumentuak - Ozark Outdoor Trail 12-Person Tent (B0F1ZRT2HQ)
 |
Naturehike Cloudup-Pro Ultralight Tent CNK2350WS020 - Setup and Specifications Detailed information on the Naturehike Cloudup-Pro Ultralight Backpack Tent, model CNK2350WS020, including accessory lists, setup instructions, storage dimensions, and technical specifications for 1, 2, and 3-person models. |
 |
Ozark Trail W731 18' x 18' 14-Person Family Tent Assembly Guide Detailed assembly instructions, safety warnings, care tips, and replacement parts list for the Ozark Trail W731 18' x 18' 14-person family tent. |
 |
Ozark Trail W843.2 10-Person Dome Tent Assembly Instructions Detailed assembly instructions for the Ozark Trail W843.2 10-Person Modified Dome Tent with Screen Porch, including safety warnings, care tips, replacement parts, and step-by-step setup guide. |
 |
Inflatable Tent User Manual and Installation Guide Comprehensive user manual for setting up and using your inflatable tent. Includes package components, safety warnings, and step-by-step installation instructions for outdoor use. |
 |
Bushnell 12 pertsonentzako kabina-denda azkarra: Ezaugarriak, konfigurazioa eta bermearen gida Bushnell 12 pertsonentzako kabina-denda azkarraren gida osoa, bere ezaugarriak zehaztuz, hala nola konfigurazio azkarra, bero-babesa eta eguraldiaren aurkako babes-teknologiak. Urratsez urrats muntatzeko eta desmuntatzeko argibideak, maiz egiten diren galderak, arazoak konpontzeko aholkuak eta bermeari buruzko informazioa barne hartzen ditu. |
 |
CORE 12 Person Instant Cabin Tent with Full Rainfly (Model 40488) - Setup and Care Guide Comprehensive guide for setting up, taking down, and caring for the CORE 12 Person Instant Cabin Tent with Full Rainfly (Model 40488). Includes instructions, FAQs, warnings, and warranty information for this 2-3 season camping karpa. |
Ask a question about this manual
Ask about setup, troubleshooting, compatibility, parts, safety, or missing instructions. Manuals+ will review the question and use this page’s manual context to help answer it.