
1. Sarrera
This manual provides detailed instructions for the safe and effective use of your Mulcort Model 850 Stud Center Finder. This device is designed to accurately detect studs, metal objects, and live AC wires behind various wall materials, including wood, gypsum board, and plastic board. It features an LCD digital display, audio alerts, and an integrated bubble level for enhanced precision.
Mesedez, irakurri arretaz eskuliburu hau gailua erabili aurretik eta gorde etorkizunean erreferentzia gisa.
2. Segurtasun informazioa
Beti jarraitu segurtasun neurri hauek lesio pertsonalak edo gailuari kalteak ekiditeko:
- Ez saiatu gailua irekitzen edo aldatzen.
- Mantendu gailua lehor eta muturreko tenperaturetatik urrun.
- Kendu bateria gailua denbora luzez erabiliko ez bada.
- When detecting live AC wires, exercise extreme caution. Always turn off power to the area if possible before drilling or cutting.
- This device is intended for detection purposes only. Always verify findings with other methods if uncertainty exists.
3. Produktua amaitu daview
The Mulcort Model 850 Stud Center Finder is equipped with advanced sensor technology for reliable detection. Its ergonomic design ensures comfortable handling during use.
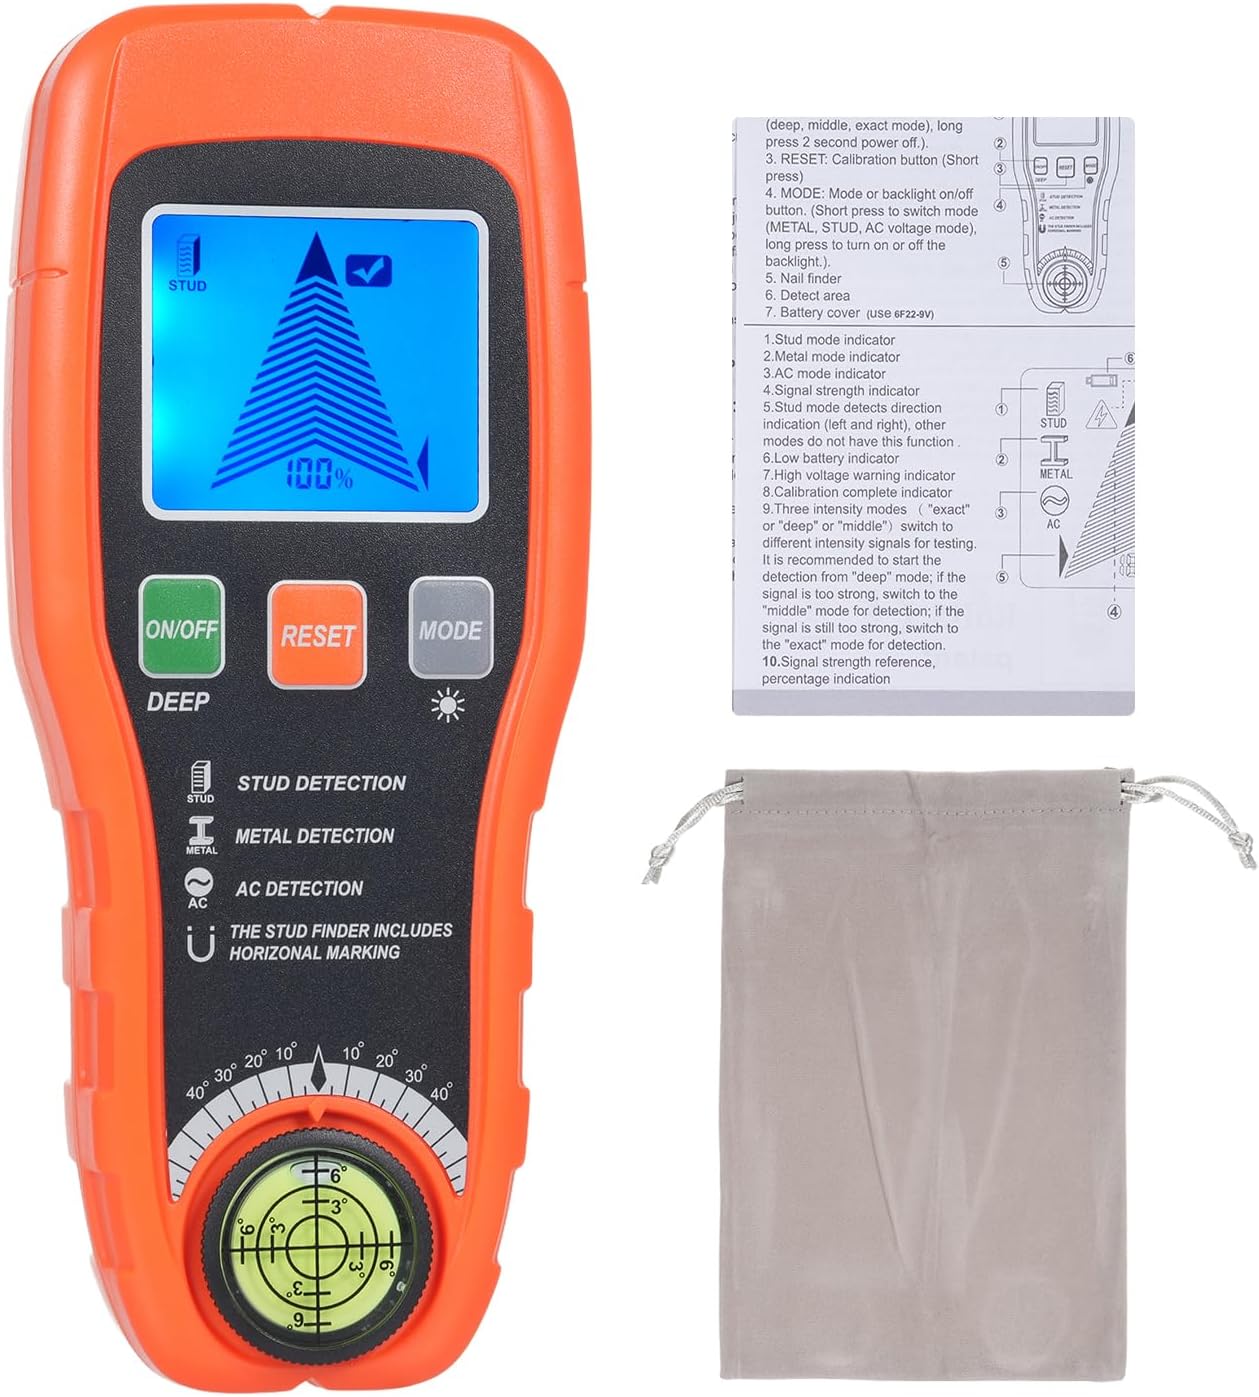
Image: The Mulcort Model 850 Stud Center Finder, shown with its included user manual and storage bag. The device is orange and black, featuring an LCD screen, control buttons, and a built-in bubble level at the bottom.
Ezaugarri nagusiak:
- Advanced Smart Sensor Technology: Ensures accurate and rapid detection.
- Versatile Detection Modes: Deep, medium, and precise strength sensing levels for various materials.
- Backlit LCD Digital Display: Clear, easy-to-read display in all lighting conditions.
- Audio alertak: Combines with directional indicators for efficient object location.
- Burbuila maila integratua: For accurate horizontal and vertical alignment.

Image: A detailed diagram illustrating the components of the Mulcort Stud Finder, including the LCD Display, ON/OFF button, RESET button, MODE button, Sensor area, Battery cover, and Nail finder.
4. Konfigurazioa
4.1 Bateriaren instalazioa
The Mulcort Model 850 requires one 9V battery (not included).
- Locate the battery cover on the back of the device.
- Lerratu estalkia ireki.
- Sartu 9V-ko bateria berri bat, polaritate zuzena ziurtatuz.
- Itxi bateriaren estalkia ongi.

Image: A user's hands demonstrating the installation of a 9V battery into the back compartment of the Mulcort Stud Finder.
4.2 Hasierako Kalibrazioa
Before each use, calibrate the device on a flat, clear surface.
- Sakatu ON/OFF gailua pizteko botoia.
- Place the tester flat against the wall or surface where you intend to scan.
- Eduki sakatuta Berrezarri button. Release it when the LCD screen displays a checkmark (✓). The buzzer will emit a short beep, and the LCD progress bar will clear, displaying zero percentage.
Video: A demonstration of the Mulcort Stud Center Finder's features and basic operation, including power-on, mode selection, and scanning. This video provides a visual guide to the device's functionality.
5. Funtzionamendu-argibideak
5.1 Detekzio moduak hautatzea
Sakatu MODUA button to cycle through the available detection modes:
- Stud Detection: For locating wood studs.
- Metalen detekzioa: For identifying metal objects like pipes or rebar.
- AC Detection: For detecting live unshielded AC wires.
The LCD screen will display the active mode icon (Stud, Metal, or AC).

Irudia: Bandera ikuskizun batasing the Mulcort Stud Finder Wall Scanner's ability to detect AC wires, wooden beams, joist pipes, metal rebar, stud edges, stud centers, nails, and features an HD LCD screen, self-calibration, and a bubble level.
5.2 Scanning for Objects
After calibration and mode selection, move the tester slowly across the desired surface from left to right. Maintain firm contact with the wall.
- As the device detects an object, the LCD progress bar will rise, and the percentage handituko da.
- When the signal strength is at its peak (100%), the LCD will display a full bar, and the buzzer will alarm continuously, indicating the center of the object.
- Mark the edges of the detected object as the signal strength decreases. The center is typically between these marks.

Image: An illustration demonstrating the operation of the Mulcort Stud Finder for metal detection. It shows the device being moved horizontally across a surface, indicating how to mark the edges and center of a detected metal object.
5.3 Stud Mode Detection
The device offers three depth settings for stud detection:
- 0.39 inches (10 mm) deep
- 0.79 inches (20 mm) deep
- 1.5 inches (38 mm) deep
If you are unsure of the wall thickness, it is recommended to scan in 0.39" mode first, then 0.79" mode, and finally 1.5" mode.

Image: A visual representation of the Mulcort Stud Finder's stud mode detection capabilities at three different depths: 0.39 inches (10mm), 0.79 inches (20mm), and 1.5 inches (38mm).
5.4 Metal Mode Detection
The metal detection mode can identify both magnetic and non-magnetic metals:
- Non-magnetic Metal Mode: Detects objects like copper pipes up to 1.65 inches (42 mm) deep.
- Magnetic Metal Mode: Detects objects like rebar up to 2.36 inches (60 mm) deep.

Image: An illustration showing the Mulcort Stud Finder detecting both non-magnetic metals (like copper pipes) and magnetic metals (like rebar) at different depths within a wall.
5.5 AC Wire Detection
The device can detect the presence of live, unshielded electrical wiring up to 2 inches (51 mm) deep.
- The AC detection mode indicates the presence of live current.
- A special lightning bolt symbol will appear on the screen when AC wires are detected.
- Ohar garrantzitsua: Some wall objects may isolate the current, so buried live wires may not always be detected. Always exercise caution.

Image: A visual demonstrating the AC Wire Detection feature of the Mulcort Stud Finder, showing the device detecting live electrical wiring up to 2 inches (51mm) deep within a wall.
5.6 Using the Nail Finder and Bubble Level
The integrated nail finder and bubble level enhance the device's utility.
- The nail finder, located at the bottom of the device, can be used to detect nails or other small metal objects within the wall.
- The bubble level assists in ensuring accurate horizontal and vertical alignment when marking or installing items.

Image: An illustration detailing the use of the Nail Finder and Bubble Level on the Mulcort Stud Finder. It shows how to use the detector to find studs and then use the magnetic nail finder to locate metal on the studs, along with the bubble level for horizontal positioning.
6. Mantentzea
- Garbitu gailua zapi leun eta lehor batekin. Ez erabili garbitzaile edo disolbatzaile urratzailerik.
- Gorde gailua leku fresko eta lehor batean, eguzki-argitik eta hezetasunetik urrun.
- Remove the battery if the device is not used for extended periods to prevent leakage.
7. Arazoak
| Arazoa | Kausa posiblea | Irtenbidea |
|---|---|---|
| Inaccurate readings or inconsistent detection. | Improper calibration; uneven scanning motion; wall material too thick for selected mode. | Ensure proper calibration on a clear, flat surface. Scan slowly and evenly. Try different depth modes. |
| Screen difficult to read. | Estua viewing angles of the LCD. | Egokitu zure viewing angle. If space is limited, try turning the finder upside down to get a better angle. |
| Gailua ez da pizten. | Bateria agortuta edo gaizki instalatuta. | Replace the 9V battery. Ensure it is installed with correct polarity. |
| AC wire not detected. | Wire is shielded; wall material isolates current; wire is too deep. | Ensure the wire is unshielded. Be aware that some materials can block detection. Always use caution and verify with other methods. |
8. Zehaztapenak
- Modelo zenbakia: 850
- Energia iturria: Battery Powered (1x 9V battery, not included)
- Stud Detection Depth: Gehienez 1.5 hazbete (38 mm)
- Metal Detection Depth: Magnetic up to 2.36 inches (60 mm), Non-magnetic up to 1.65 inches (42 mm)
- Korronte alternoko kablearen detekzio-sakonera: Up to 2 inches (51 mm) (unshielded live wires)
- Dakarten osagaiak: Detector, Instruction Manual, Storage Bag
- Kolorea: Laranja
9. Bermea eta Laguntza
For warranty information or technical support, please refer to the contact details provided with your purchase or visit the official Mulcort webgunea. Gorde erosketa-agiria erosketaren frogagiri gisa.