1. Sarrera
This manual provides detailed instructions for the safe and efficient operation of your Generic HiFi Tube Preamplifier. Please read this manual thoroughly before use and retain it for future reference. This device is designed to enhance your home stereo sound system by providing a warm, clear, and dynamic audio experience through its vacuum tube technology.
2. Segurtasun informazioa
- Elikatze-iturria: Erabili emandako korronte-egokitzailea soilik. Ziurtatu bolumenatage zure tokiko elikadura hornidura bat dator.
- Aireztapena: Jarri aurreamplifier in a well-ventilated area. Do not cover ventilation openings.
- Hezetasuna: Keep the device away from water, moisture, and high humidity.
- Beroa: Saihestu unitatea bero-iturrien ondoan edo eguzki-argiaren eraginpean jartzea.
- Hutseko hodiak: Vacuum tubes can become hot during operation. Avoid touching them directly. Allow the unit to cool before handling tubes.
- Zerbitzua: Ez saiatu unitatea zeuk konpontzen. Konponketa guztiak langile kualifikatuei eskatu.
3. Paketearen edukia
Mesedez, egiaztatu elementu guztiak paketean daudela:
- 1 x HiFi Vacuum Tube Preampbiziagoa
- 1 x Erabiltzailearen eskuliburua (dokumentu hau)
- 1 x korronte egokitzailea (AEBetako entxufea)
- 2 x JAN5654 Vacuum Tubes
4. Produktua amaitu daview
The Generic HiFi Tube Preamplifier is designed to deliver a pleasant, transparent, and mellow sound quality with a wide soundstage. It features adjustable treble, midrange, and bass controls for precise audio customization.
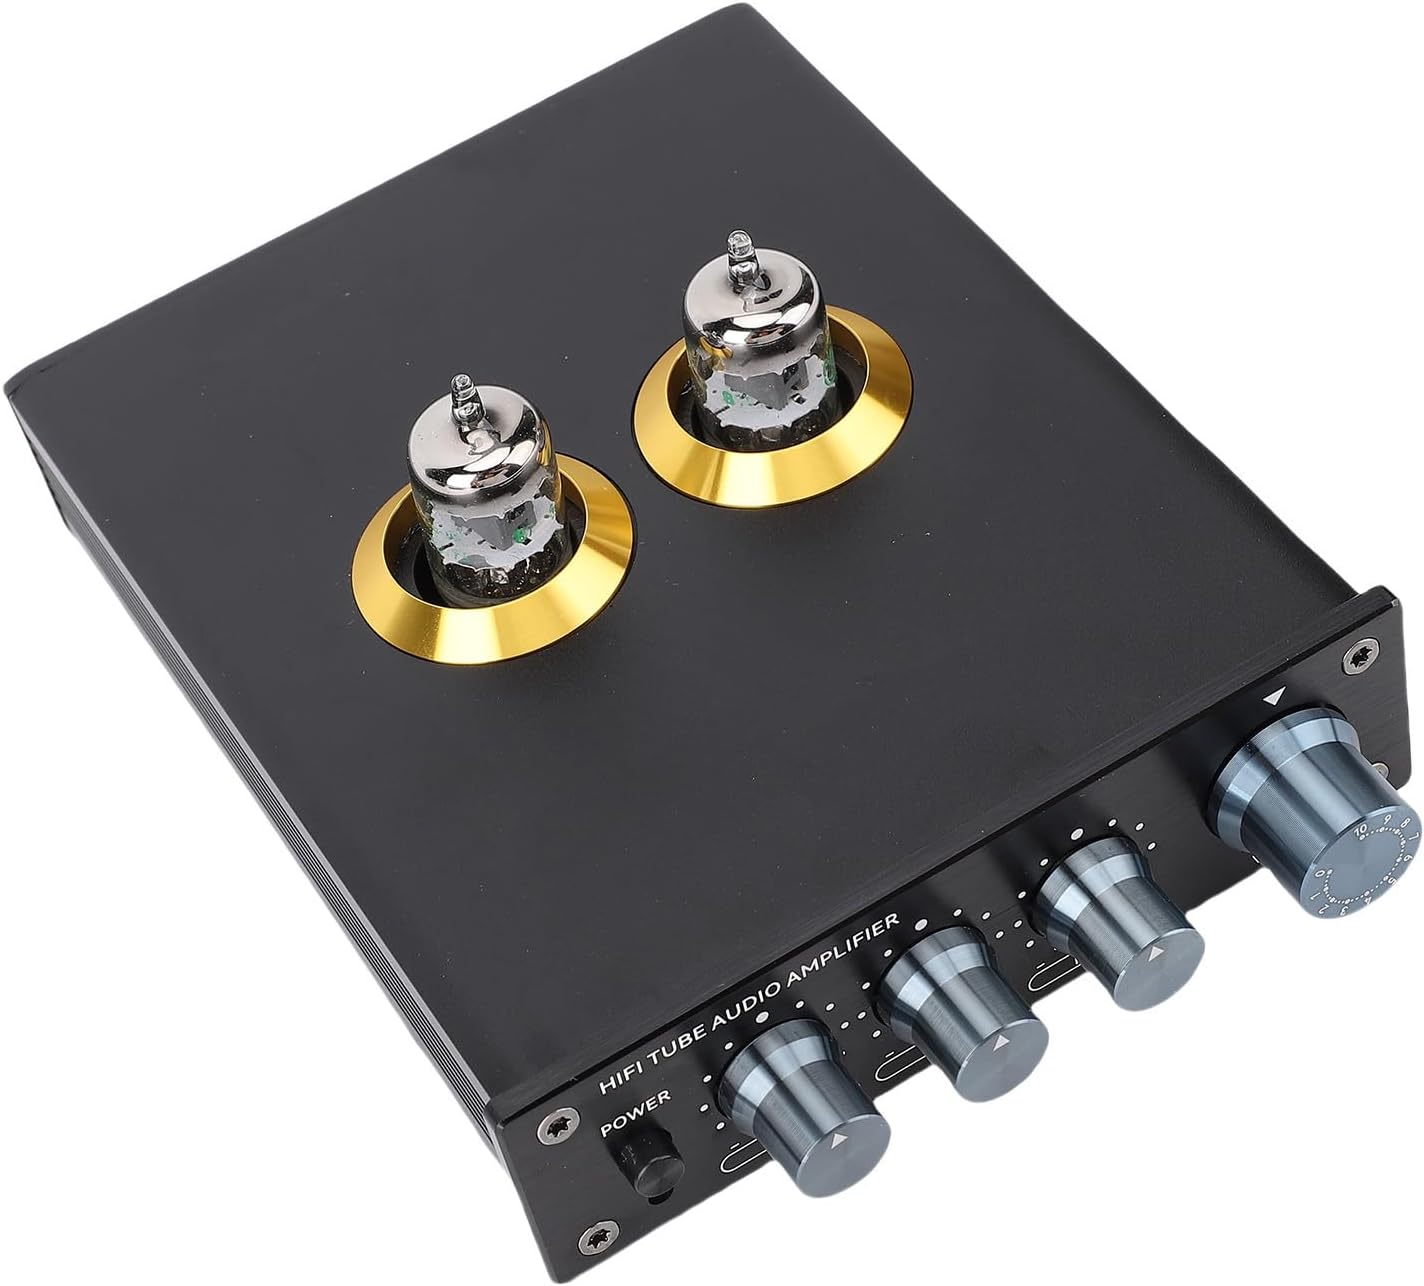
4.1. irudia: Aurrean eta goian view of the HiFi Tube Preampbizitzailea, erakustaldiaasing the two visible vacuum tubes and the front panel controls for power, low, mid, high, and volume.
Aurrealdeko paneleko kontrolak

4.2. irudia: Xehetasuna view aurreamplifier's front panel. From left to right: Power button, Low (bass) adjustment knob, Mid (midrange) adjustment knob, High (treble) adjustment knob, and a larger Volume control knob.
- Pizteko botoia: Toggles the unit on and off.
- BAXU botoia: Adjusts the bass frequencies (±6dB).
- ERDIKO botoia: Adjusts the midrange frequencies (±6dB).
- HIGH botoia: Adjusts the treble frequencies (±6dB).
- BOLUMENaren botoia: Irteera bolumen orokorra kontrolatzen du.
Atzeko panelaren konexioak

4.3. irudia: Atzekoa view aurreamplifier. It features stereo RCA input jacks (L/R), stereo RCA output jacks (L/R), and a DC ±15V power input port.
- INPUT (RCA L/R): Connect your audio source (e.g., CD player, DAC, streamer) to these jacks.
- OUTPUT (RCA L/R): Connect these jacks to your power ampargitzaile edo hiztun aktiboak.
- DC ±15V: Energia-sarrerako ataka. Konektatu hemen emandako energia-egokigailua.
5. Konfiguratzeko argibideak
- Tube Installation: Carefully insert the two JAN5654 vacuum tubes into their respective sockets on the top of the preamplifier. Ensure they are seated firmly and correctly oriented.
- Konektatu audio iturria: Using RCA cables, connect your audio source (e.g., CD player, media player) to the 'INPUT' RCA jacks on the rear panel of the preamplifier. Ensure left and right channels are correctly matched.
- Konektatu AmpHizlaria/Hizlariak: Using RCA cables, connect the 'OUTPUT' RCA jacks on the rear panel of the preampzure potentziaren sarrerarako zalifikatzailea amplifier or active speakers. Ensure left and right channels are correctly matched.
- Konektatu energia: Connect the provided power adapter to the 'DC ±15V' input on the rear panel of the preamplifier, then plug the adapter into a suitable wall outlet.
- Hasierako piztea: Ensure all connections are secure. Press the 'POWER' button on the front panel to turn on the preamplifier. The tubes will glow as they warm up.
6. Funtzionamendu-argibideak
- Piztu/Itzali: Press the 'POWER' button on the front panel to turn the unit on or off. Allow a few moments for the tubes to warm up after powering on.
- Bolumenaren doikuntza: Use the large 'VOLUME' knob to adjust the overall output level. Start with a low volume and gradually increase it to a comfortable listening level.
- Tonuen kontrola: Use the 'LOW', 'MID', and 'HIGH' knobs to adjust the bass, midrange, and treble frequencies according to your preference. These controls allow for fine-tuning of the sound to match your audio source and listening environment.
- Tube Rolling (Optional): The JAN5654 vacuum tubes can be replaced with compatible tubes such as 6J1, 6J4, 6J5, 6AK5, or 6*1N to explore different sound characteristics. Ensure the unit is powered off and cooled down before attempting to replace tubes. Handle tubes carefully by their base.
7. Mantentzea
- Garbiketa: Disconnect the power before cleaning. Use a soft, dry cloth to wipe the exterior of the unit. Do not use liquid cleaners or abrasive materials.
- Hodiaren zaintza: Avoid touching the glass part of the tubes with bare hands, as oils can leave residue. If tubes become dirty, wipe gently with a clean, lint-free cloth.
- Biltegiratzea: If storing the unit for an extended period, disconnect it from power and store it in a cool, dry place, away from direct sunlight and extreme temperatures.
8. Arazoak
- Soinurik ez:
- Ziurtatu korronte-egokitzailea ondo konektatuta dagoela eta unitatea piztuta dagoela.
- Check all RCA audio connections between the source, preamplifikatzailea, eta ampargitzaile/hiztunak.
- Verify that the volume knob is not set to minimum.
- Confirm your audio source is playing and its output volume is adequate.
- Soinu distortsionatua:
- Reduce the volume level on both the preamplifijadorea eta zure audio iturria.
- Check if the tubes are properly seated.
- Ziurtatu kableak ez daudela hondatuta edo akastun.
- Zurrumuda zarata:
- Ziurtatu kable guztiak behar bezala blindatu eta konektatuta daudela.
- Try moving the preampMantendu gailua interferentziak sor ditzaketen beste gailu elektronikoetatik urrun.
- Check for ground loop issues; try plugging all audio components into the same power strip.
- Tubes Not Glowing:
- Ziurtatu unitatea piztuta dagoela.
- Check if tubes are correctly inserted.
- If only one tube is not glowing, it might be faulty and require replacement.
9. Zehaztapenak
| Eredua | Generichn0e5pdrs4-11 |
| Marka | Generikoa |
| Aurreamp Irabazi | 5x |
| Bass Treble Range | ± 6 dB |
| Bolumen eragileatage | DC±15V |
| Sarrerako sentikortasuna | 0.2V |
| Maiztasun Erantzuna | 20Hz-20kHz (±3dB) |
| Distortsioa | %0.1 |
| Seinalea zarata erlazioa | ≥98dB |
| Materiala | Aluminiozko aleazioa |
| Elementuaren pisua | 1.5 kilo |
| Produktuaren neurriak | 11.81 x 7.48 x 2.36 hazbete |
10. Bermea eta Laguntza
Mesedez, kontsultatu zure erosketa-dokumentazioa edo dendariarena. website for specific warranty details and terms. For technical support or assistance with your Generic HiFi Tube Preamplifier, please contact your point of purchase or the manufacturer directly.


