
1. Sarrera
Thank you for choosing the Zeuslap Z13KT 13.3-inch Portable Touchscreen Monitor. This device is designed to enhance your productivity and entertainment experience with its high-resolution 2K IPS display, 100% sRGB color gamut, and responsive touch functionality. This manual provides essential information for the safe and efficient use of your monitor, including setup, operation, maintenance, and troubleshooting.
2. Segurtasun informazioa
- Read all instructions carefully before using the monitor.
- Ez jarri monitoreari euriari, hezetasunari edo muturreko tenperaturei.
- Saihestu monitoreak bero-iturrien ondoan edo eguzki-argiaren eraginpean jartzea.
- Erabili fabrikatzaileak emandako edo gomendatutako korronte-egokigailua eta kableak soilik.
- Ez saiatu monitoreak zeuk desmuntatzen edo konpontzen. Mantendu konponketa guztiak langile kualifikatuen esku.
- Clean the monitor with a soft, dry cloth. Avoid using liquid cleaners or aerosols.
- Mantendu monitoreak eremu magnetiko indartsuetatik urrun.
3. Paketearen edukia
Mesedez, egiaztatu paketearen edukia kutxa irekitzean. Elementuren bat falta bada edo hondatuta badago, jarri harremanetan zure saltzailearekin.
- Zeuslap Z13KT Portable Monitor
- USB-C to USB-C Cable (for power and video/touch)
- Mini HDMI to HDMI Cable (for video)
- USB-Atik USB-Crako kablea (energiarako)
- Energiaren egokitzailea (sartuta badago)
- Protective Cover/Stand
- Erabiltzailearen eskuliburua (dokumentu hau)
4. Produktua amaitu daview
Familiarize yourself with the monitor's components and ports.
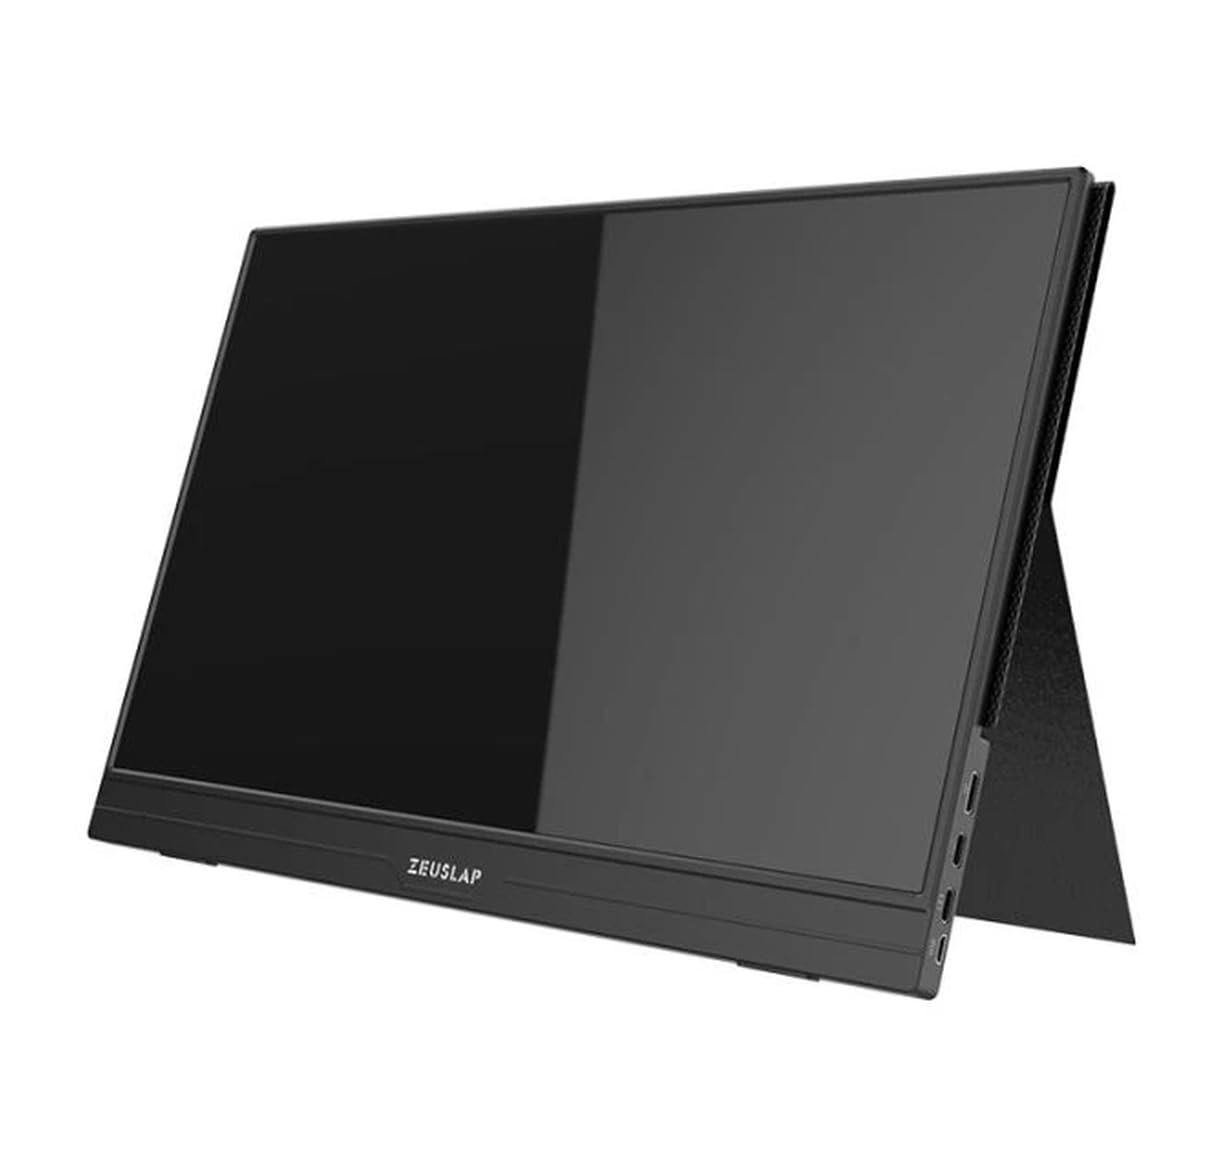
4.1. irudia: Aurrealdea view of the Zeuslap Z13KT portable monitor, showcasing its slim design and screen.
4.1. Monitor Components
- 13.3-inch 2K IPS Touchscreen: Main display area with touch input capability.
- Pizteko botoia: Turns the monitor on/off and can be used to access the OSD menu.
- Menu/Nabigazio botoiak: For navigating the On-Screen Display (OSD) menu.
- Hizlariak: Audio irteera integratua.
4.2. Available Ports
- USB-C Port (Full-featured): For power, video signal, and touch data transmission from compatible devices (e.g., laptops, smartphones).
- USB-C Port (Power Only): For connecting to an external power adapter to supply power to the monitor.
- Mini HDMI ataka: For video signal input from devices like gaming consoles, cameras, or older laptops.
- 3.5 mm-ko audio-konexioa: Kanpoko entzungailuak edo bozgorailuak konektatzeko.
5. Konfigurazioa
Follow these steps to connect your Zeuslap Z13KT monitor to your device.
5.1. Connecting to a Laptop/PC (USB-C with DisplayPort Alt Mode)
- Ensure your laptop's USB-C port supports DisplayPort Alternate Mode (DP Alt Mode) and power delivery.
- Connect one end of the provided USB-C to USB-C cable to the full-featured USB-C port on the monitor.
- Connect the other end of the USB-C to USB-C cable to your laptop's compatible USB-C port.
- The monitor should automatically detect the signal and power on. If not, press the monitor's power button.
- For touch functionality, ensure the USB-C connection is established correctly.
5.2. Connecting to a Laptop/PC (HDMI + USB for Power/Touch)
- Connect one end of the Mini HDMI to HDMI cable to the Mini HDMI port on the monitor.
- Connect the other end of the HDMI cable to your laptop's HDMI port.
- For power, connect the USB-A to USB-C cable from your laptop's USB-A port (or a power adapter) to the power-only USB-C port on the monitor.
- For touch functionality, if your laptop has a USB-A port, connect the USB-A end of the USB-A to USB-C cable to your laptop and the USB-C end to the full-featured USB-C port on the monitor. This will provide touch data.
- The monitor should power on and display the image.
5.3. Connecting to a Smartphone (USB-C with DisplayPort Alt Mode)
Note: Not all smartphones support video output via USB-C. Check your phone's specifications.
- Connect one end of the USB-C to USB-C cable to the full-featured USB-C port on the monitor.
- Connect the other end of the USB-C to USB-C cable to your compatible smartphone's USB-C port.
- The monitor will draw power from the phone. For extended use or if the phone cannot supply enough power, connect an external power adapter to the monitor's power-only USB-C port.
- The monitor should display your phone's screen, and touch functionality should be active.
6. Funtzionamendu-argibideak
6.1. Piztu/Itzali
- Pizteko: Sakatu Pizteko botoia.
- Itzaltzeko: Eduki sakatuta pizteko botoia 3 segundoz.
6.2. Pantailako pantaila (OSD) menua
OSD menuak monitorearen hainbat ezarpen doitzeko aukera ematen du.
- Accessing the OSD: Press the Menu button (or short press the Power button, depending on model variation).
- Nabigazioa: Use the navigation buttons (or touch gestures if enabled) to move through menu options.
- Hautaketa: Press the Menu button (or tap) to select an option.
- Irteera: Navigate to the "Exit" option or wait for the OSD to time out.
6.3. OSD ezarpen arruntak
- Distira/Kontrastea: Adjust display luminance and contrast levels.
- Kolore ezarpenak: Aldatu kolore-tenperatura, ñabardura eta saturazioa.
- Sarrera iturria: Manually select between USB-C and Mini HDMI inputs.
- Aspektu-erlazioa: Change the display aspect ratio (e.g., 16:9, 4:3).
- Bolumena: Adjust the built-in speaker volume.
- Hizkuntza: Select the OSD menu language.
6.4. Ukipen-pantailaren funtzionaltasuna
The monitor supports multi-touch gestures. Ensure your device (laptop/smartphone) is compatible and connected via a full-featured USB-C cable for touch input to function.
- Sakatu: Saguaren klik baten baliokidea.
- Pasatu hatza: For scrolling or navigating.
- Zoom egiteko apur bat egin: For zooming in or out on content.
7. Mantentzea
7.1. Monitorea garbitzea
- Monitorea beti itzali eta deskonektatu garbitu aurretik.
- Erabili zapi leun eta pelunik gabeko bat pantaila eta c astiro-astiro garbitzeko.asing.
- Orban egoskorretarako, arinki garbituampGarbitu zapia urarekin edo pantailarako garbiketa-soluzio espezifiko batekin. Ez ihinztatu likidoa zuzenean pantailan.
- Avoid using abrasive cleaners, alcohol, or ammonia-based solutions, as they can damage the screen surface.
7.2. Biltegiratzea
- When not in use, store the monitor in a cool, dry place.
- Use the provided protective cover to prevent scratches and dust accumulation.
- Saihestu objektu astunak monitorearen gainean jartzea.
8. Arazoak
Monitorearekin arazoak badituzu, jo ezazu honako arazo eta irtenbide ohikoenei.
| Arazoa | Kausa posiblea | Irtenbidea |
|---|---|---|
| Ez dago pantailarik/ez dago seinalerik |
|
|
| Ukipen-pantaila ez dabil |
|
|
| Flickering or unstable display |
|
|
| No audio from monitor speakers |
|
|
9. Zehaztapenak
| Ezaugarri | Xehetasuna |
|---|---|
| Eredua | ZL-Z13KT |
| Pantailaren tamaina | 13.3 hazbetekoa |
| Ebazpena | 2560 x 1600 (2K) |
| Freskatze tasa | 60Hz |
| Panel mota | IPS |
| Kolore gama | %100 sRGB |
| Distira | 300 cd/m² |
| Ukipen-pantaila | Bai |
| Konektibitatea | 2x USB-C (1x Full-featured, 1x Power), 1x Mini HDMI, 1x 3.5mm Audio Jack |
| Potentzia Sarrera | USB-C (5V-20V) |
10. Bermea eta Laguntza
Specific warranty information for the Zeuslap Z13KT monitor is not available in the provided product data. Please refer to the warranty card included with your product or visit the official ZEUSLAP webwebgunean bermearen baldintza zehatzak ikusteko.
For technical support, product inquiries, or service requests, please contact your retailer or the manufacturer directly through their official support channels.