1. Sarrera
This manual provides detailed instructions for the setup, operation, and maintenance of your VOKSUN Wireless Digital Color Display Weather Station, Model 3378YC. This device offers comprehensive weather data, including indoor/outdoor temperature and humidity, weather forecasts, moon phases, and more, all displayed on a clear 7.5-inch LCD screen.
2. Zer dago kutxan
Mesedez, egiaztatu paketearen edukia elementu guztiak daudela ziurtatzeko:
- 1 x VOKSUN Weather Station (Main Unit)
- 1 x Haririk gabeko Kanpoko Sentsore
- 1 x AC/DC korronte egokitzailea
- 1 x Erabiltzailearen eskuliburua
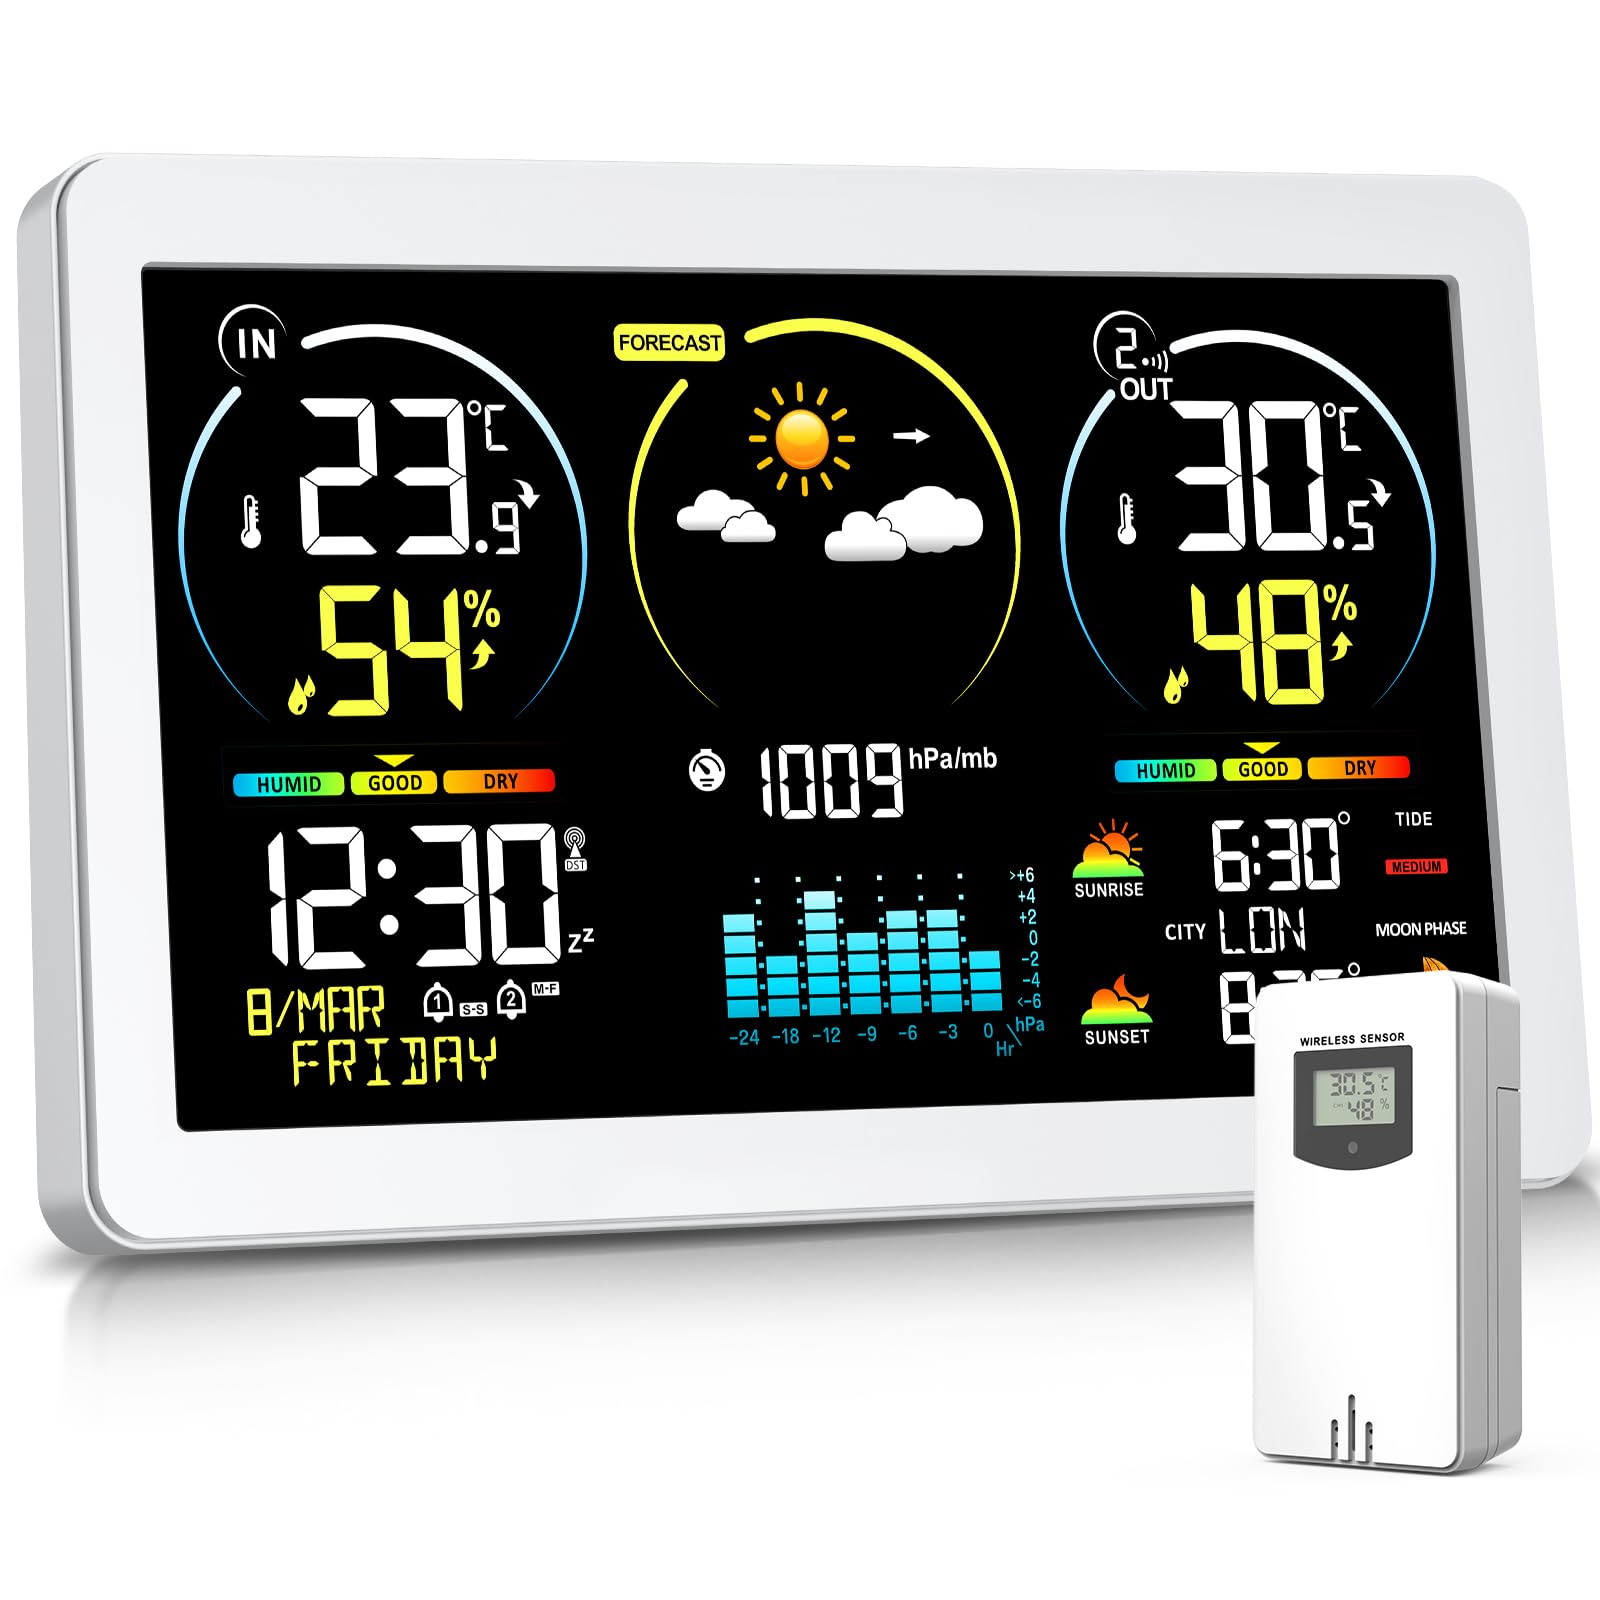
Image: The VOKSUN Weather Station main unit and its wireless outdoor sensor.
Bideoa: Amaiera batview of the VOKSUN Weather Station, demonstrating its features and included components.
3. Produktuaren ezaugarriak
- 7.5-inch Color VA LCD Display: The weather station features an advanced 7.5-inch VA LCD screen, providing clear and easy-to-read weather data from various angles and lighting conditions.
- Wireless Outdoor Sensor with 60m Range: The included wireless sensor transmits outdoor temperature and humidity data to the main unit. It supports up to three sensors simultaneously (additional sensors sold separately) with a transmission range of up to 60 meters (200 feet).
- Potentzia bikoitzeko moduak: The main unit can be powered by the included AC/DC adapter or by AA batteries (not included), ensuring continuous operation. It also features a USB port for charging other devices.
- High Precision Measurements & Alarm Function: Equipped with intelligent sensors for accurate indoor and outdoor temperature and humidity monitoring. Temperature range: Indoor -9.9°C to +50°C (14.2°F to 122°F), Outdoor -40°C to +70°C (-40°F to 158°F). Humidity range: 20% to 95%. An alarm function alerts you to extreme conditions.
- Datuen bistaratzea: Displays indoor/outdoor temperature and humidity, 12-hour weather forecasts, sunrise/sunset times, current time and date, moon phases, atmospheric pressure, tides, and comfort/mold alerts.
- Radio Controlled Clock (RCC) Function: Automatically synchronizes time with the DCF signal, ensuring accurate timekeeping and automatic adjustment for Daylight Saving Time.

Image: The weather station's display showing temperature, humidity, weather forecast, and other data.

Image: Illustration of multiple outdoor sensors wirelessly connected to the main weather station unit.

Image: The weather station can be powered by an AC adapter or AA batteries.

Image: The weather station displaying detailed weather information and time.

Image: The weather station receiving the DCF radio signal for accurate time synchronization.
4. Konfiguratzeko argibideak
4.1. Powering the Main Unit
- Using AC/DC Adapter: Connect the provided AC/DC adapter to the power socket (B12) on the back of the main unit and plug it into a wall outlet. The display will light up.
- Using AA Batteries (Backup): Open the battery compartment (B4) on the back of the main unit and insert 3 x AA batteries (not included), observing polarity. The display will briefly light up. Note: When powered by batteries only, the backlight will only illuminate temporarily when a button is pressed.
4.2. Powering the Wireless Outdoor Sensor
- Open the battery compartment (C7) on the back of the outdoor sensor.
- Insert 2 x AA batteries (not included), observing polarity. The sensor's LCD display (C1) will show temperature and humidity.
- Select a channel (1, 2, or 3) using the channel switch (C6) inside the battery compartment. If using multiple sensors, ensure each uses a different channel.
- Itxi bateriaren konpartimendua.
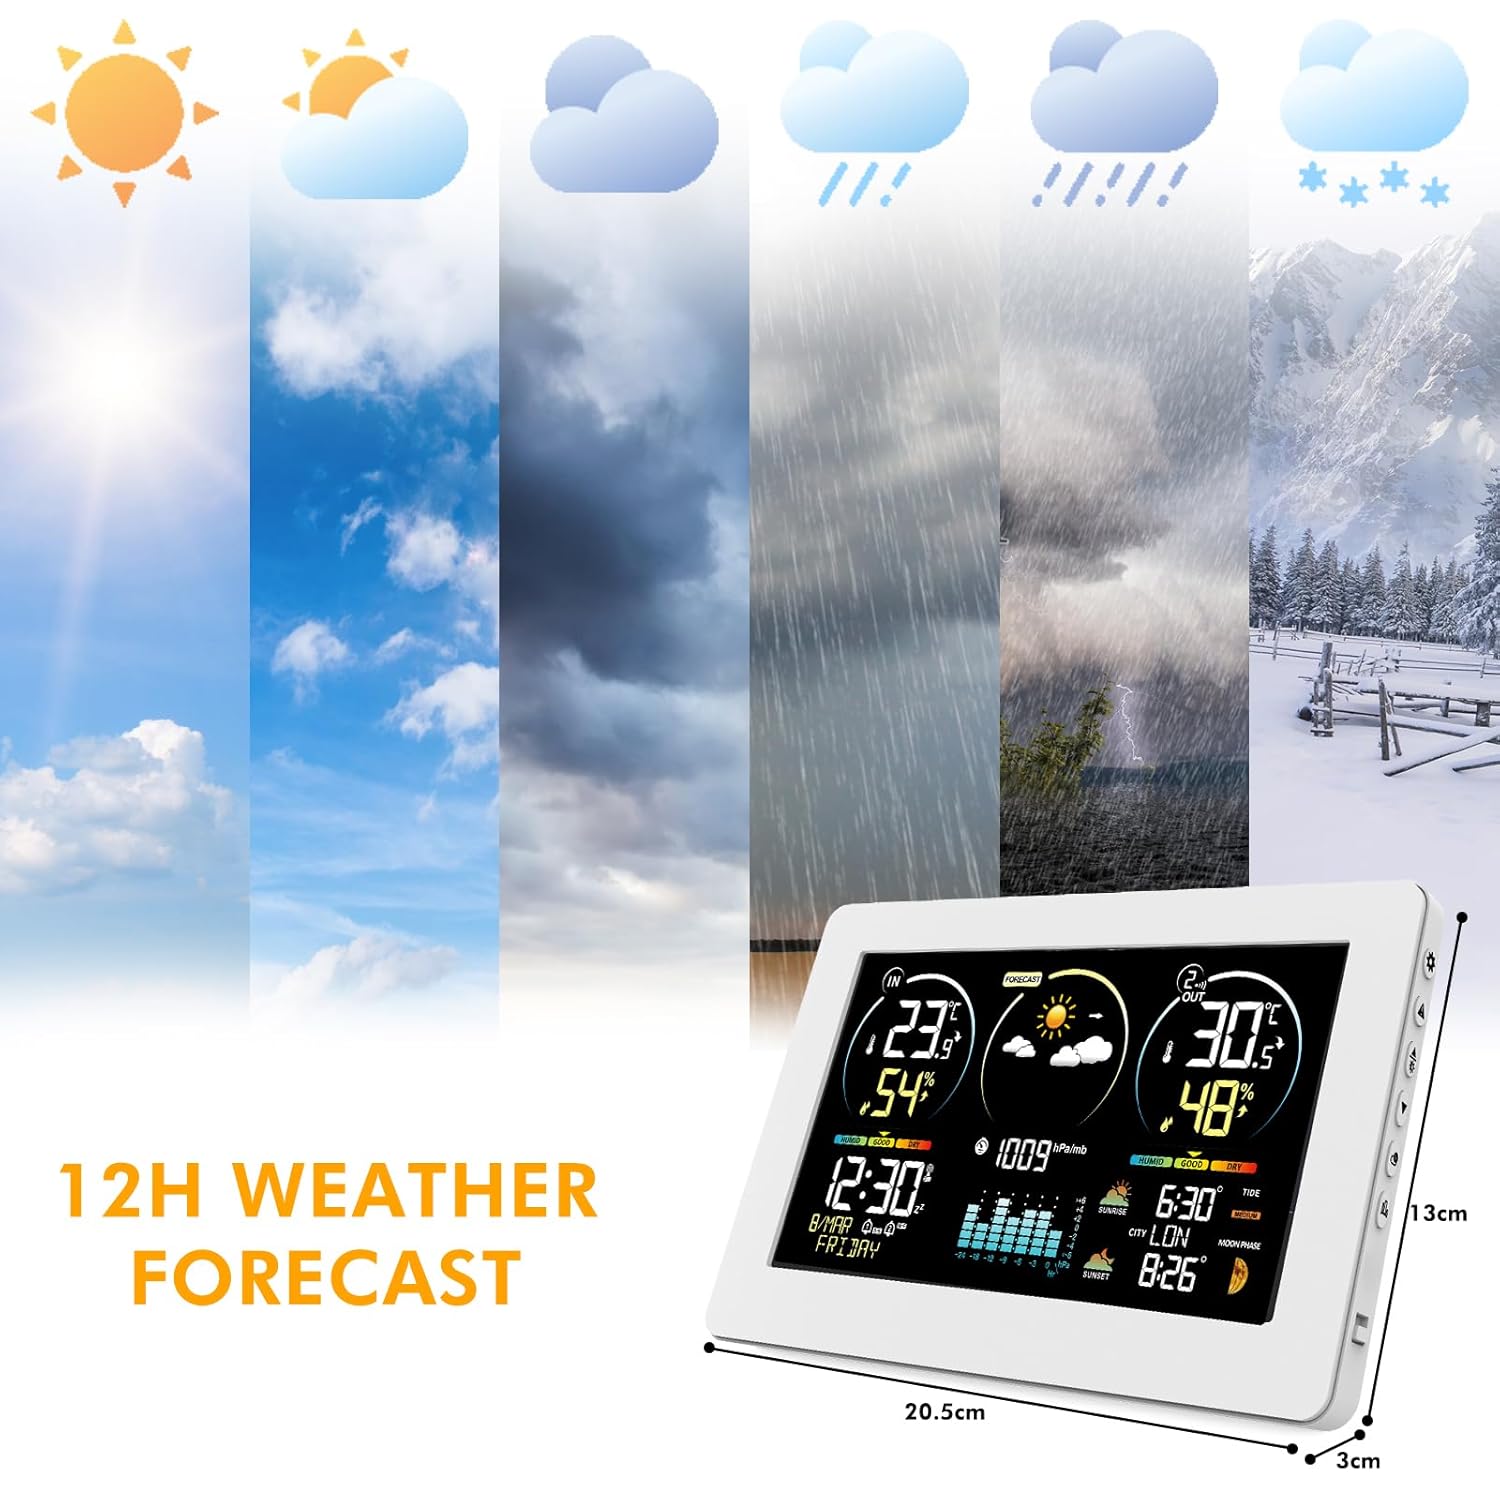
Image: The wireless outdoor sensor with its battery compartment open, showing battery insertion and channel selection.
4.3. Pairing the Sensor with the Main Unit
- Place the outdoor sensor near the main unit.
- Once both units are powered, the main unit will automatically search for the outdoor sensor signal. The outdoor temperature and humidity will appear on the main unit's display (A9, A11). This may take a few minutes.
- If the main unit does not receive the signal, press and hold the "▼" button (B6) on the main unit for 3 seconds to manually initiate a search. You can also press the "TX" button (C5) on the outdoor sensor to send a signal.
4.4. Hasierako ordua eta data ezartzea
- The weather station will attempt to synchronize with the DCF radio signal automatically. This process can take several hours, especially during initial setup.
- To manually set the time and date, refer to the "Operating Instructions" section.
5. Funtzionamendu-argibideak
5.1. Erakutsi baino gehiagoview

Irudia: Xehetasun handikoa view of the main unit's display, indicating various data points.
The display is divided into several zones:
- Indoor Data (A2, A3, A4): Indoor temperature, humidity, and comfort indicator.
- Weather Forecast (A8): 12-hour weather prediction.
- Outdoor Data (A9, A11, A13): Outdoor temperature, humidity, and comfort indicator.
- Time & Date (A5, A6, A7): Current time, month, date, and day of the week.
- Barometric Pressure (A10, A12): Current atmospheric pressure and historical trends.
- Astronomical Data (A14, A15, A16, A17, A18): Sunrise/sunset times, moon phase, selected city, and tide level.
5.2. Botoiaren funtzioak

Irudia: Atzealdea view of the weather station with labeled buttons for control.
- " /zz" Touch Field (B1): Activates backlight/snooze function.
- "▼" Button (B6): Decreases values, manually searches for sensor signal.
- "▲/" Button (B7): Increases values, switches temperature units (°C/°F).
- "" Button (B8): Enters/exits setting mode.
- "" Button (B9): Sets alarm.
- "" Button (B10): Displays historical pressure trends.
- "" Button (B11): Selects city for sunrise/sunset times.
5.3. Setting Time, Date, and City
- Press and hold the "" button (B8) for 3 seconds to enter time setting mode. The hour digit will flash.
- Use the "▲/" (B7) and "▼" (B6) buttons to adjust the value.
- Press "" (B8) to confirm and move to the next setting (minute, year, month, day, 12/24-hour format, time zone).
- To set your city for accurate sunrise/sunset times, press the "" button (B11). Use "▲/" and "▼" to select your city code. Refer to the manual's appendix for a list of city codes.

Image: The display during city selection, which influences sunrise/sunset times and moon phases.
5.4. Eguraldi Iragarpena
The weather station provides a 12-hour weather forecast based on atmospheric pressure changes. The icons displayed (sunny, partly cloudy, cloudy, rainy, stormy, snowy) are predictions and may not always match current conditions. Use these forecasts as a guide and cross-reference with local weather reports.

Image: Various weather icons representing different forecast conditions.
5.5. Comfort Indicator
The comfort indicator (A4, A13) displays the current indoor and outdoor comfort levels based on temperature and humidity. This helps you maintain an optimal environment.
| Hezetasun-barrutia | Erosotasun Maila |
|---|---|
| 1-35% RH | Lehorra |
| 35-44% RH | Lehorra |
| 45-65% RH | Erosotasuna |
| 66-80% RH | Bustia |
| 80-99% RH | Hezeegia |

Image: The comfort indicator on the display, showing categories like Humid, Good, and Dry.
5.6. Alarma eta atzerapen funtzioa
- Press the "" button (B9) to view iratzargailuaren ordua.
- Press and hold "" (B9) for 3 seconds to enter alarm setting mode. Use "▲/" (B7) and "▼" (B6) to set the alarm time.
- Press "" (B9) to activate/deactivate the alarm.
- When the alarm sounds, press the " /zz" touch field (B1) to activate the snooze function (5-60 minutes). The alarm will sound again after the snooze interval.
- To stop the alarm, press any other button.

Image: The weather station acting as an alarm clock on a bedside table.
6. Mantentzea
- Garbiketa: Wipe the display and unit surfaces with a soft, damp oihal. Ez erabili garbitzaile edo disolbatzaile urratzailerik.
- Bateria ordezkatzea: Replace batteries in both the main unit and outdoor sensor when the low battery indicator appears on the display. Ensure correct polarity.
- Lekua: Place the outdoor sensor in a shaded area, protected from direct sunlight and rain, to ensure accurate readings. Avoid placing it near heat sources or metal objects.
7. Arazoak
| Arazoa | Kausa posiblea | Irtenbidea |
|---|---|---|
| No outdoor temperature/humidity displayed. | Sensor not paired or out of range. | Ensure sensor batteries are fresh. Press and hold "▼" on main unit for 3 seconds to search. Press "TX" on sensor. Move sensor closer to main unit. |
| Tenperatura/hezetasun irakurketa okerrak. | Sensor exposed to direct sunlight/rain or near heat source. | Relocate the outdoor sensor to a shaded, protected area. |
| Pantaila ilun edo hutsik dago. | Low batteries or power adapter issue. | Replace batteries in main unit. Check AC/DC adapter connection. |
| Ordua ez da zuzena. | DCF signal not received or manual setting needed. | Ensure the unit is in an area with good signal reception. Manually set time if DCF signal is consistently unavailable. |
| "LL.L" or "HH.H" displayed. | Temperature/humidity is outside the measurable range. | This indicates the reading is below the minimum or above the maximum range. The device is functioning correctly. |
8. Zehaztapenak
| Ezaugarri | Xehetasuna |
|---|---|
| Eredua | 3378YC |
| Marka | VOKSUN |
| Bistaratzeko mota | Koloretako LCDa |
| Energia iturria (unitate nagusia) | AC/DC Adapter or 3 x AA Batteries (not included) |
| Energia iturria (kanpoko sentsorea) | 2 x AA pila (ez daude barne) |
| Konektibitate Teknologia | Haririk gabekoa |
| Barruko Tenperatura Tartea | -9.9 °C eta +50 °C (14.2 °F eta 122 °F) |
| Kanpoko tenperatura-tartea | -40°C eta +70°C (-40°F eta 158°F) |
| Hezetasun-barrutia | % 20 eta % 95 RH |
| Tenperaturaren zehaztasuna | ±1°C |
| Haririk gabeko transmisio-eremua | Up to 60 meters (200 feet) in open air |
| Onartutako sentsoreak | Up to 3 wireless outdoor sensors |
| UPC | 774300101834 |
9. Bermea eta Laguntza
VOKSUN products are designed for reliability and performance. This product comes with a standard manufacturer's warranty. For specific warranty details, please refer to the warranty card included in your package or contact VOKSUN customer support.
If you encounter any issues or have questions regarding your VOKSUN Weather Station, please contact our customer support team through the retailer's platform or the contact information provided on the VOKSUN official website. Please have your model number (3378YC) and purchase details ready when contacting support.