1. Sarrera
The AWithZ UK1 Mini Portable Spot Welder is a versatile and compact tool designed for precise spot welding applications, particularly for battery pack assembly and repair. Featuring a 9000W output, it offers stable welding performance while protecting battery cells. Its intuitive knob control and dual operating modes (automatic and pedal) make it suitable for both beginners and experienced users.
This manual provides essential information on the safe and effective use of your AWithZ UK1 spot welder. Please read it thoroughly before operation.

Figure 1: AWithZ UK1 Mini Portable Spot Welder with key components.
2. Segurtasun informazioa
- Always wear appropriate personal protective equipment, including safety glasses, during operation to protect against sparks.
- Ziurtatu lan-eremua ondo aireztatuta dagoela eta material sukoirik gabe.
- This spot welder is ez da egokia for welding copper, gold, silver, or jewelry.
- When welding pure nickel, a flux may be required to achieve optimal results.
- Do not attempt to weld materials thicker than the specified limits to avoid damaging the device or producing weak welds.
- Mantendu gailua uretatik eta hezetasun handietatik urrun.
- Ez desmuntatu edo aldatu gailua. Mantendu konponketa guztiak langile kualifikatuen esku.
3. Paketearen edukia
Egiaztatu elementu guztiak paketean daudela:
- 1 x AWithZ UK1 Spot Welding Unit
- 2 x WP110 Spot Welding Pens
- 1 x Oin Pedala
- 1 x Nickel-Plated Strip (approx. 2m)
- 1 x USB-C Charging Cable (approx. 0.5m)
- 1 x Lixa-papera
- 1 x Argibide eskuliburua
- Soldatzeko pin pare bat ordezko

Figure 2: All included components in the AWithZ UK1 package.
4. Produktua amaitu daview
The AWithZ UK1 is designed for portability and ease of use. It features a compact body with an intuitive control interface.
4.1 Ezaugarri fisikoak
- Neurriak: Approximately 150mm (length) x 100.5mm (width) x 48mm (height).
- Pisua: Approximately 370g (main unit).
- Bateria: Built-in high-quality Lithium-polymer battery.
4.2 Interface and Controls
- Adjustment Knob/Button: Used for powering on/off, toggling options, and adjusting parameters. Rotate clockwise to increase, counter-clockwise to decrease. Short press to confirm selections.
- Bistaratzeko pantaila: LED display showing current mode, gear (power level), trigger settings, and continuous weld count.
- Abiarazle interfazea: Port for connecting the foot pedal.
- C motako kargatzeko ataka: Barneko bateria kargatzeko.
- Spot Welding Pen Installation Interface: Soldatzeko boligrafoak konektatzeko atakak.

3. irudia: Xehetasuna view of the AWithZ UK1 unit with dimensions and interface labels.
5. Konfigurazioa
5.1 Hasierako karga
Before first use, fully charge the spot welder. Connect the provided USB-C charging cable to the Type-C charging port on the device and to a suitable USB power adapter (not included).
- The display will indicate charging status. A full circle on the display indicates 100% charge.
- It is recommended to charge the device regularly, even during periods of inactivity, to maintain battery health.
5.2 Soldatzeko boligrafoak konektatzea
Insert the two spot welding pens into the designated installation interfaces on the front of the unit. Ensure they are securely connected.
5.3 Connecting Foot Pedal (Optional)
If using the foot pedal for manual welding, plug its connector into the Trigger Interface port on the unit.
6. Funtzionamendu-argibideak
6.1 Piztu/Itzali
To power on or off the device, sakatu luzea doikuntzako botoia.
6.2 Parameter Adjustment
The AWithZ UK1 offers precise control over welding parameters via its single knob interface. The display shows four main adjustable parameters: Mode, Gear, Trigger, and Cont Welds.
- Biratu botoia to cycle through the available options (Mode, Gear, Trigger, Cont Welds).
- Short press the knob to select the flashing option and enter adjustment mode for that parameter.
- Biratu botoia to adjust the parameter value (clockwise to increase, counter-clockwise to decrease).
- Short press the knob again to confirm the new setting and exit adjustment mode for that parameter.

Figure 4: Knob operation for parameter adjustment.
Parametroaren xehetasunak:
- Modua: Selects between Automatic (A) and Pedal (M) welding modes.
- Engranajea: Adjusts the welding power level from 1 to 100. Higher numbers indicate more power.
- Trigger: (Only for Automatic Mode) Sets the delay time (0.5-5 seconds) before a weld is triggered after the pens contact the material.
- Jarraipen soldadurak: Sets the number of continuous welding pulses (1 or 2) for a single trigger.
6.3 Soldadura prozesua
The AWithZ UK1 is suitable for welding nickel-plated steel (0.1-0.35mm), pure nickel (0.1mm), and steel (0.1-0.3mm) for battery pack assembly and repair. It is commonly used for 18650 battery welding.
- Materiala prestatu: Ensure the nickel strip and battery terminals are clean and free of oxidation. Use the included sandpaper if necessary.
- Kokatu zerrenda: Place the nickel strip firmly onto the battery terminal where the weld is desired.
- Position Welding Pens: Hold the welding pens perpendicular to the nickel strip, with the tips making firm contact with the strip, directly above the battery terminal. Ensure the tips are close to each other but not touching.
- Soldadura hasi:
- Modu automatikoa: The weld will trigger automatically after the set delay once both pen tips make contact.
- Pedal modua: Press the foot pedal to trigger the weld. This offers more precise control over the timing.
- Soldadura ikuskatu: After welding, gently test the strength of the weld. Adjust the 'Gear' (power level) as needed for stronger or weaker welds.
Video 1: Demonstration of AWithZ UK1 Spot Welder operation, including interface, charging, and welding in both manual and auto modes.
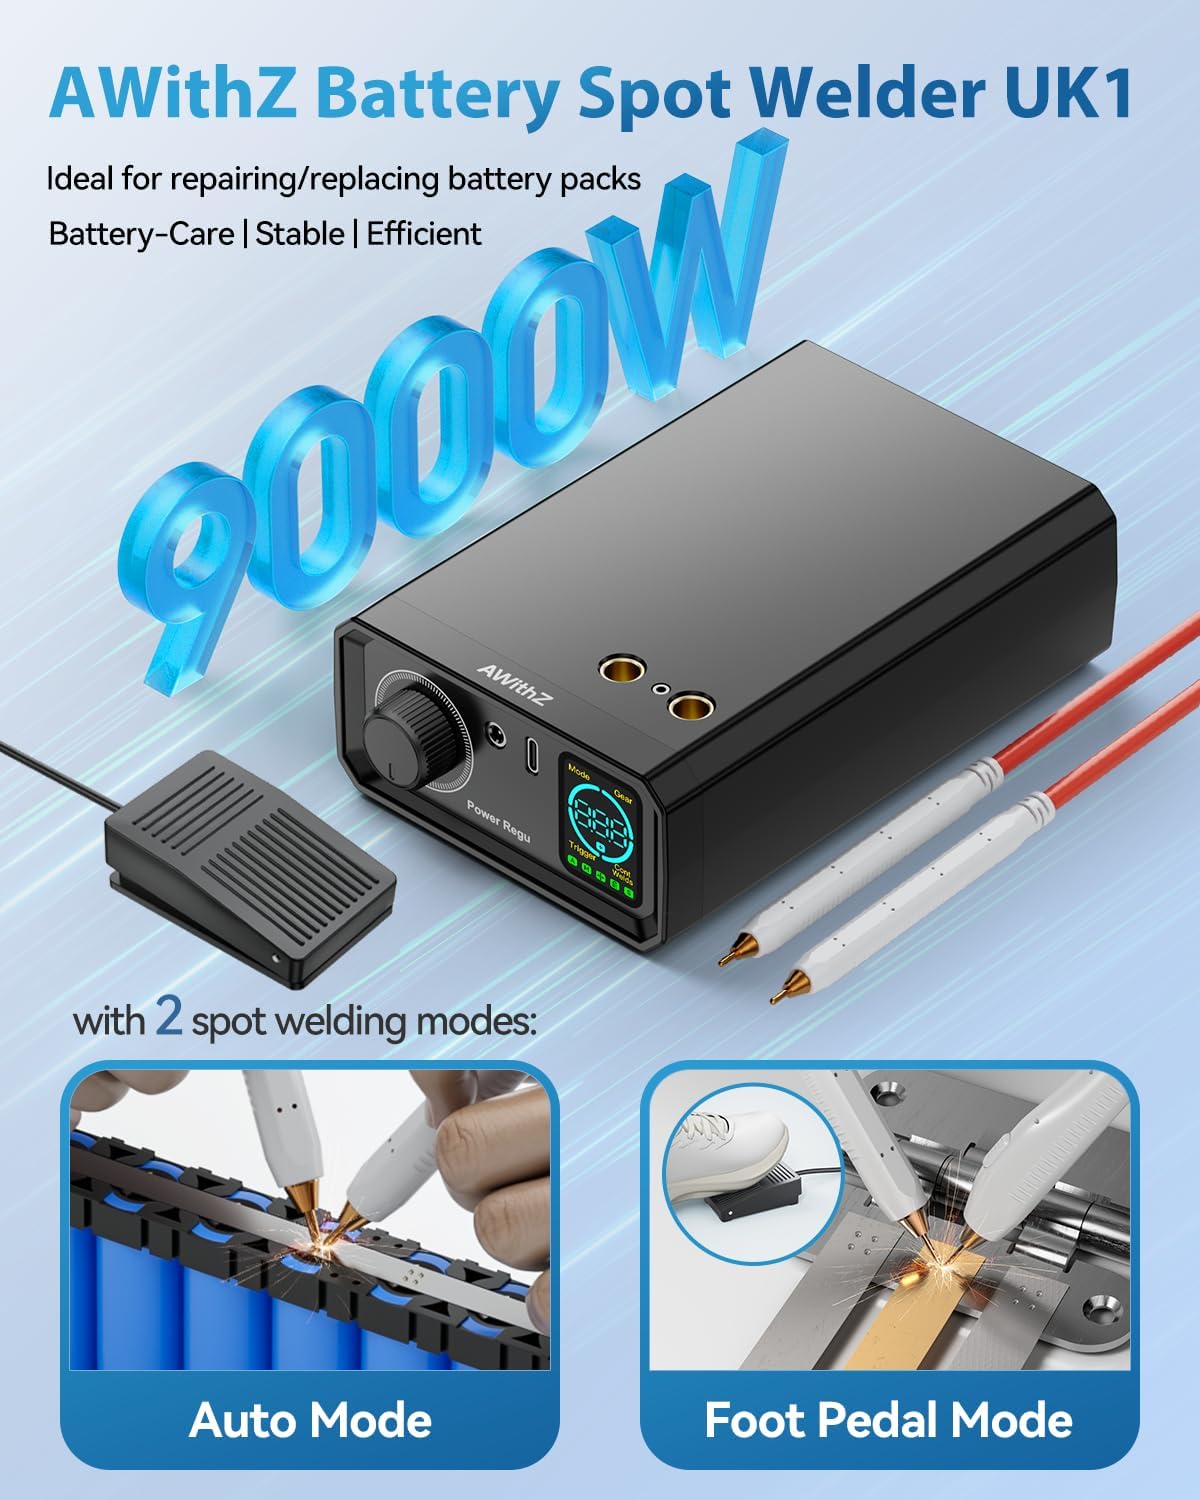
Figure 5: Illustration of Auto Mode and Foot Pedal Mode for welding.

Figure 6: Welding power levels and material compatibility.
7. Mantentzea
7.1 Electrode Tip Maintenance
Over time, the welding tips may oxidize or become worn, affecting weld quality. Use the provided sandpaper to gently polish the tips to remove any oxide layer. Replace the soldering pins if they become excessively worn or damaged.
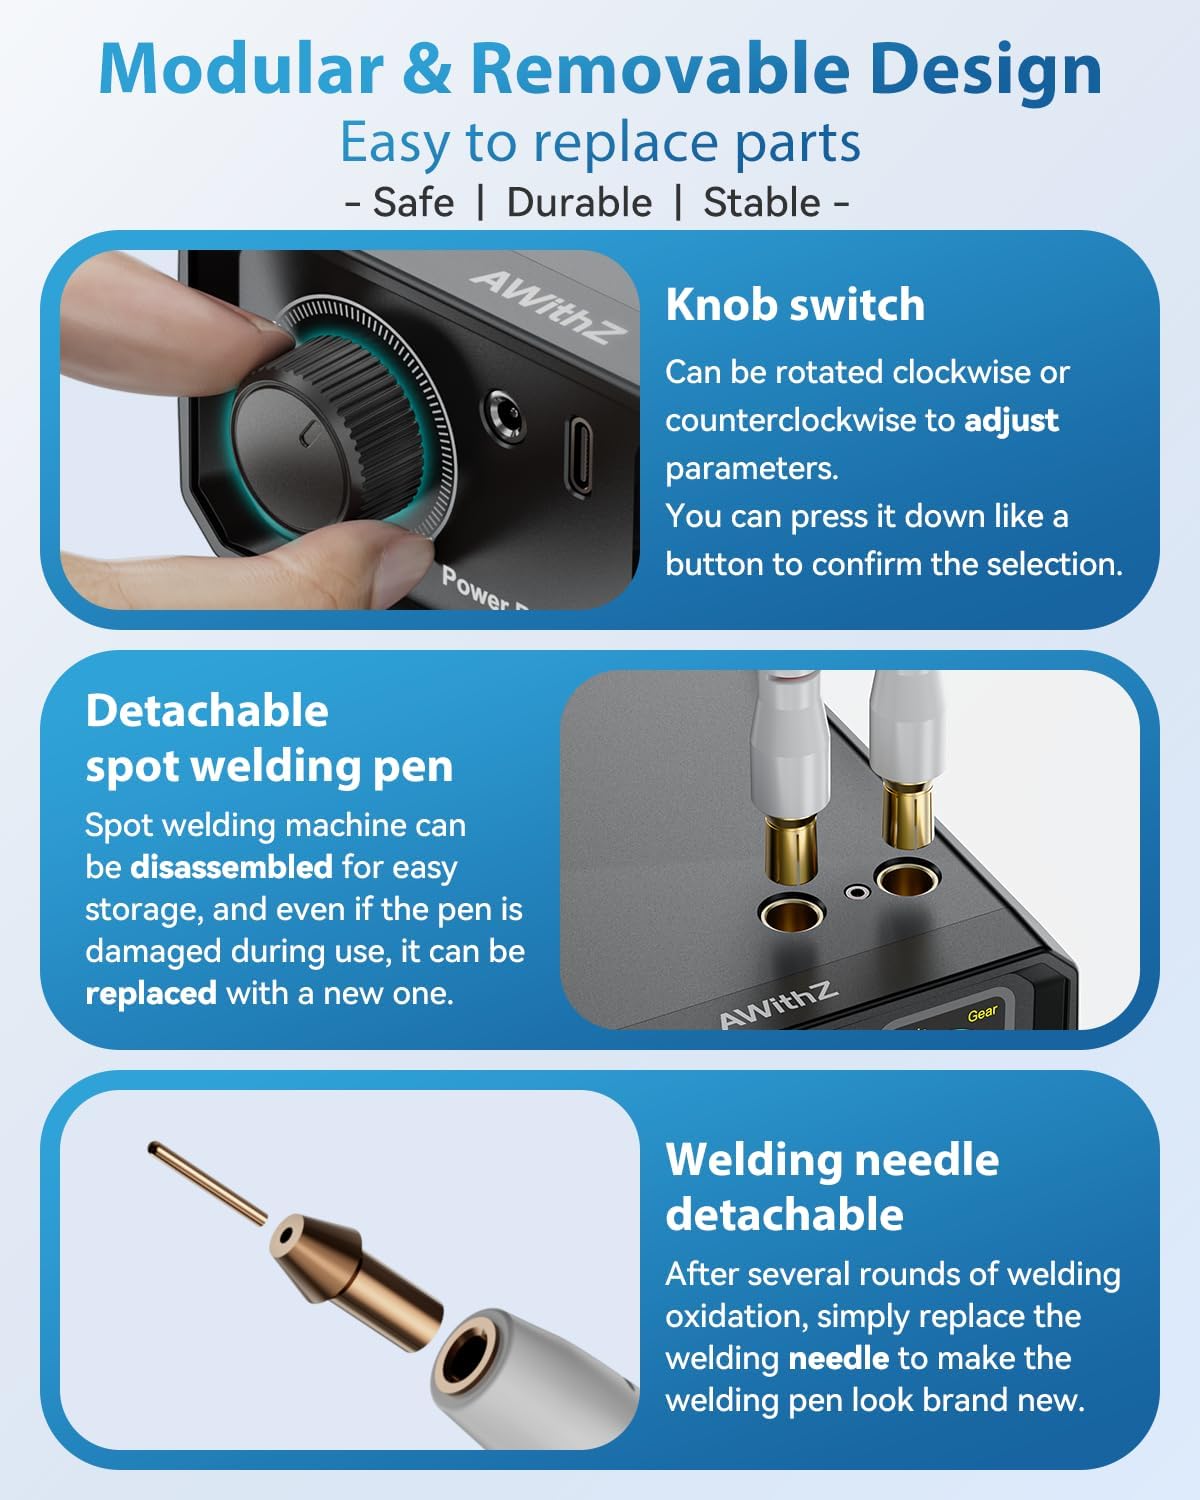
Figure 7: Detachable welding pen and replaceable welding needle.
7.2 Biltegiratzea
Store the device in a cool, dry place when not in use. Detach the welding pens for easier storage and portability.
8. Arazoak
- Weak or Inconsistent Welds:
- Ensure welding tips are clean and polished.
- Increase the 'Gear' (power level) setting.
- Verify the material thickness is within the specified range.
- Ensure firm contact between welding pens, nickel strip, and battery terminal.
- Gailua ez da pizten:
- Egiaztatu bateriaren karga-maila eta kargatu behar izanez gero.
- Ensure the power button (knob) is long-pressed correctly.
- Gehiegizko berotzea: The device features intelligent thermal protection and auto-shutoff after 8 minutes of inactivity to prevent overheating. Allow the device to cool down if it becomes excessively warm.
9. Zehaztapenak
| Ezaugarri | Xehetasuna |
|---|---|
| Fabrikatzailea | AWithZ |
| Eredua | UK1 |
| Produktuaren neurriak (L x W x H) | 15 x 10 x 4.8 cm |
| Pisua (unitate nagusia) | Gutxi gorabehera. 370 gramo |
| Bateria mota | Litio-polimeroa (barne) |
| Potentzia Irteera | 9000 Watt |
| Weldable Nickel-Plated Steel Thickness | 0.1 - 0.35 mm |
| Weldable Pure Nickel Thickness | 0.1 mm |
| Weldable Steel Thickness | 0.1 - 0.3 mm |
| Funtzionamendu moduak | Automatic, Pedal (Manual) |
| Power Adjustment Levels | 1 - 100 |
10. Bermea eta Laguntza
AWithZ is committed to providing reliable products and excellent customer service. If you have any questions, concerns, or require technical assistance regarding your UK1 Mini Portable Spot Welder, please contact AWithZ customer support through the retailer where you purchased the product.