
1. Produktua amaitu daview
The GIGABYTE UD750GM PG5 V2 ICE is a 750W fully modular power supply designed for high-performance computing systems. It features 80 Plus Gold certification for efficiency, ATX 3.1 compliance, and native PCIe 5.1 support, ensuring stable and reliable power delivery for modern components.
Ezaugarri nagusiak
- 750W-ko edukiera +12V-ko errail bakarrarekin
- Supports PCIe Gen 5.1 graphics cards (16 Pin)
- Intel ATX 3.1 Certified
- 80 PLUS Urrezko Ziurtagiria
- ATX forma-faktorea
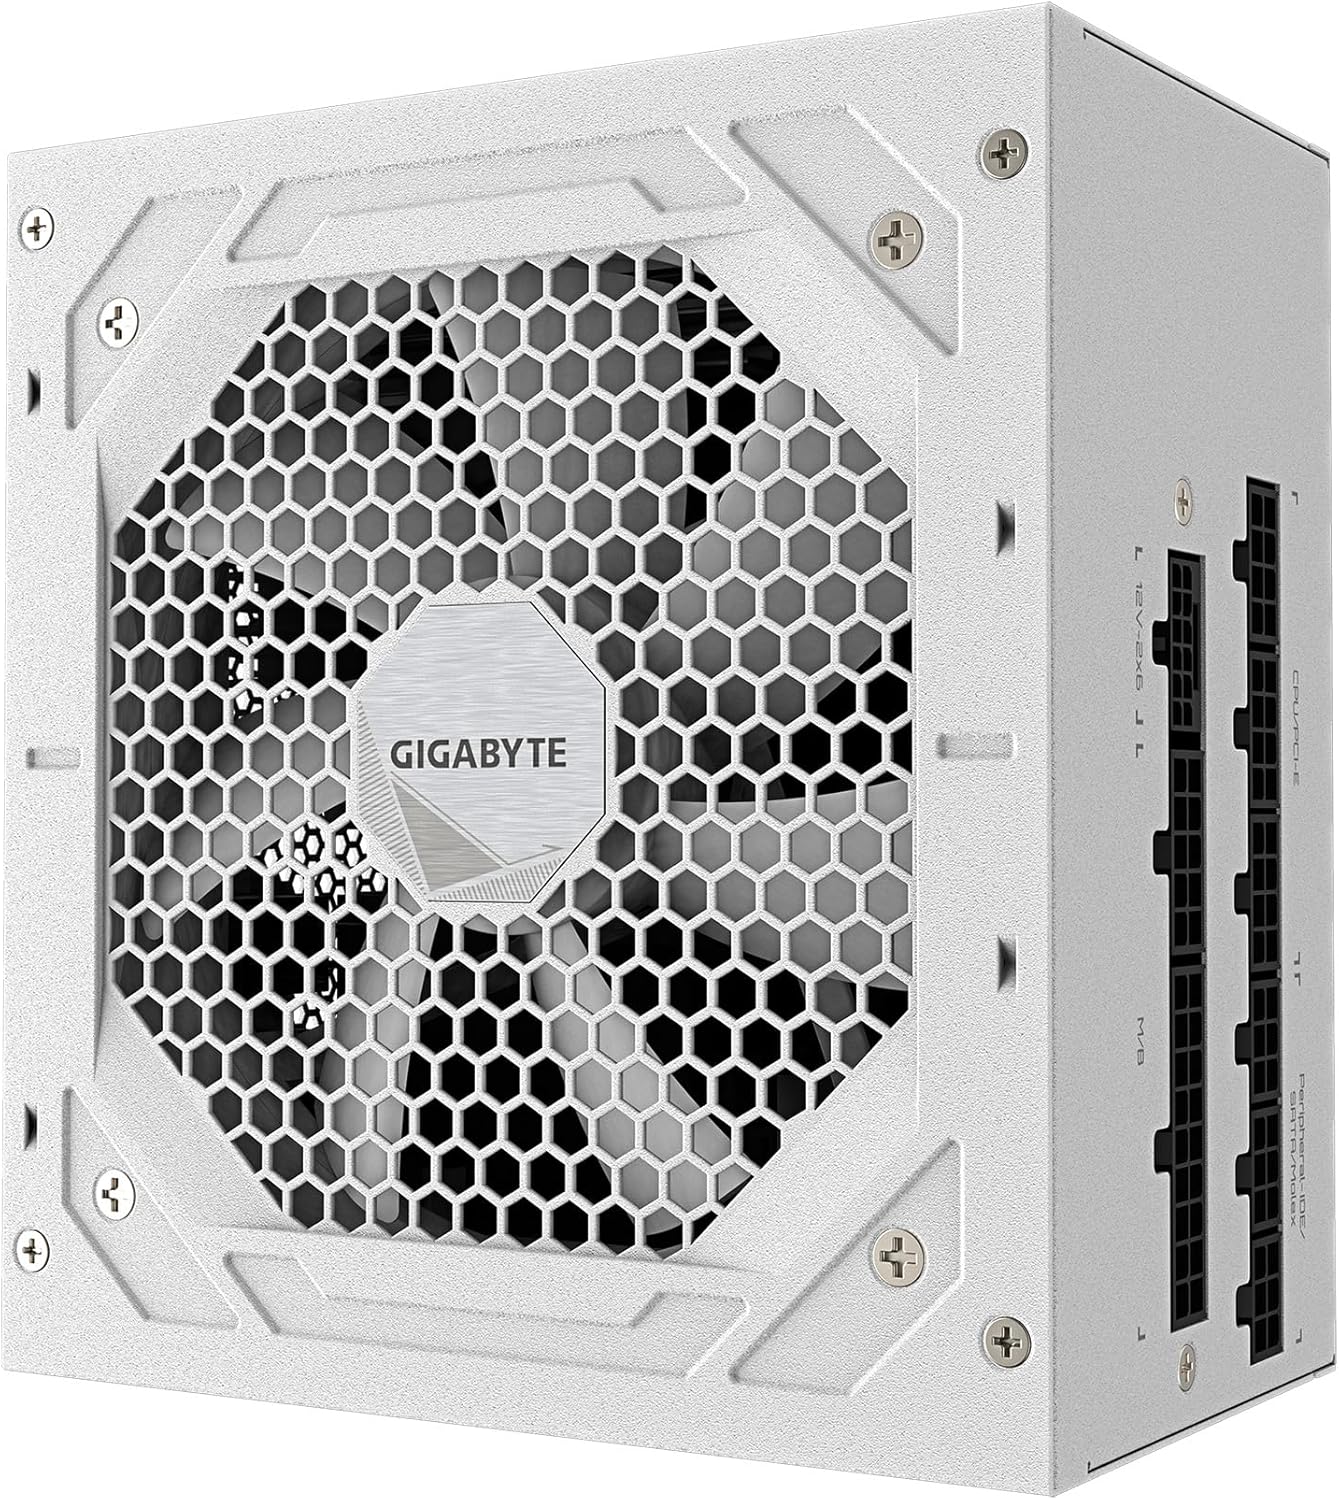
1.1. irudia: Goian view of the GIGABYTE UD750GM PG5 V2 ICE Power Supply, highlighting the fan grille.
2. Segurtasun informazioa
Please read and understand all safety instructions before installing or operating this power supply unit. Failure to follow these instructions may result in electric shock, fire, or damage to the product and connected components.
- Ez ireki elikatze-iturria casing. Bolumen altuatage components are present inside, which can cause severe injury or death. There are no user-serviceable parts.
- Ensure the power supply is disconnected from the AC power outlet before installation, removal, or cleaning.
- Instalatu elikatze-iturria ondo aireztatutako leku batean, bero-iturrietatik, eguzki-argitik eta hezetasunetik urrun.
- Erabili elikatze-iturri honekin batera datozen kable modularrak soilik. Kable bateraezinak erabiltzeak kalteak eragin ditzake.
- Produktu hau barrualdean erabiltzeko diseinatuta dago.
- Instalazio profesionala gomendatzen da.

Image 2.1: Rear panel of the power supply showing the AC input, power switch, and safety certification labels, including warning symbols.
3. Paketearen edukia
Instalazioarekin jarraitu aurretik, egiaztatu elementu guztiak paketean daudela:
- GIGABYTE UD750GM PG5 V2 ICE Power Supply Unit
- Modular Cable Set (including 24-pin ATX, 8-pin CPU, 6+2-pin PCIe, 16-pin PCIe 5.1, SATA, and Molex cables)
- AC korronte kablea
- Muntatzeko Torlojuak
- Erabiltzailearen eskuliburua (dokumentu hau)
4. Instalazio gida
Follow these steps to properly install your GIGABYTE power supply into your computer system.
4.1. Prestatu zure sistema
- Turn off your computer and disconnect the AC power cord from the wall outlet.
- Open your computer case. Refer to your case manufacturer's manual for specific instructions.
- Elikatze-iturri bat ordezkatzen baduzu, deskonektatu kable guztiak PSU zaharretik eta atera kaxatik.
4.2. Mount the Power Supply
- Carefully place the new GIGABYTE power supply into the designated PSU bay in your computer case.
- Lerrokatu elikatze-iturriko torloju-zuloak kaxakoekin.
- Lotu elikadura hornidura hornitutako muntaketa-torlojuen bidez.
4.3. Connect Modular Cables
Identify the necessary cables for your system components and connect them to the corresponding ports on the power supply. Ensure each cable is firmly seated.
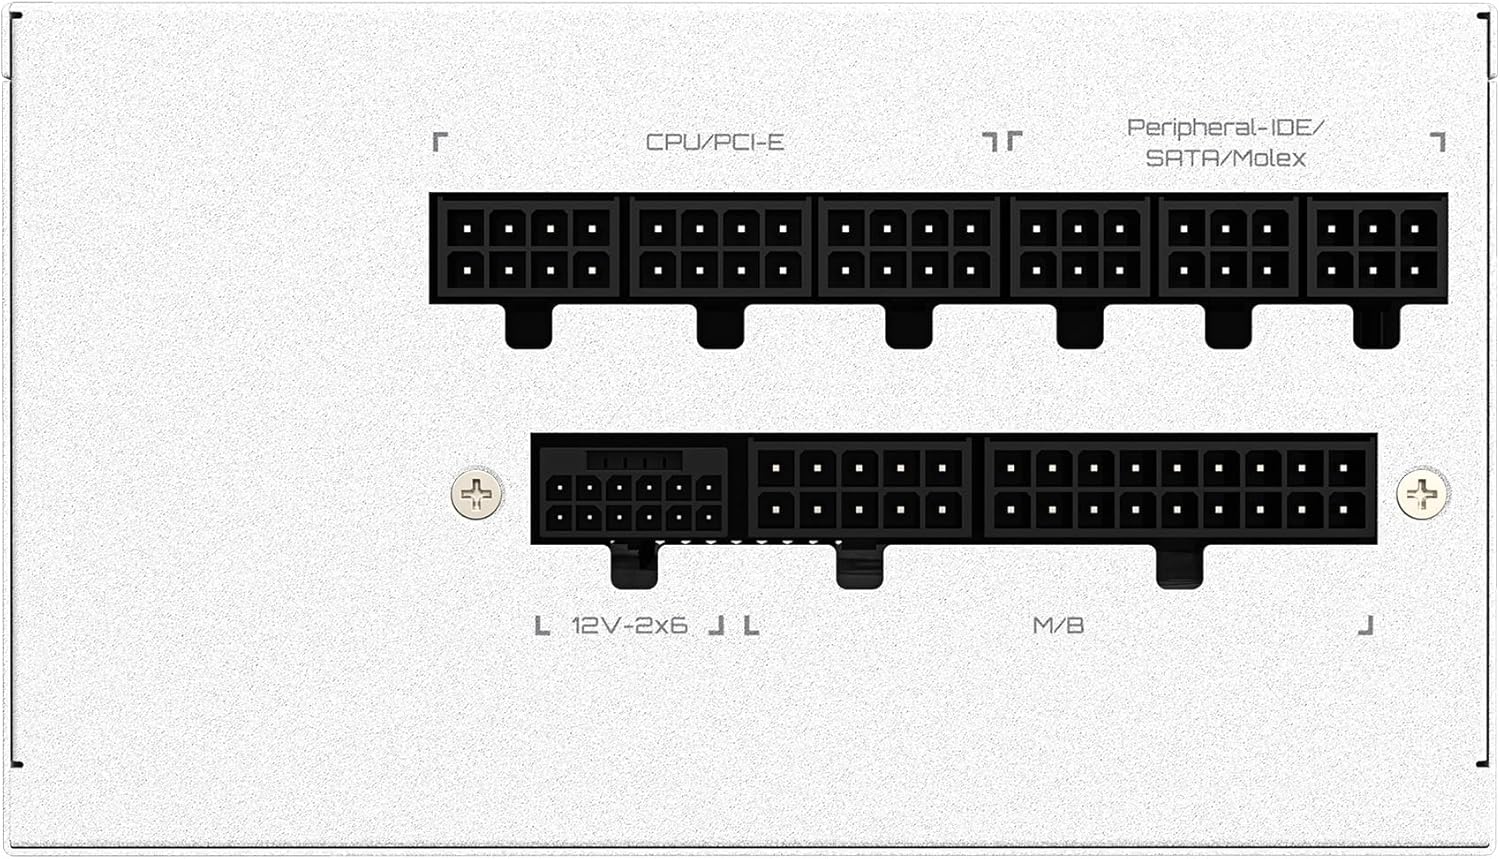
Image 4.1: Modular cable connection panel. Labels indicate ports for M/B (Motherboard), CPU/PCI-E, Peripheral-IDE/SATA/Molex, and 12V-2x6 (PCIe 5.1).
- M/B (Motherboard): Konektatu 24 pin ATX kablea plakara.
- CPU/PCI-E: Connect the 8-pin (4+4) CPU cable to the motherboard's CPU power connector. Connect 6+2-pin PCIe cables to your graphics card(s) as needed.
- 12V-2x6: Connect the 16-pin PCIe 5.1 cable directly to compatible graphics cards.
- Peripheral-IDE/SATA/Molex: Connect SATA power cables to storage drives (HDDs, SSDs) and optical drives. Use Molex cables for other peripherals if required.
4.4. Connect to Components
Route the connected modular cables neatly within your case and connect them to their respective components (motherboard, CPU, graphics card, storage drives, etc.). Ensure all connections are secure.
4.5. Connect AC Power
- Ensure the power switch on the back of the power supply is in the 'OFF' (0) position.
- Connect the AC power cord to the power supply's AC inlet.
- Plug the other end of the AC power cord into a grounded wall outlet or surge protector.
5. Funtzionamendua
Once installation is complete, you can power on your system.
5.1. Piztu/Itzaltzea
- Flip the power switch on the back of the power supply to the 'ON' (I) position.
- Press the power button on your computer case.
- To turn off the system, shut down your operating system normally. For a complete power cycle, flip the power switch on the PSU to 'OFF' (0) after system shutdown.
6. Mantentzea
Proper maintenance helps ensure the longevity and optimal performance of your power supply.
6.1. Garbiketa
- Periodically clean the exterior of the power supply and its fan grille to prevent dust buildup.
- Use compressed air to gently remove dust from the fan and vents.
- Always disconnect the AC power cord before cleaning.
6.2. Fan Check
Ensure the power supply fan is operating correctly. If you notice unusual noises or the fan is not spinning under load, consult the troubleshooting section or contact support.
7. Arazoak
If you encounter issues with your power supply, refer to the following common problems and solutions.
7.1. Botererik ez
- Check AC Power: Ensure the AC power cord is securely connected to both the power supply and the wall outlet. Verify the wall outlet has power.
- PSU Switch: Confirm the power switch on the back of the PSU is in the 'ON' (I) position.
- Kable konexioak: Double-check all modular cable connections, especially the 24-pin ATX and 8-pin CPU cables, are firmly seated.
- Sistema Osagaiak: Disconnect non-essential components (e.g., extra drives, peripherals) to isolate if a faulty component is preventing the system from booting.
7.2. System Instability or Random Shutdowns
- Gainkarga: Ensure your system's power requirements do not exceed the 750W capacity of the PSU.
- Aireztapena: Check that the power supply and case have adequate airflow and are not obstructed by dust.
- Kableen osotasuna: Verify all power cables are in good condition and properly connected.
- Component Issues: Test other components (RAM, GPU) if possible, as instability may not always be PSU-related.
8. Zehaztapenak
Detailed technical specifications for the GIGABYTE UD750GM PG5 V2 ICE Power Supply.
| Ezaugarri | Zehaztapena |
|---|---|
| Marka | GIGABYTE |
| Modelo zenbakia | GP-UD750GM PG5 ICE |
| Gehienezko potentzia | 750 Watt |
| 80 PLUS Ziurtagiria | Urrea |
| ATX bertsioa | ATX 3.1 |
| PCIe euskarria | PCIe 5.1 (16 Pin) |
| Forma-faktorea | ATX |
| Sarrera boltage | 120 voltio |
| Output Current (+12V) | 62.5 A |
| Output Current (+5V) | 20 A |
| Output Current (+3.3V) | 20 A |
| Neurriak (L x W x H) | 5.91 x 5.51 x 3.39 hazbete |
| Kolorea | Zuria |
| UPC | 810162143176 |
9. Bermea eta Laguntza
9.1. Bermearen informazioa
This GIGABYTE power supply is covered by a 10 urteko fabrikatzailearen bermea. Please retain your proof of purchase for warranty claims. The warranty covers defects in materials and workmanship under normal use. It does not cover damage caused by misuse, accident, modification, or improper installation.
9.2. Laguntza Teknikoa
For technical assistance, troubleshooting, or warranty inquiries, please visit the official GIGABYTE support webwebgunean edo jarri harremanetan bere bezeroarentzako zerbitzuarekin.
GIGABYTE Official Store: https://www.amazon.com/stores/GIGABYTE/page/854232BB-540A-4979-BE5B-6F3F3A530F1E

