
1. Sarrera
Thank you for choosing the Thermalright Mjolnir Vision 360 ARGB CPU Water Cooler. This all-in-one liquid cooling system is designed to provide efficient heat dissipation for your CPU, featuring a 360mm radiator, three PWM fans, and a magnetic detachable LCD screen for system monitoring and customization. This manual provides detailed instructions for installation, operation, maintenance, and troubleshooting to ensure optimal performance and longevity of your cooler.

1.1. irudia: The Thermalright Mjolnir Vision 360 ARGB CPU Water Cooler, showcasing the radiator, fans, and the magnetic detachable LCD screen.
2. Segurtasun informazioa
Please read and understand all safety instructions before installing or operating this product. Failure to follow these instructions may result in product damage, personal injury, or voiding of your warranty.
- Ziurtatu ordenagailua itzalita eta hormako entxufetik deskonektatuta dagoela instalatu aurretik.
- Manipulatu osagaiak kontu handiz kalteak ekiditeko.
- Do not open the liquid cooler's sealed loop. It contains coolant that should not be ingested or come into contact with skin or eyes. In case of contact, rinse thoroughly with water and seek medical attention if irritation persists.
- Mantendu produktua haurrengandik eta maskotengandik urrun.
- Use only the provided mounting hardware. Using incorrect hardware may damage your CPU or motherboard.
- Ensure proper cable management to prevent interference with moving parts or airflow.
3. Paketearen edukia
Instalazioarekin jarraitu aurretik, egiaztatu osagai guztiak paketean daudela:
- Thermalright Mjolnir Vision 360 ARGB CPU Water Cooler (Radiator, Pump/Water Block with LCD, and attached tubing)
- 3 x 120mm PWM ARGB Fans
- Intel Mounting Bracket Kit (LGA1150/1151/1155/1156/1200/2011/2066/1700/1851)
- AMD Mounting Bracket Kit (AM4/AM5)
- Fan Torlojuak
- Erradiadorea muntatzeko torlojuak
- Pasta Termikoa
- Fan Splitter kablea
- ARGB Controller Cable
- USB Cable for LCD Screen
4. Konfigurazioa eta instalazioa
This section guides you through the installation process. It is recommended to consult your motherboard and PC case manuals for specific instructions regarding component placement and clearances.
4.1. Instalazioaren aurreko egiaztapenak
- Prestatu zure sistema: Itzali ordenagailua eta deskonektatu korronte-iturritik. Ireki ordenagailuaren karkasa.
- Sakea: Ensure your PC case has adequate space for a 360mm radiator and three 120mm fans. Common mounting locations include the top or front of the case.
- Kendu hozkailu bat: If you have an existing CPU cooler, carefully remove it and clean any old thermal paste from the CPU surface using isopropyl alcohol.
4.2. Fan and Radiator Mounting
- Attach the three 120mm PWM ARGB fans to the radiator using the provided fan screws. Ensure the fan airflow direction is appropriate for your case's cooling strategy (typically exhausting air out of the case when mounted at the top, or intaking air when mounted at the front).
- Mount the radiator assembly into your PC case using the longer radiator mounting screws.

4.1. irudia: Xehetasuna view of the TL-K12 fan, highlighting features such as shock-absorbing silicone pads and S-FDB V2 bearing for quiet operation and durability.
4.3. Water Block Mounting
The installation process varies slightly depending on your CPU socket type.
4.3.1. Intel Sockets (LGA115X/1200/1700/1851/2011/2066)
- Install the appropriate Intel backplate (if required for your socket, e.g., LGA1700/1851) behind your motherboard.
- Secure the Intel standoffs onto the motherboard.
- Apply a small amount of thermal paste to the center of your CPU's integrated heat spreader (IHS).
- Carefully place the water block onto the CPU, aligning the mounting holes.
- Secure the water block with the Intel thumb screws, tightening them in a diagonal pattern until snug. Do not overtighten.
4.3.2. AMD Sockets (AM4/AM5)
- Remove the plastic retention clips from the stock AMD backplate, but keep the backplate in place.
- Install the appropriate AMD standoffs onto the motherboard's stock backplate screws.
- Apply a small amount of thermal paste to the center of your CPU's integrated heat spreader (IHS).
- Carefully place the water block onto the CPU, aligning the mounting holes.
- Secure the water block with the AMD thumb screws, tightening them in a diagonal pattern until snug. Do not overtighten.

4.2. irudia: The Mjolnir Vision 360 ARGB cooler installed within a PC case, demonstrating the radiator, fans, and water block with its integrated LCD screen.
4.4. Kableen konexioak
- Fan potentzia: Connect the three fan PWM cables to the included fan splitter cable, then connect the splitter to a CPU_FAN or PUMP_FAN header on your motherboard.
- ARGB argiztapena: Connect the ARGB cables from the fans and the water block to the included ARGB controller cable, then connect the controller to a 5V 3-pin ARGB header on your motherboard.
- Ponparen potentzia: Connect the pump's 4-pin PWM cable to a dedicated PUMP_FAN or AIO_PUMP header on your motherboard. If your motherboard lacks such a header, use a CPU_OPT or a standard fan header, ensuring it is configured for full speed in the BIOS.
- LCD pantaila: Connect the small USB cable from the water block to an available internal USB 2.0 header on your motherboard.
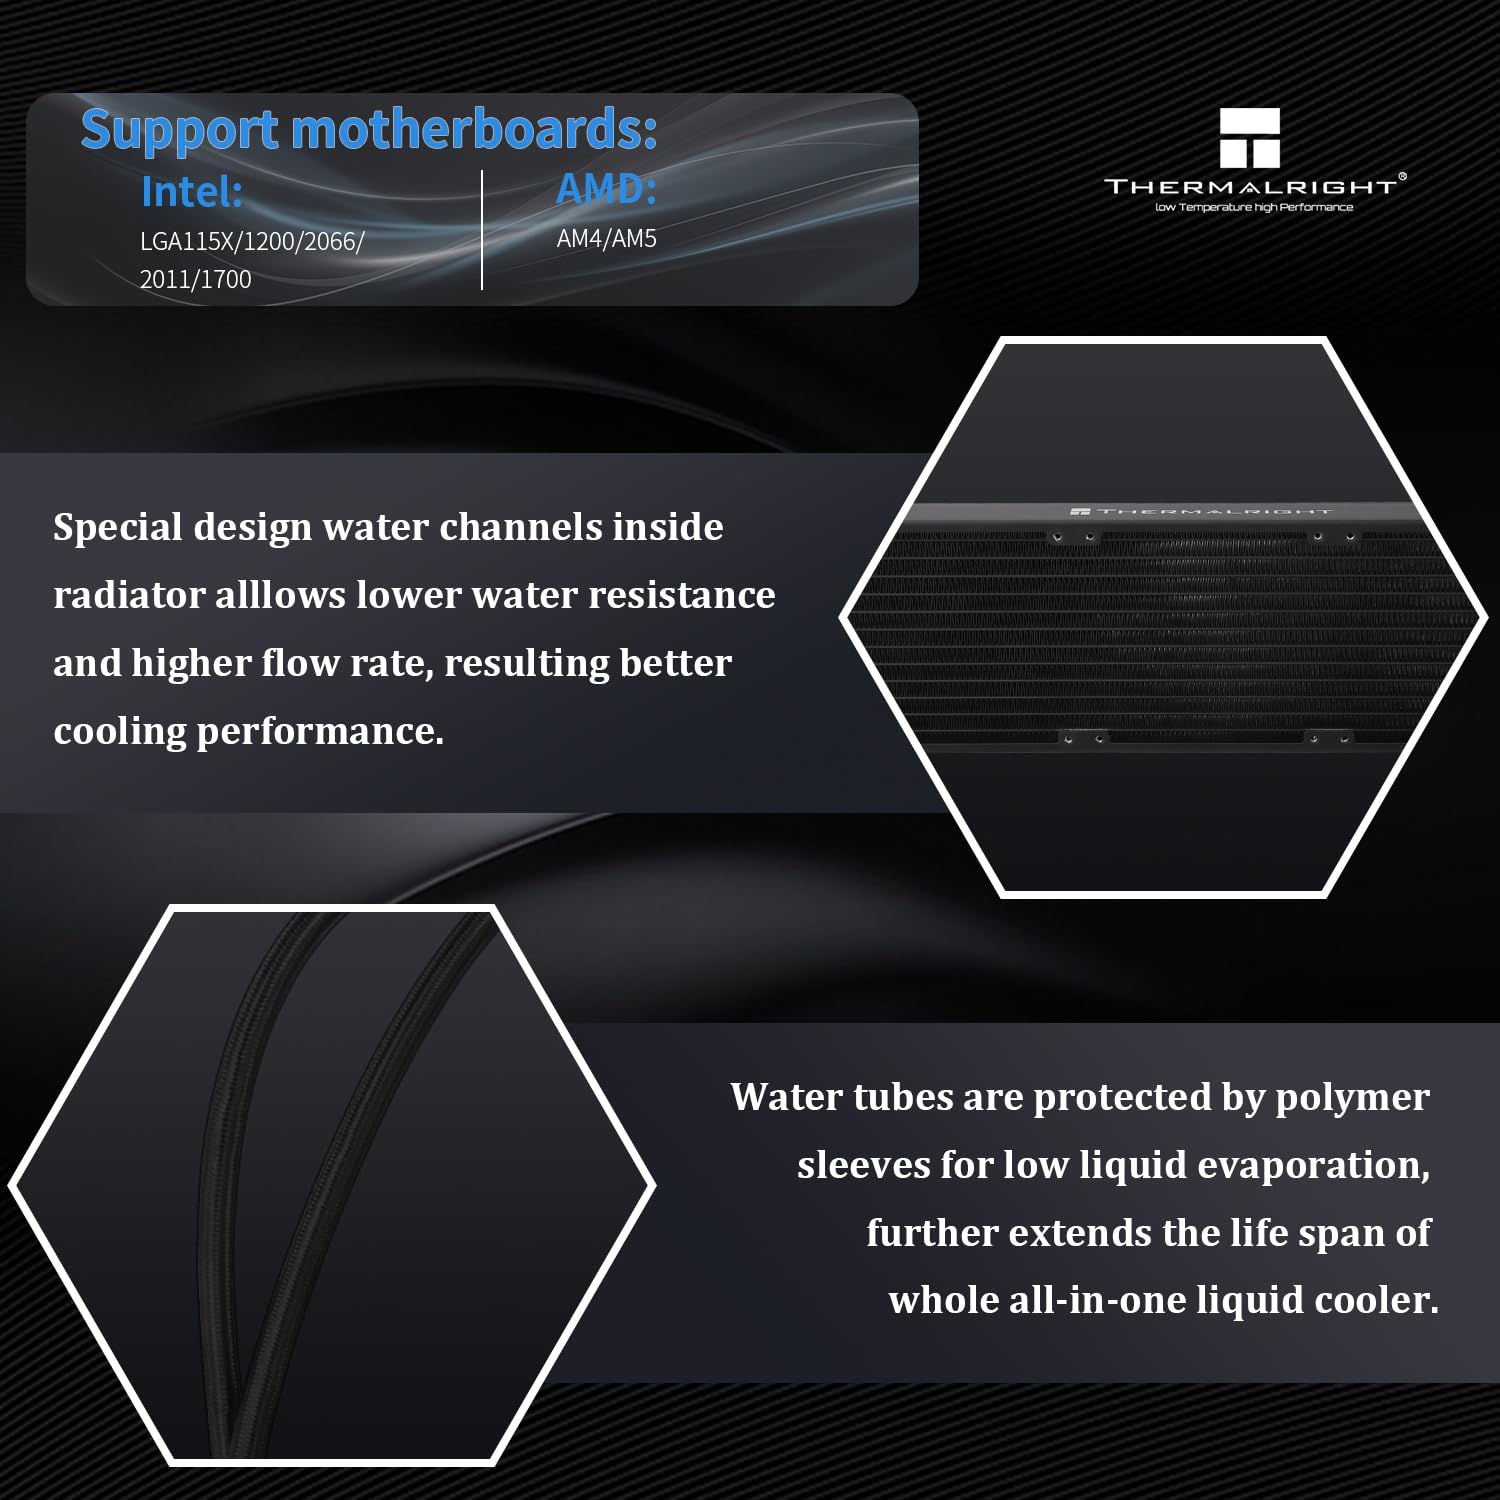
4.3. irudia: Illustration of supported motherboard sockets (Intel LGA115X/1200/2066/2011/1700 and AMD AM4/AM5) and the internal design of the radiator for optimized water flow.
5. Funtzionamendu-argibideak
Once installed, the Thermalright Mjolnir Vision 360 ARGB CPU Water Cooler is ready for operation. The integrated LCD screen provides real-time system information and customization options.
5.1. Hasierako piztea
After completing all connections, close your PC case, plug in the power, and power on your system. The fans and ARGB lighting should illuminate, and the LCD screen on the water block should power on.
5.2. LCD Screen Functionality
The 3.5-inch IPS LCD screen displays various system parameters and can be customized.
- Sistemaren jarraipena: The screen can display real-time CPU temperature, GPU temperature, CPU usage, GPU usage, clock frequencies, and other system metrics.
- Pertsonalizazioa: You can upload personalized images, GIFs, or short videos to be displayed as custom backgrounds or themes.
- Software kontrola: Dedicated software (available for download from the Thermalright website) is required to configure the display settings, upload custom content, and select monitoring parameters.

5.1. irudia: Gertu bat view of the 3.5-inch LCD screen, displaying system information such as date, time, and CPU/GPU temperatures.
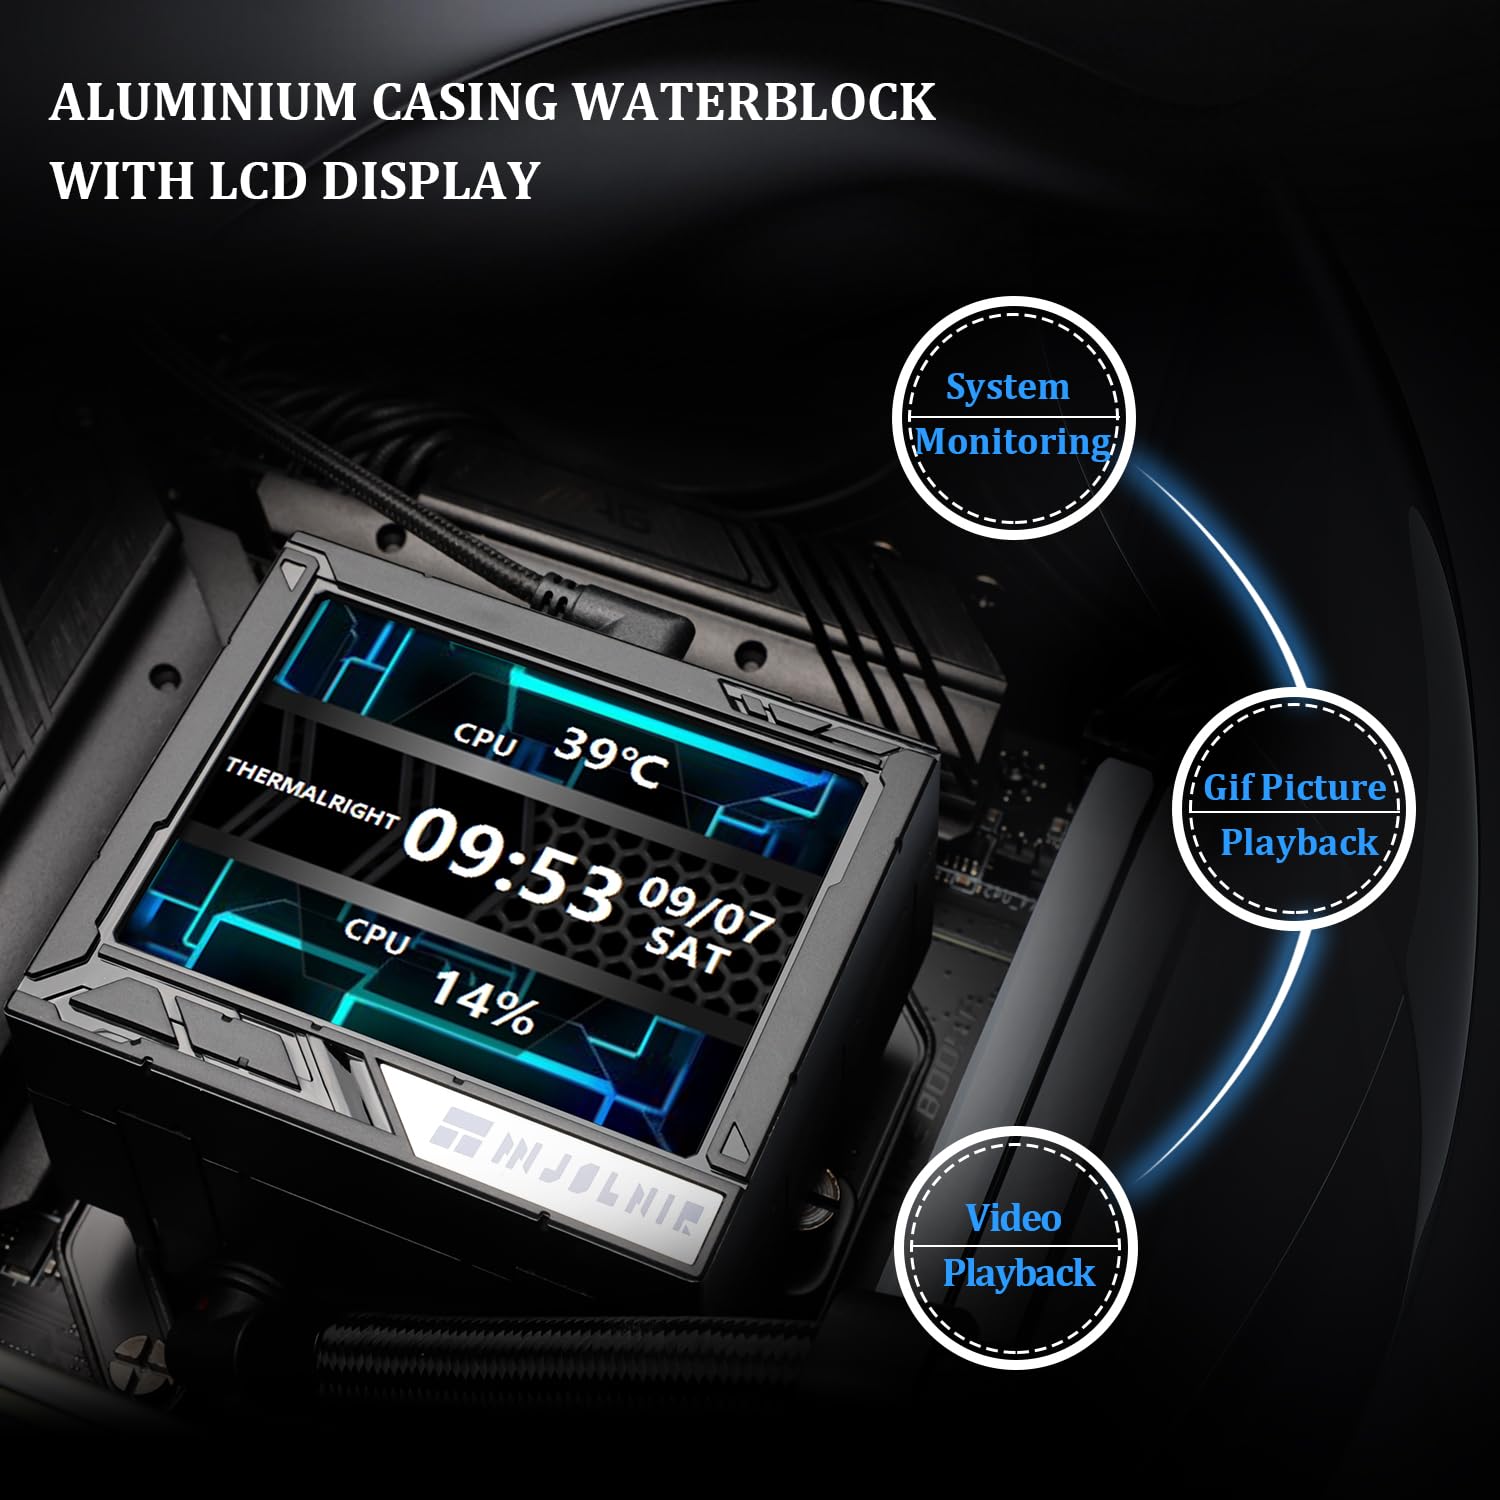
5.2. irudia: The water block with its integrated LCD display, illustrating its capabilities for system monitoring, GIF picture playback, and video playback.
5.3. Fan Speed Control (PWM)
The included PWM fans automatically adjust their speed based on CPU temperature, as controlled by your motherboard's BIOS settings or fan control software. You can configure fan curves in your motherboard's BIOS to optimize for noise levels or cooling performance.
6. Mantentzea
Mantentze-lan erregularrak zure hozkailu likidoaren iraupena eta errendimendu optimoa bermatzen laguntzen du.
- Hautsa garbitzea: Periodically clean dust from the radiator fins and fan blades using compressed air. Ensure the fans are not spinning during cleaning to prevent damage to the bearings.
- Ikus-ikuskapena: Regularly inspect the tubing for any signs of kinks, leaks, or damage. Check the water block and radiator for any corrosion or unusual buildup.
- No Coolant Refill: This is a closed-loop system and does not require coolant refills or maintenance. Do not attempt to open the loop.
7. Arazoak
If you encounter issues with your Thermalright Mjolnir Vision 360 ARGB CPU Water Cooler, refer to the following common problems and solutions:
| Arazoa | Kausa posiblea | Irtenbidea |
|---|---|---|
| CPUaren tenperatura altuak | Improper water block mounting, insufficient thermal paste, poor airflow, pump failure. | Re-seat water block, reapply thermal paste, ensure fans are spinning correctly and radiator is clean, check pump connection. |
| Fans Not Spinning / ARGB Not Lighting Up | Incorrect cable connections, disabled fan headers in BIOS, faulty components. | Verify all fan and ARGB cables are securely connected to the correct headers. Check BIOS settings for fan control. |
| LCD pantaila ez da bistaratzen | USB cable disconnected, software not installed/running, faulty screen. | Ensure the internal USB 2.0 cable is securely connected. Install and run the Thermalright LCD software. Check device manager for USB device recognition. |
| Hozkailuaren zarata ezohikoa | Air bubbles in loop (initial startup), fan bearing noise, pump noise. | For air bubbles, gently tilt the PC case to help move air to the radiator. If fan noise persists, check for obstructions or contact support if a fan is faulty. |
If these steps do not resolve your issue, please contact Thermalright customer support.
8. Zehaztapenak
Detailed technical specifications for the Thermalright Mjolnir Vision 360 ARGB CPU Water Cooler:
| Osagaia | Zehaztapena |
|---|---|
| Hozkailu mota | Guztia batean (AIO) CPU hozgailu likidoa |
| Erradiadoreen Neurriak | 397 mm x 120 mm x 27 mm |
| Ur blokeen neurriak | 85 mm x 75 mm x 65 mm |
| Fan dimentsioak | 120 mm x 120 mm x 25 mm |
| Fan kantitatea | 3 |
| Fan Abiadura | 2150 RPM ± 10% (Max) |
| Fan Airflow | 69 CFM (Max) |
| Haizagailuaren presio estatikoa | 2.87 mmH₂O (Max) |
| Haizagailuaren zarata-maila | ≤ 27 dBA |
| Fan errodamendu mota | S-FDB V2 Bearing |
| Pump Voltage | DC 12V |
| Energia konektore mota | 4-Pin PWM (Fans & Pump) |
| Hozteko metodoa | Likidoa (Ura) |
| Gailu bateragarriak | Mahaigaineko ordenagailuak |
| Materiala | Aluminioa, Plastikoa |
| LCD pantaila | 3.5-inch IPS, 320x240 Resolution |
| CPU Socket bateragarritasuna | Intel: LGA1150/1151/1155/1156/1200/2011/2066/1700/1851 AMD: AM4/AM5 |

8.1. irudia: A summary table of the Mjolnir Vision 360 ARGB Black cooler's key specifications, including dimensions, fan performance, and compatibility.
9. Bermea eta Laguntza
Thermalright products are manufactured to the highest quality standards. For warranty information, please refer to the warranty card included with your product or visit the official Thermalright website. If you require technical assistance or have questions regarding your product, please contact Thermalright customer support through their official channels.
Ofiziala Webgunea: www.thermalright.com