
Sarrera
This manual provides detailed instructions for the installation, operation, and maintenance of the ASUS B760M-AYW WiFi D4 II microATX motherboard. Please read this manual thoroughly before installing or using the product to ensure correct setup and optimal performance.
Segurtasun Informazioa
- Always disconnect the power cable from the wall socket before touching any internal components.
- Wear an anti-static wrist strap or frequently touch a grounded object to prevent electrostatic discharge (ESD) damage to components.
- Osagaiak ertzetik heldu, zati sentikorrak ez ukitzeko.
- Ziurtatu ordenagailuaren karkasa behar bezala aireztatuta dagoela gehiegi berotzea saihesteko.
Konfigurazioa
1. CPUaren instalazioa
The motherboard supports Intel LGA 1700 socket processors. Carefully align the CPU with the socket, ensuring the triangular mark on the CPU matches the mark on the socket. Lower the CPU gently into the socket, then close the load plate and secure the retention lever.
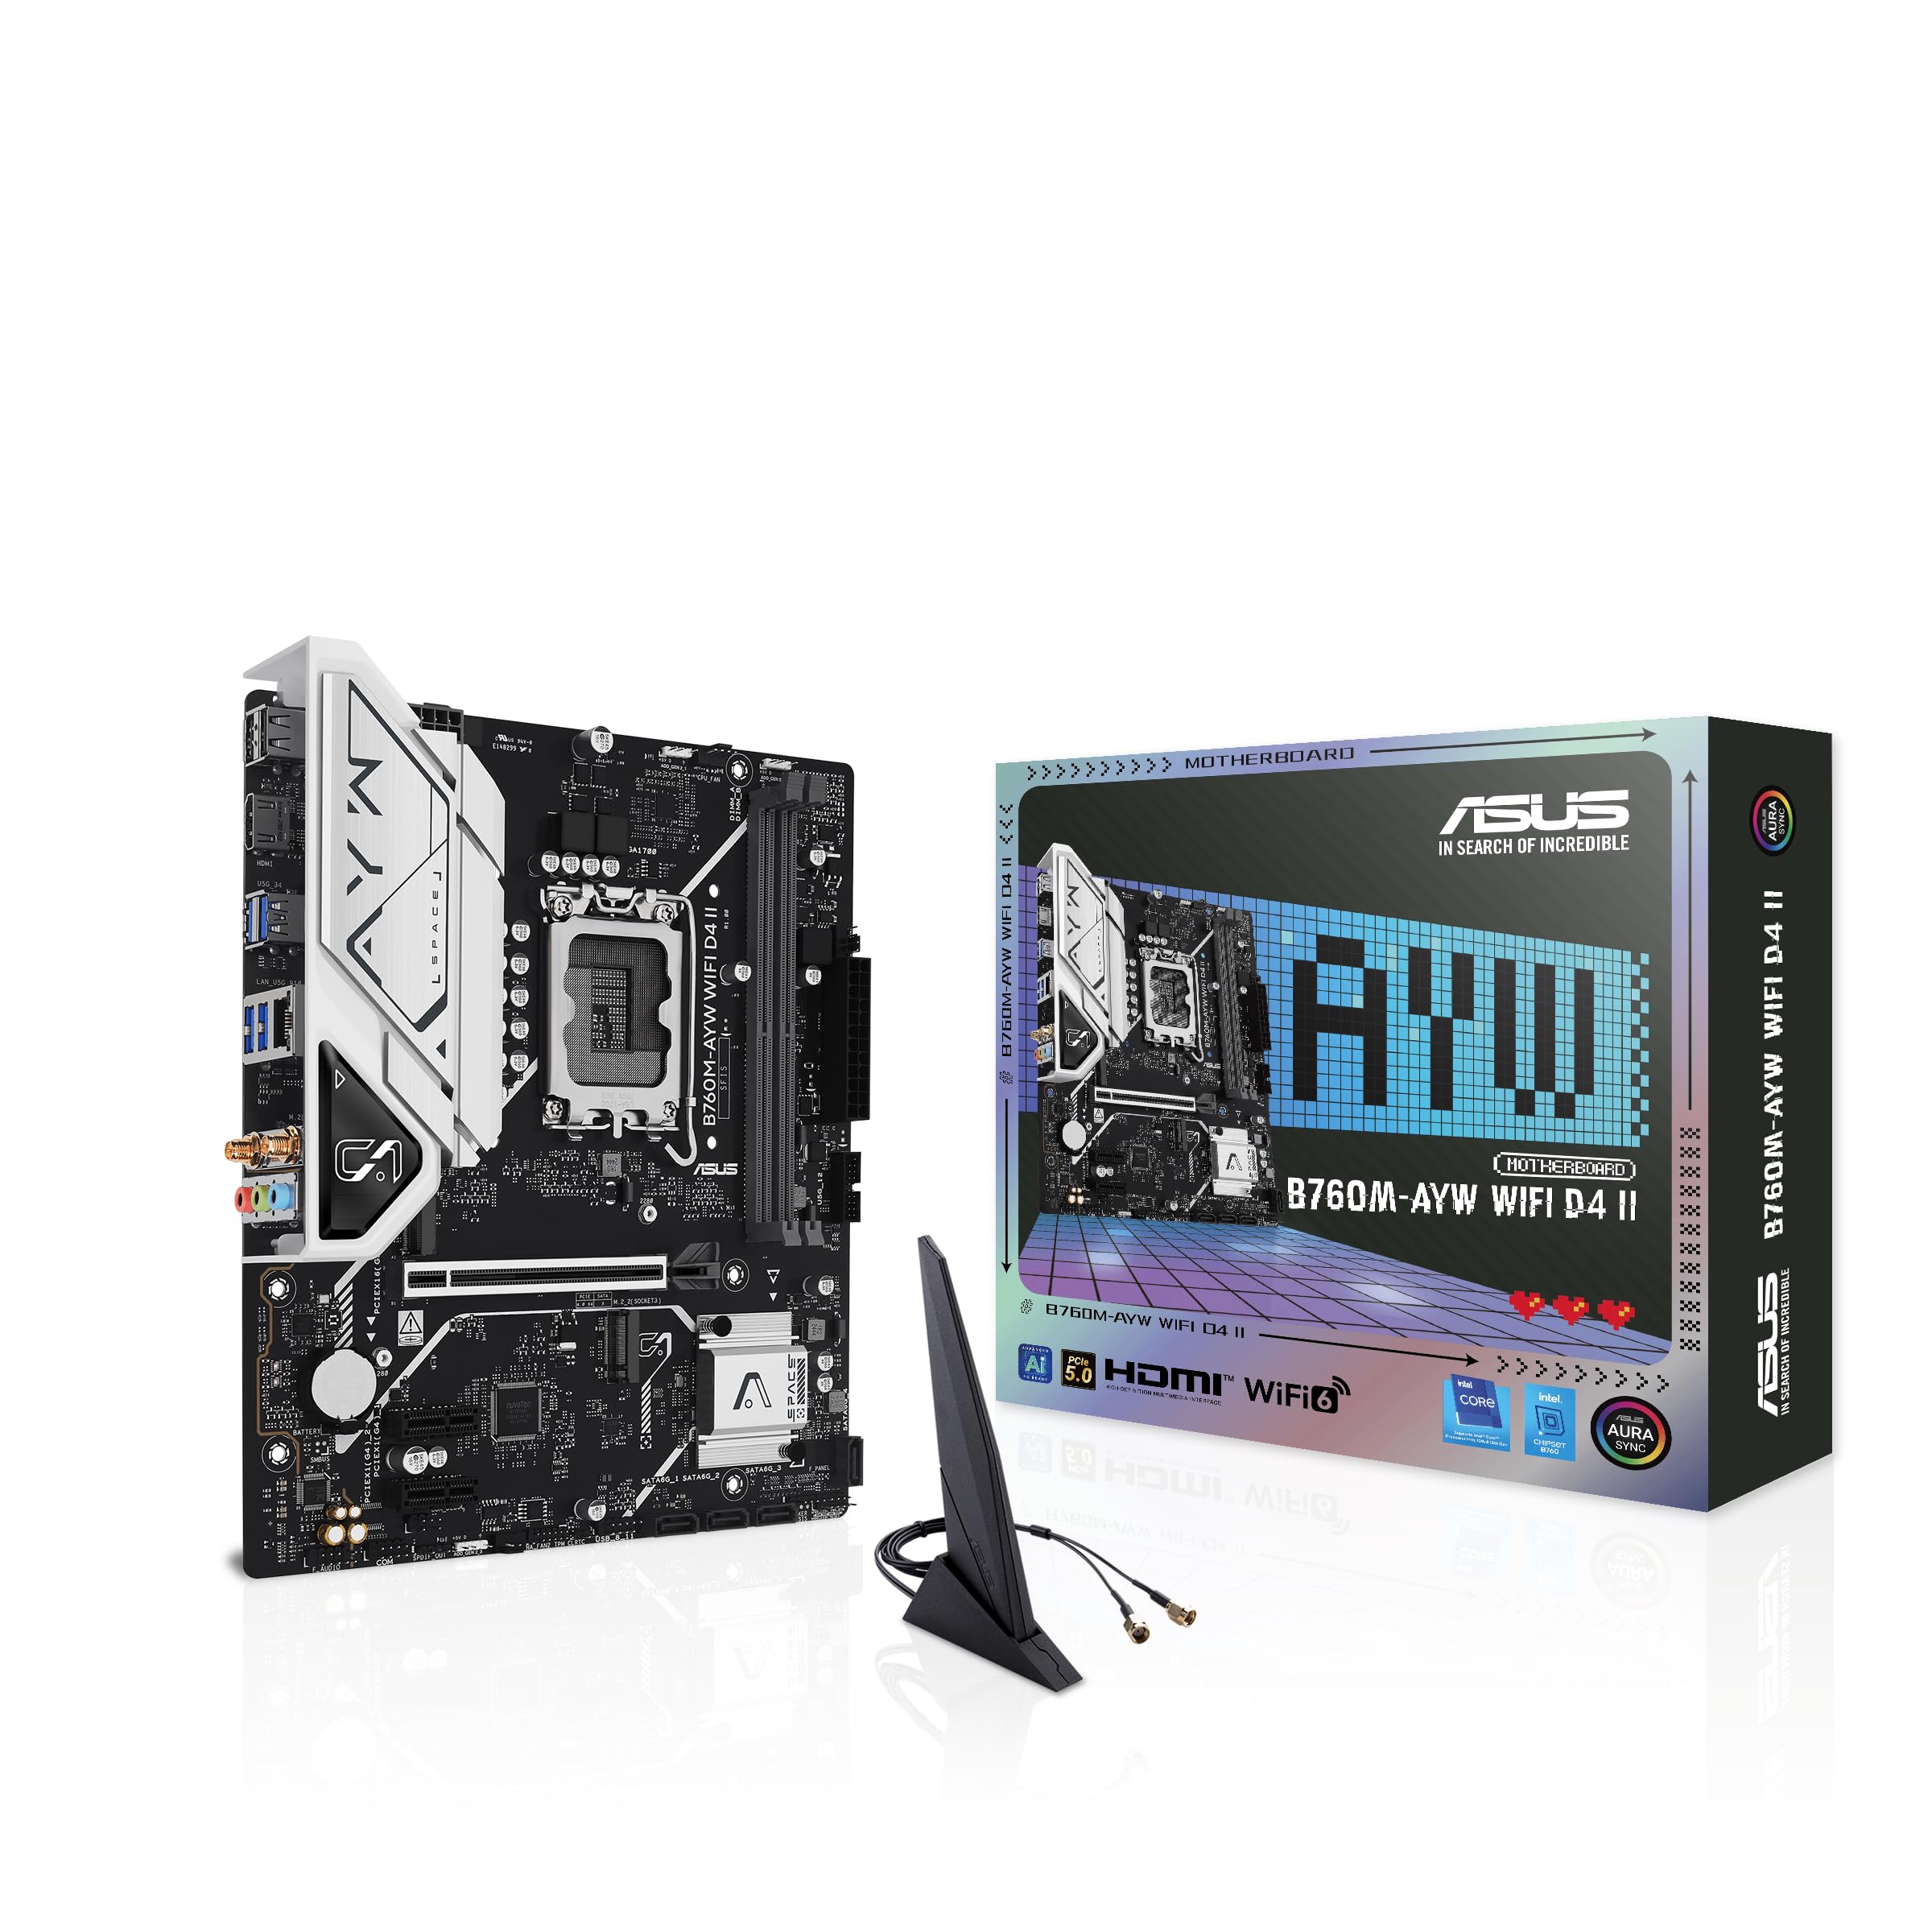
Irudia: Goitik behera view of the ASUS B760M-AYW WiFi D4 II motherboard, highlighting the LGA 1700 CPU socket.
2. Memoriaren (RAM) instalazioa
This motherboard features two DDR4 DIMM slots. For optimal performance, install memory modules in a dual-channel configuration. Open the clips on both ends of the DIMM slot, align the memory module with the slot key, and press down firmly until the clips snap into place.
3. Storage Installation (M.2 and SATA)
The motherboard includes two M.2 slots for NVMe SSDs and four SATA 6 Gbps ports for traditional hard drives or SSDs.
- M.2 SSD: Insert the M.2 SSD into the slot at a 30-degree angle, then push it down and secure it with the provided M.2 screw package.
- SATA unitateak: Konektatu SATA datu-kableak biltegiratze-unitateetatik plaka baseko SATA ataketara. Konektatu elikatze-iturritik unitateetara elikatze-kableak.

Image: The ASUS B760M-AYW WiFi D4 II motherboard shown with its retail box, Wi-Fi antenna, SATA cables, and M.2 screw packages.
4. Hedapen Txartelaren Instalazioa (PCIe)
The motherboard features one PCIe 5.0 x16 slot for graphics cards and additional PCIe 4.0 x1 slots for other expansion cards. Insert the card firmly into the desired slot until it clicks into place and secure it with a case screw.
5. Konexio elektrikoak
Connect the 24-pin ATX power connector and the 8-pin CPU power connector from your power supply to the corresponding ports on the motherboard.
6. Aurreko panelaren konexioak
Connect your PC case's front panel cables (USB 5Gbps, audio, power switch, reset switch, power LED, HDD LED) to the corresponding headers on the motherboard. Refer to the motherboard layout for exact header locations.
7. Rear I/O Connections
Connect your peripherals to the rear I/O ports. These include HDMI, USB 5Gbps Type-A, Realtek 2.5Gb Ethernet, and audio jacks.
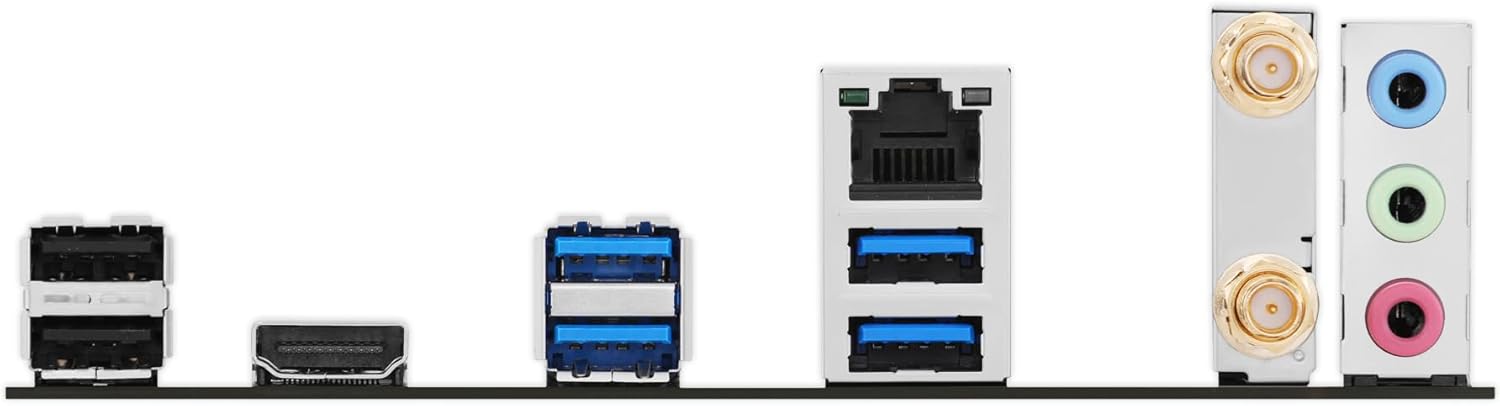
Irudia: Xehetasun zehatza view of the rear input/output panel of the ASUS B760M-AYW WiFi D4 II motherboard, showing USB ports, Ethernet, and audio jacks.
8. Wi-Fi Antenna Installation
Screw the included Wi-Fi antenna onto the two antenna connectors on the rear I/O panel. Position the antenna for optimal signal reception.
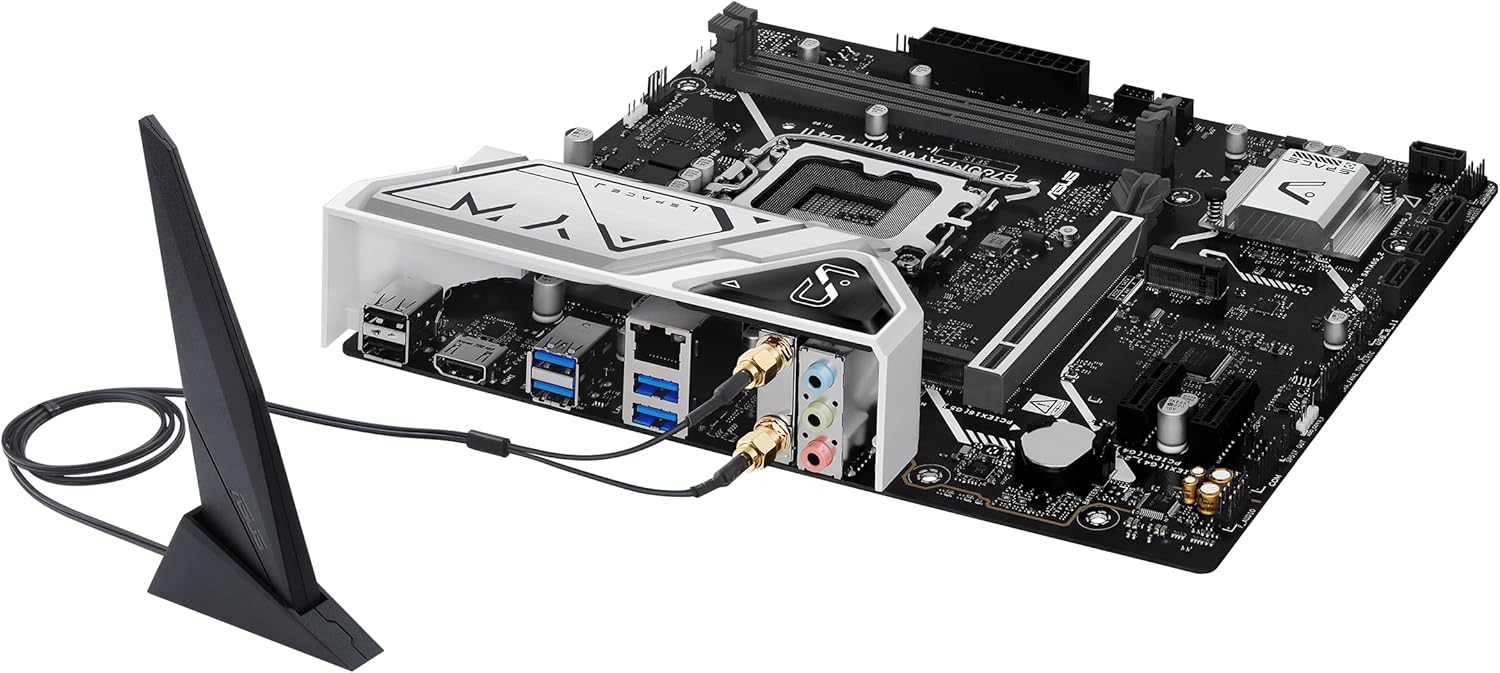
Image: The ASUS B760M-AYW WiFi D4 II motherboard with its external Wi-Fi antenna connected to the rear I/O ports.
Funtzionamendua
1. BIOS/UEFI konfigurazioa
To access the BIOS/UEFI setup utility, press the Ezabatu key during the Power-On Self-Test (POST). Here you can configure boot order, enable XMP for memory, adjust fan speeds, and manage other system settings.
2. Gidariaren instalazioa
After installing your operating system, install the necessary drivers for the motherboard's components. These include chipset drivers, LAN drivers, Wi-Fi drivers, and audio drivers. Drivers can be found on the ASUS support webzure plaka basearen modelo espezifikorako gunea.
3. Software Utilities
ASUS provides several utilities to enhance your system experience:
- Aura sinkronizazioa: For controlling RGB lighting on compatible components.
- Zaletu Aditua 2+: For advanced fan control and system cooling optimization.
- Armategiko kutxa: A centralized software suite for system monitoring, driver updates, and utility management.
Mantentzea
1. BIOS eguneraketak
Aldian-aldian egiaztatu ASUSen laguntza website for BIOS updates. BIOS updates can improve system stability, add support for new hardware, or fix bugs. Use the ASUS EZ Flash utility within the BIOS to perform updates, following the instructions carefully.
2. Gidarien eguneraketak
Keep your drivers updated to ensure optimal performance and compatibility. Regularly check the ASUS support website for the latest drivers for your motherboard.
3. Garbiketa
To maintain optimal performance and longevity, regularly clean dust from your PC case and motherboard components. Use compressed air to remove dust from heatsinks, fans, and slots. Ensure the system is powered off and unplugged before cleaning.
Arazoak konpontzea
1. Q-LED Core Indicators
The motherboard features Q-LED Core indicators that light up to indicate the status of key components during POST. These LEDs can help diagnose issues:
- CPUaren LEDa: Indicates CPU initialization status.
- DRAM LEDa: Indicates memory detection status.
- VGA LEDa: Indicates graphics card detection status.
- ABIOKO LEDA: Indicates boot device detection status.
If an LED remains lit, it suggests an issue with the corresponding component.
2. Arazo arruntak
- Potentziarik gabe: Check all power connections (24-pin ATX, 8-pin CPU, GPU power). Ensure the power supply is switched on.
- Ez dago pantailarik: Verify the graphics card is properly seated and connected to power. Ensure the monitor cable is connected to the graphics card, not the motherboard (unless using integrated graphics).
- Sistemaren ezegonkortasuna: Check memory seating, run memory diagnostic tools, ensure CPU cooler is properly installed, and verify BIOS settings.
- Periferikoa ez da detektatu: Ensure the device is properly connected and its drivers are installed. Try a different port if available.
Zehaztapenak
| Ezaugarri | Zehaztapena |
|---|---|
| Marka | ASUS |
| Ereduaren izena | B760M-AYW WIFI D4 II |
| CPU Socketa | LGA 1700 |
| Prozesadore bateragarriak | Intel Core 14th, 13th, 12th Gen, Pentium Gold, Celeron Processors |
| Txip mota | Intel B760 |
| RAM Memoria Teknologia | DDR4 |
| Memoria zirrikituak eskuragarri | 2 |
| Gehienezko memoria biltegiratze-ahalmena | 96 GB |
| Txartel grafikoen interfazea | PCI Express 5.0 x16 |
| Total M.2 Slots | 2 |
| Total SATA Ports | 4 |
| Ethernet | Realtek 2.5Gb Ethernet |
| Wi-Fi | Wi-Fi 6 |
| HDMI atakak | 1 |
| Front USB | USB 5Gbps support |
| Atzeko USBa | USB 5 Gbps A motakoa |
| Forma-faktorea | mikroATX |
| Elementuaren neurriak (L x W x H) | 9.6"L x 8.3"Z x 1.4"A |
Bermearen informazioa
The ASUS B760M-AYW WiFi D4 II motherboard comes with a 3-year limited warranty. For detailed terms and conditions, please refer to the warranty card included with your product or visit the official ASUS support webgunea.
Laguntza
For technical support, driver downloads, BIOS updates, and further product information, please visit the official ASUS support webgunea:
You can also find FAQs and troubleshooting guides on the support portal.