1. Sarrera
This manual provides detailed instructions for the safe and efficient operation of your Jectse 14MP Digital Film and Slide Scanner. This device is designed to convert various film types, including 135 Film, 126KPK Film, 110 Film, Super8 Film, Monochrome, and Slides, into digital images. Please read this manual thoroughly before using the product and retain it for future reference.
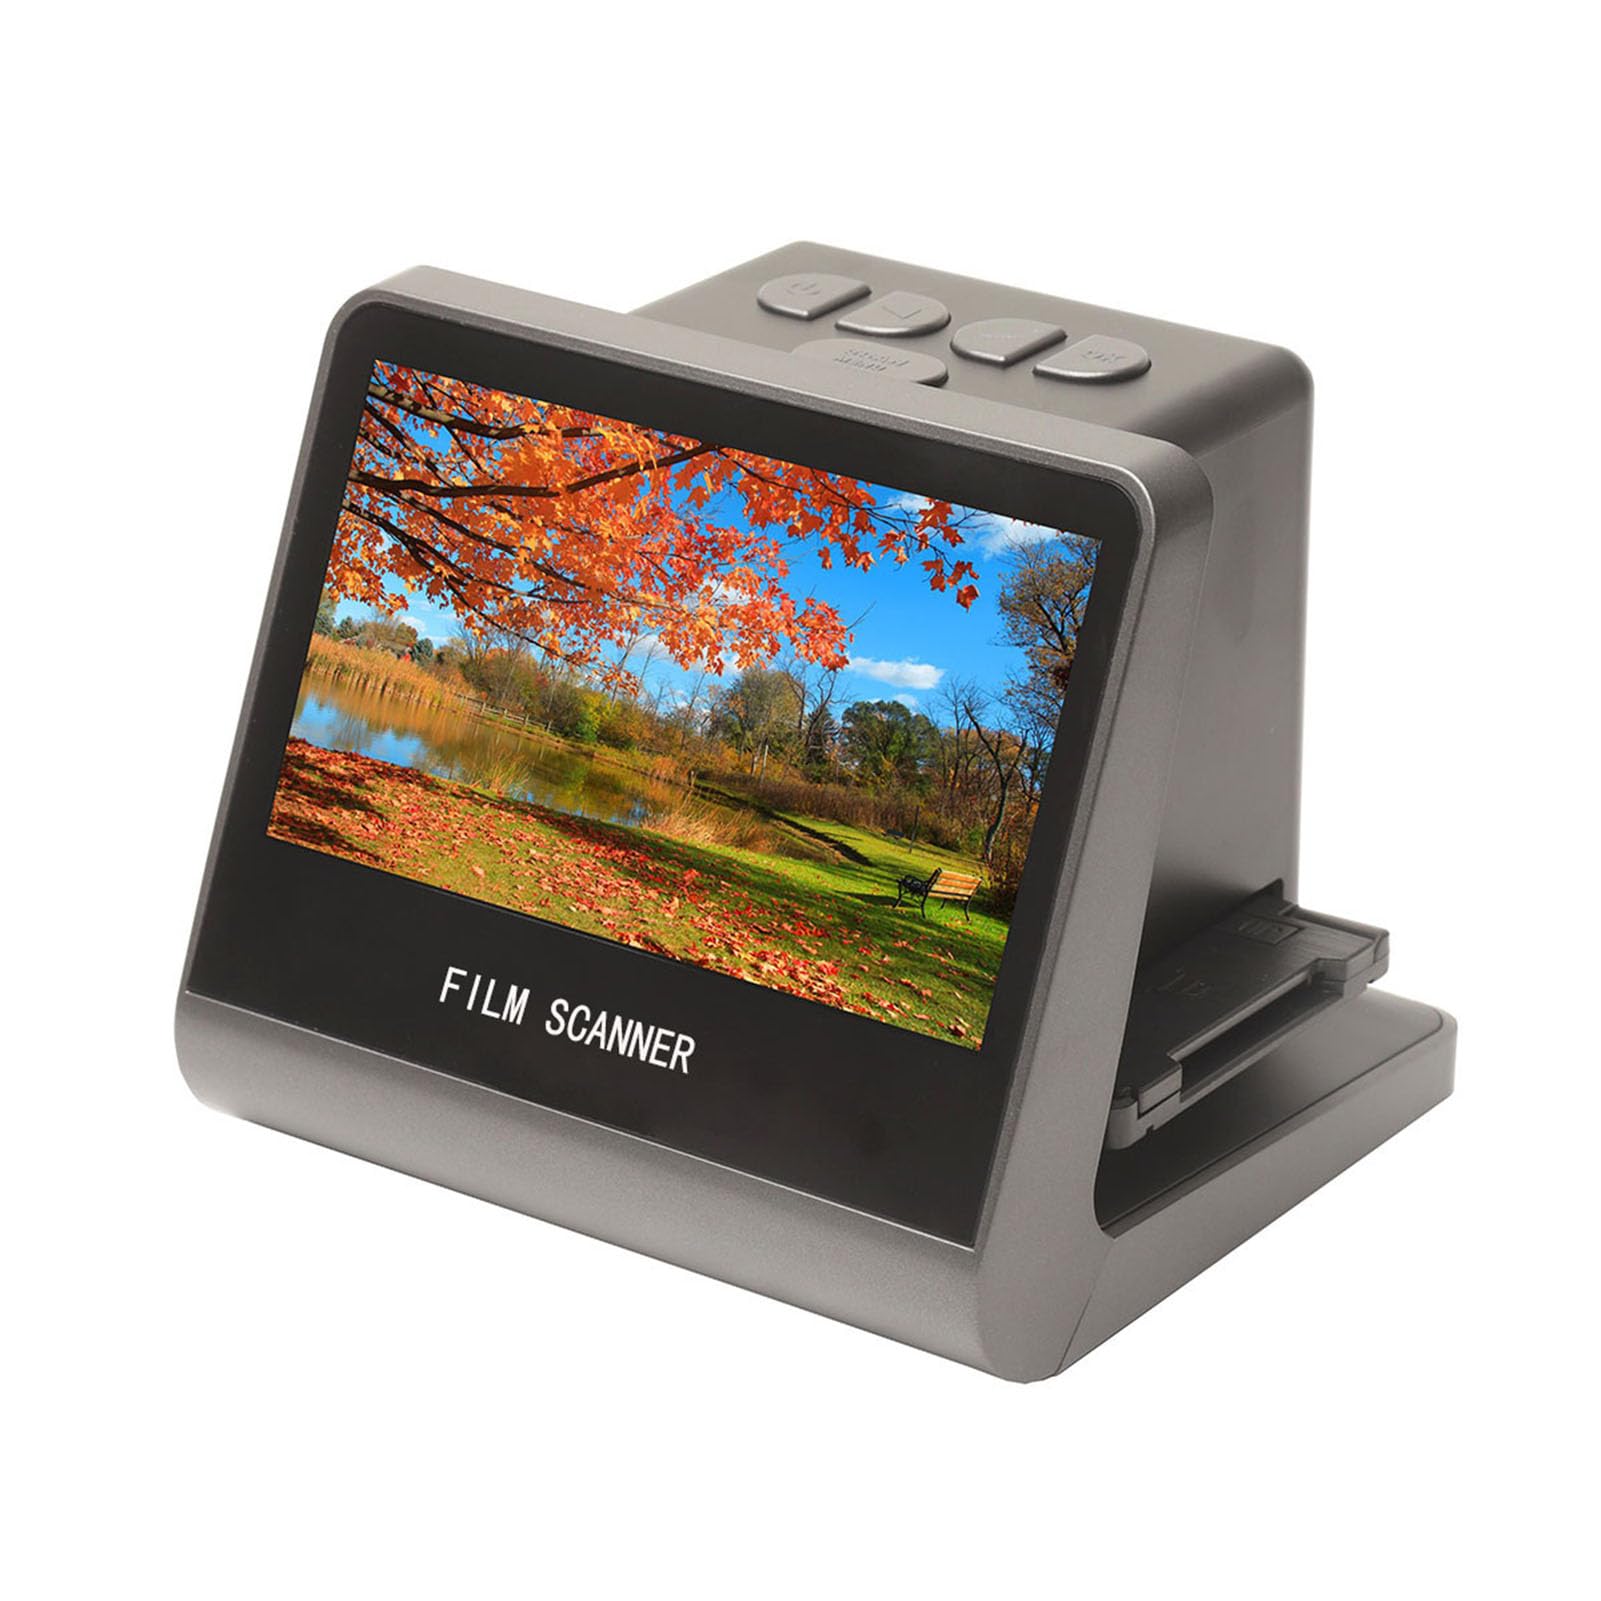
Figure 1: Jectse 14MP Digital Film and Slide Scanner, a compact device for digitizing various film formats.
2. Segurtasun informazioa
- Energia iturria: Erabili zehaztutako energia-egokitzailea soilik. Ziurtatu bolumenatage zure eskualdearekin bateragarria da.
- Ura eta hezetasuna: Do not expose the device to water or excessive moisture. Do not operate with wet hands.
- Aireztapena: Ziurtatu gailuaren inguruko aireztapen egokia dagoela. Ez blokeatu aireztapen-irekidurak.
- Garbiketa: Disconnect power before cleaning. Use a soft, dry cloth. Avoid liquid cleaners.
- Desmihiztatu: Ez saiatu gailua zeuk desmuntatzen edo konpontzen. Mantendu mantentze-lan guztiak langile kualifikatuen esku.
- Haurrak: Mantendu gailua haurren eskura.
3. Paketearen edukia
Egiaztatu behean zerrendatutako elementu guztiak zure paketean sartuta daudela:
- 1 x Film eskanerra
- 1 x HD Data Cable
- 1 x C motako kablea
- 1 x eskuila
- 1 x Erabiltzailearen eskuliburua (dokumentu hau)
- 1 x 110 Film Stand
- 1 x Super8 Film Stand
- 1 x 126 Film Stand
- 1 x Negative Film Stand
4. Produktua amaitu daview
The Jectse Film and Slide Scanner features a 5-inch LCD screen for easy operation and previewing. It includes built-in 16GB memory for storing scanned images and supports various film types.
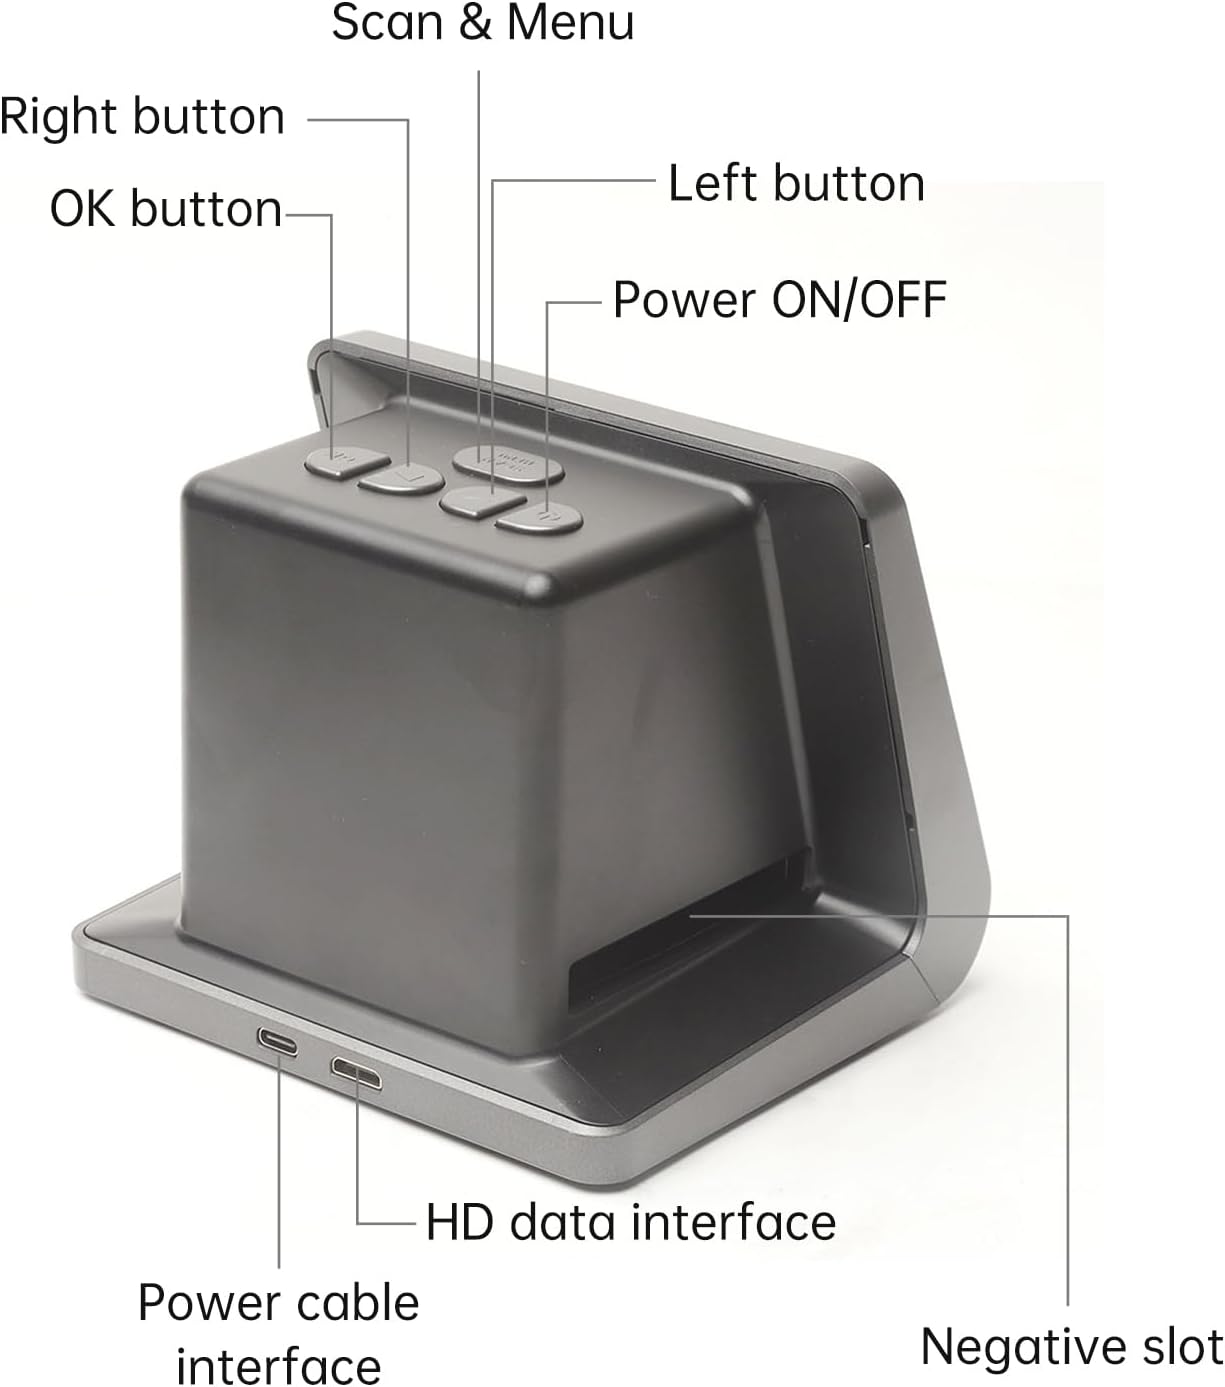
2. irudia: Aurrealdea eta alboa view of the scanner with labeled buttons and interfaces. Key components include the Power ON/OFF button, Scan & Menu button, Left and Right navigation buttons, OK button, Power cable interface (Type-C), HD data interface, and Negative slot.
4.1 Ezaugarri nagusiak
- Filmen bateragarritasuna: 135 Film (36*24mm), 126KPK Film (27*27mm), 110 Film (17*13mm), Super8 Film (4.01*5.79mm), Monochrome, Slide.
- Bereizmen handiko sentsorea: 14.0 Mega pixels (4416*3312) 1/2.33” CMOS sensor.
- Pantaila: Color 5" LCD HD screen with 22W Pixels display.
- Barne biltegiratzea: Built-in 16GB memory.
- Konektibitatea: Type-C USB for power/data, Mini HD for TV output.
- Hizkuntza anitzeko euskarria: Chinese, T-Chinese, English, French, German, Italian, Spanish, Japanese.

3 Irudia: Gainetikview of the scanner's capabilities, highlighting its compatibility with various film types, 22MP interpolation, 5-inch LCD screen, and 16GB internal memory.
5. Konfigurazioa
5.1 Gailua piztea
- Connect the provided Type-C cable to the "Power cable interface" on the scanner.
- Connect the other end of the Type-C cable to a DC 5V power adapter (not included) or a USB port on your computer.
- Sakatu Piztu/Itzali button located on the top of the scanner to turn it on. The LCD screen will illuminate.
5.2 Ordenagailu edo telebista batera konektatzea
The scanner can be connected to a computer or TV for a larger display of scanned images.
- For Computer Connection: Use the Type-C cable to connect the scanner to your computer. The scanner will function as a USB MSDC (Mass Storage Device Class), allowing you to transfer scanned images. No additional drivers or software are required. Compatible with Windows Vista/7/8/10 and above.
- For TV Connection: Use the provided HD Data Cable to connect the "HD data interface" on the scanner to the HD input on your television. Select the appropriate input source on your TV to view the scanner's display.

Figure 4: The scanner connected to a computer monitor and a television, demonstrating its compatibility with external displays for viewing scanned content.
6. Funtzionamendua
6.1 Loading Film and Slides
Ensure you use the correct film stand for your film type. The scanner supports 135 Film, 126KPK Film, 110 Film, Super8 Film, Monochrome, and Slides.
6.1.1 Loading Slides
- Hold the slide up to the light to identify the correct orientation.
- Take out the slide holder. Ensure the side with the "open" logo faces you, and the side with the "<" logo faces down. Open the slide holder.
- Place the slides into the recessed area in the holder. Film strips can also be loaded into the slide holder. Close the slide holder and press the edges to lock it in place.
- Insert the loaded slide holder into the slot on the right side of the film scanner as shown in Figure 5.

Figure 5: Step-by-step guide illustrating how to correctly load individual slides into the slide holder and then insert the holder into the scanner.
6.1.2 Loading Negative Film (135, 126KPK, 110, Super8)
- Hold the negative film strip up to the light to determine the correct orientation.
- Take out the negative holder. Ensure the side with the "open" logo faces you, and the side with the "<" logo faces down. Open the negative holder.
- Place the negative film strip into the recessed area in the holder. Close the negative holder and press the edges to lock it in place.
- Insert the loaded negative holder into the slot on the right side of the film scanner as shown in Figure 6.
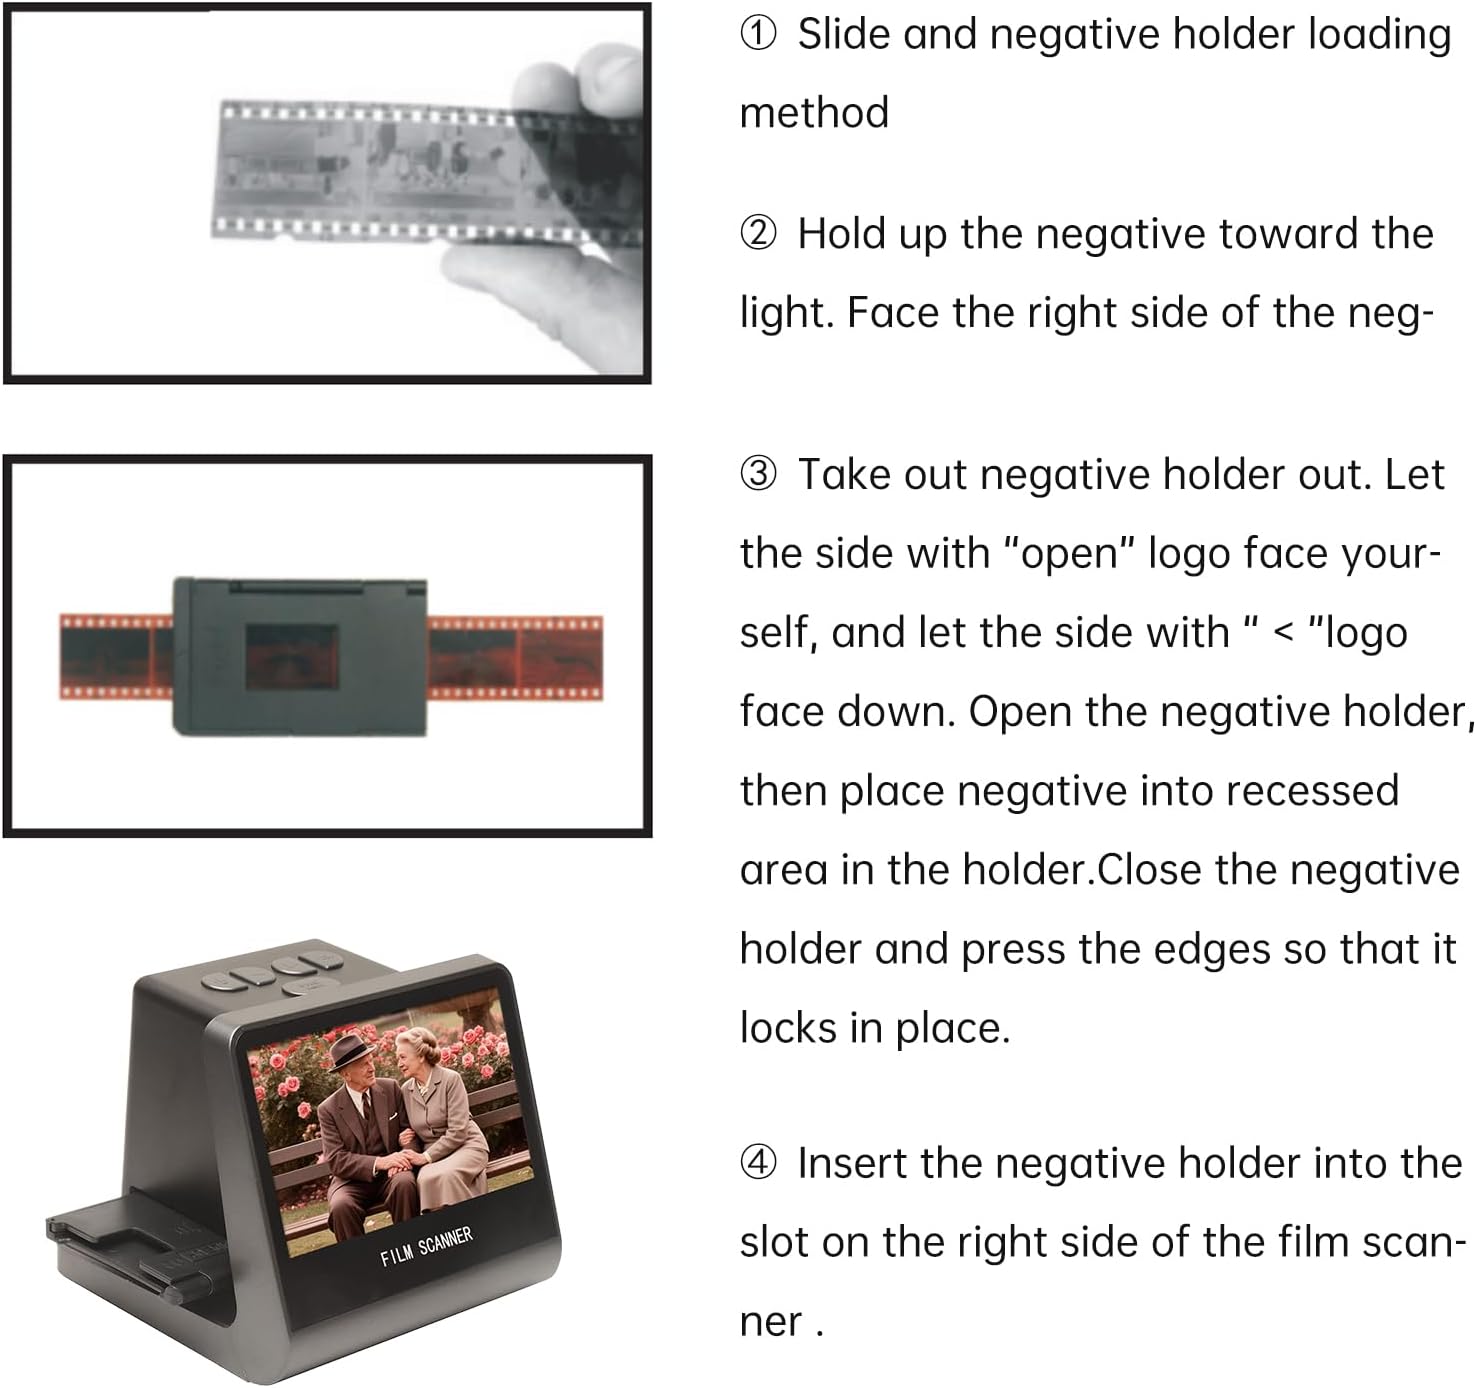
Figure 6: Step-by-step guide demonstrating how to correctly load negative film strips into the negative holder and then insert the holder into the scanner.
6.2 Eskaneatze prozesua
- After loading the film/slide, the image will appear on the 5-inch LCD screen.
- Erabili Ezkerra eta Eskuin buttons to navigate through menu options or adjust settings.
- Sakatu Scan & Menu button to access the scanning options or menu.
- Select the appropriate film type (e.g., 135 Film, Slide) from the menu if prompted.
- Adjust exposure compensation (Automatic / Manual (-2.0 EV~ +2.0EV)) and white balance (Automatic) if necessary using the menu options.
- Once the image is properly framed and settings are adjusted, press the OK button to capture and save the digital image. The scanned image will be saved to the built-in 16GB memory.
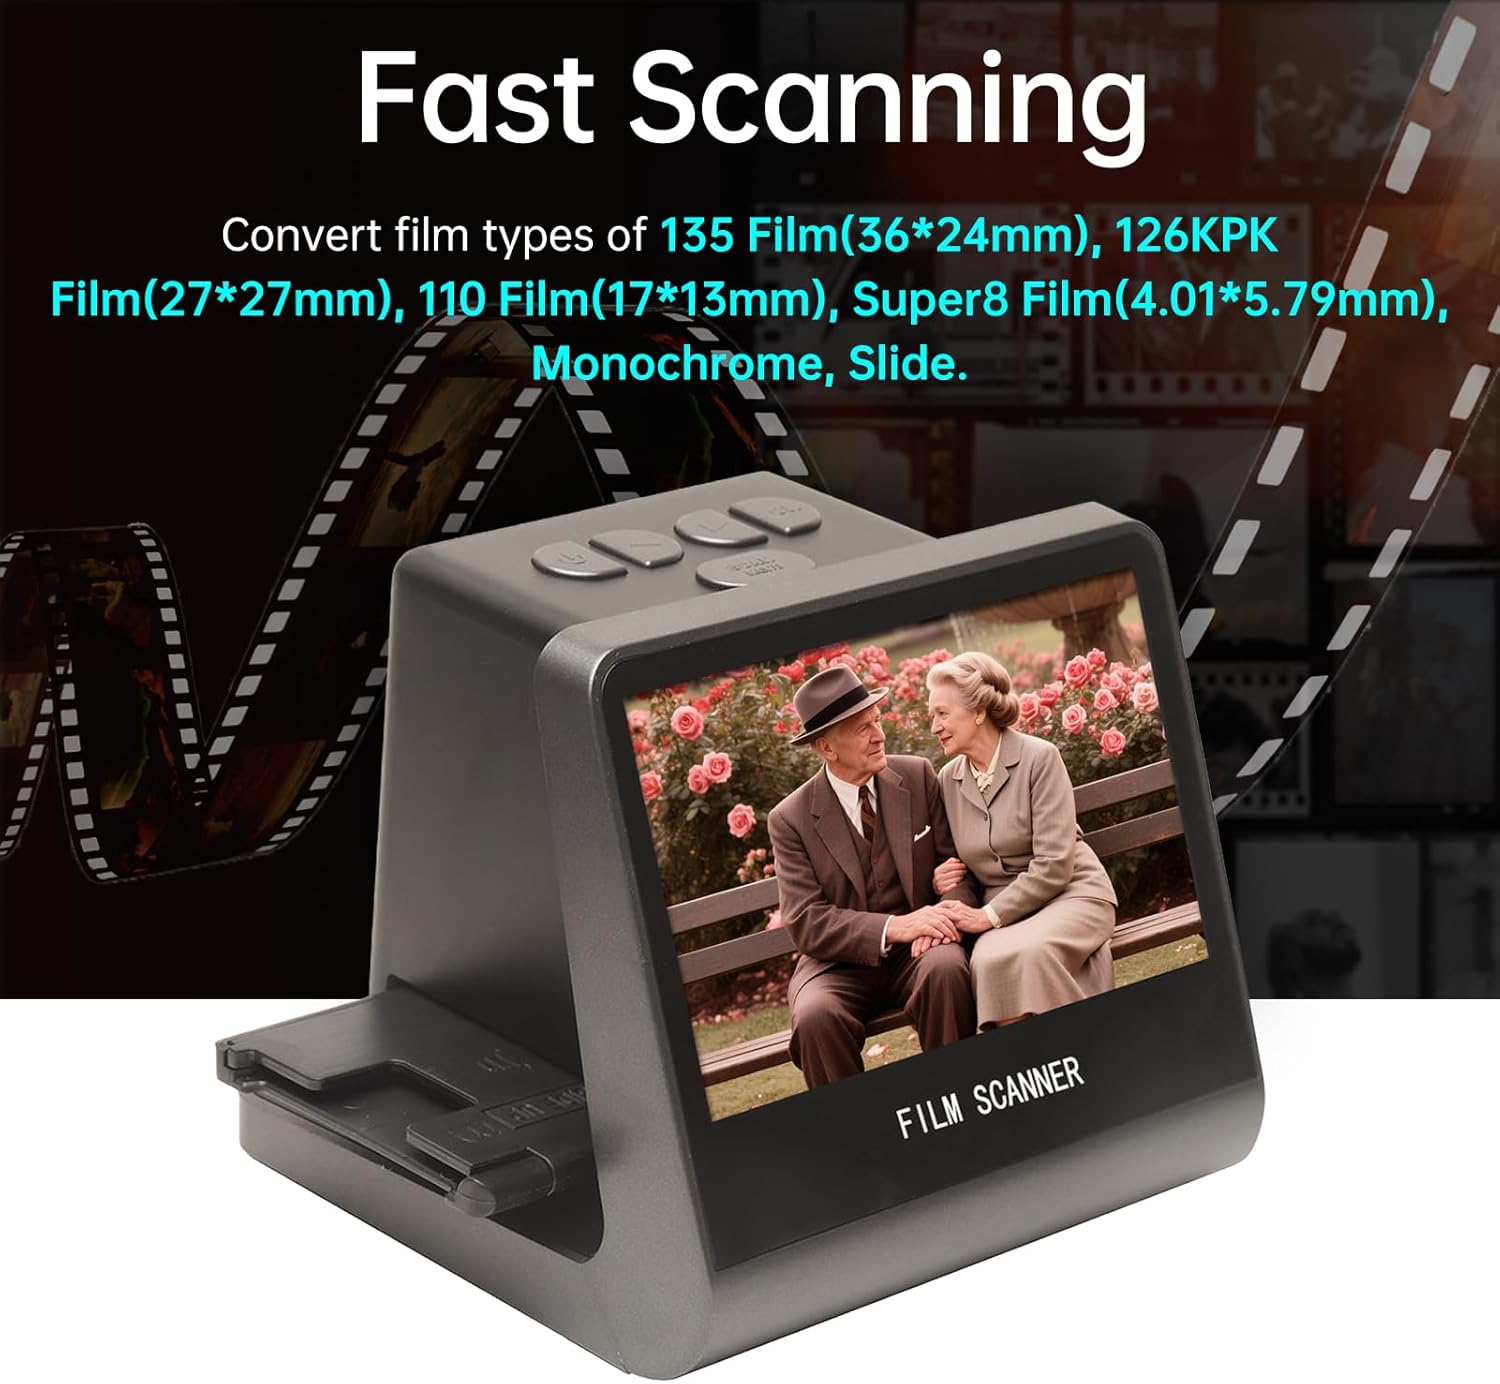
Figure 7: The scanner in operation, demonstrating its ability to quickly convert various film types into digital images, displayed on its integrated screen.
6.3 Hizkuntza ezarpenak
The scanner supports 8 system languages. To change the language:
- Sakatu Scan & Menu botoia menu nagusian sartzeko.
- Erabili Ezkerra or Eskuin buttons to navigate to the "Language" option.
- Sakatu OK botoia hautatzeko.
- Choose your desired language (Chinese, T-Chinese, English, French, German, Italian, Spanish, Japanese) and press OK baieztatzeko.
7. Mantentzea
7.1 Eskanerra garbitzea
- Kanpoaldea: Use a soft, dry, lint-free cloth to wipe the exterior of the scanner. Do not use liquid cleaners or abrasive materials.
- Film Slot/Sensor: Use the provided brush to gently remove dust or debris from the film slot and around the scanning sensor. Avoid touching the sensor directly.
- LCD pantaila: Use a soft, dry microfiber cloth specifically designed for electronics screens.
Regular cleaning helps maintain optimal scanning quality and extends the life of your device.
8. Arazoak
| Arazoa | Kausa posiblea | Irtenbidea |
|---|---|---|
| Gailua ez da pizten. | Ez dago korronte konexiorik edo kable akastuna. | Ensure the Type-C cable is securely connected to both the scanner and a working power source (DC 5V adapter or computer USB port). Try a different cable or power source. |
| Eskaneatutako irudiak lausoak edo nahasiak dira. | Dust/debris on film or sensor; incorrect film loading. | Clean the film/slide thoroughly before scanning. Use the provided brush to clean the scanner's film slot and sensor. Ensure the film/slide is correctly seated in its holder. |
| Ezin da transferitu files ordenagailura. | Incorrect USB mode; cable issue. | Ensure the scanner is connected to the computer via the Type-C cable. The scanner should automatically enter USB MSDC mode. Check cable connection. Ensure your computer's operating system is compatible (Vista/7/8/10 and above). |
| Ez dago irudirik telebistan konektatuta dagoenean. | Incorrect TV input; faulty HD cable. | Verify the HD Data Cable is securely connected to both the scanner and the TV. Select the correct HD input source on your television. Try a different HD cable if available. |
9. Zehaztapenak
| Ezaugarri | Xehetasuna |
|---|---|
| Funtzioa | Film eskanerra / USB MSDC |
| Interfazea | Type-C, Mini HD |
| Irudi-sentsorea | 14.0 Mega pixels (4416*3312), 1/2.33” CMOS sensor |
| Bistaratzea | Color 5" LCD HD (22W Pixels display) |
| Esposizio Kontrola | Automatikoa / Eskuzkoa (-2.0 EV~ +2.0EV) |
| Zurien Balantzea | Automatikoa |
| Ebazpena | 14.0 Mega pixels / 22 Mega pixels (interpolation) |
| Film Types Supported | 135 Film (36*24mm), 126KPK Film (27*27mm), 110 Film (17*13mm), Super8 Film (4.01*5.79mm), Monochrome, Slide |
| Irudi-efektuak | Slides, Negatives |
| File Formatua | JPEG |
| TV-OUT Type | NTSC/PAL |
| Memoria integratua | 16 GB |
| Elikatze Hornidura | DC 5V Adapter / USB Port |
| Onartutako hizkuntzak | S-Chinese, T-Chinese, English, French, German, Italian, Spanish, Japanese |
| Sistema eragilearen euskarria | For Vista/7/8/10 and above |
| Produktuaren Tamaina | 132x115x110mm |
| Pisua | 330 g |

Figure 8: Dimensions of the Jectse Film and Slide Scanner, showing its compact size (14cm/5.51in width, 12cm/4.72in height, 11cm/4.33in depth).
10. Bezeroarentzako arreta
For technical assistance, warranty information, or service inquiries, please contact your retailer or the manufacturer's customer support channels. Refer to the product packaging or the manufacturer's official webharremanetarako datuak lortzeko gunea.