1. Sarrera
This manual provides detailed instructions for the safe and effective operation of the Generic Digital Clamp Meter ACM81. This True RMS auto-ranging clamp meter is designed for measuring AC current, AC/DC voltage, resistance, continuity, diode, and temperature. It features a V-alert function for non-contact AC voltage detection and an automatic power-off function to conserve battery life.
2. Segurtasun informazioa
WARNING: To avoid electric shock or personal injury, read and understand all safety information before using this meter.
- Always ensure the meter is in the correct function mode before making measurements.
- Ez gainditu gehienezko sarrera-balioak inolako tartetarako.
- Oso kontuz ibili voltag30V AC RMS, 42V peak edo 60V DC-tik gorakoak. Bolumen hauektagshock arriskua dakar.
- Korrontea cl-rekin neurtu aurretikamp, ensure the circuit is de-energized if possible, and always wear appropriate personal protective equipment.
- The meter conforms to IEC-61010-1, IEC-61010-2-030, IEC-61010-2-032, IEC-61010-2-033 standards.
- Bolumen gehiegitage protection class: CAT III 300V, CAT II 600V, pollution degree II.
3. Produktua amaitu daview
Familiarize yourself with the components of your Digital Clamp Meter ACM81.

3.1. irudia: Labeled diagram of the ACM81 Digital Clamp Meter, showing the V-Alert sensor area, jaws for current measurement, trigger, rotary switch, manual automatic switching keys, reading backlight, HOLD button, SEL button, display, and input terminals.
- Masailurrak: Kontakturik gabeko korronte alternoa neurtzeko erabiltzen da.
- Trigger: Opens and closes the jaws.
- Etengailu birakaria: Selects the measurement function (e.g., AC current, voltage, erresistentzia).
- Pantaila: Neurketa-irakurketak eta adierazleak erakusten ditu.
- HOLD botoia: Uneko irakurketa pantailan izozten du.
- SEL botoia: Selects sub-functions within a rotary switch position (e.g., AC/DC voltage, diodoa/jarraitasuna).
- RAN Button: Toggles between auto-ranging and manual ranging (if applicable).
- V-Alert Button: Activates the non-contact AC voltage detekzio funtzioa.
- Sarrerako terminalak: Bolumenaren proba-kableak konektatzekotage, resistance, continuity, diode, and temperature measurements.
4. Konfigurazioa
4.1 Bateriaren instalazioa
The meter requires two 1.5V AAA batteries (not included). Follow these steps to install or replace batteries:
- Ziurtatu neurgailua itzalita dagoela.
- Bilatu bateriaren konpartimentua neurgailuaren atzealdean.
- Erabili bihurkin bat bateriaren estalkia lotzen duen torlojua askatzeko.
- Kendu bateriaren estalkia.
- Insert two 1.5V AAA batteries, observing the correct polarity (+ and -).
- Jarri bateriaren estalkia eta estutu torlojua.

4.1. irudia: Illustration of the battery compartment and the process of replacing batteries using a screwdriver.
5. Funtzionamendu-argibideak
5.1 Piztu/Itzali
Turn the rotary switch from the OFF position to any desired measurement function to power on the meter. To power off, turn the rotary switch back to the OFF position. The meter will automatically power off within 15 minutes if there is no operation.
5.2 AC Current Measurement (by Jaws)
Korronte alternoa neurtzeko:
- Turn the rotary switch to the 'A~' position.
- Press the trigger to open the jaws.
- Clamp the jaws around a single conductor (not a bundle of wires) through which the current is flowing. Ensure the jaws are fully closed.
- Read the AC current value on the display. The meter can measure AC current from a minimum of 1mA up to 200A.

5.1. irudia: Demonstrates how to easily open the clamp meter jaws by pulling the trigger for current measurement.

5.2. irudia: Clamp meter's jaws are shown clamped around a single conductor to measure industrial current.
5.3 liburukiatage Neurketa (AC/DC)
AC edo DC bolumena neurtzekotage:
- Insert the red test lead into the 'VΩ' input terminal and the black test lead into the 'COM' input terminal.
- Turn the rotary switch to the 'V~' (for AC voltage) or 'V=' (for DC voltage) position. If the symbol is 'V~', press 'SEL' to switch to 'V=' for DC voltage.
- Konektatu proba-kableak paraleloan neurtu nahi duzun zirkuituarekin edo osagaiarekin.
- Irakurri liburukiatage value on the display. The meter measures voltage from 0.1mV to 600V.
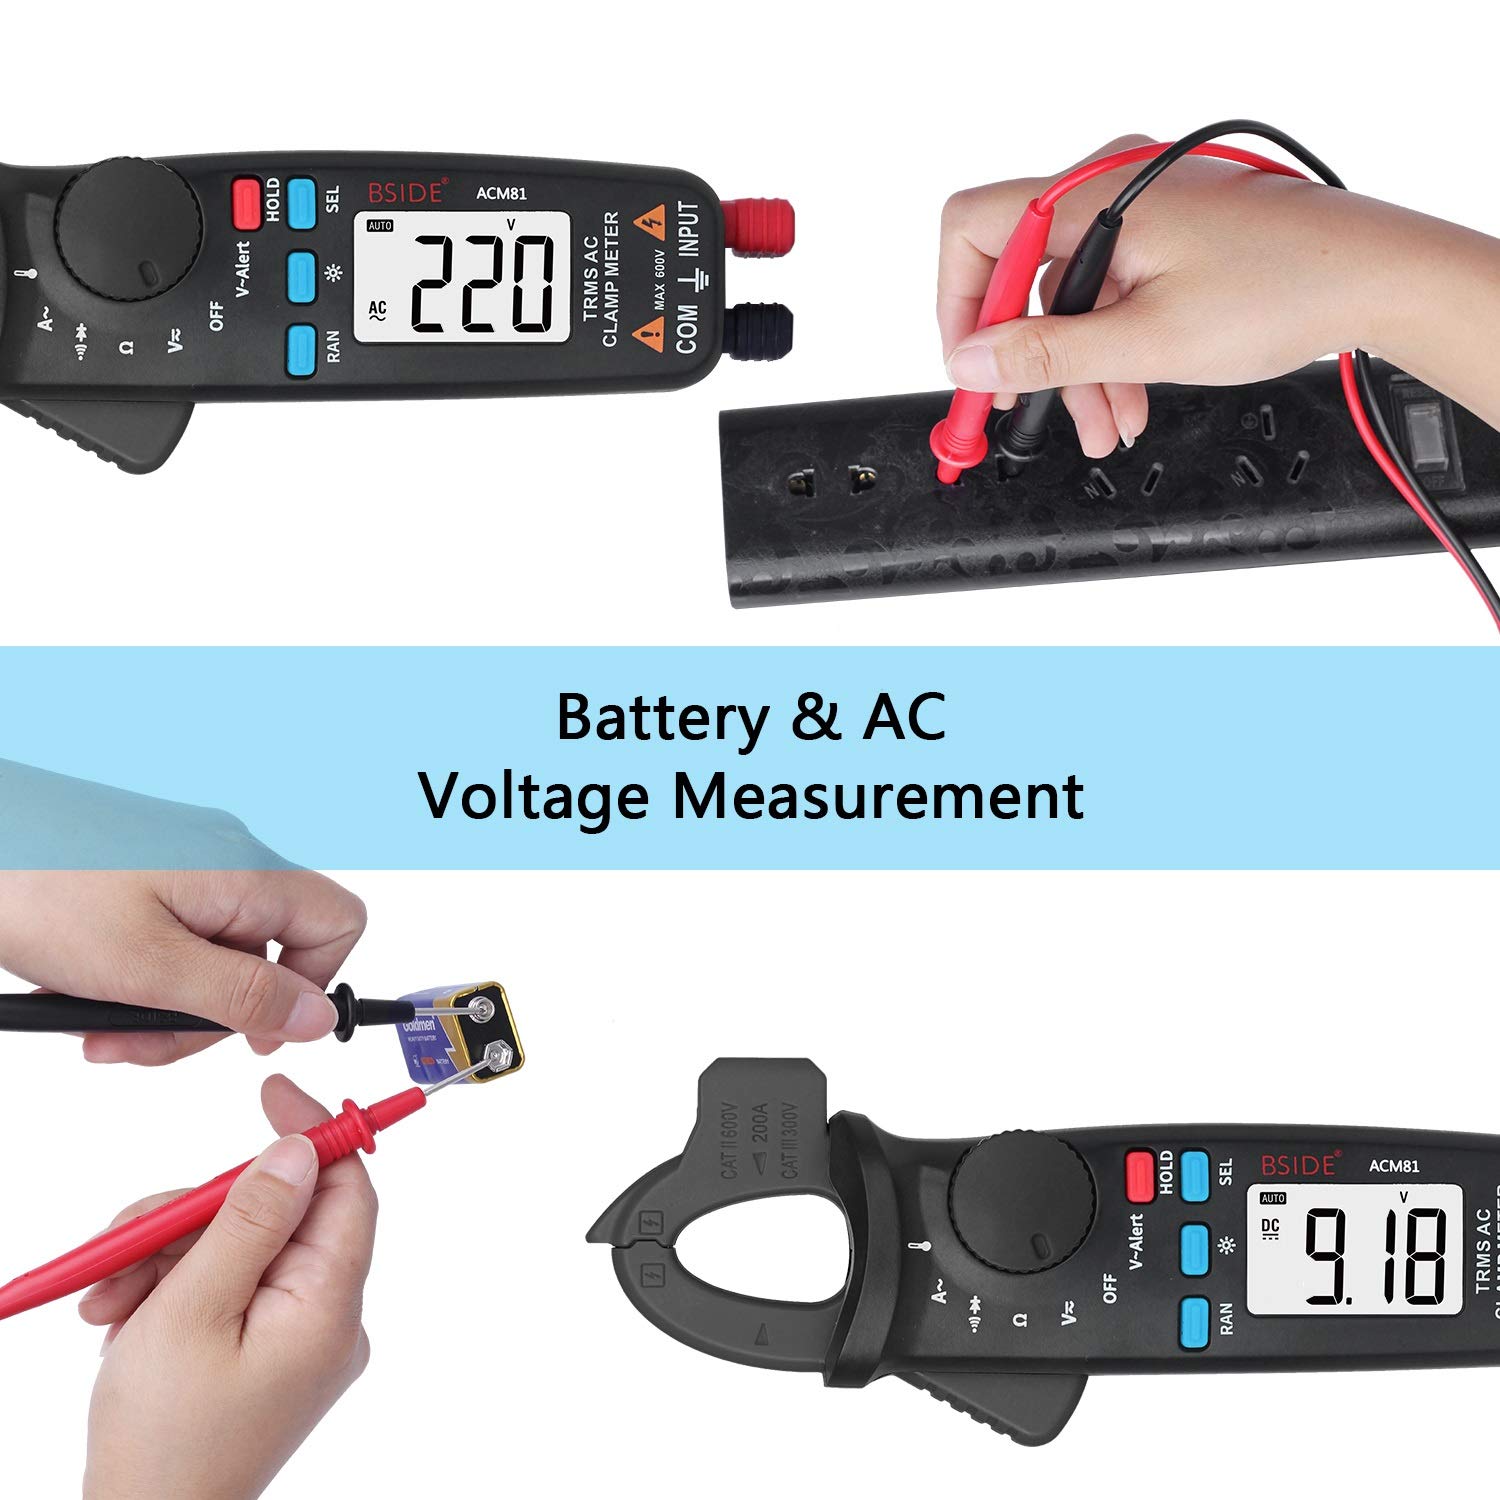
5.3. irudia: Demonstrates the meter performing both AC voltage measurement from a power outlet and DC voltage measurement from a battery.
5.4 Erresistentzia Neurketa
Erresistentzia neurtzeko:
- Insert the red test lead into the 'VΩ' input terminal and the black test lead into the 'COM' input terminal.
- Biratu biraketa-etengailua 'Ω' posiziora.
- Ziurtatu zirkuitua edo osagaia deskonektatuta dagoela proba-kableak bertara konektatu aurretik.
- Irakurri erresistentziaren balioa pantailan.
5.5 Jarraitasun proba
Jarraitasun-proba bat egiteko:
- Insert the red test lead into the 'VΩ' input terminal and the black test lead into the 'COM' input terminal.
- Turn the rotary switch to the 'Ω' position. Press 'SEL' until the continuity symbol (a speaker icon) appears on the display.
- Konektatu proba-kableak zirkuituan edo osagaian zehar.
- If the resistance is less than approximately 30Ω, the continuity beeper will sound, indicating a continuous path.
5.6 Diodoaren proba
Diodo bat probatzeko:
- Insert the red test lead into the 'VΩ' input terminal and the black test lead into the 'COM' input terminal.
- Turn the rotary switch to the 'Ω' position. Press 'SEL' until the diode symbol appears on the display.
- Konektatu proba-kable gorria diodoaren anodora eta proba-kable beltza diodoaren katodora. Pantailak aurreranzko bolumena erakutsiko du.tage tanta.
- Reverse the test leads. The display should show 'OL' (Open Line) for a good diode.
5.7 Tenperaturaren Neurketa
Tenperatura neurtzeko:
- Insert the thermocouple into the input terminals, observing polarity.
- Turn the rotary switch to the 'TEMP' position (often shared with another function, use 'SEL' if needed).
- Place the thermocouple probe on or near the object whose temperature you wish to measure.
- Read the temperature value on the display. The meter measures temperature from -20°C to 500°C (-4°F to 932°F).
5.8 V-Alert Function (Non-Contact AC Voltage detekzioa)
To use the V-alert function:
- Turn the rotary switch to the 'V-Alert' position.
- Bring the top part of the meter (V-Alert sensor area) close to an AC voltage source (e.g., an electrical outlet or insulated wire).
- AC boltage is detected, the meter will emit an audible beep and the V-Alert indicator light will flash.
5.9 Datuak gordetzea
Uneko irakurketa pantailan izozteko:
- While taking a measurement, press the 'HOLD' button. The reading on the display will be frozen.
- Press the 'HOLD' button again to release the data hold and resume live measurements.
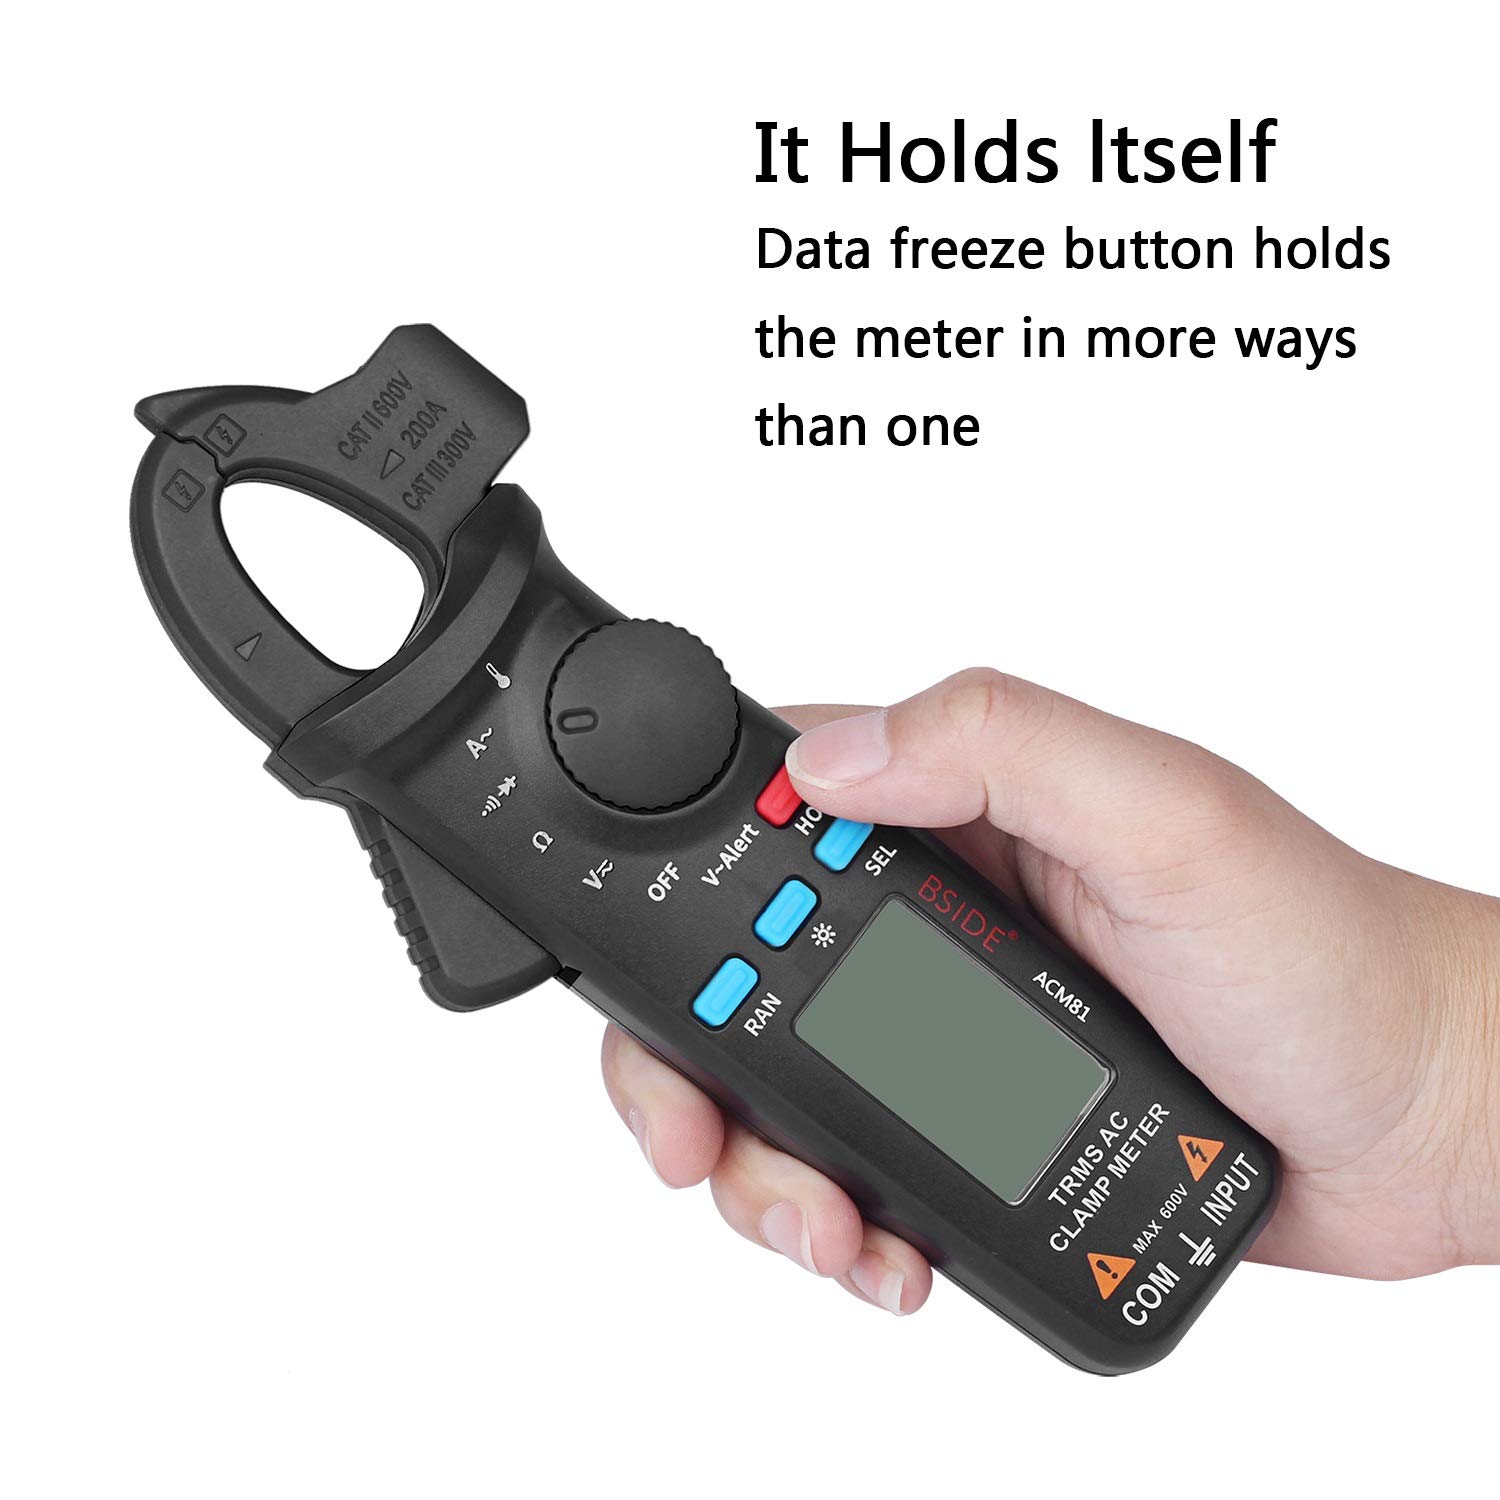
5.4. irudia: The meter's data freeze function is activated by pressing the 'HOLD' button, allowing the current reading to be retained on the display.
6. Mantentzea
6.1 Garbiketa
Garbitu neurgailuaren kaxa iragarkiarekinamp oihal eta detergente leun batekin. Ez erabili urratzailerik edo disolbatzailerik. Ziurtatu neurgailua guztiz lehor dagoela erabili aurretik.
6.2 Bateria ordezkatzea
When the low battery indicator appears on the display, replace the batteries as described in Section 4.1. Prompt battery replacement ensures accurate readings and proper meter function.
7. Arazoak
- Ez dago pantailarik: Egiaztatu bateriaren instalazioa eta ziurtatu bateriak ez daudela agortuta. Ordeztu behar izanez gero.
- Irakurketa okerrak: Verify the correct function is selected for the measurement. Ensure test leads are properly connected and making good contact. Check battery level.
- Neurgailuak ez du erantzuten: Itzali neurgailua eta piztu berriro. Arazoak jarraitzen badu, aldatu bateriak.
8. Zehaztapenak
Detailed technical specifications for the Generic Digital Clamp Meter ACM81:
| Parametroa | Barrutia | Zehaztasuna |
|---|---|---|
| Bistaratzea | 2000 zenbaketa | |
| AC korrontea | 2A/20A/200A | ±(%2.5+5) |
| DC bolumenatage | 200mV/2V/20V/200V/600V | ±(%1.0+3) |
| AC Boltage | 200mV/2V/20V/200V/600V | ±(%1.0+3) |
| Erresistentzia | 200Ω/2kΩ/20kΩ/200kΩ/2MΩ | ±(%1.0+3) |
| 20 MΩ | ±(%1.2+20) | |
| Jarraitutasun zalaparta | Soinuak erresistentzia < 30Ω bada | |
| Diodoa | Shows positive voltage value approximately | |
| Tenperatura | -20 ℃ ~ 500 ℃ / -4 ℉ ~ 932 ℉ | ±(%2.0+2) |
| Masailezur-ahalmena | 20 mm | |
| Boterea | 1.5 V (AAA) x 2 | |
| Tamaina | 179 x 67 x 36 mm | |
| Pisua | 137 g | |
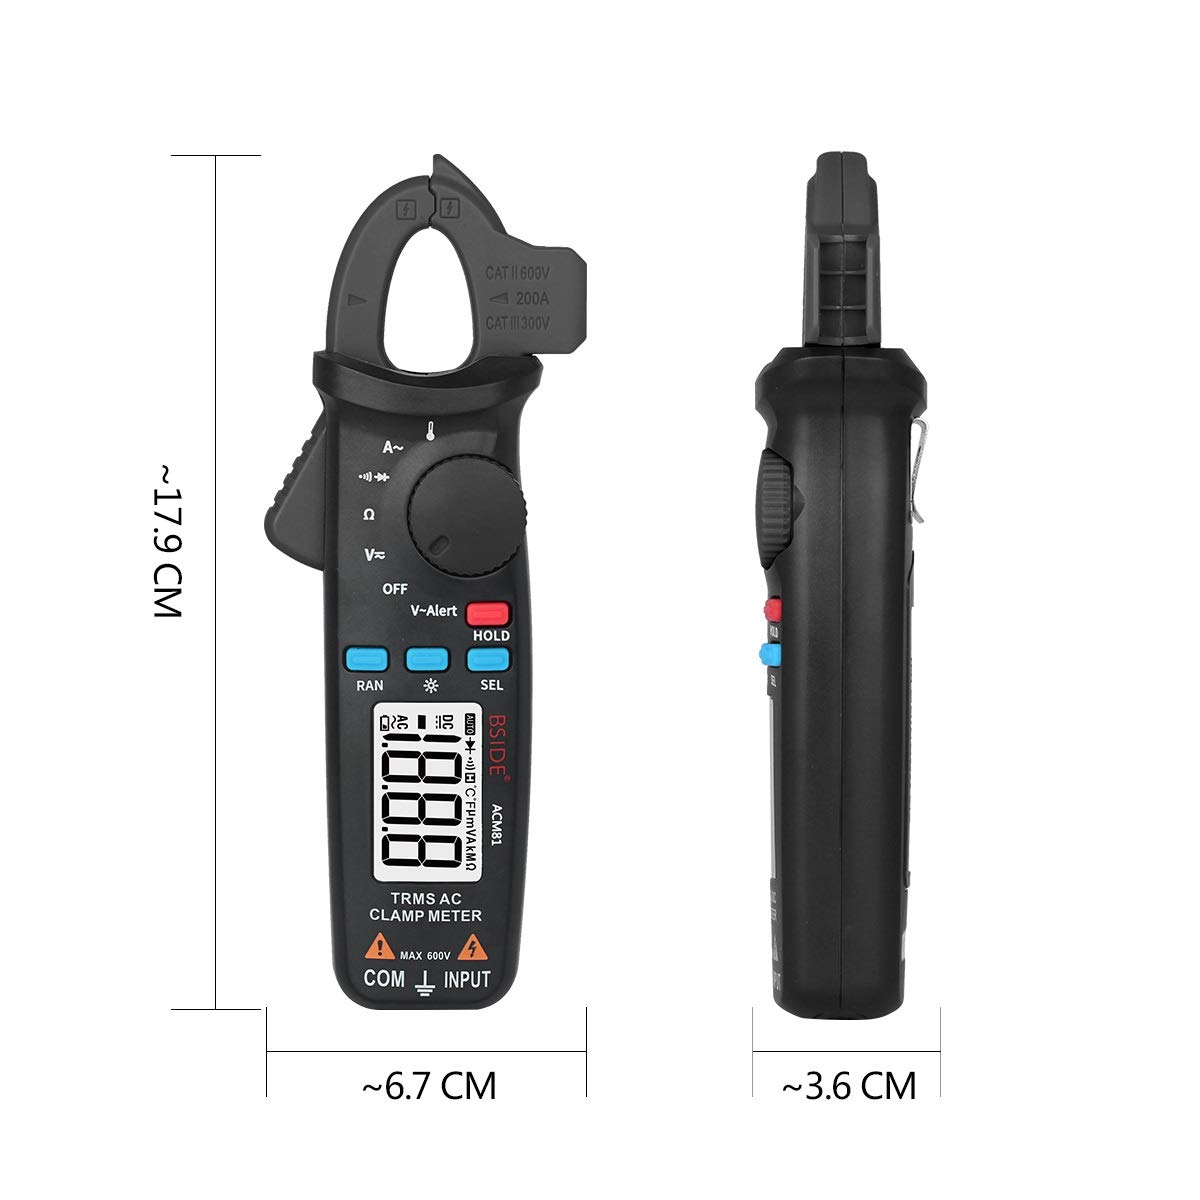
8.1. irudia: Physical dimensions of the ACM81 Digital Clamp Neurgailua.
9. Paketearen edukia
Elementu hauek zure produktu paketean sartzen dira:
- 1 x Digital TRMS Clamp Meter (ACM81)
- 1 x Proba eramateko
- 1 x Termoparea
- 1 x Maleta garraiatzeko
- 1 x bihurkin
- 1 x Erabiltzailearen eskuliburua
10. Bermea eta Laguntza
Bermeari buruzko informazioa edo laguntza teknikoa lortzeko, jo ezazu zure saltzaileak edo fabrikatzailearen hornitzaile ofizialak emandako harremanetarako datuetara. webgunea. Gorde erosketa-agiria berme-erreklamazioetarako.
