
1. Sarrera
This manual provides detailed instructions for the installation, operation, and maintenance of your GIGABYTE X870E AORUS ELITE X3D Motherboard. Designed for high-performance computing, this motherboard supports AMD Ryzen 9000 series processors and features advanced power delivery, high-speed memory support, and extensive connectivity options. Please read this manual thoroughly before proceeding with installation to ensure proper setup and optimal performance.
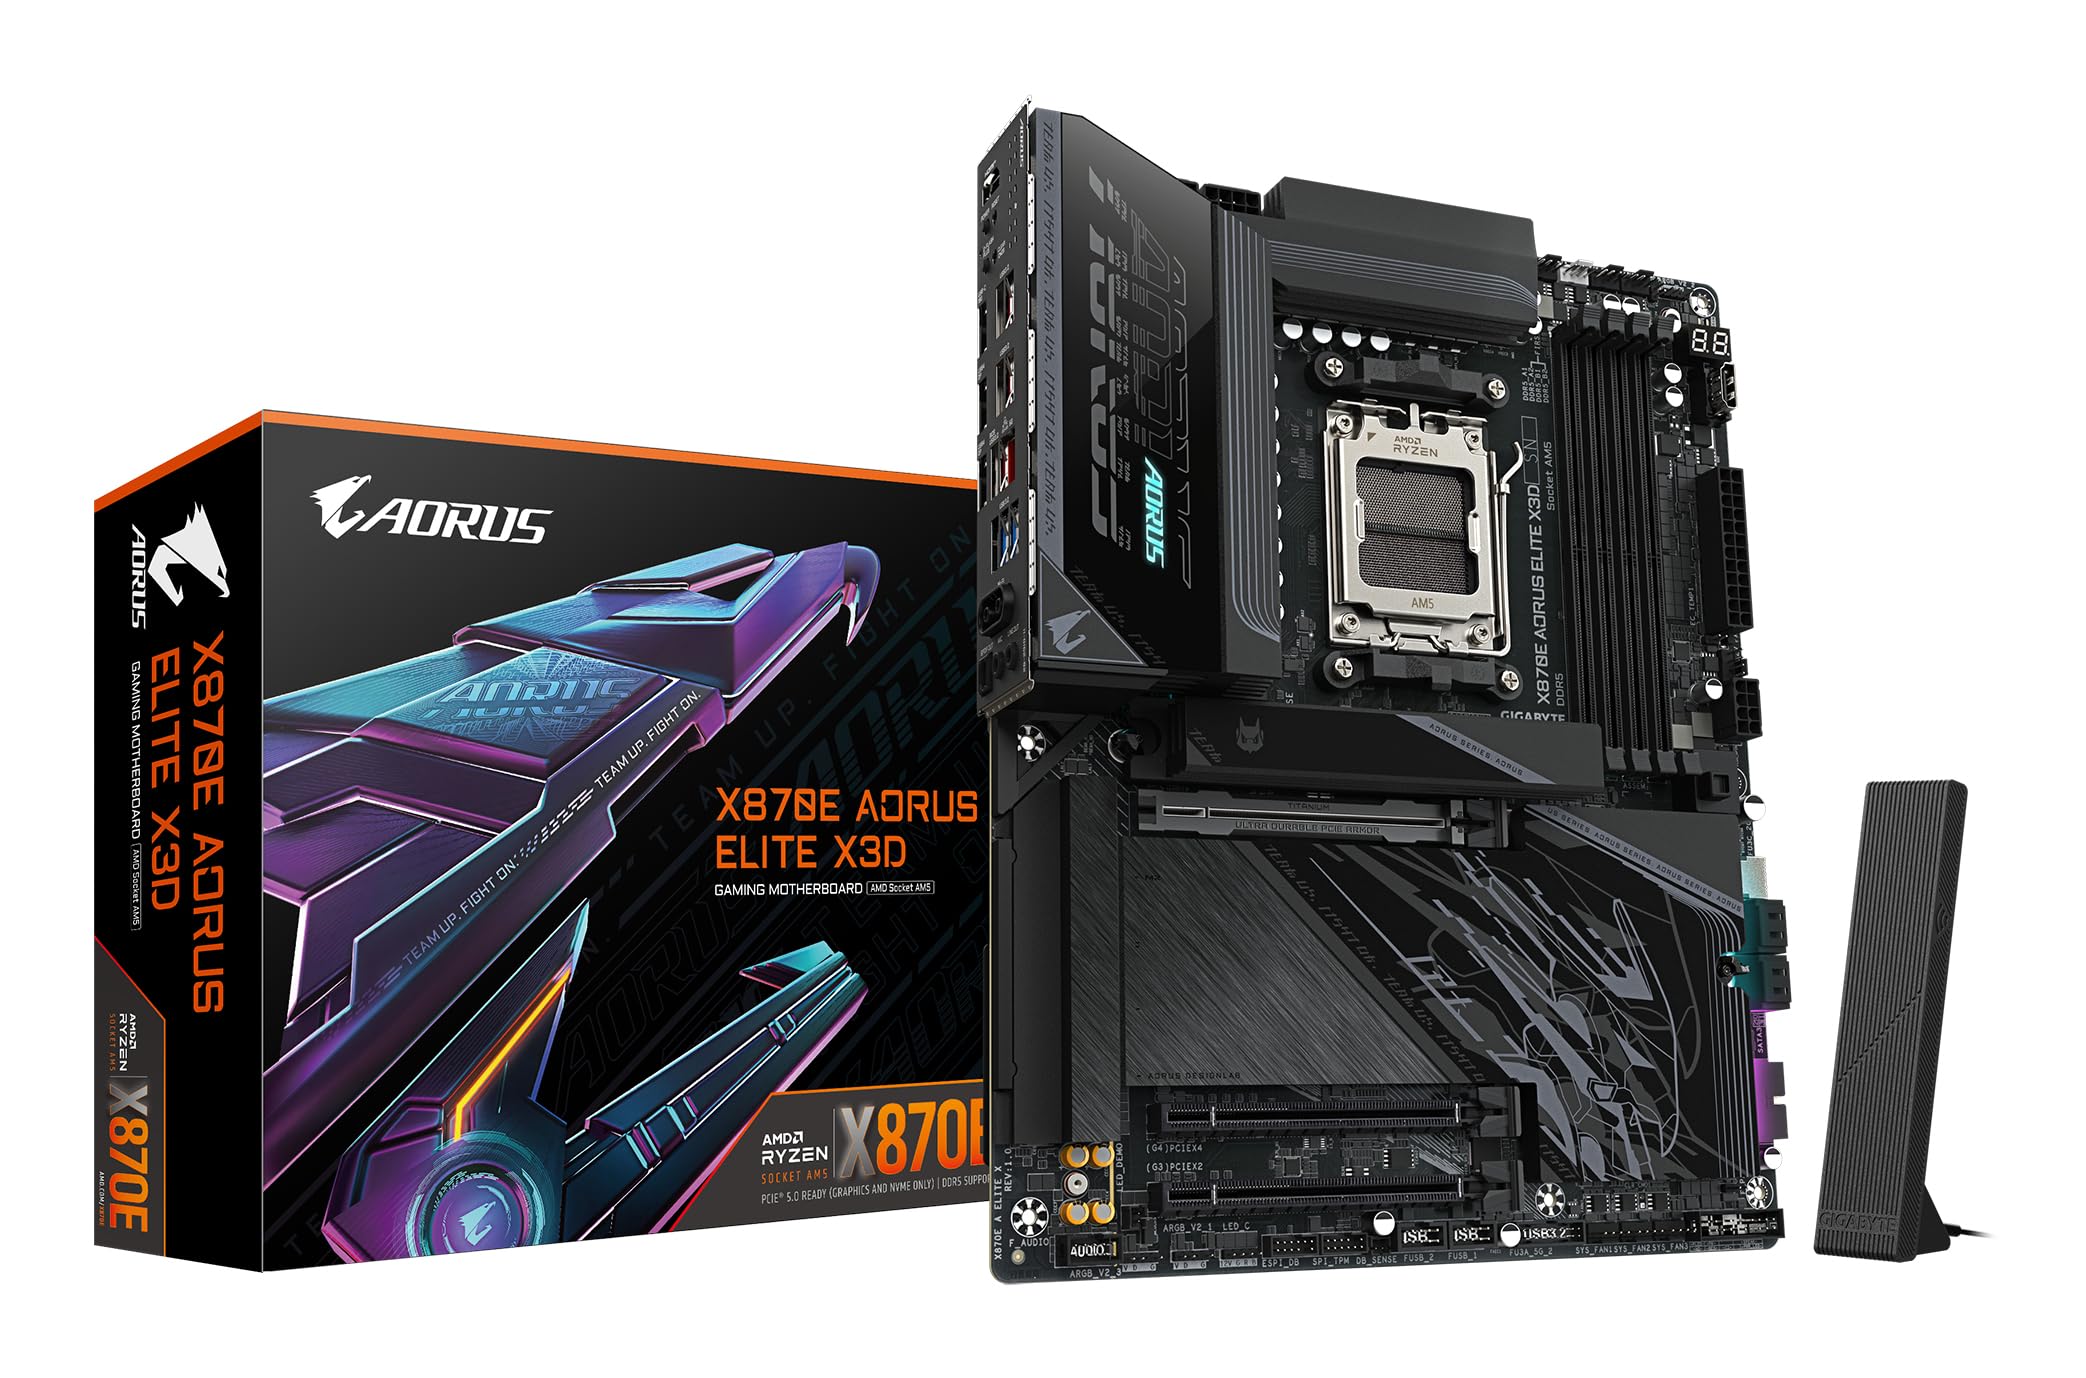
Figure 1: GIGABYTE X870E AORUS ELITE X3D Motherboard - Top View
2. Konfigurazioa eta instalazioa
Instalazioa hasi aurretik, ziurtatu sistema itzalita eta energia-iturritik deskonektatuta dagoela. Plaka baseari ertzetik heldu deskarga estatikoak saihesteko.
2.1 CPU instalazioa (AM5 socketa)
- Aurkitu AM5 CPUaren socket-a plaka basean.
- Open the CPU retention lever.
- Carefully align the CPU with the socket, ensuring the triangular markers match. Do not force the CPU into the socket.
- Gently lower the CPU into place.
- Itxi atxikitzeko palanka CPUa finkatzeko.

Figure 2: AMD Ryzen 3D Processor for Socket AM5
2.2 RAM instalazioa (DDR5)
- Open the clips on both ends of the DDR5 memory slots.
- Lerrokatu memoria-modulua zirrikituarekin, moduluko koska zirrikituan dagoen giltzarekin bat datorrela ziurtatuz.
- Sakatu gogor memoria-moduluaren bi muturretan, klipak bere lekuan sartu arte.
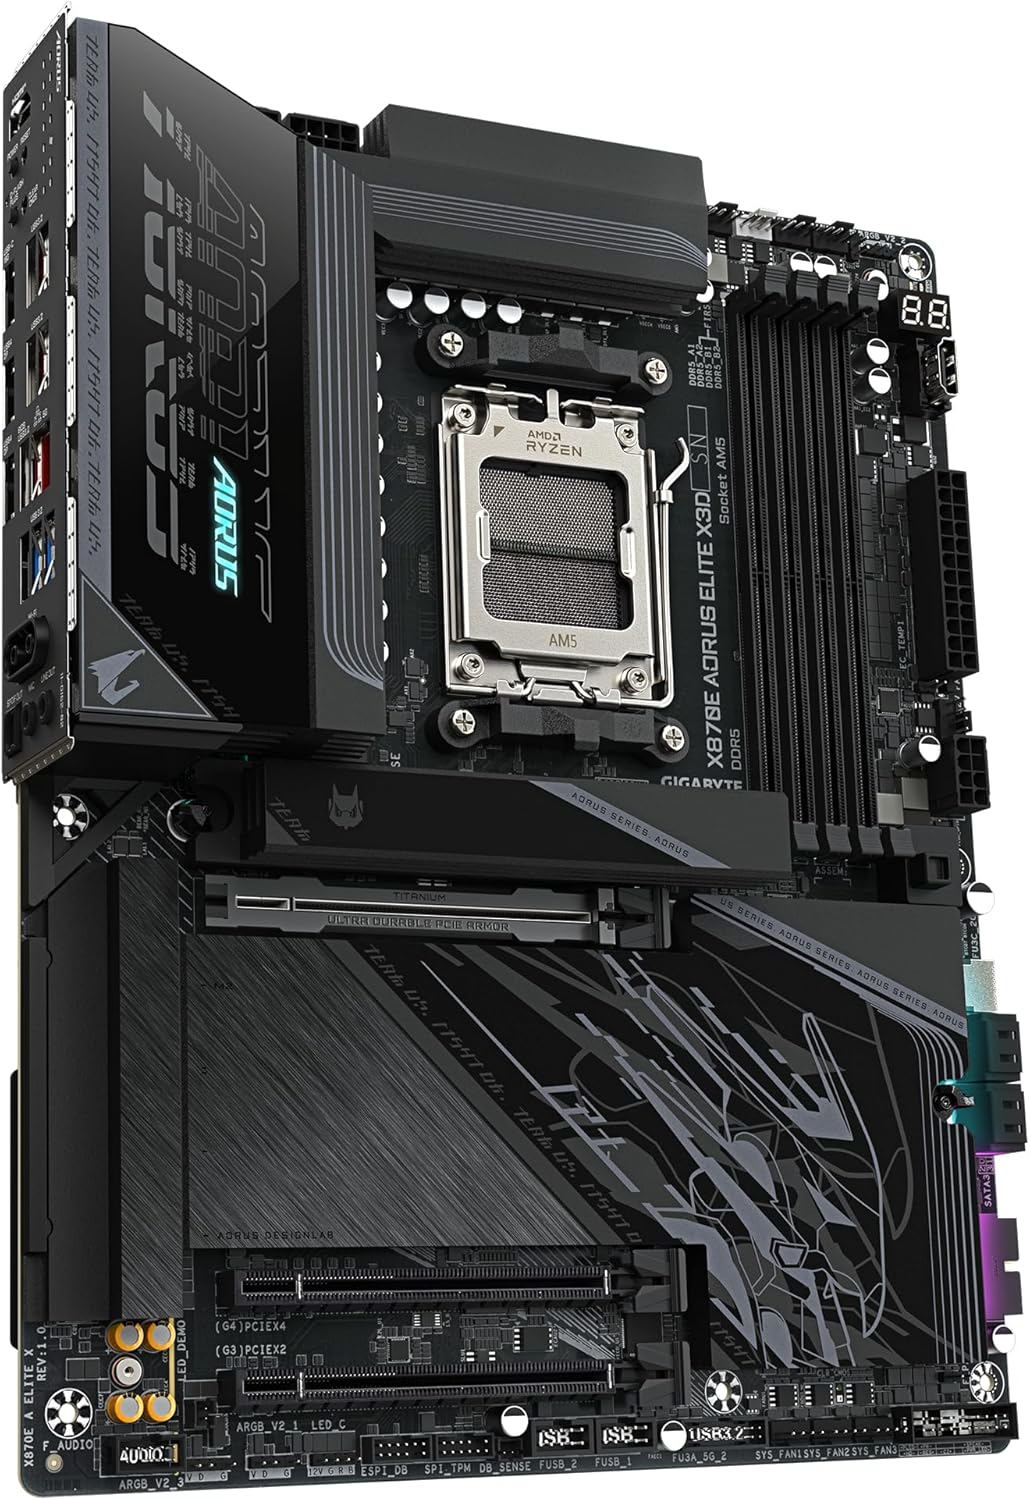
Figure 3: DDR5 Memory Slots
2.3 M.2 SSD Installation (EZ-Latch Click & Plus)
The motherboard features M.2 EZ-Latch Click & Plus for tool-less installation of M.2 SSDs and their heatsinks.
- Locate an M.2 slot and remove the protective film from the thermal pad on the M.2 heatsink.
- Sartu M.2 SSDa zirrikituan angelu batean.
- Gently push down the M.2 SSD and secure it using the EZ-Latch mechanism.
- Place the M.2 heatsink over the SSD and secure it using the EZ-Latch Plus mechanism.

Figure 4: EZ DIY Features for M.2 and PCIe Installation
2.4 PCIe txartelaren instalazioa
Insert your graphics card or other PCIe expansion cards into the appropriate PCIe 5.0 or PCIe 4.0 slots. Ensure the card is fully seated and secured with the case's retention mechanism.
2.5 Wi-Fi Antenna Installation (EZ-Plug)
Attach the included Wi-Fi antenna to the designated connectors on the rear I/O panel. The EZ-Plug design ensures a quick and easy connection.
2.6 Potentzia-konexioak
Konektatu 24 pineko ATX elikatze-konektore nagusia eta 8 pineko (edo 4+4 pineko) CPU elikatze-konektorea elikatze-iturritik plaka basera.
2.7 Rear I/O Panel Overview

Figure 5: Rear I/O Panel Connectivity
The rear I/O panel provides a range of connectivity options including HDMI, Dual USB4 Type-C with DP-Alt, multiple USB 3.2 ports, 5GbE LAN, and Wi-Fi 7 antenna connectors.
3. Funtzionamendu-argibideak
3.1 Initial Boot and BIOS/UEFI Access
Upon first power-on, the system will perform a Power-On Self-Test (POST). To access the BIOS/UEFI setup, press the DEL key repeatedly during the POST process. The BIOS allows you to configure system settings, boot order, and advanced features.
3.2 X3D Turbo Mode 2.0
The GIGABYTE X870E AORUS ELITE X3D motherboard features X3D Turbo Mode 2.0, an AI-driven technology designed to optimize performance for AMD Ryzen X3D processors. This mode intelligently adjusts CPU parameters to maximize gaming and application performance. This feature can typically be enabled or configured within the BIOS/UEFI settings under the 'Tweaker' or 'Performance' sections.

Figure 6: AI-Driven Performance Optimization
3.3 Memory Overclocking (AMD EXPO)
This motherboard supports AMD EXPO for easy DDR5 memory overclocking up to 9000MT/s. To enable EXPO profiles, navigate to the BIOS/UEFI settings, usually under the 'Tweaker' or 'Memory' section, and select the desired EXPO profile for your memory modules.
3.4 Gidariaren instalazioa
After installing your operating system, install the necessary drivers for the motherboard components. These typically include chipset drivers, LAN drivers, Wi-Fi drivers, and audio drivers. Drivers can be found on the GIGABYTE official website for your specific motherboard model. It is recommended to download the latest drivers for optimal compatibility and performance.
4. Mantentzea
Regular maintenance helps ensure the longevity and stable operation of your motherboard and PC system.
- Hautsa kentzea: Aldian-aldian garbitu hautsa ordenagailuaren kaxa barrutik, batez ere bero-hustugailuetatik eta haizagailuetatik, aire konprimitua erabiliz. Ziurtatu sistema itzalita eta deskonektatuta dagoela garbitu aurretik.
- Konexioaren egiaztapenak: Occasionally check all power and data cable connections to ensure they are secure.
- BIOS/UEFI eguneraketak: Keep your BIOS/UEFI firmware updated to benefit from performance improvements, bug fixes, and support for new hardware. Refer to the GIGABYTE webeguneratze-prozeduren gunea eta files.
- Software eguneraketak: Ziurtatu zure sistema eragilea eta gidariak eguneratuta daudela.

Figure 7: Motherboard Thermal Design
5. Arazoak
Arazoak badituzu, jarraitu arazoak konpontzeko ohiko urrats hauek:
- Energiarik ez/POSTik ez:
- Egiaztatu elikatze-kable guztiak (24 pineko ATX, CPU elikadura) ondo konektatuta daudela.
- Ensure RAM modules are correctly seated in their slots. Try reseating them or testing with one module at a time.
- Check CPU installation and ensure the CPU cooler is properly installed.
- Clear CMOS by removing the CMOS battery for a few minutes or using the Clear CMOS jumper/button (refer to motherboard diagram).
- Ez dago pantailarik:
- Ensure your monitor is connected to the correct graphics output (either dedicated GPU or motherboard's integrated graphics port).
- Reseat your graphics card.
- Ahal bada, probatu beste pantaila-kable edo monitore batekin.
- Sarearen konexio arazoak (LAN/Wi-Fi):
- Ensure LAN cable is properly connected or Wi-Fi antennas are securely attached.
- Verify that the correct LAN and Wi-Fi drivers are installed. If not, download them from the GIGABYTE website using another device and transfer them via USB.
- Check network settings in your operating system.
- M.2 SSDa ez da detektatu:
- Ensure the M.2 SSD is fully inserted into its slot and secured.
- Check BIOS/UEFI settings to ensure the M.2 slot is enabled and configured correctly.
- Some M.2 slots may share bandwidth with SATA ports; ensure no conflicts exist (refer to the full motherboard manual for details).
6. Zehaztapenak
| Ezaugarri | Xehetasuna |
|---|---|
| Marka | Gigabyte |
| Ereduaren izena | X870E A ELITE X |
| CPU Socketa | AM5 entxufea |
| Prozesadore bateragarriak | AMD Ryzen 9000 / 8000 / 7000 Series |
| Txip mota | AMD X870E |
| RAM teknologia | DDR5 |
| Memoria Abiadura | 9000 MHz-ra arte (OC) |
| Memoria zirrikituak | 4 (kanal bikoitza) |
| Max RAM Size | 256 GB |
| VRM Design | 16+2+2 Phase Digital |
| PCIe zirrikituak | 2 x PCIe 5.0, 2 x PCIe 4.0 (Total 3 physical slots) |
| M.2 zirrikituak | 4 (including PCIe 5.0 x4 support) |
| SATA portuak | 4 |
| LAN | 5 GbE LAN |
| Haririk gabeko konexioa | Wi-Fi 7 |
| USB atakak | 11 (including Dual USB4 Type-C with DP-Alt, QC-USB 65W front) |
| HDMI atakak | 1 |
| Energia konektore nagusia | 24 pin |
| Neurriak (LxWxH) | 30.5L x 24.4W x 3.5H cm |
| Pisua | 2980 gramo |
7. Bermea eta Laguntza
7.1 Produktuaren bermea
The GIGABYTE X870E AORUS ELITE X3D Motherboard comes with a 3 urteko fabrikatzailearen bermea. Please retain your proof of purchase for warranty claims. The warranty covers defects in materials and workmanship under normal use. It does not cover damage caused by improper installation, accidents, misuse, abuse, natural disasters, or unauthorized modifications.
7.2 Laguntza Teknikoa
For technical assistance, driver downloads, BIOS updates, or further information, please visit the official GIGABYTE website. You can find support resources, FAQs, and contact information for customer service there.
GIGABYTE Ofiziala Webgunea: www.gigabyte.com


